Authentication
Describes the supported authentication methods and authentication procedures.
Authentication mode
Set the authentication mode. You can combine Face, PIN, Card / QR Code, and ID for authentication mode, and you can also set schedules for each authentication mode.
Registering auth mode
-
Press
 and authenticate with the Admin level credential.
 -
Press AUTHENTICATION → Auth Mode.
-
Select
 .
. -
Pressing
 will display the credential that can be added on the screen. Select the credentials to add. Press the
  while the credential is added, and the added credential will be deleted.
-
After setting the desired authentication mode, set Schedule.
Category Description Face -  : This mode uses only facial authentication.
- +  : This mode requires facial authentication followed by PIN entry.
Card / QR Code -  : This mode uses only card / QR code authentication.
- + : This mode requires card / QR code authentication followed by facial authentication.
- + : This mode requires card / QR code authentication followed by PIN entry.
- + / : This mode requires card / QR code authentication followed by either facial authentication or PIN entry.
- + + : This mode uses both facial authentication and PIN entry after card / QR code authentication.ID -  + : This mode requires ID entry followed by facial authentication.
- + : This mode requires ID entry followed by PIN entry.
- + / : This mode requires ID entry followed by either facial authentication or PIN entry.
- + + : This mode uses both facial authentication and PIN entry after ID entry.Info-
Schedule can be configured in BioStar X. If no schedule is set, only Always can be selected.
-
For more information about the Schedule settings, please refer to the BioStar X Administrator Guide.
-
To use QR Code authentication, AUTHENTICATION must be clicked and Operation must have QR Authentication activated, and a separate device license is required. For more information, refer to License.
-
-
To save the settings, press OK.
Modifying auth mode
-
Press
and authenticate with the Admin level credential. -
Press AUTHENTICATION → Auth Mode.
-
Select the authentication mode to modify.
-
Modify the authentication mode by referring to Registering auth mode and press OK.
Delete auth mode
-
Press
and authenticate with the Admin level credential. -
Press AUTHENTICATION → Auth Mode.
-
Press
 and select the authentication mode to delete. You can select multiple options.
 -
To delete the selected item, press OK.
Operation
Server matching
You can set up server matching.
-
Press
and authenticate with the Admin level credential. -
After pressing AUTHENTICATION, activate Operation in Server Matching (Card, ID).
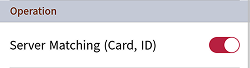
- Server Matching (Card, ID): When server matching is set, user authentication is performed by BioStar X without the device performing user authentication. It can be used when the device has too much user information or when the device is installed outside.
-
Server Matching can only use cards and IDs.
-
If you use Server Matching, you must enable server matching on both the device and BioStar X. For more information on BioStar X server matching settings, please refer to the BioStar X Administrator Guide.
QR authentication
You can activate QR code authentication.
-
Press
and authenticate with the Admin level credential. -
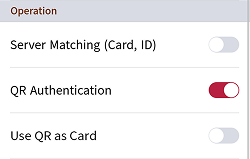
After pressing AUTHENTICATION, activate Operation for QR Authentication.
-
QR Authentication: Set whether to use QR code authentication through the device's camera.
-
Use QR as Card: You can set up authentication with a QR code that has the same data as the CSN card or Wiegand card issued to the user. This can only be set when QR Authentication is activated.
InfoA separate device license is required to use QR Authentication. For more information, refer to License.
-
PIN
Set whether to use the scramble keypad when entering passwords.
-
Press
and authenticate with the Admin level credential. -
After pressing AUTHENTICATION, set whether to use PIN in Scramble Keypad.
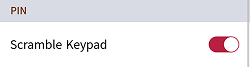
- Scramble Keypad: The positions of numeric keys can be scrambled randomly when entering a password to prevent password leaks.
Auth result display option
You can set the auth result display option.
-
Press
and authenticate with the Admin level credential. -
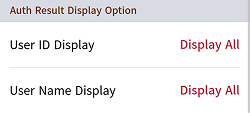
After pressing AUTHENTICATION, change the desired items in Auth Result Display Option.
-
User ID Display: You can select how the user ID is displayed on the authentication result screen of the device.
-
Display All: Displays the entire user ID.
-
Mask All but First Letter: Displays only the first letter of the user ID.
-
Hide All: Do not display the user ID.
-
-
User Name Display: You can select how the user name is displayed on the authentication result screen of the device.
-
Display All: Displays the entire user name.
-
Mask All but First Letter: Displays only the first letter of the user name.
-
Hide All: Do not display the user name.
-
-
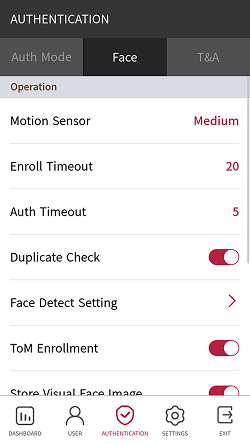
Face
You can change the configuration for facial authentication.
-
Press
and authenticate with the Admin level credential. -
Select AUTHENTICATION → Face.
-
Change the desired item.
-
Motion Sensor: Set the sensitivity to detect motion around the device. When Motion Sensor is set to Off, touch the screen to authenticate your face.
-
Enroll Timeout: If the face is not enrolled within the set time, the face registration will be canceled.
-
Auth Timeout: If authentication is not completed within the set time, authentication fails.
-
Duplicate Check: You can check for duplicate faces during face registration.
-
Face Detect Setting: Set the position and size of the area where the device detects faces during face authentication.
InfoFor optimal performance, it is recommended to use default settings for the sub-options of Face Detect Setting. The default values of each option are as follows:
-
Maximum Head Pose Angle: 15
-
Detection Distance: Min 30 cm, Max 100 cm
-
Wide Search: Deactivated
-
-
ToM Enrollment: By activating ToM Enrollment, you can enroll the Template on Mobile issued by BioStar X. Template on Mobile allows biometric authentication without storing user data on the BioStar X server, Airfob Portal, or device by storing the user's biometric template on a mobile access card.
InfoFor more information about Template on Mobile, please refer to the BioStar X Administrator Guide.
-
Store Visual Face Image: You can set to store both the actual images and templates in Visual Face, or to store only the templates without saving the actual images. If disabled, all stored images of visual faces will be deleted, and newly enrolled visual faces will store templates excluding images.
InfoAfter disabling this setting, connect to BioStar 2 v2.9.7 or later or BioStar X.
-
Security Level: You can set the security level for 1:N authentication.
-
Operation Mode: You can set the operating mode of the device for face authentication.
-
Fusion Matching: Both visual and infrared matching work to increase the accuracy of face authentication.
-
Fast Matching: Users can perform rapid authentication while walking within the device's authentication range.
-
-
Fake Detection: You can prevent user authentication with spoofed faces such as photos. Activated when Operation Mode is set to Fusion Matching.
Info-
Face anti-spoofing performance has been improved to pass the iBeta Level 1 ISO 30107-3 Presentation Attack Detection Test.
-
In strong sunlight, it is recommended to use the Fake Detection function as Normal.
-
-
Advanced Settings: You can change advanced settings for facial authentication, such as mask detection.
-
Mask Detection: You can set whether to use mask detection.
-
Detection Mode: You can set the method to check if a mask is worn. This is activated when the Mask Detection is set to Enabled.
Info-
Require Mask (Hard): Users not wearing a mask will be denied authentication and a mask non-compliance event logs.
-
Require Mask (Soft): Users not wearing a mask can be authenticated, but a mask non-compliance event logs.
-
Require No Mask: Only users not wearing a mask can be authenticated, and when this mode is used, the mask check mode is fixed to Check Before Authentication.
-
-
Mask Detection Level: Set the sensitivity for detecting mask usage. This is activated when the Mask Detection is set to Enabled.
-
Check Mode: Set the confirmation mode according to the purpose of the device.
Info-
Check After Authentication: After authentication, check whether the user is wearing a mask.
-
Check Before Authentication: Authenticate after checking whether the user is wearing a mask.
-
Check Only: The device can only be used to check if a mask is worn. When this mode is activated, any user wearing a mask can access it regardless of authentication.
-
-
-
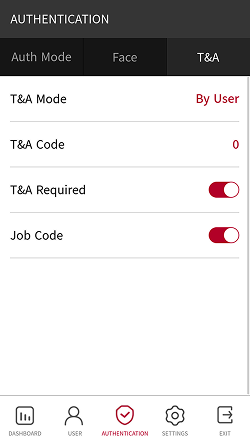
T&A (Time and Attendance)
You can set how to register T&A mode.
-
Press
and authenticate with the Admin level credential. -
Select AUTHENTICATION → T&A.
-
Change the desired item.
-
T&A Mode: Set how to use attendance mode.
-
T&A Code: Register T&A events. To register attendance events, select T&A Code →
and then set the icon to display on the screen, T&A Event Name, and Schedule. -
T&A Required: Set to require a user to select a T&A event when authenticating. Available when T&A Mode is set to By User.
-
Fixed T&A Key: Set to use only a T&A event selected by the administrator. Available when T&A Mode is set to Fixed.
-
Job Code: Set whether to use the job code.
-