Settings
Provides instructions on how to set system and device configurations.
Display & Sound
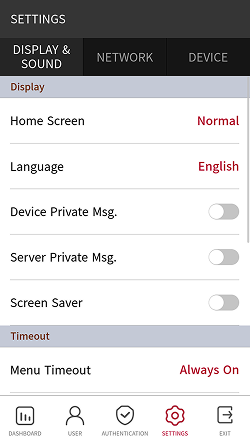
You can change the display and sound settings of the device.
-
Press
 and authenticate with the Admin level credential.
 -
Press SETTINGS → DISPLAY & SOUND.
-
Change the desired item.
-
Home Screen: You can choose items to display in the background of the home screen.
-
Language: You can select the language that will be displayed on the screen.
-
Device Private Msg.: Set whether to use a Private Message, which will be displayed on the screen when the user authenticates. The Device Private Msg. can be set using the BioStar Device SDK. If not set, does not display a message when authentication is successful even if Device Private Msg. is enabled on the device.
-
Server Private Msg.: Set whether to use a Private Message, which will be displayed on the screen when the user authenticates. Server Private Msg. can be set using the BioStar X API. If not set, does not display a message when authentication is successful even if Server Private Msg. is enabled on the device.
-
Screen Saver: Set whether the screen saver is enabled or not. It reduces unnecessary energy consumption by lowering the brightness of the screen when the device is not in use.
-
Menu Timeout: Set the time (sec) for the menu screen to disappear automatically. If there is no button input during a set time, the screen will return to the home screen.
-
Message Timeout: Set the time (sec) for a setting complete message or notification message to disappear automatically.
-
Backlight Timeout: Set the time (sec) to turn off the lighting of the screen.
-
Voice Instruction: You can use voice guidance instead of notification tones.
-
Volume: Set the volume.
-
Intercom Speaker Volume: Adjust the speaker's output volume when using intercom.
-
Intercom Microphone Volume: Adjust the microphone's input volume when using intercom.
-
For more information on the BioStar Device SDK, refer to the BioStar Device SDK page on the Suprema Knowledge Base.
Network
You can change the network settings of the device, such as Ethernet, server, OSDP, etc.
Ethernet
-
Press
and authenticate with the Admin level credential. -
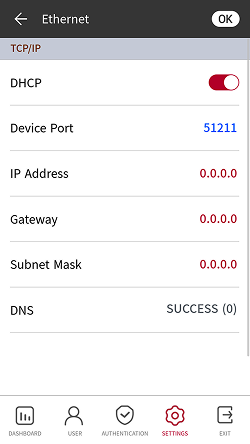
Select SETTINGS → NETWORK → Ethernet.
-
Change the desired item.
-
DHCP: Set whether to use DHCP. If DHCP setting is disabled, the user can modify IP Address, Gateway, and Subnet Mask.
-
Device Port: Set the device's port.
-
IP Address: You can check the device's IP address. To modify, disable DHCP setting.
-
Gateway: You can check the device's gateway. To modify, disable DHCP setting.
-
Subnet Mask: You can check the device's subnet mask. To modify, disable DHCP setting.
-
DNS: Set the DNS server address.
-
-
To save the settings, press OK.
Ethernet cannot be used with Wireless.
Wireless
-
Press
and authenticate with the Admin level credential. -
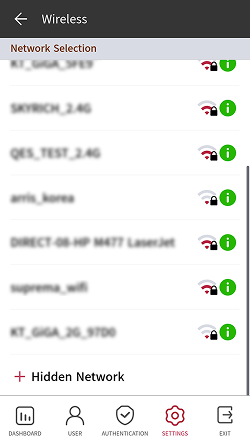
Select SETTINGS → NETWORK → Wireless.
-
The list of networks available to connect will be displayed.
-
Hidden Network: Add and connect to a wireless network by entering network information manually.
-
SSID: Enter the SSID. The SSID may be up to 32 characters long and include alphanumeric (case-sensitive), and special characters.
-
Password: Enter the password. The password can include alphanumeric and special characters only.
-
-
-
Select the network you wish to connect to and enter the password. When you press OK, the connection to the wireless network will be made.
-
Press
 the wireless network you wish to use and then disable DHCP settings to allow users to modify IP Address, Gateway, and Subnet Mask.
-
Wireless is only available for BS3-APWB model.
-
Wireless cannot be used with Ethernet.
-
To connect to Wireless, a wireless router is required. For content regarding the installation and configuration of wireless router, refer to the user’s manual of the wireless router.
Server
-
Press
and authenticate with the Admin level credential. -
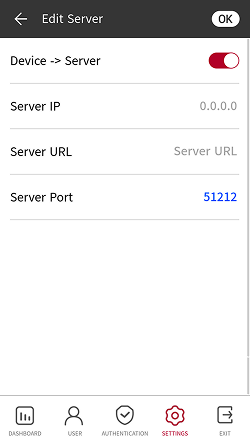
Select SETTINGS → NETWORK → Server.
-
Change the desired item.
-
Device → Server: You can send a connection signal from the device to a server with the input information directly. When Device → Server is enabled, the user can input Server IP, Server URL, and Server Port.
-
Server IP: Enter the IP address of the PC on which BioStar X is installed.
-
Server URL: You can enter Server URL instead of Server IP.
-
Server Port: Enter the port of the PC on which BioStar X is installed.
-
-
To save the settings, press OK.
OSDP settings
-
Press
and authenticate with the Admin level credential. -
Select SETTINGS → NETWORK.
-
Set the desired item in OSDP Setting.

-
RS-485: Select the RS-485 mode.
-
Baud Rate: Select the desired baud rate.
-
Authentication Result: When using Intelligent Slave, select to display the authentication results of 3rd party controllers or devices on the screen. This option can be used when RS-485 mode is set to Default or Slave.
-
Device
IP Intercom
Set the account and extensions of intercom.
-
Press
and authenticate with the Admin level credential. -
Select SETTINGS → DEVICE → Intercom.
-
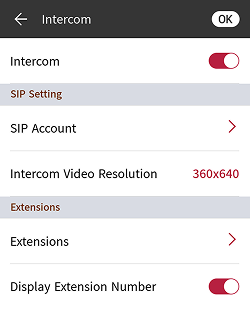
Intercom: Set whether the intercom is enabled or not. Enabling intercom settings allows you to configure SIP Account and Extensions.
-
SIP Account: Enter each item so that the device can be registered on the SIP server.
-
Intercom Video Resolution: Select the resolution of the intercom video output from the device.
-
Extensions: Add, delete, or edit extension numbers.
-
Display Extension Number: Set whether to display extension numbers.
Info-
If Display Name is not set, it will not be possible to distinguish receivers.
-
Extension numbers can only enter alphanumeric (case sensitive), and special characters
+-@..
-
-
To save the settings, press OK.
License
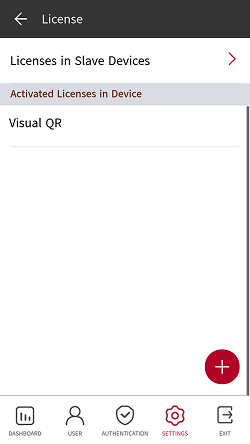
You can activate the device license or check Licenses in Slave Devices and Activated Licenses in Device.
-
Press
and authenticate with the Admin level credential. -
Select SETTINGS → DEVICE → License.
-
To activate the device license, connect the USB with the license to the device and select
 .
.
-
Licenses that can be activated appear on the screen. Activate the desired license.

-
Contact the place of purchase to issue a device license.
-
One feature is available per device license.
-
You can include multiple device licenses in one device license file. (Supports up to 100)
-
The device license file is an encrypted file and cannot be modified arbitrarily.
-
Device licenses are issued based on device ID. If the device ID is changed in an unusual way, the warranty service for the license is not provided.
Relay
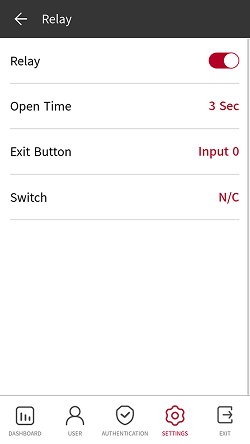
You can set the input ports of Open Time and Exit Button in the device.
-
Press
and authenticate with the Admin level credential. -
Select SETTINGS → DEVICE → Relay.
-
Relay: You can set whether relay is enabled or not. To set Open Time and Exit Button, activate this option.
-
Open Time: Set the duration for the door to remain open when standard user authentication has been carried out.
-
Exit Button: Select the input port where the exit button is connected.
-
Switch: Select the type of switch (N/O or N/C) for the Exit Button's input port.
-
Date & Time
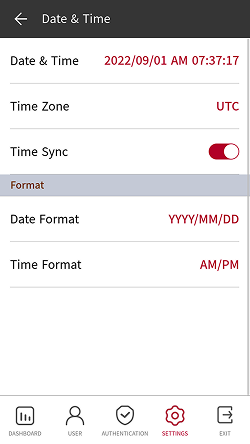
You can set date and time. Set the date and time accurately in order to collect accurate log data.
-
Press
and authenticate with the Admin level credential. -
Select SETTINGS → DEVICE → Date & Time.
-
Change the desired item.
-
Date & Time: Check the current date and time. To modify it manually, disable Time Sync.
-
Time Zone: Set the time reference of the current location.
-
Time Sync: Synchronize the server and the time. If you wish to synchronize the server and the time, enable Time Sync.
-
Date Format: You can set the date format. You can select YYYY/MM/DD, MM/DD/YYYY, and DD/MM/YYYY.
-
Time Format: You can set the time format. You can select AM/PM and 24-Hour.
-
Daylight saving time
You can use the device by applying daylight saving time. Set the start and end time correctly.
-
Press
and authenticate with the Admin level credential. -
Select SETTINGS → DEVICE → Daylight Saving Time and then press
to add additional daylight-saving time. -
Change the desired item.

-
Name: Set the name of daylight-saving time.
-
Start Month / Start Week / Start Day / Start Time: Set details of when daylight-saving time begins.
-
End Month / End Week / End Day / End Time: Set details of when daylight-saving time ends.
-
-
To save the settings, press OK.
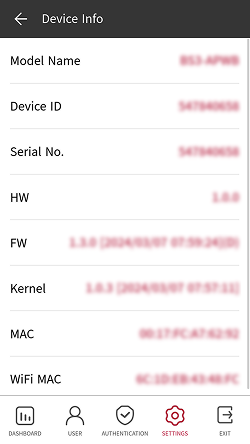
Device Information
You can view the model name, device ID, serial number, device and firmware version, kernel, and MAC address.
-
Press
and authenticate with the Admin level credential. -
Select SETTINGS → DEVICE → Device Info. You can view the information for Model Name, Device ID, Serial No., HW, FW, Kernel, MAC, and WiFi MAC.
-
Long-press MAC to display FAS_IR_SP information showing the version of the face anti-spoofing algorithm. If you press FAS_IR_SP, you can check the entire hash value in a pop-up message.
-
WiFi MAC can only be confirmed on the BS3-APWB model.
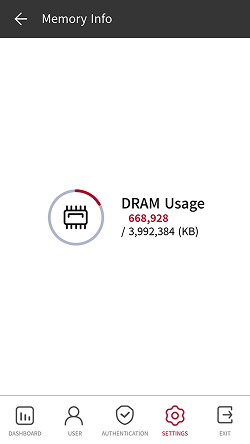
Memory information
View the status of memory usage.
-
Press
and authenticate with the Admin level credential. -
Select SETTINGS → DEVICE → Memory Info. You can view the memory usage status of the device.
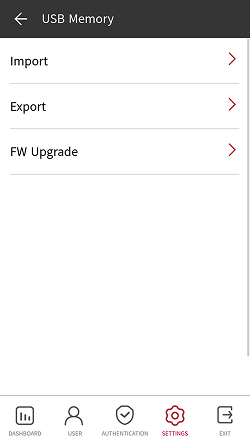
USB memory
Connect USB Memory and import user information to the device or export log and user information from the device. You can also upgrade the firmware.
-
Press
and authenticate with the Admin level credential. -
Select SETTINGS → DEVICE → USB Memory.
-
Select the desired item and change the setting.
-
Import: Import user information from the connected USB memory.
-
Export: Select information you wish to export to the connected USB memory.
-
FW Upgrade: Upgrade the firmware if the firmware files are saved in the connected USB memory.
-
Do not disconnect the power supply while upgrading the firmware of the device. The device may malfunction.
-
It is recommended to use a USB flash drive formatted in exFAT. USB flash drives in FAT32 format may malfunction when more than 50,000 face credentials are stored.
-
Check the amount of free space on your USB flash drive. To save 100,000 face credentials, a minimum of 15 GB of free space is required.
Secure Tamper
You can set whether to use security tamper. When the tamper is turned on, you can set to delete the entire user, the entire log, and the security key.
-
Press
and authenticate with the Admin level credential. -
Select SETTINGS → DEVICE.
-
Activate Secure Tamper to delete data of all registered users, all logs, and secure keys when a temper event occurs.
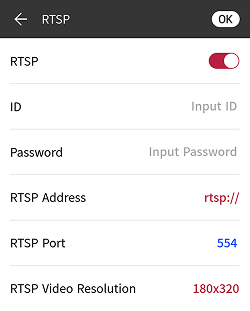
RTSP
Connect a third-party video management system (VMS) to monitor videos filmed with the product's visual camera.
-
Press
and authenticate with the Admin level credential. -
Select SETTINGS → DEVICE → RTSP.
-
Select the desired item and change the setting.
-
RTSP: You can set whether RTSP is enabled or not. When RTSP setting is enabled, the user can configure ID, Password, RTSP Address, RTSP Port, and RTSP Video Resolution.
-
ID: Enter the ID. The ID may have up to 32 characters, in a combination of alphanumeric (case-sensitive) characters and certain symbols
-_. -
Password: Enter the password. The password may have 8-32 characters in a combination of alphabetic (capital and lowercase letters) and numeric characters.
-
RTSP Address: Enter the RTSP address.
-
RTSP Port: Enter the RTSP port number.
-
RTSP Video Resolution: Select the resolution of the RTSP video output from the device.
-
When the device is configured as a slave device, the RTSP function may not be available.
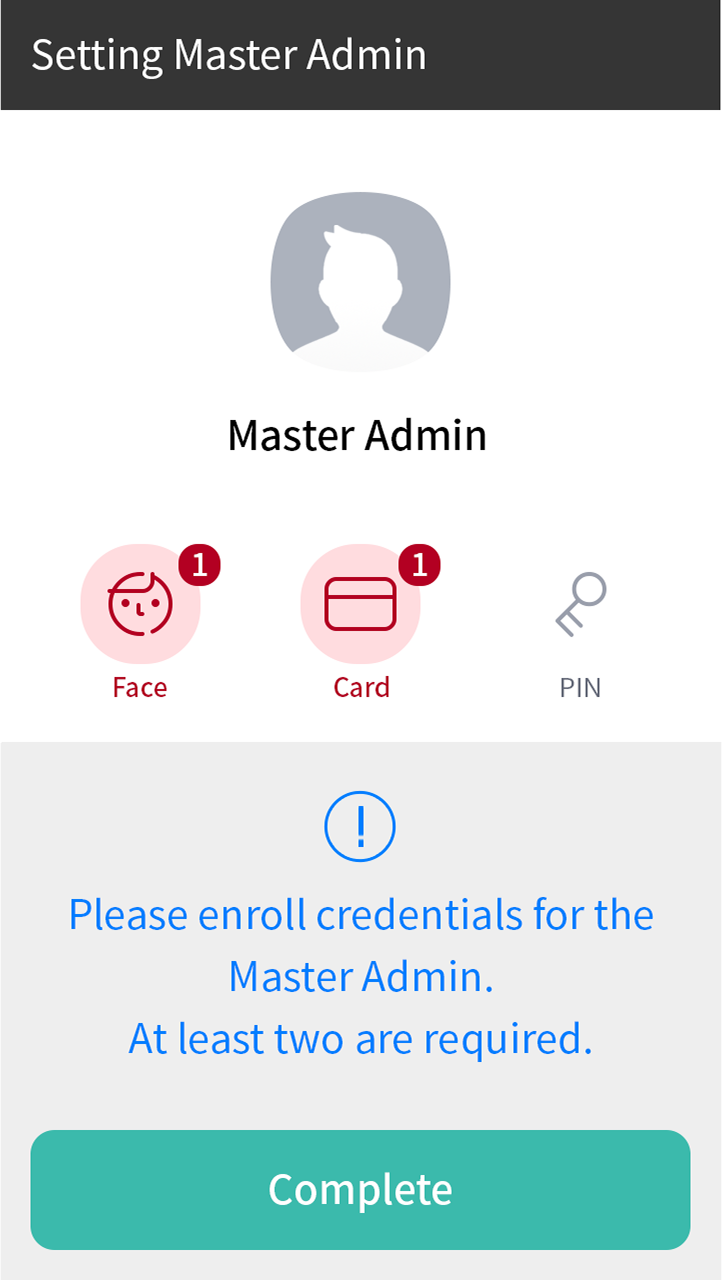
Master administrator CE products
You can change the authentication method of the Master Admin.
-
Press
and authenticate with the Admin level credential. -
Select SETTINGS → DEVICE → Master Admin.
-
Configure the desired authentication methods.

-
You must enroll at least two types of credentials.
-
This feature is only available on devices with firmware version 1.4.0 or higher.
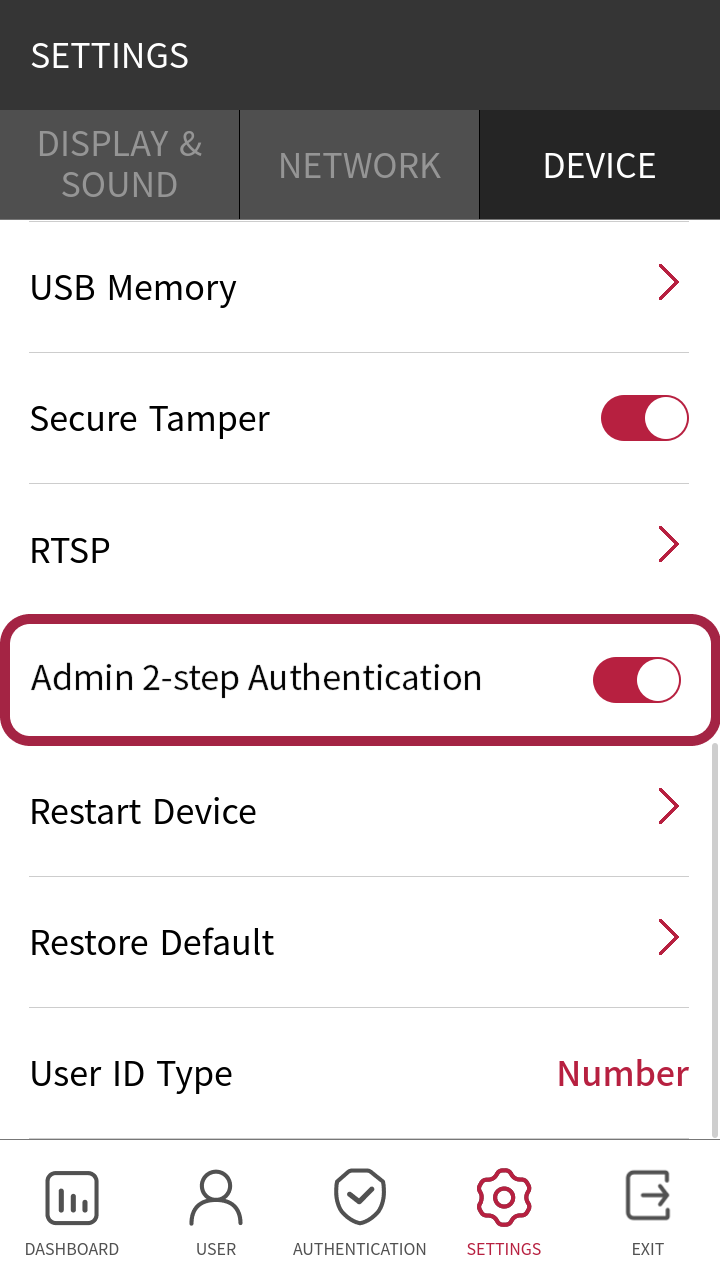
Administrator two-step authentication CE products
A CE product that has been upgraded from firmware does not provide Master Admin settings, but you can use the Admin 2-step Authentication option to enhance overall administrator privileges and improve device security.
-
Admin 2-step Authentication can be activated only if all enrolled administrators have at least two types of credentials.
- PIN cannot be used as a standalone credential, so the ID + PIN combination is not supported.
-
The firmware upgrade device cannot be downgraded to a lower version after upgrading the firmware.
-
Press
and authenticate with the Admin level credential. -
Enable SETTINGS → DEVICE → Admin 2-step Authentication.
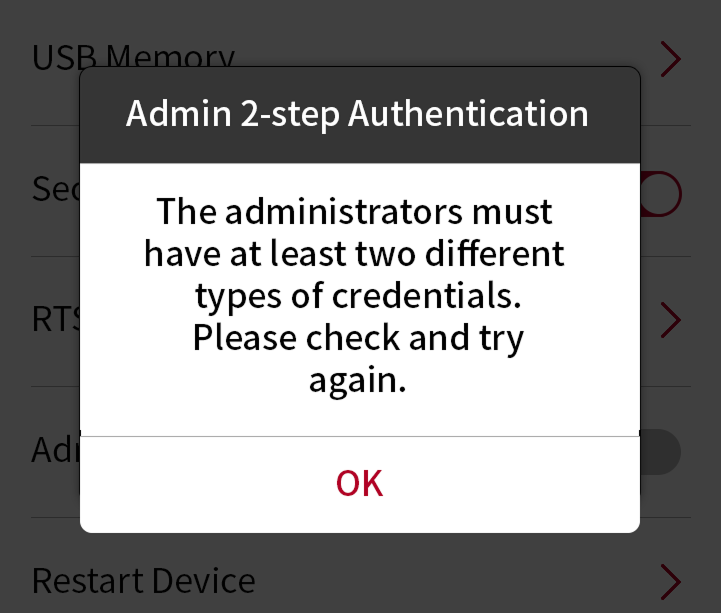
If there are not two types of credentials enrolled for all administrators, activation fails and an error message is displayed.
Enroll two types of credentials for all administrators and try again.
- PIN cannot be used as a standalone credential, so the ID + PIN combination is not supported.
If you enable Admin 2-step Authentication and delete all administrators' credentials to fewer than two types, you cannot access the administrator menu when BioStar X or BioStar 2 is unavailable. Therefore, you need to be particularly careful when deleting administrator credentials.
Restart device
The user can restart the device.
-
Press
and authenticate with the Admin level credential. -
Select SETTINGS → DEVICE → Restart Device.
-
Press OK to restart the device. Press Cancel to return to the previous screen.
Restore default
Device settings, network settings, and operator levels will be reset.
-
Press
and authenticate with the Admin level credential. -
Select SETTINGS → DEVICE → Restore Default.
-
All settings: Initializes all settings stored on the device. Press OK to initialize all device settings. Press Cancel to return to the previous screen.
-
Keep Network Settings: Initializes all settings except for network settings. Press OK to initialize all settings except for network settings. Press Cancel to return to the previous screen.
-
Factory Default: Deletes all information saved in the device and the root certificate, restoring settings to default.
-
Delete the Root Certificate: Deletes the root certificate saved in the device.
-
-
If you proceed with Restore Default, the device will restart.
-
When you reset, the operator level will be reset as well. After resetting, make sure to set the operator level again.
-
Language setting will not change after resetting.
-
The Factory Default menu can be used when the root certificate is saved in the device.
-
The Delete the Root Certificate menu can be used only when the root certificate is saved in the device and an administrator has been designated.
User ID type
Select the type of user ID to register to the device.
-
Press
and authenticate with the Admin level credential. -
Select SETTINGS → DEVICE → User ID Type.
-
Number: You can enter a user ID with numbers only.
-
Alphanumeric: You can enter a user ID using alphanumeric characters and certain symbols
_-.
-
-
Select to the desired item.