Device Settings
Guide for device settings and management.
Search and register slave device
You can easily expand the access control system's network by adding slave devices to CoreStation. CoreStation (master) and slave devices can be connected via RS-485, and additional devices such as Secure I/O can also be connected for use.
-
Click CONFIGURE.
-
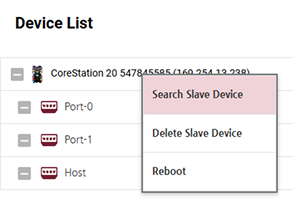
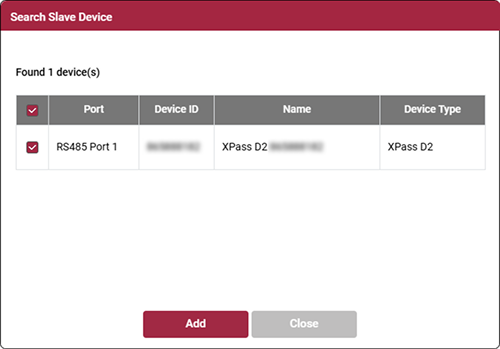
Right-click on CoreStation in the Device List and click Search Slave Device. A list of slave devices connected to CoreStation will appear.
-
Select the device to register as a slave and click Add. Alternatively, you can select individual ports to add slave devices.
Restart device
The user can restart the device.
-
Click CONFIGURE.
-
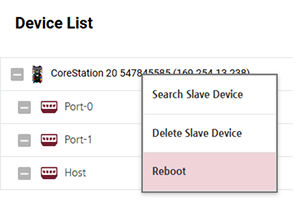
Right-click on CoreStation in the Device List and click Reboot.
Modify device settings and information
You can configure details for CoreStation.
-
Click CONFIGURE.
-
Edit the necessary fields.
-
To complete all settings and save changes, click Apply.
Information
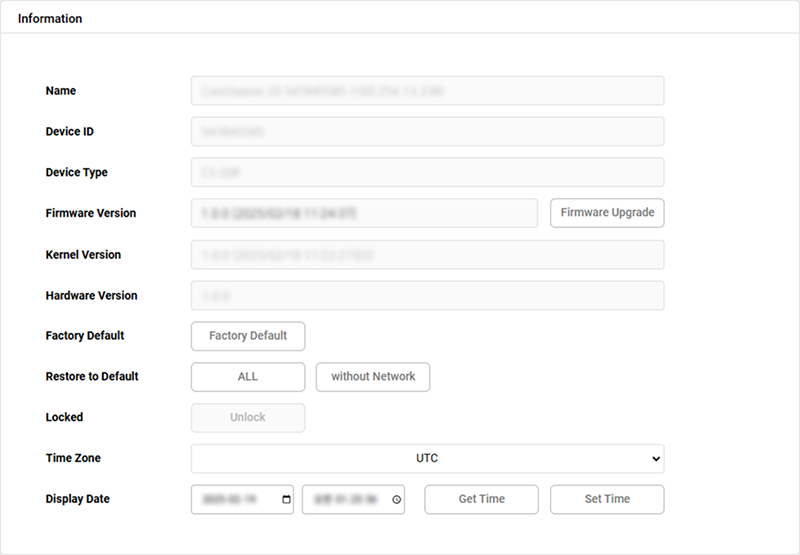
| Name | Feature description |
|---|---|
| Name | You can check the device name. |
| Device ID | You can check the device ID. |
| Device Type | You can check the device type. |
| Firmware Version | You can install a new version of the firmware by clicking Firmware Upgrade and selecting the firmware file to upgrade. |
| Kernel Version | You can check the kernel version. |
| Hardware Version | You can check the hardware version. |
| Factory Default | You can delete all information stored on the device and reset the settings. |
| Restore to Default | You can initialize the device settings. - ALL: Initializes all settings. - without Network: Initializes all settings except network settings. |
| Locked | When the device is locked due to operating conditions, you can use the Unlock button. |
| Time Zone | You can set the device's time zone. |
| Display Date | You can manually set the date and time. - Get Time: Click to retrieve the time set on the device. - Set Time: Click to apply the time set in the CoreStation Setup Manager to the device. |
The Factory Default menu can be used when a root certificate is stored on the device. Executing a factory reset will delete the administrator account.
Backup and Restore

| Name | Feature description |
|---|---|
| Device Backup | Click Export Backup Data to back up CoreStation setting information to a file. The backup file is compressed, encrypted, and saved to the download location set in the browser. |
| Restore Device | Click Import Backup Data to restore CoreStation setting information from a backed-up file. |
-
The backup file includes the Device ID, Network (IP, DNS, Server, Gateway), RS485 Baud Rate (per channel), SCB Key, and root certificate. The MAC address is not included in the backup file. When you replace a device, the MAC address changes, so the IP address may change in a DHCP environment. Use a static IP for backup and restore.
-
Restore is available only between the same device types as the one used to create the backup file.
-
If slave devices are connected to CoreStation, SCB Key restore is not supported. You cannot restore a CoreStation that already uses the SCB Key to connect slave devices.
Network
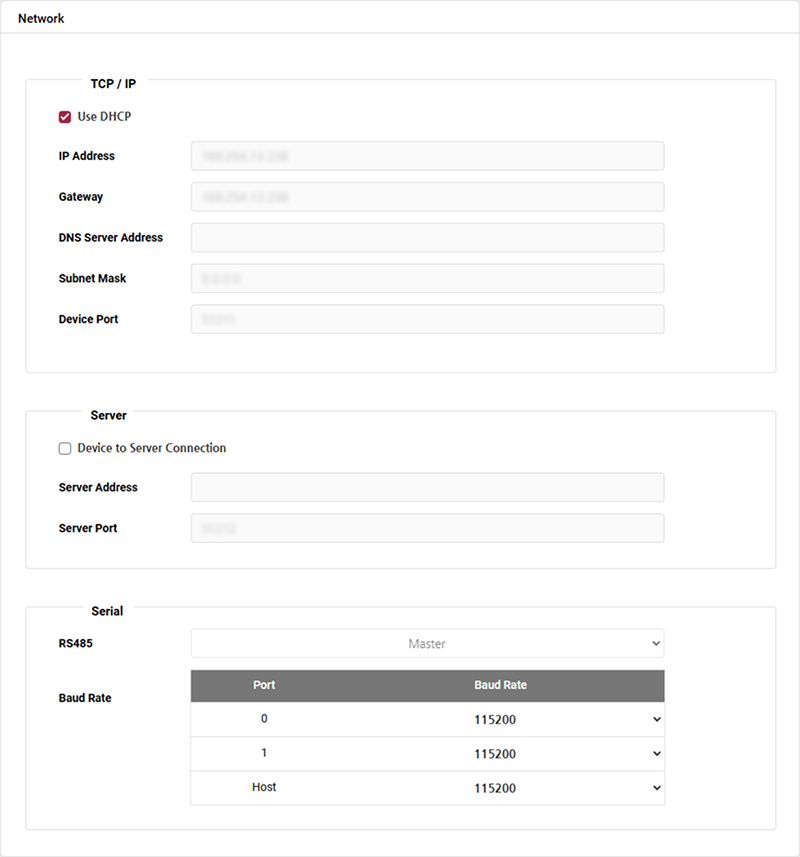
| Name | Feature description |
|---|---|
| Use DHCP | Select this option to set the device to use a dynamic IP address. If you select this item, a fixed IP address cannot be assigned. |
| IP Address | You can check the device's IP address. |
| Gateway | You can check the device's gateway. |
| DNS Server Address | You can check the device's DNS server address. |
| Subnet Mask | You can check the device's subnet mask. |
| Device Port | Enter the port the device will use. |
| Device to Server Connection | Selecting this option allows you to enter BioStar X server information to connect the device to the server. |
| Server Address | Enter the IP address or domain address of the BioStar X server. |
| Server Port | Enter the port of the BioStar X server. |
| RS485 | Only master mode is available. |
| SCB Key | Enter the security key to apply to CoreStation directly. |
| Baud Rate | You can set the transmission speed for each RS-485 port. |
If slave devices are connected to CoreStation, you cannot set the SCB Key.
Authentication
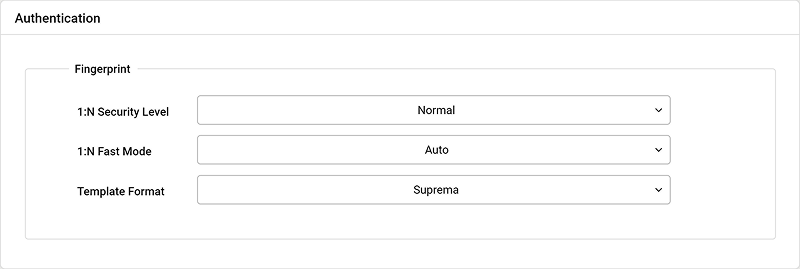
| Name | Feature description |
|---|---|
| 1:N Security Level | You can set the security level used to authenticate fingerprints. As the security level increases, the false rejection rate (FRR) increases, while the false acceptance rate (FAR) decreases. |
| 1:N Fast Mode | You can set the speed of fingerprint authentication. Selecting Auto sets the authentication speed according to the total number of fingerprint templates enrolled on the device. |
| Template Format | You can check the configured fingerprint template format. |
Biometric authentication is supported only on CoreStation.
Advanced Settings
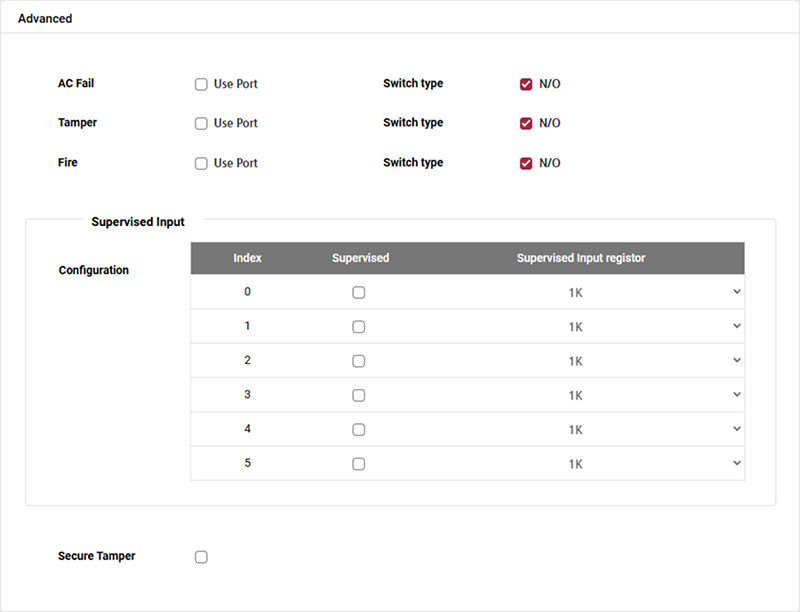
| Name | Feature description |
|---|---|
| AC Fail | You can set an AUX port to monitor power input signals. |
| Tamper | You can set an AUX port for tamper notifications. |
| Fire | You can set an AUX port to monitor fire detection signals. |
| Configuration | You can set CoreStation's Supervised Input port as an Input port and configure the resistor value to be used for Supervised Input. Resistor values can be set to 1 kΩ, 2.2 kΩ, 4.7 kΩ, or 10 kΩ. |
| Secure Tamper | In the event of tampering with the device, you can set it to delete all user information, logs, and security keys stored on the device. |