Set Up XPass D2
You can configure settings to apply to XPass D2 as a template and then directly apply them to individual devices. You can apply settings much faster than by accessing the management program on a PC or using command cards.
Some settings may not apply if the device's firmware version is low. To apply all settings, refer to Upgrade device firmware to upgrade the firmware.
Add template
You can set RS-485 communication, card format, keypad settings, PIN, LED, and buzzer before adding them as a template. Adding a template allows you to quickly and easily apply settings without configuring each individual device every time.
-
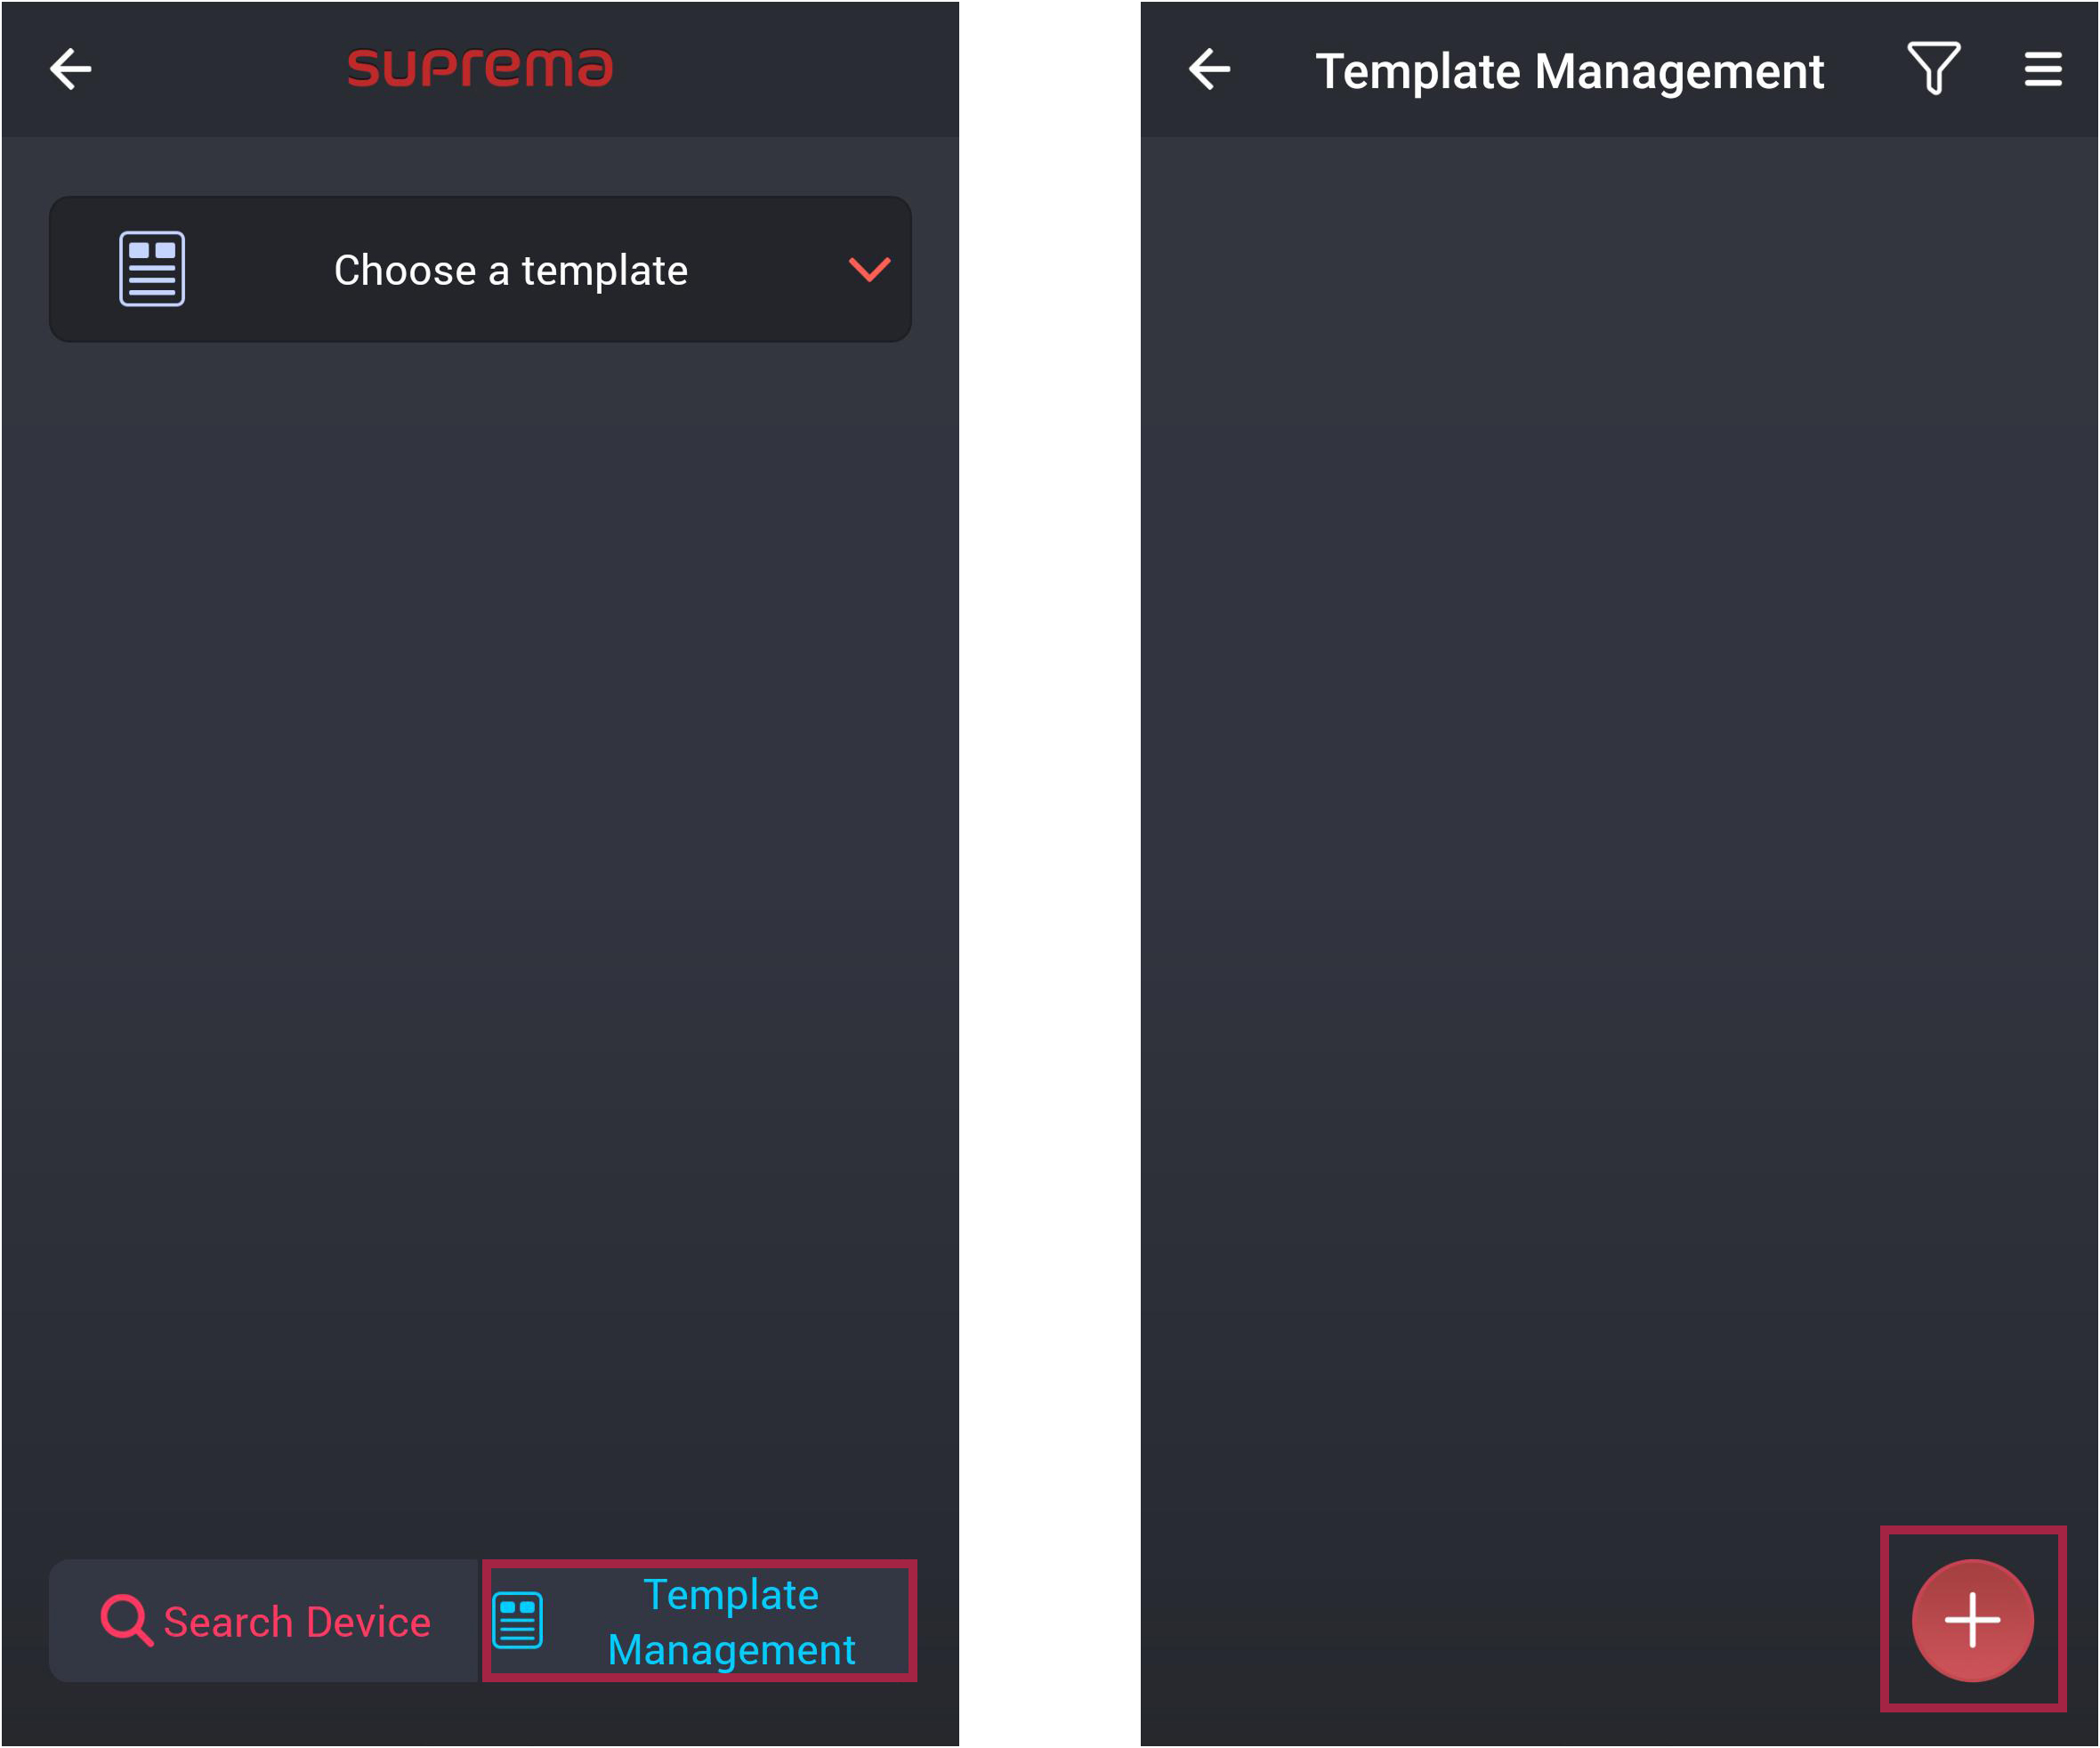
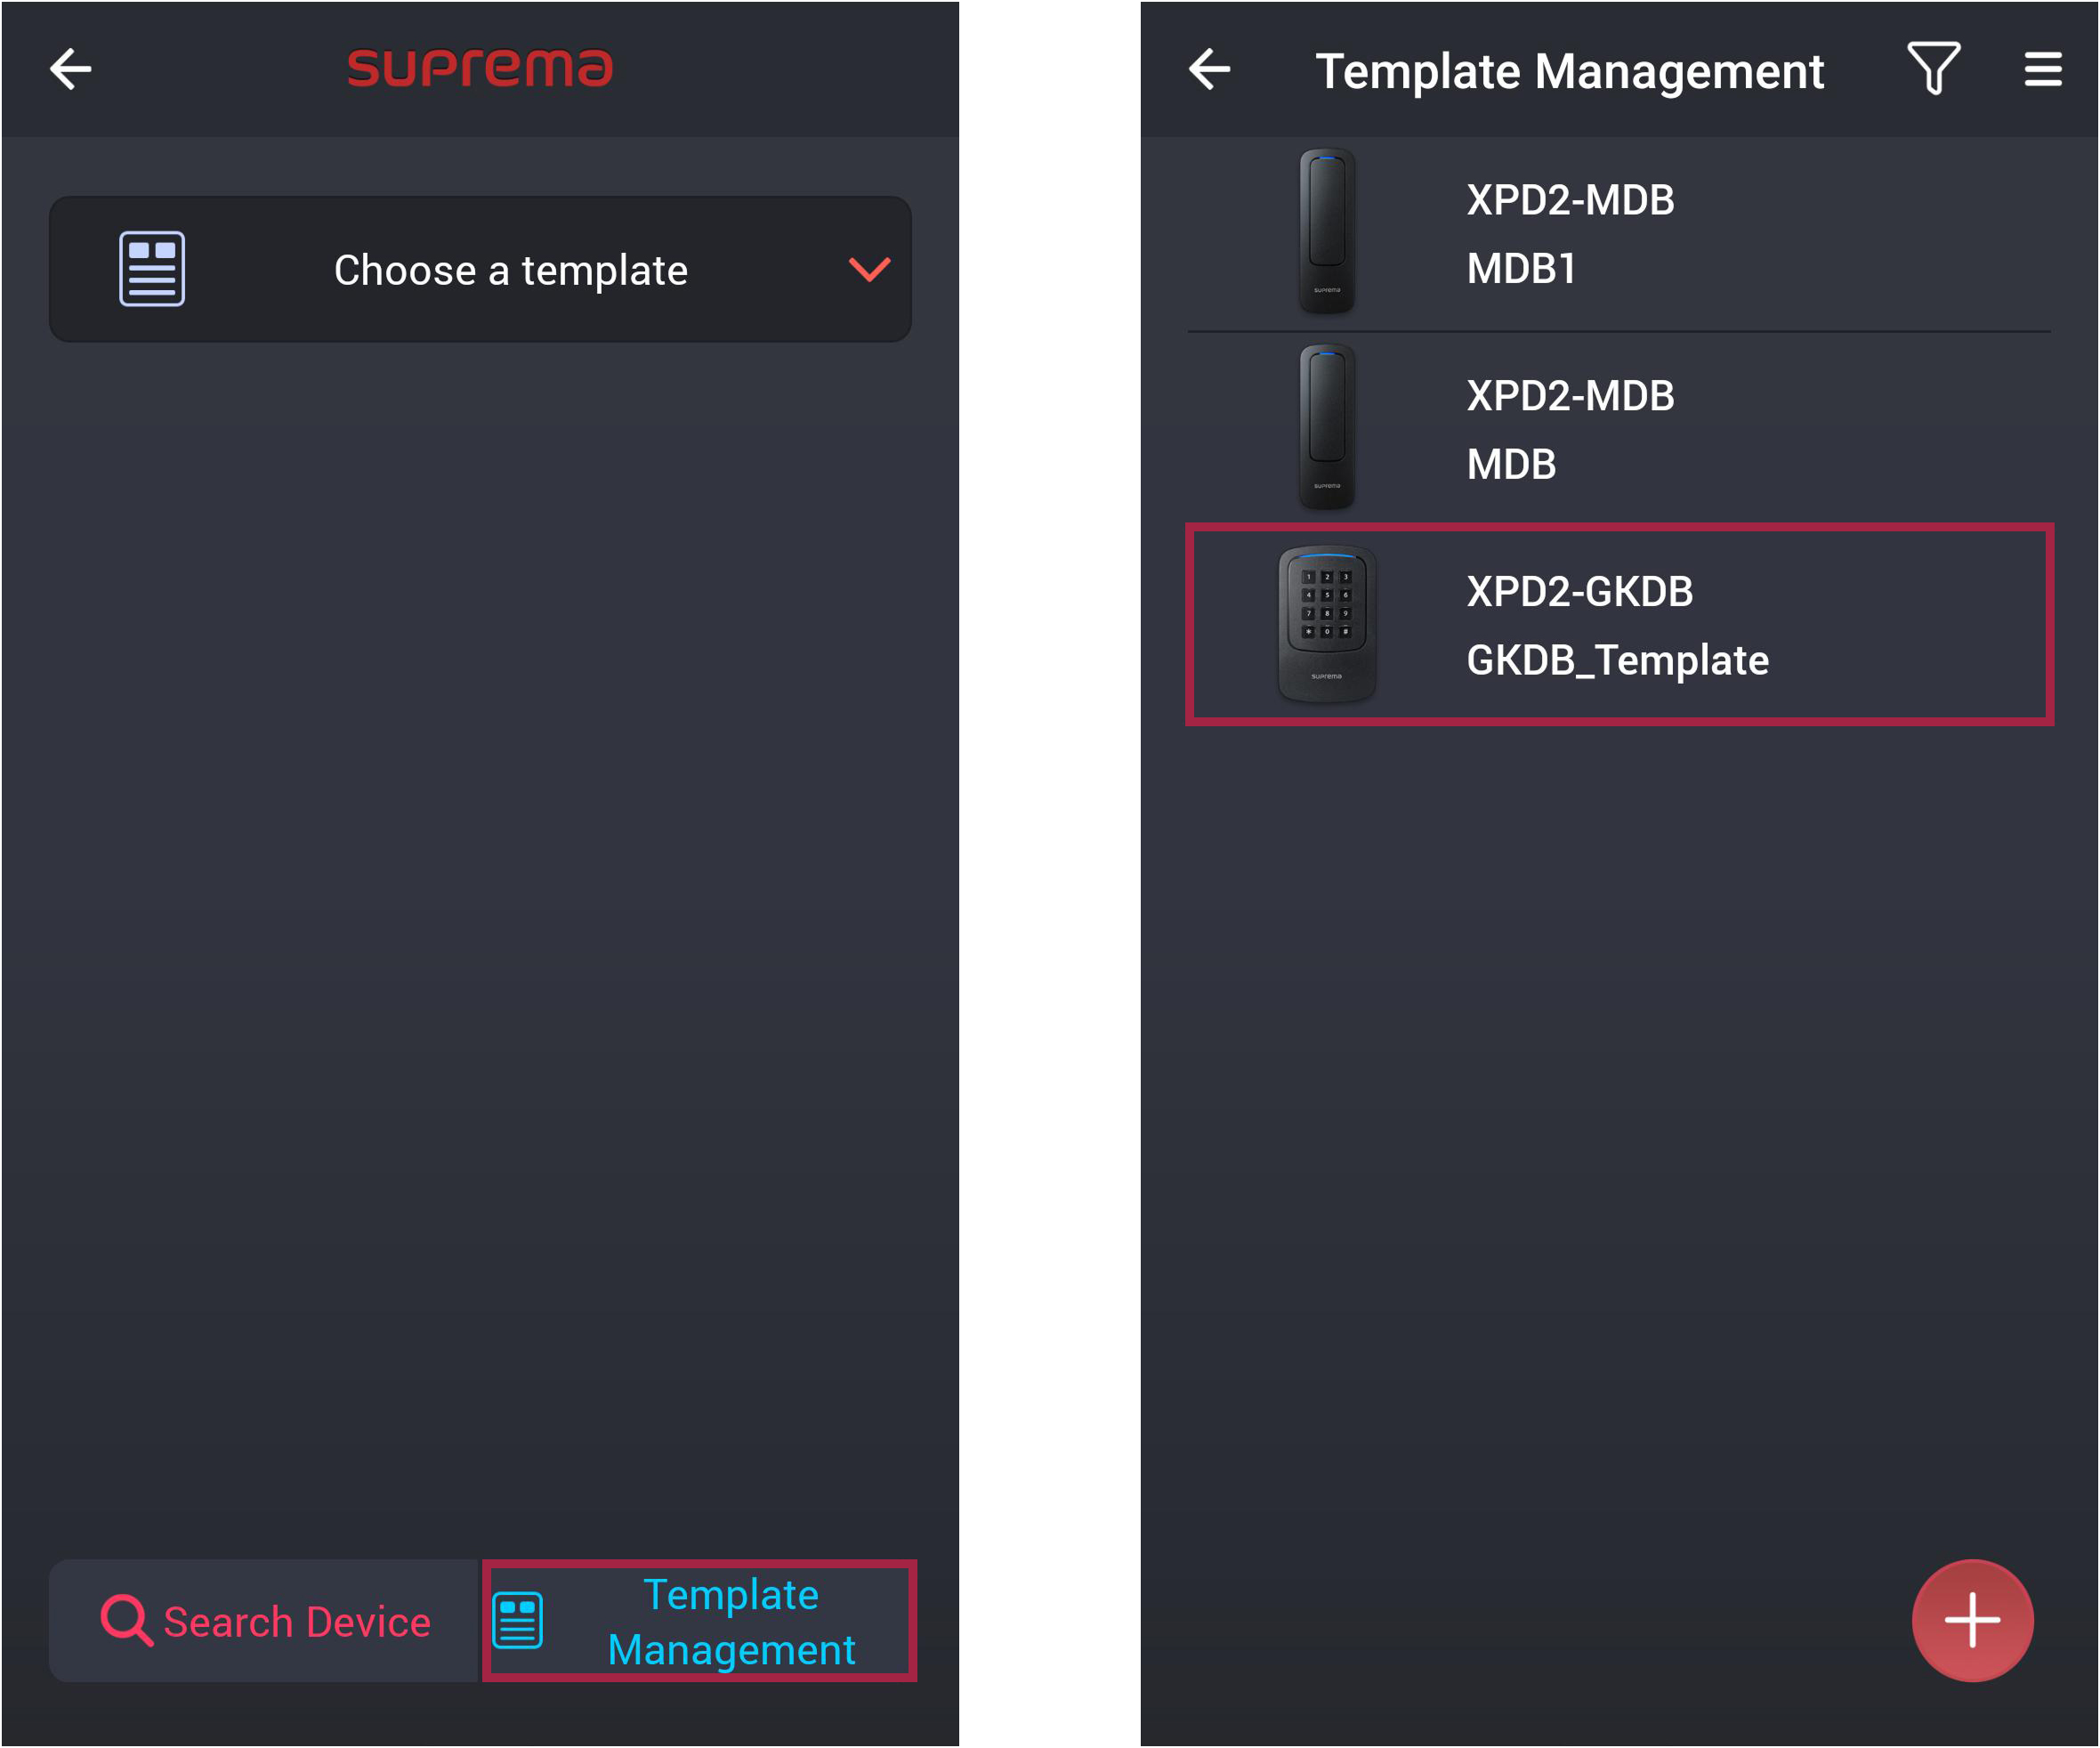
Run the Suprema Device Manager on your mobile device.
-
Select XPass D2 on the main screen.
-
Tap Template Management →
 .
.
-
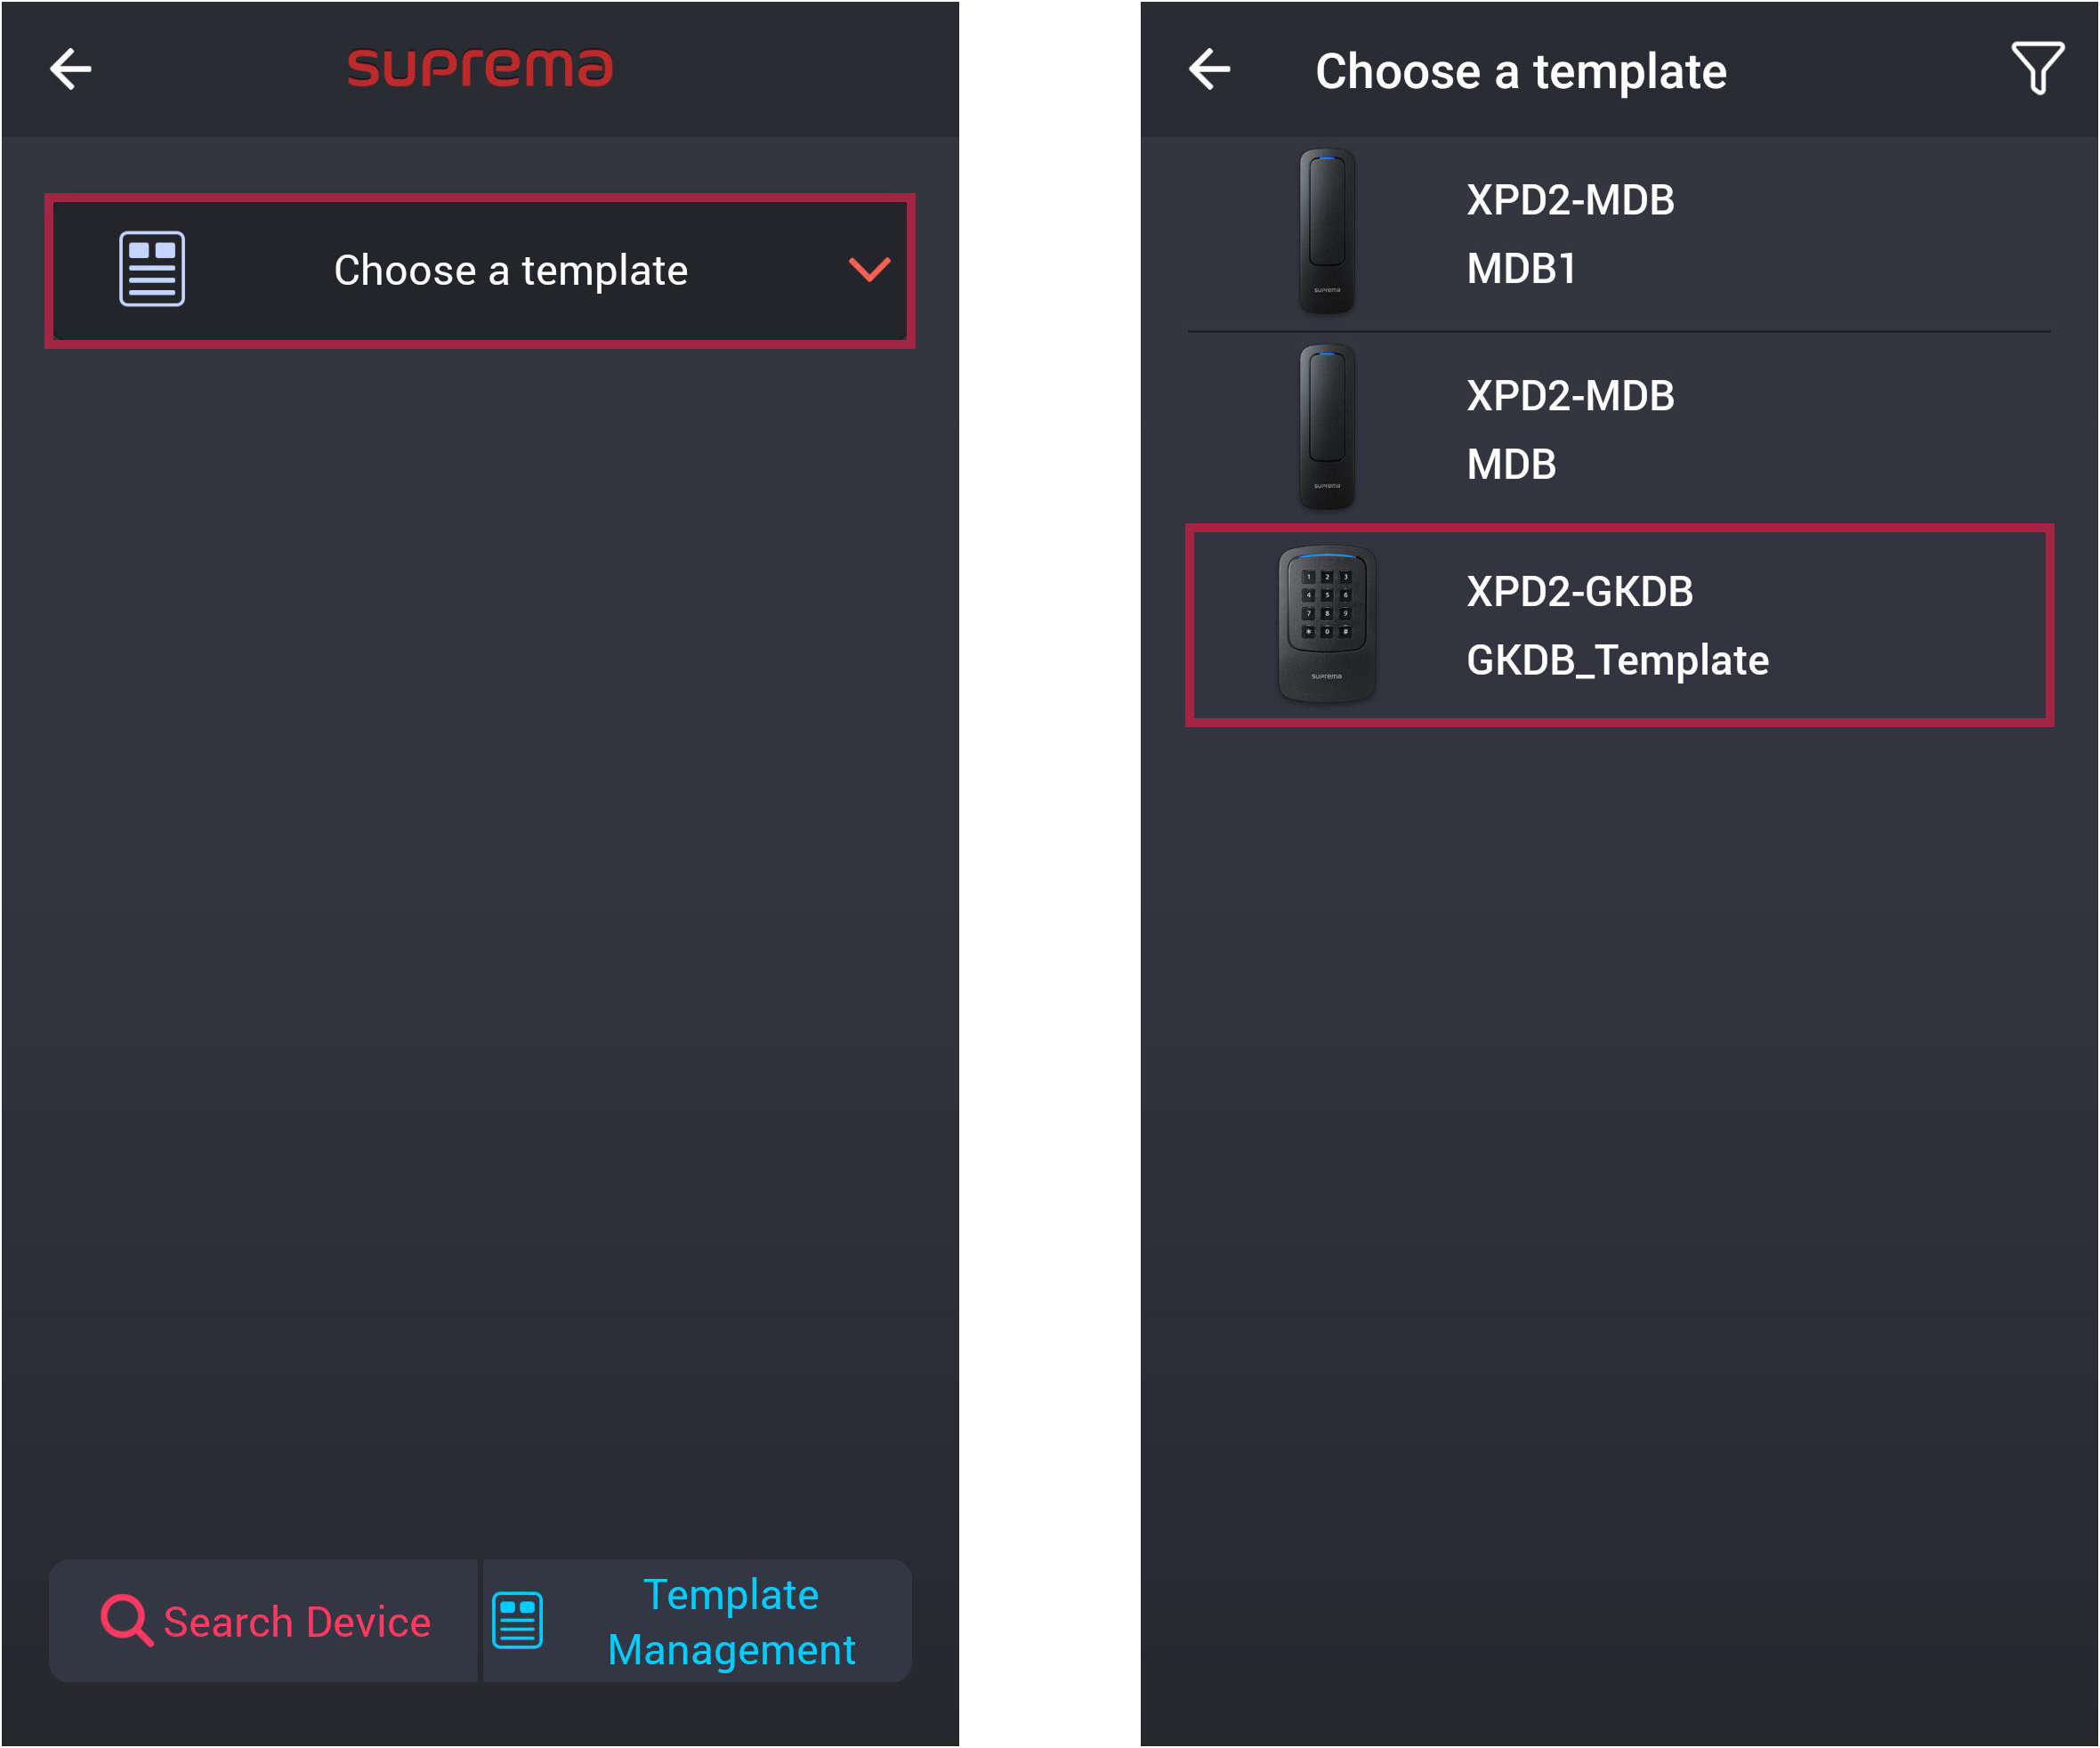
Select the device model for which you want to create the template.
-
After configuring each item, click Save to save the template.
You can add up to 100 templates.
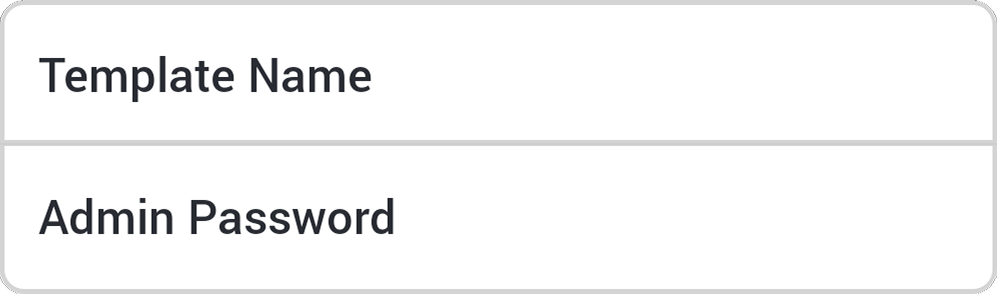
Set Template Name and Admin Password
-
Template Name: Enter the desired template name.
-
Admin Password: Enter the administrator password.
-
The administrator password can be set to 6-32 digits.
-
Be careful not to lose the administrator password. If you lose the administrator password, you will need to initialize the device to connect to the device with the applied template.
-
For more information on changing the administrator password, refer to Change admin password.
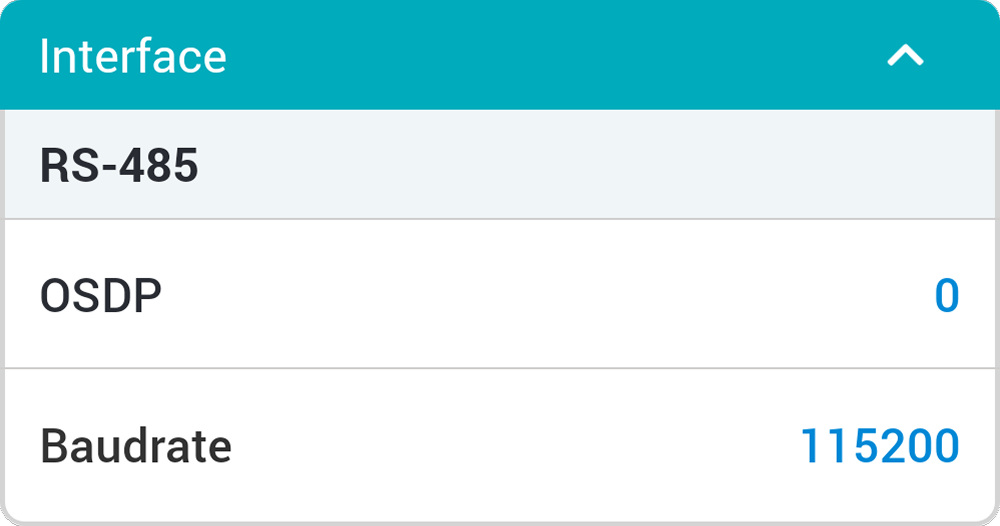
Interface
-
OSDP: Set the OSDP address to be used in communication between the device and the master device. Can be set to numbers from 0~126.
-
Baudrate: Set the RS-485 transmission speed.
Authentication

-
Card Type: You can set the type of card to be used by the device.
-
CSN Card: You can select the CSN card type and set the byte order.
-
Suprema Smart Card Layout: You can select the types of smart cards issued by Suprema.
-
Custom Smart Card Layout: You can select the types of smart cards issued by third parties.
-
Mobile: You can set the mobile card type.
-
When set to MSB, card data is processed in left-to-right order, sequentially processing from large byte to small byte order when saving the card's serial number (CSN). LSB processes the card's serial number (CSN) from small byte to large byte order when saving it.
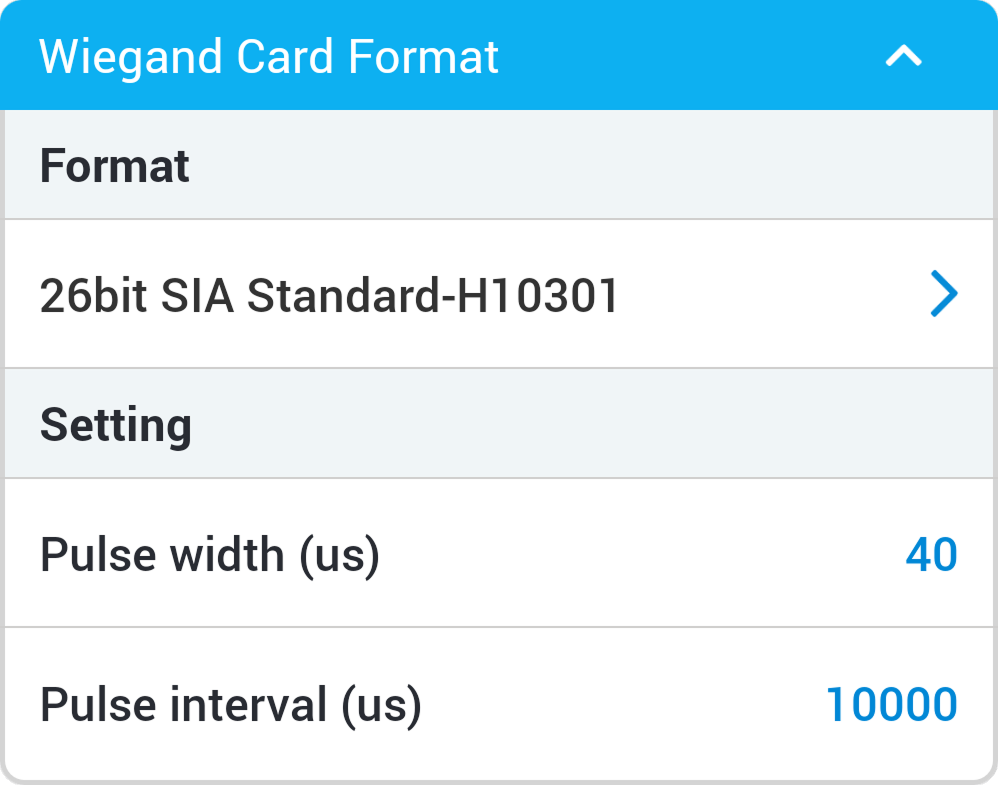
Wiegand Card Format
-
Format: You can set the Wiegand card format to be specified for the device. The card data is processed according to the set format.
-
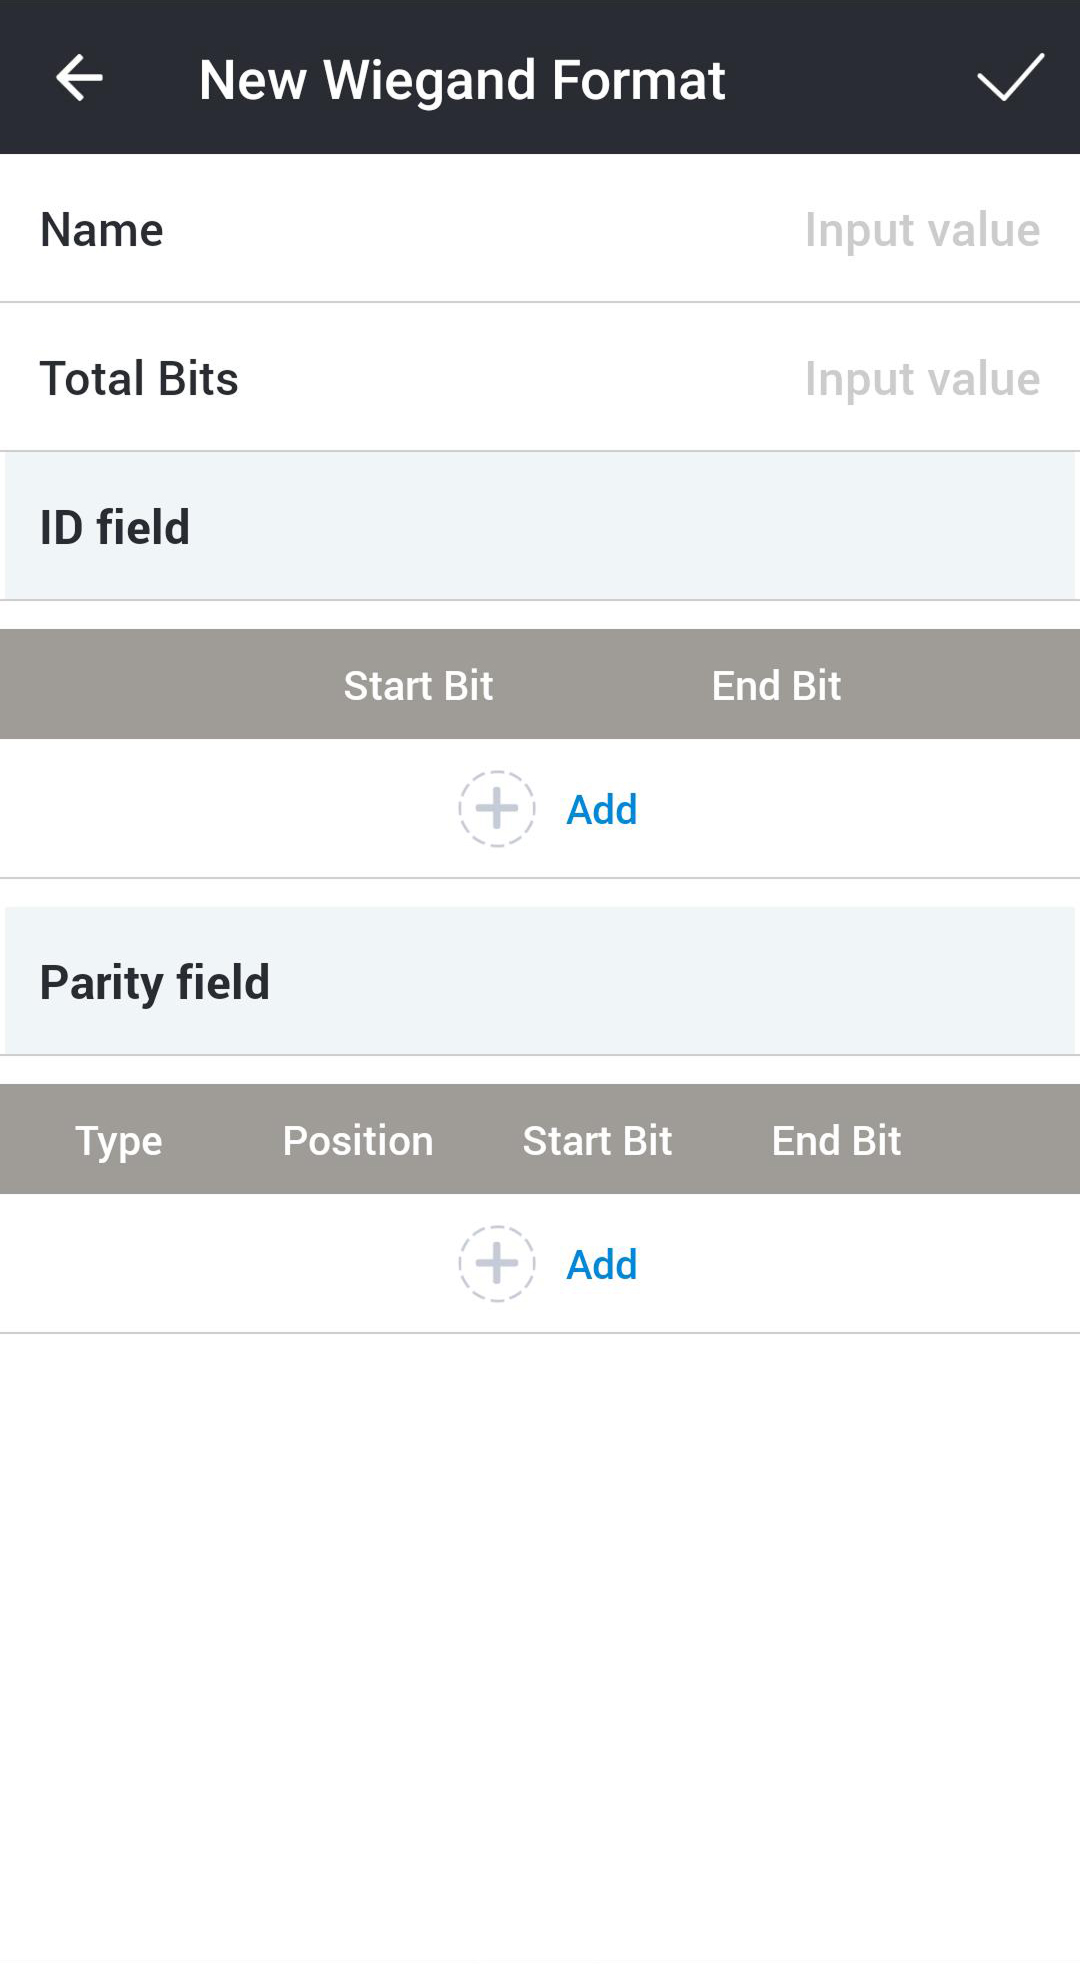
New Wiegand Format: If the desired format is not available, you can click to add a new Wiegand format.
-
Name: Enter the name of the desired Wiegand format.
-
Total Bits: Enter the total number of bits.
-
ID field: Enter the start and end bits of the ID you wish to use. Tap
 Add to add an ID field.
 -
Parity field: Enter the position of the parity field and the start and end bits you wish to use. Tap
Add to add a parity field.InfoTo add a parity field, enter the total bits.
-
-
-
Pulse width (μs): You can set the pulse width of the Wiegand signal.
-
Pulse interval (μs): You can set the pulse interval of the Wiegand signal.
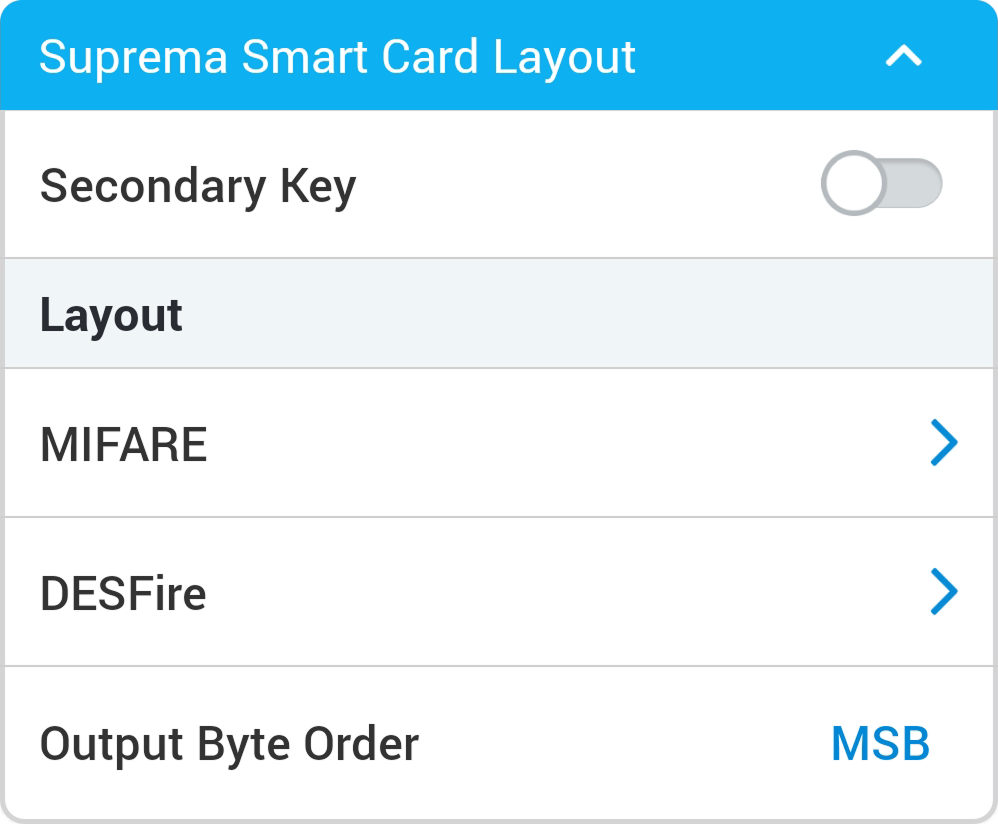
Suprema Smart Card Layout
-
Secondary Key: You can set whether to use the auxiliary site key. By setting the auxiliary site key, you can use it for authentication when the card's main key does not match.
-
MIFARE: You can set up MIFARE cards.
-
Security Level: You can set the encryption type to SL1 or SL3.
-
Primary Key: The key that encrypts communication between smart cards and the device.
-
Secondary Key: You can use it to authenticate when the card's main site key does not match. The auxiliary site key field is only displayed when Secondary Key from the previous depth is activated.
-
Start Block Index: Select the starting block where each template will be stored. This block is the index of the block where user information is stored; set it to a storable block if the user is already using the smart card. Can only be set for MIFARE.
-
-
DESFire: You can set up DESFire cards.
-
DESFire Advanced: You can use DESFire cards issued by third parties. Only DESFire can be configured.
-
Primary Key: The key that encrypts communication between smart cards and the device.
-
Secondary Key: You can use it to authenticate when the card's main site key does not match. The auxiliary site key field is only displayed when Secondary Key from the previous depth is activated.
-
App ID: Set the application ID. Serves as a kind of directory that includes a file ID. Only DESFire can be configured.
-
File ID: Set the file ID. Only DESFire can be configured.
-
Encryption Type: You can set the encryption type to DES/3DES or AES.
-
Enforce EV2/EV3 Secure Messaging: Enable this option to force secure messaging when authenticating to the device with DESFire EV2 or EV3 cards. This option is only available when Encryption Type is set to AES.
-
-
Output Byte Order: You can set the byte order for smart card output.
-
To use DESFire Advanced, please accurately enter the information for App Master Key, App Master Key Index, File Read Access Key, File Read Access Key Index, App ID, File ID, Encryption Type.
-
App Master Key, File Read Access Key can only accept up to 32 bytes of hexadecimal.
-
When set to MSB, card data is processed in left-to-right order, sequentially processing from large byte to small byte order when saving the card's serial number (CSN). LSB processes the card's serial number (CSN) from small byte to large byte order when saving it.
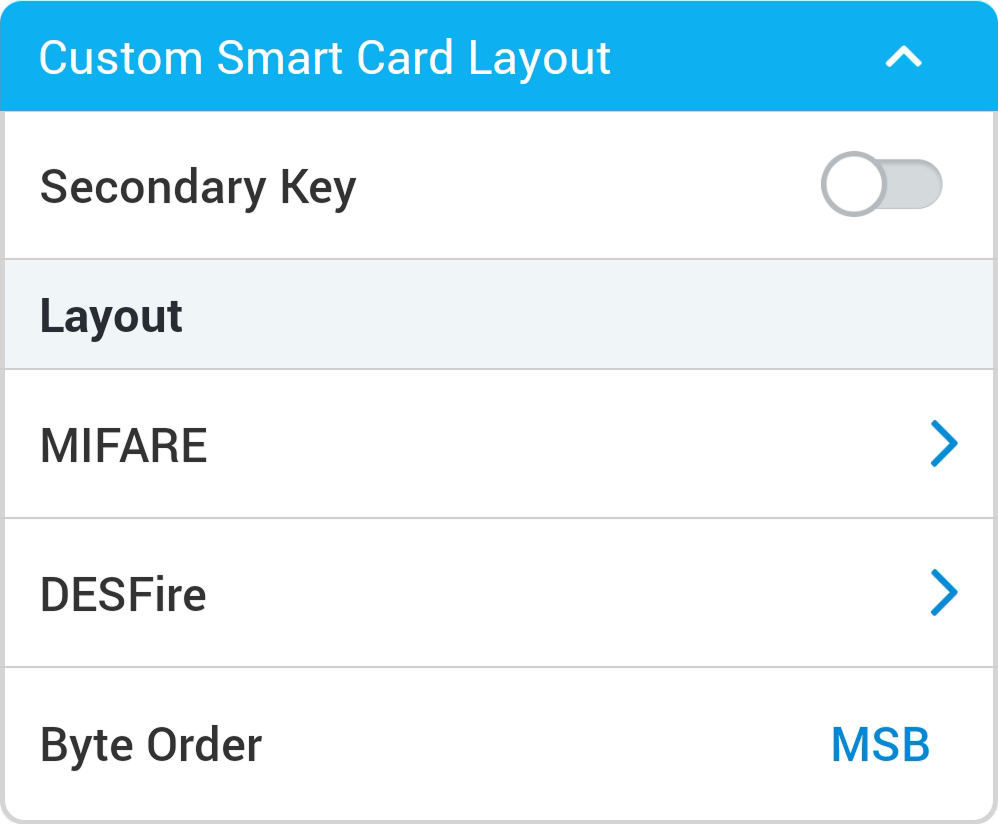
Custom Smart Card Layout
-
Secondary Key: You can set whether to use the auxiliary site key. By setting the auxiliary site key, you can use it for authentication when the card's main key does not match.
-
MIFARE: You can set up MIFARE cards.
-
Security Level: You can set the encryption type to SL1 or SL3.
-
Primary Key: The key that encrypts communication between smart cards and the device.
-
Secondary Key: You can use it to authenticate when the card's main site key does not match. The auxiliary site key field is only displayed when Secondary Key from the previous depth is activated.
-
Block Index: Select the starting block where each template will be stored. This block is the index of the block where user information is stored; set it to a storable block if the user is already using the smart card. Can only be set for MIFARE.
-
Skip Bytes: You can set the starting point for reading the card number.
-
Data Size: (If the set values of Primary Key and Secondary Key are the same as the values of the card) You can set the size of the data to read from the card.
-
-
DESFire: You can set up DESFire cards.
-
DESFire Advanced: You can use DESFire cards issued by third parties. Only DESFire can be configured.
-
Primary Key: The key that encrypts communication between smart cards and the device.
-
Secondary Key: You can use it to authenticate when the card's main site key does not match. The auxiliary site key field is only displayed when Secondary Key from the previous depth is activated.
-
App ID: Set the application ID. Serves as a kind of directory that includes a file ID. Only DESFire can be configured.
-
File ID: Set the file ID. Only DESFire can be configured.
-
Encryption Type: You can set the encryption type to DES/3DES or AES.
-
Skip Bytes: You can set the starting point for reading the card number.
-
Data Size: (If the set values of Primary Key and Secondary Key are the same as the values of the card) You can set the size of the data to read from the card.
-
Enforce EV2/EV3 Secure Messaging: Enable this option to force secure messaging when authenticating to the device with DESFire EV2 or EV3 cards. This option is only available when Encryption Type is set to AES.
-
-
Byte Order: You can set the byte order for smart card output.
-
To use DESFire Advanced, please accurately enter the information for App Master Key, App Master Key Index, File Read Access Key, File Read Access Key Index, App ID, File ID, Encryption Type.
-
App Master Key, File Read Access Key can only accept up to 32 bytes of hexadecimal.
-
When set to MSB, card data is processed in left-to-right order, sequentially processing from large byte to small byte order when saving the card's serial number (CSN). LSB processes the card's serial number (CSN) from small byte to large byte order when saving it.
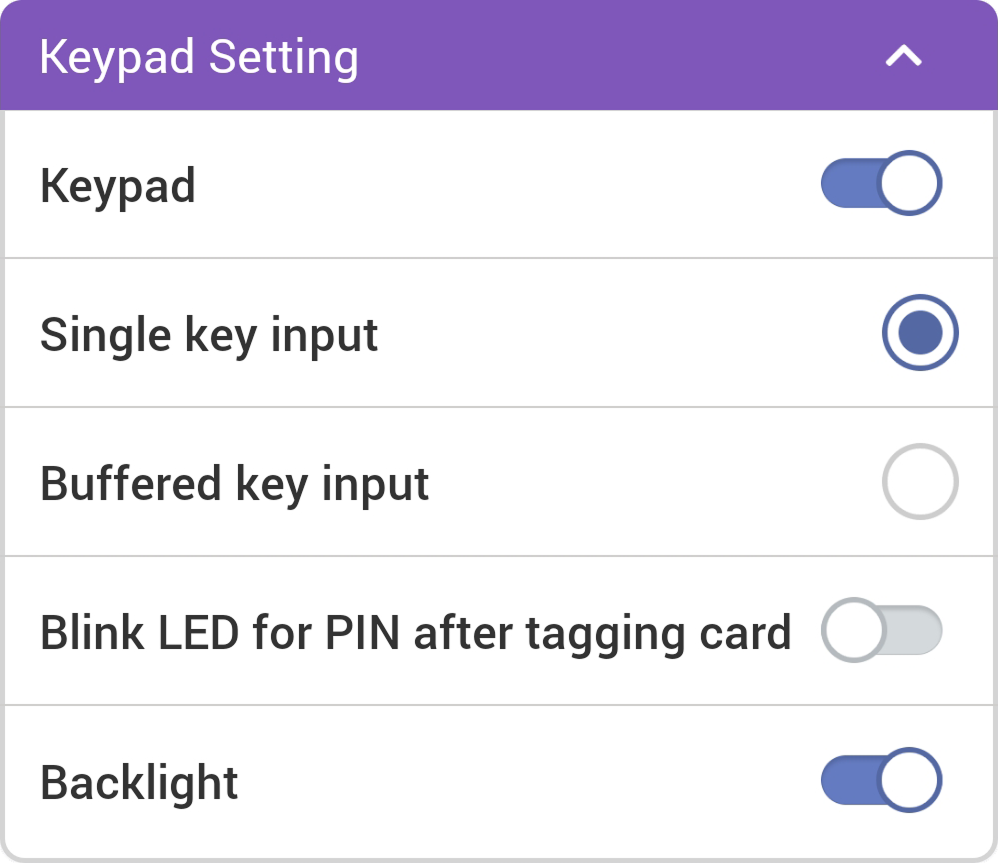
Keypad Setting
-
Keypad: You can set whether to use the keypad. When the keypad is activated, you can authenticate by entering the card ID using the keypad.
-
Single key input: Each time you press a key while entering the card ID on the keypad, the value will be sent.
-
Buffered key input: When entering the card ID on the keypad, all keys need to be pressed, and then press the
#key to send the entire value at once. -
Blink LED for PIN after tagging card: When the device's authentication mode is set to card + PIN, pressing the card will activate the LED to prompt the user to enter the PIN.
-
Backlight: You can turn the keypad backlight on or off.
-
Keypad Setting is only displayed on the template setting screen of the XPD2-GKDB device.
-
Backlight is only supported on XPD2-GKDB hardware V02M and firmware version v1.7.1 or higher.
-
Values entered through the keypad are transmitted in 4-bit units by default. Card IDs entered through the keypad are sent in the same format as the Wiegand card format.
Others
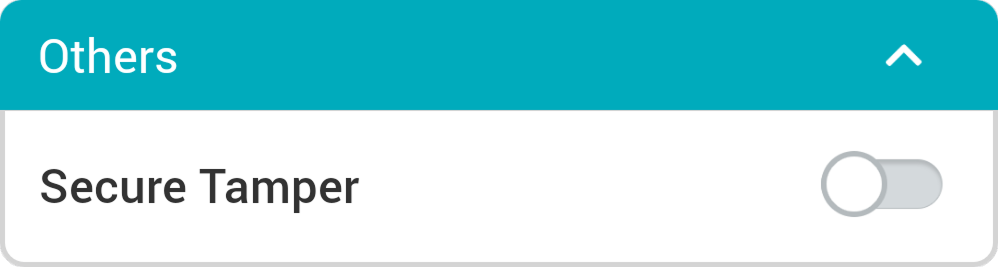
- Secure Tamper: You can set it so that when a tamper event occurs in the device, the security key stored in the device will be deleted. To use the security tamper feature, activate it.
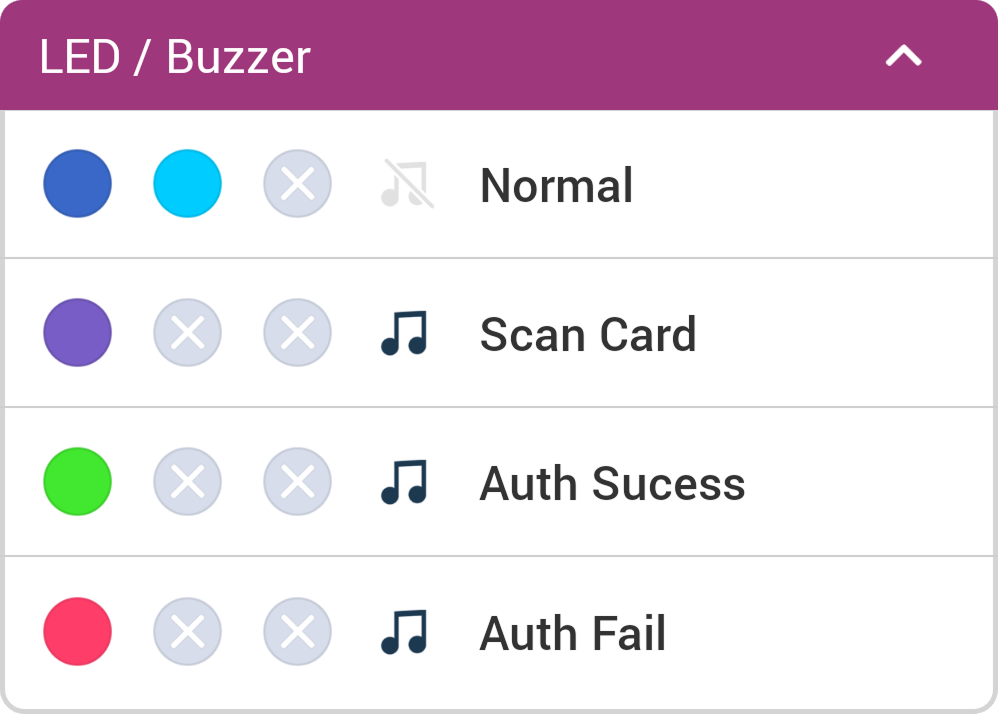
LED / Buzzer
-
Normal: You can set the colors displayed on the device LED during normal operation.
-
Scan Card: You can set the color displayed on the device LED and the number of times the buzzer sound plays when scanning a card.
-
Auth Sucess: You can set the color displayed on the device LED and the number of times the buzzer sound plays upon successful authentication.
-
Auth Fail: You can set the color displayed on the device LED and the number of times the buzzer sound plays upon failed authentication.
-
LED can be set to display a maximum of three colors in alternating patterns. Press the slot to choose a color.
-
Selecting
 skips the color sequence for that slot and displays the color set for the next slot.
Apply template
The added templates can be applied uniformly to multiple devices via BLE communication.
Some settings may not apply if the device's firmware version is low. To apply all settings, refer to Upgrade device firmware to upgrade the firmware.
-
Enable Bluetooth on your mobile device and run Suprema Device Manager.
-
Select XPass D2 on the main screen.
-
Click Choose a template. A list of available templates will appear.
-
Select the desired template from the list of templates.
-
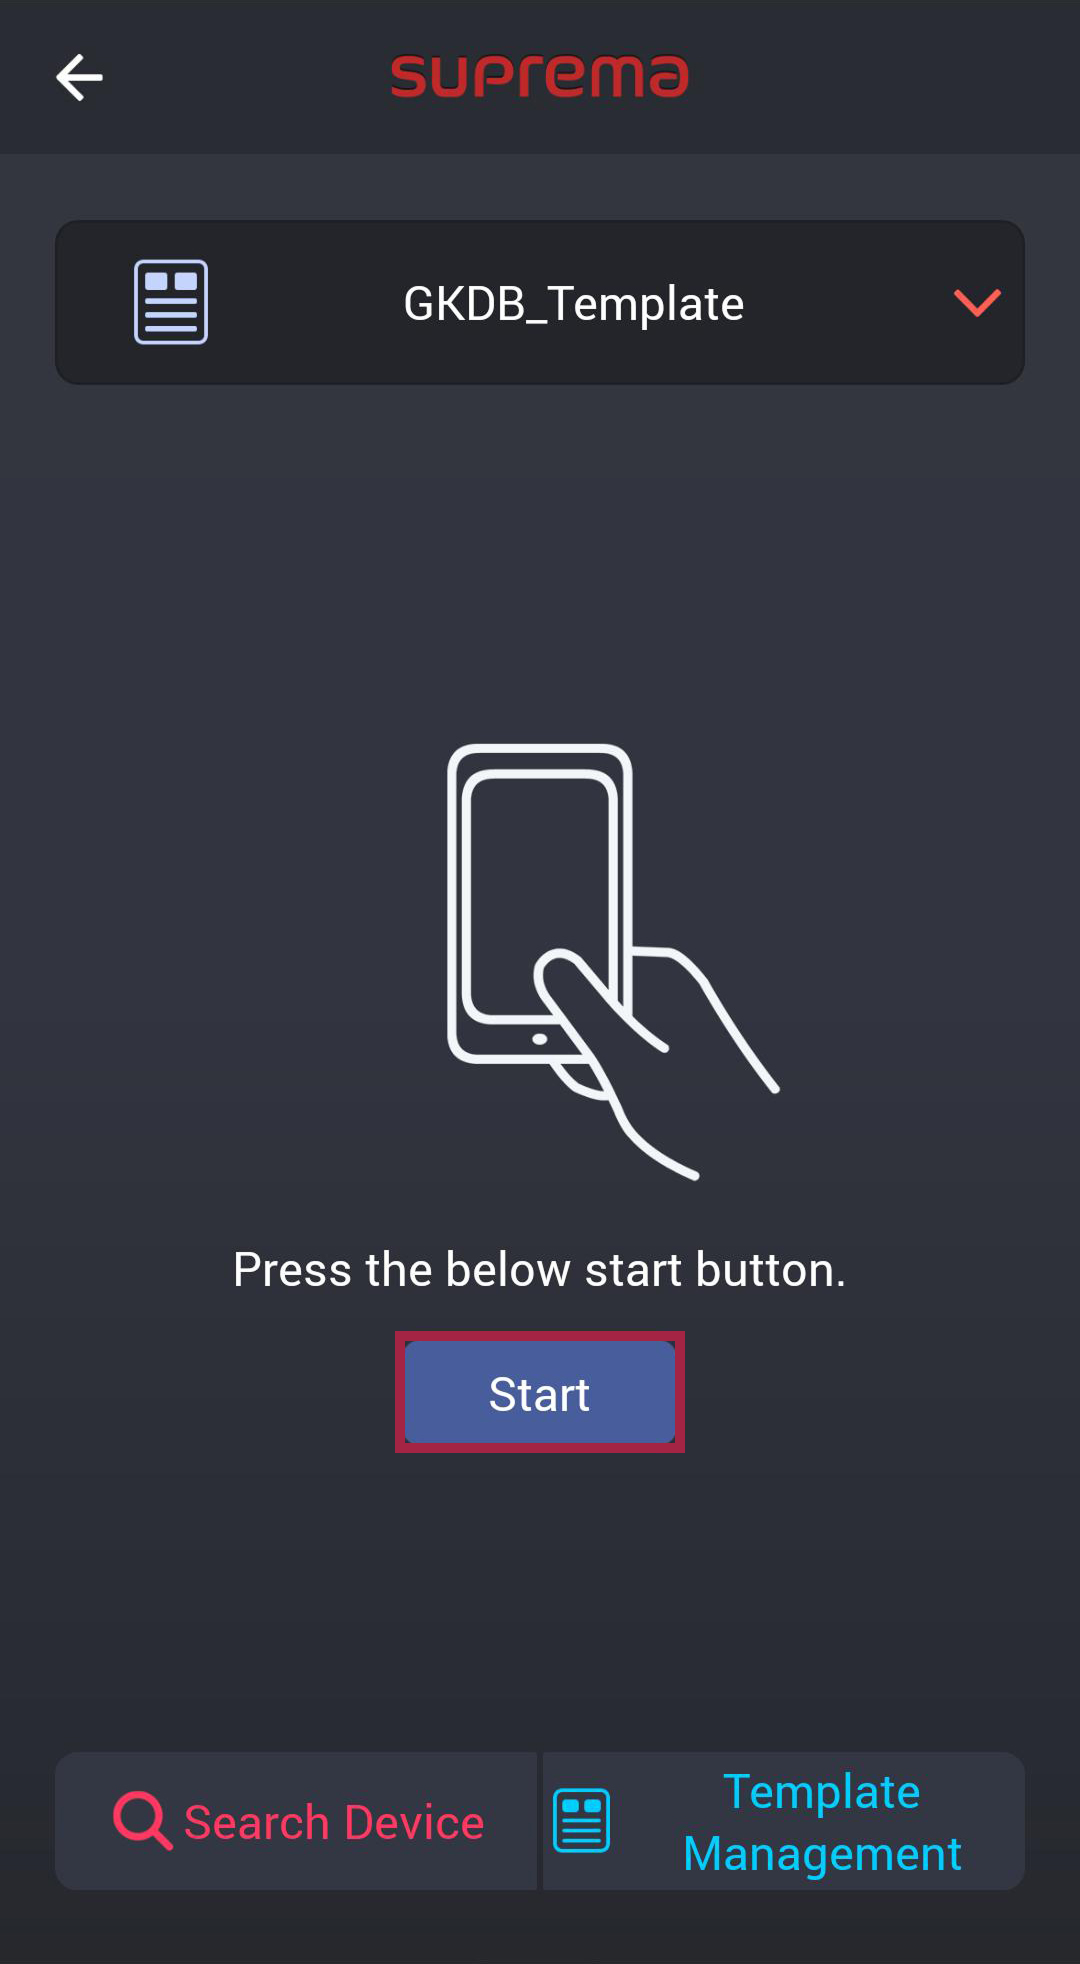
Click Start to continue.
-
Make sure the back of your mobile device touches the device to which you want to apply the template.
-
Once the template application is complete, click OK.
-
Settings changed using Suprema Device Manager are only applied to the device and will not be synchronized with the server.
-
If the device is connected to the master device or if the Wiegand output settings have changed, it cannot be connected to Suprema Device Manager with the main key. To connect with Suprema Device Manager, you must initialize the device.
Manage templates
Edit template
-
Run the Suprema Device Manager on your mobile device.
-
Select XPass D2 on the main screen.
-
Click Template Management.
-
Select the template you want to edit from the list of templates.
-
Refer to Add template to edit the template.
-
To save the changed settings, click Save; to save as a new template, click Save as new template.
Delete template
-
Run the Suprema Device Manager on your mobile device.
-
Select XPass D2 on the main screen.
-
Click Template Management.
-
Select the template you wish to delete from the list of templates.
-
Tap
 → OK to delete a template.
Export template
You can export templates for XPass D2 settings from the app.
-
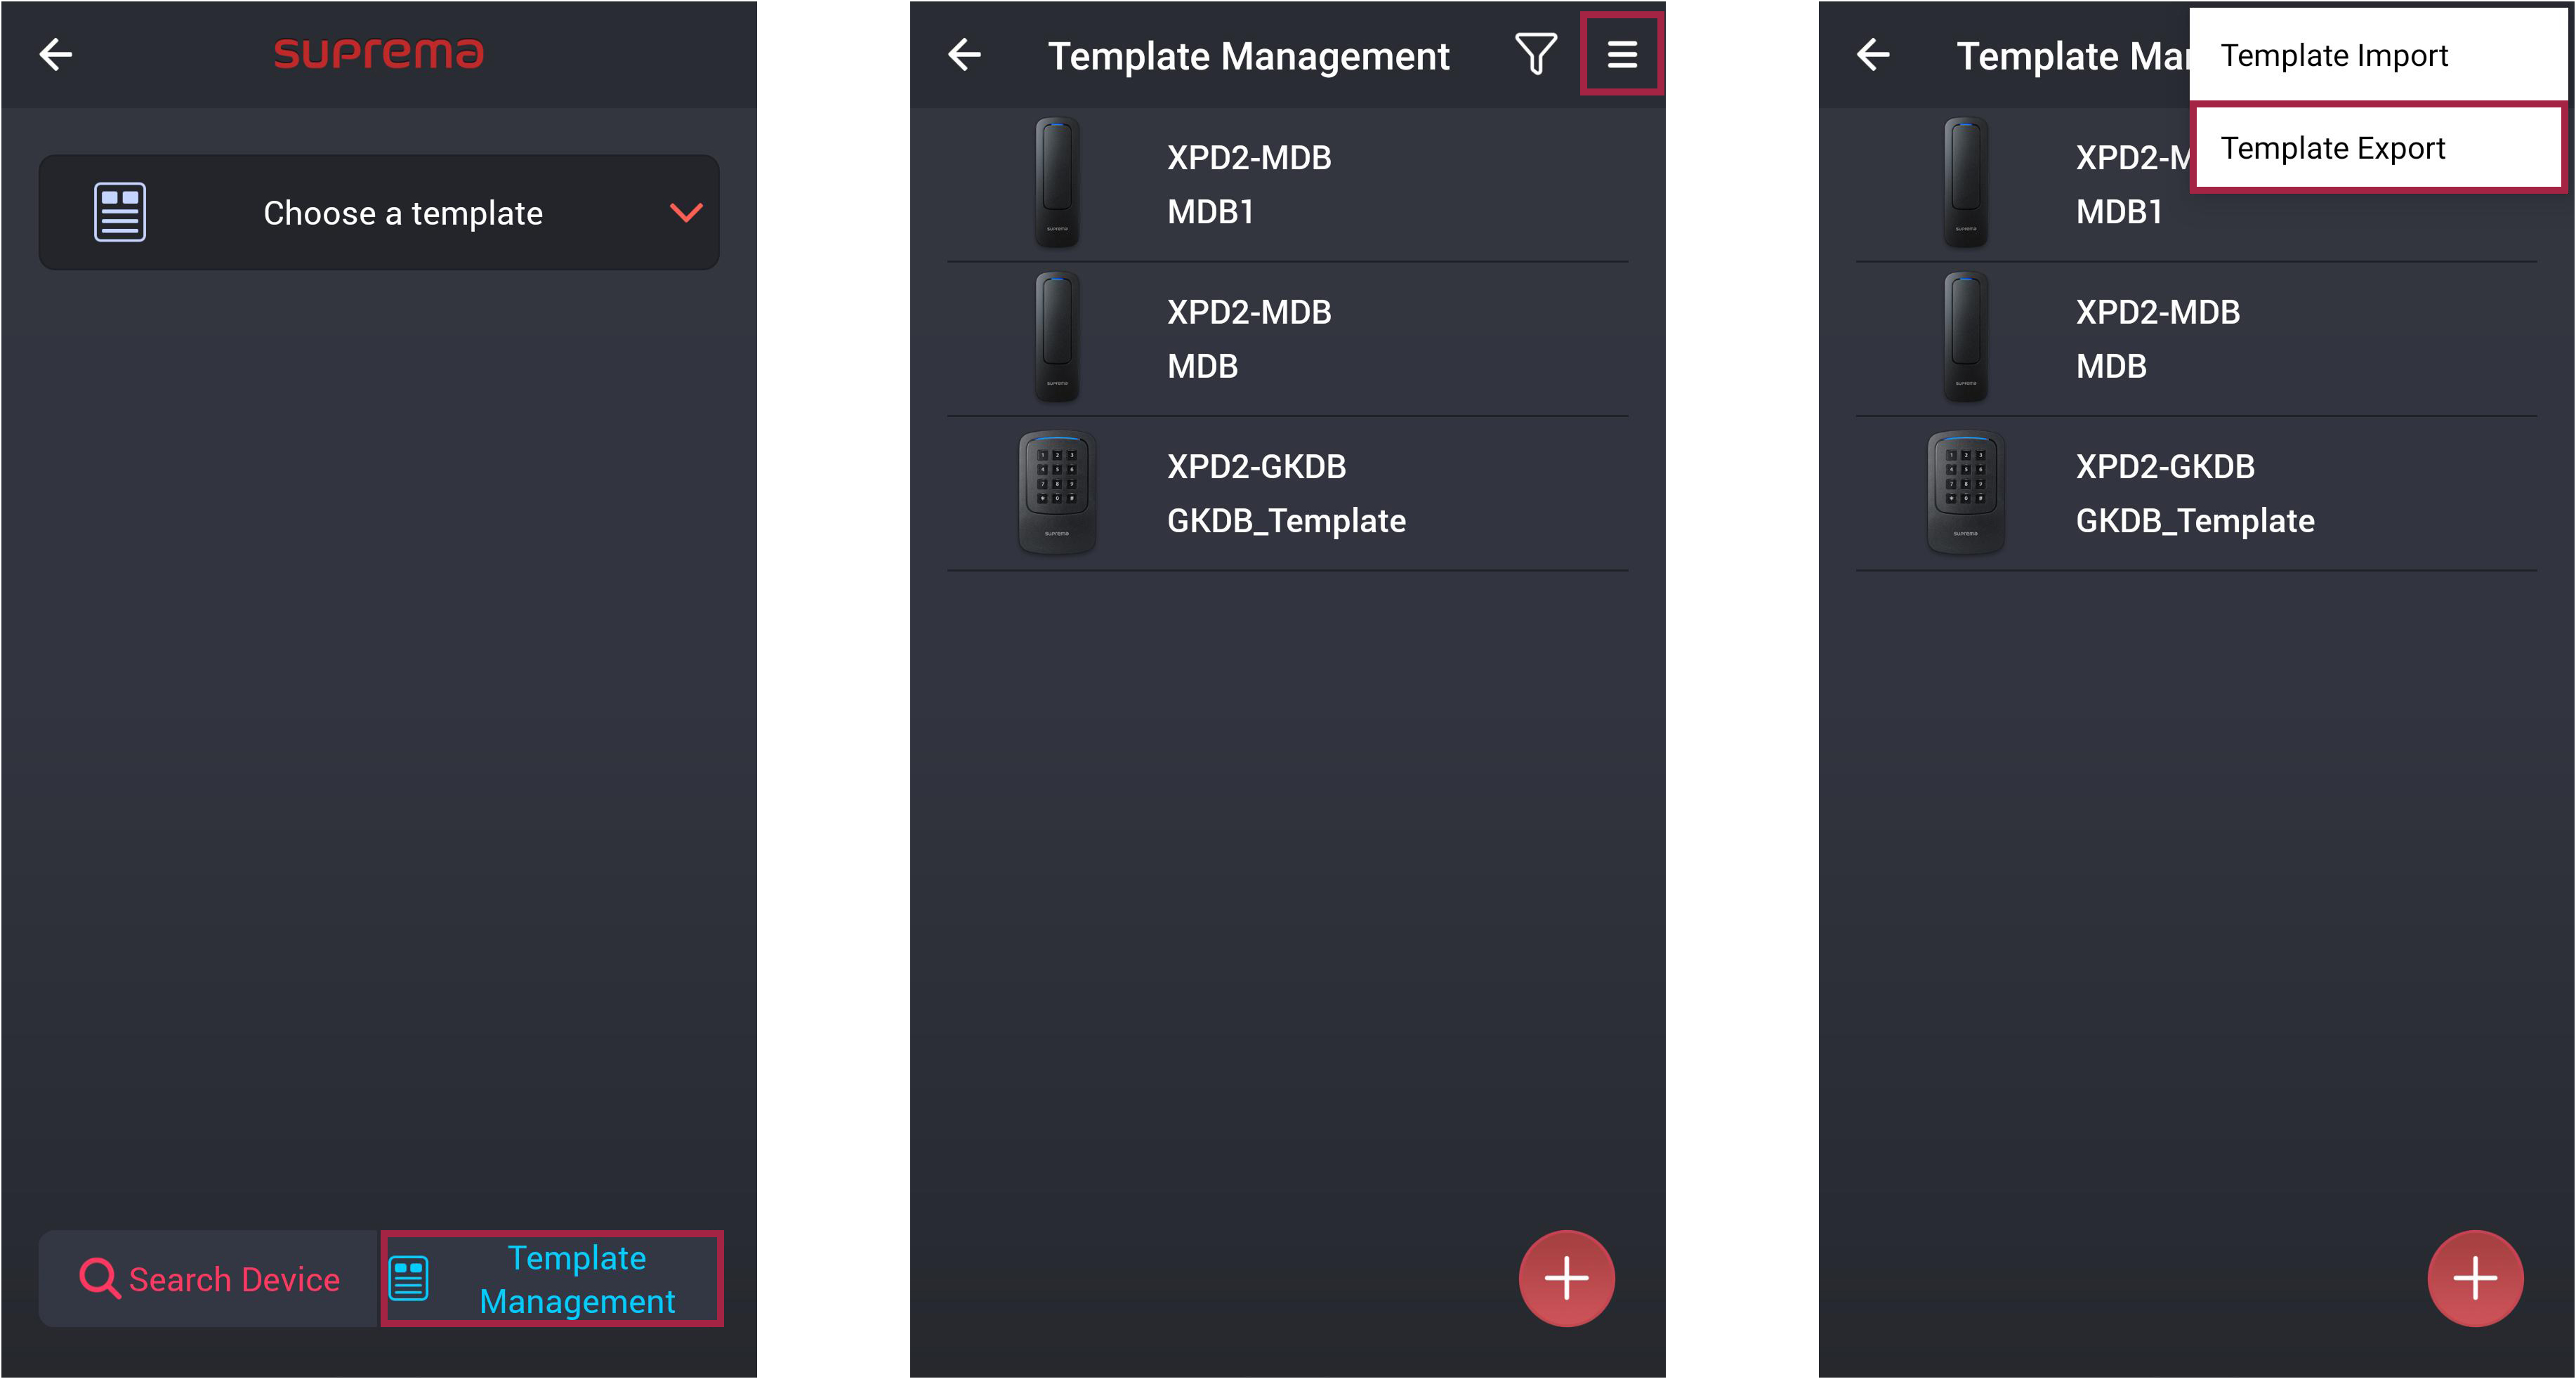
Run the Suprema Device Manager on your mobile device.
-
Select XPass D2 on the main screen.
-
Click Template Management.
-
At the top of the template list, tap
 and select Template Export.
 -
After selecting the template to export, tap
 .
.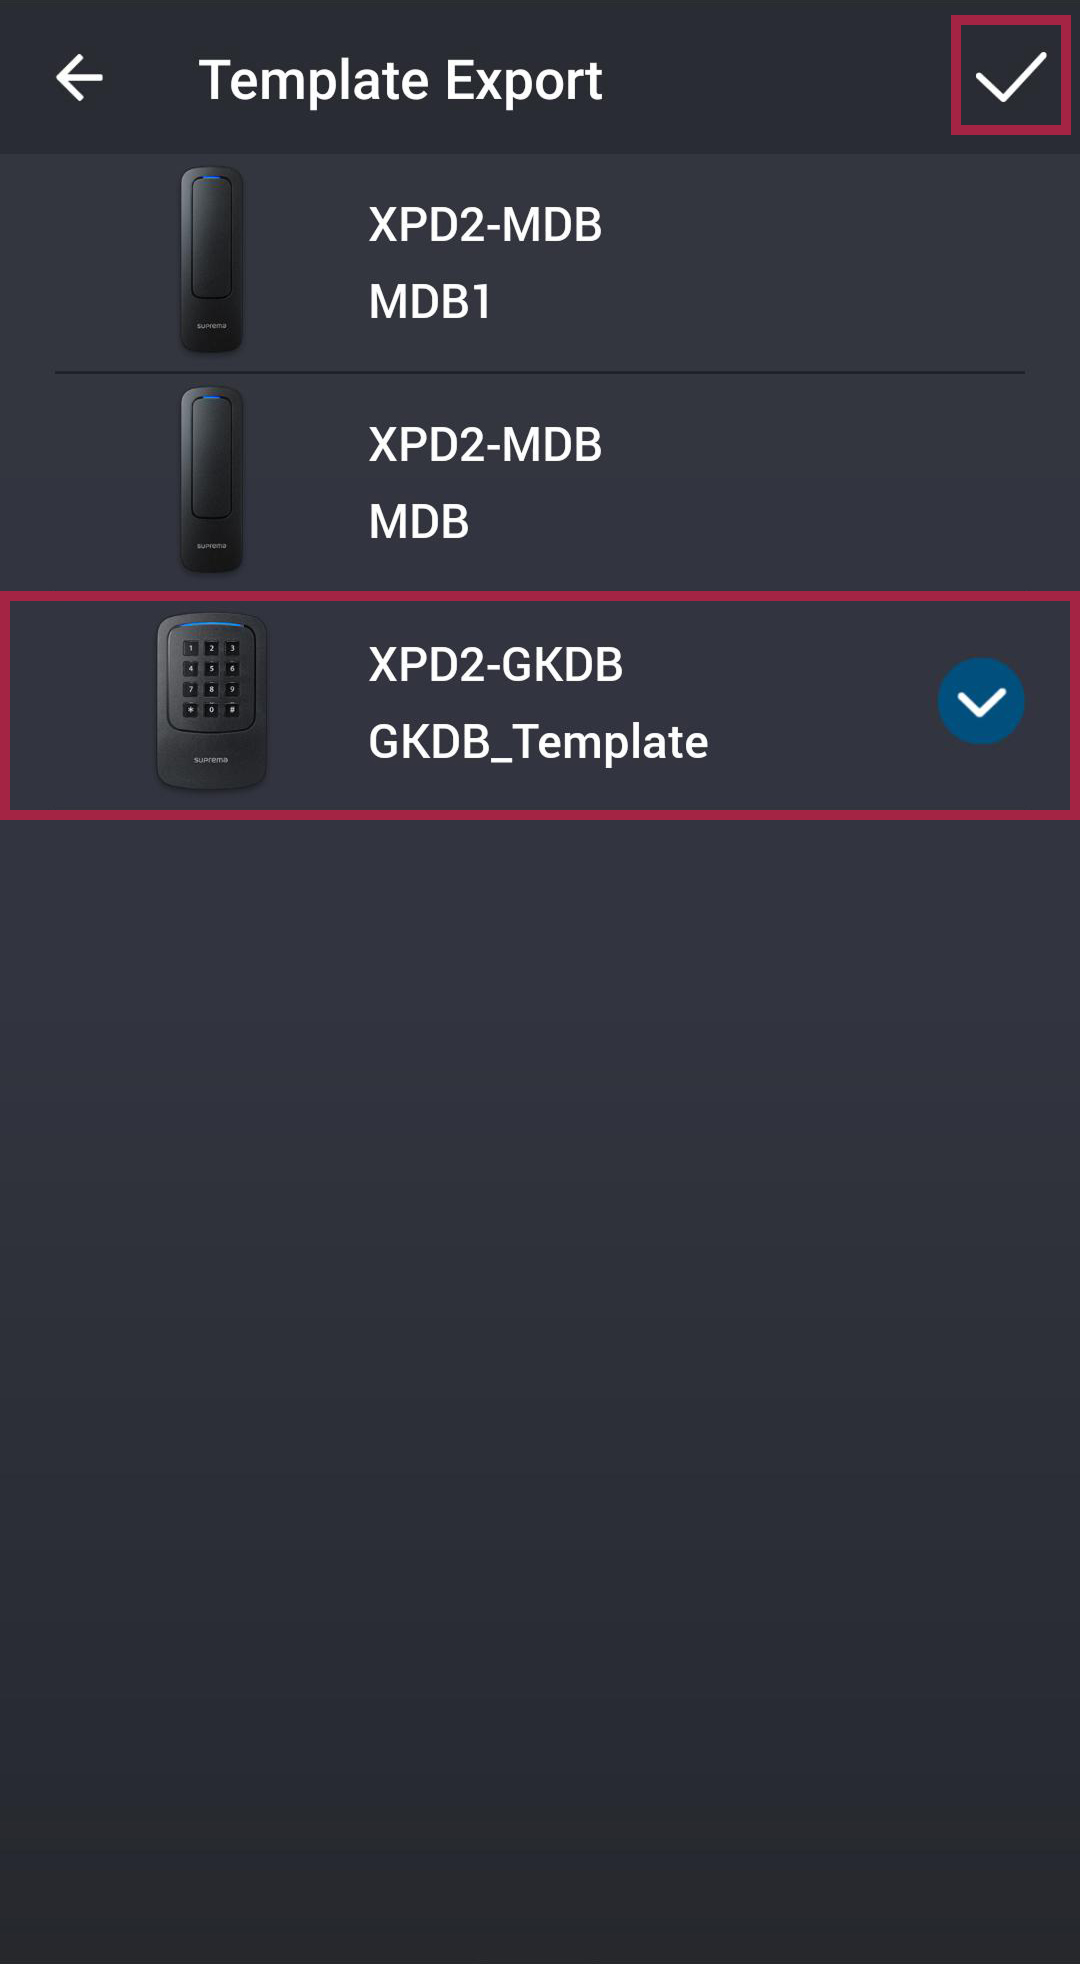
Template files are saved to the following folder on your mobile device.
-
Android: Download → DeviceManager_TemplateFiles
-
iOS: Device
Import template
You can import templates for XPass D2 settings into the app.
-
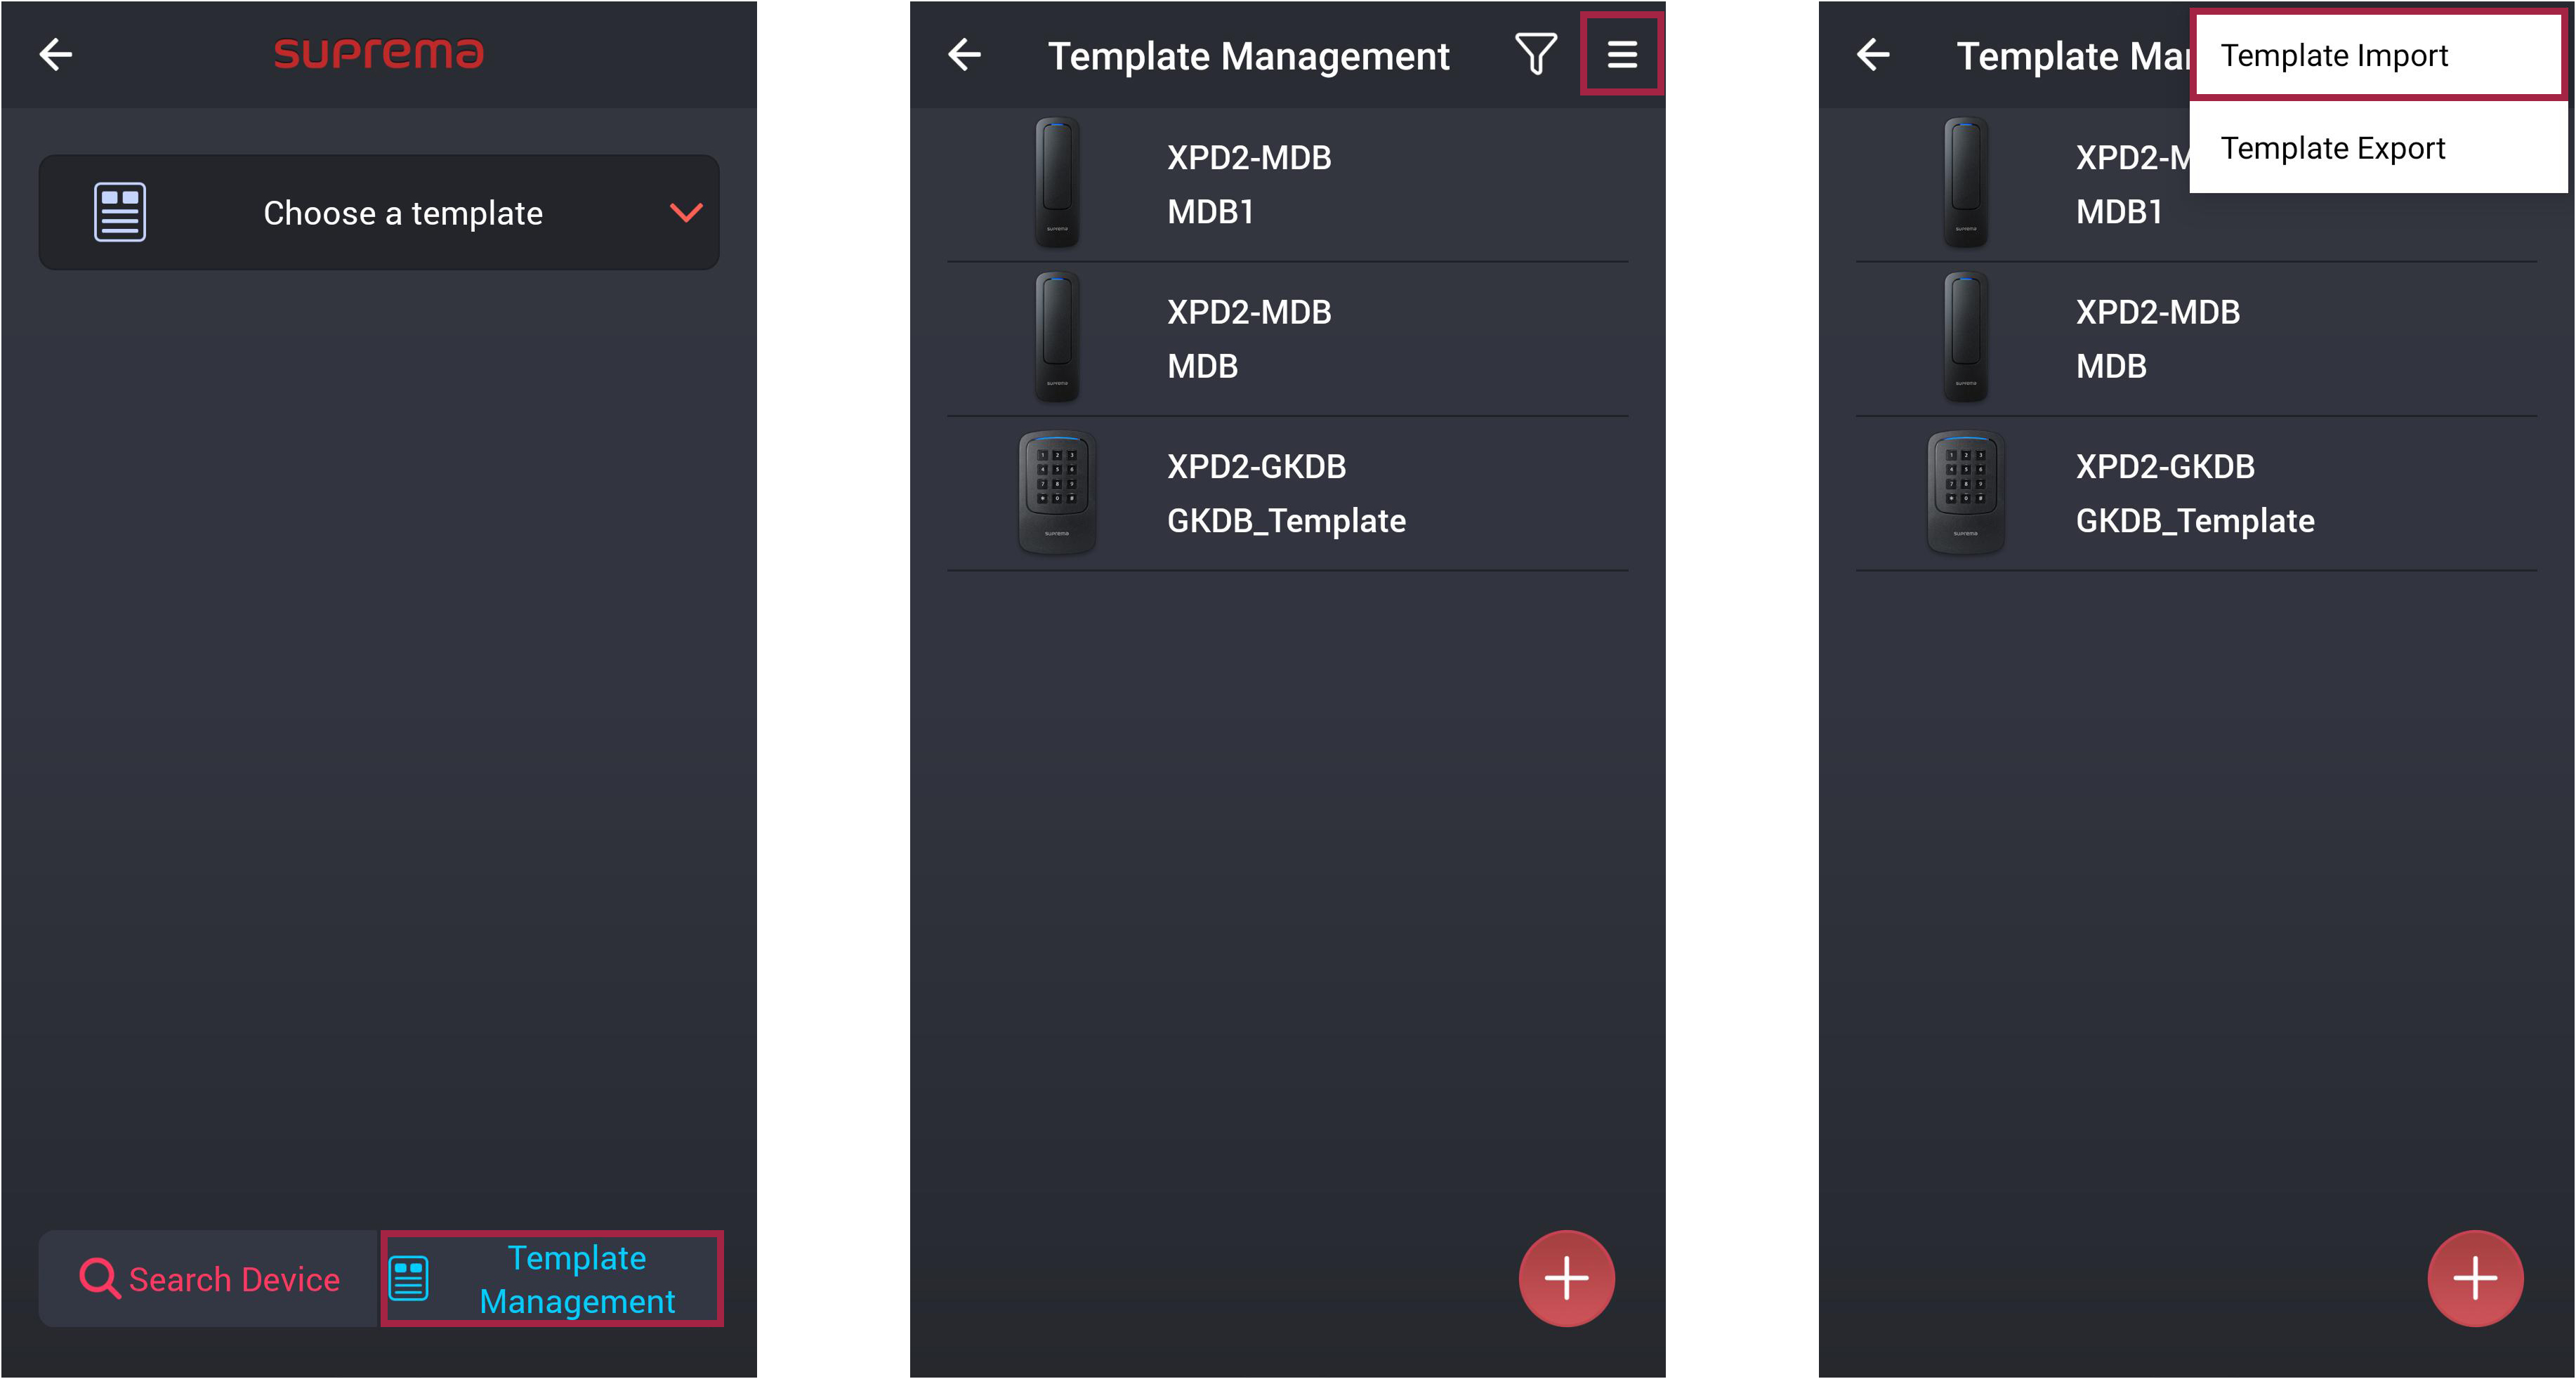
Run the Suprema Device Manager on your mobile device.
-
Select XPass D2 on the main screen.
-
Click Template Management.
-
At the top of the template list, tap
and select Template Import. -
Select the template you want to import from the folder where the templates are stored.
Template files are saved to the following folder on your mobile device.
-
Android: Download → DeviceManager_TemplateFiles
-
iOS: Device
Search and connect device
You can search for and connect to XPass D2 installed nearby. By connecting to Suprema Device Manager, you can upgrade the firmware of the device or use features such as restarting the device or changing the template password.
-
Enable Bluetooth on your mobile device and run Suprema Device Manager.
-
Select XPass D2 on the main screen.
-
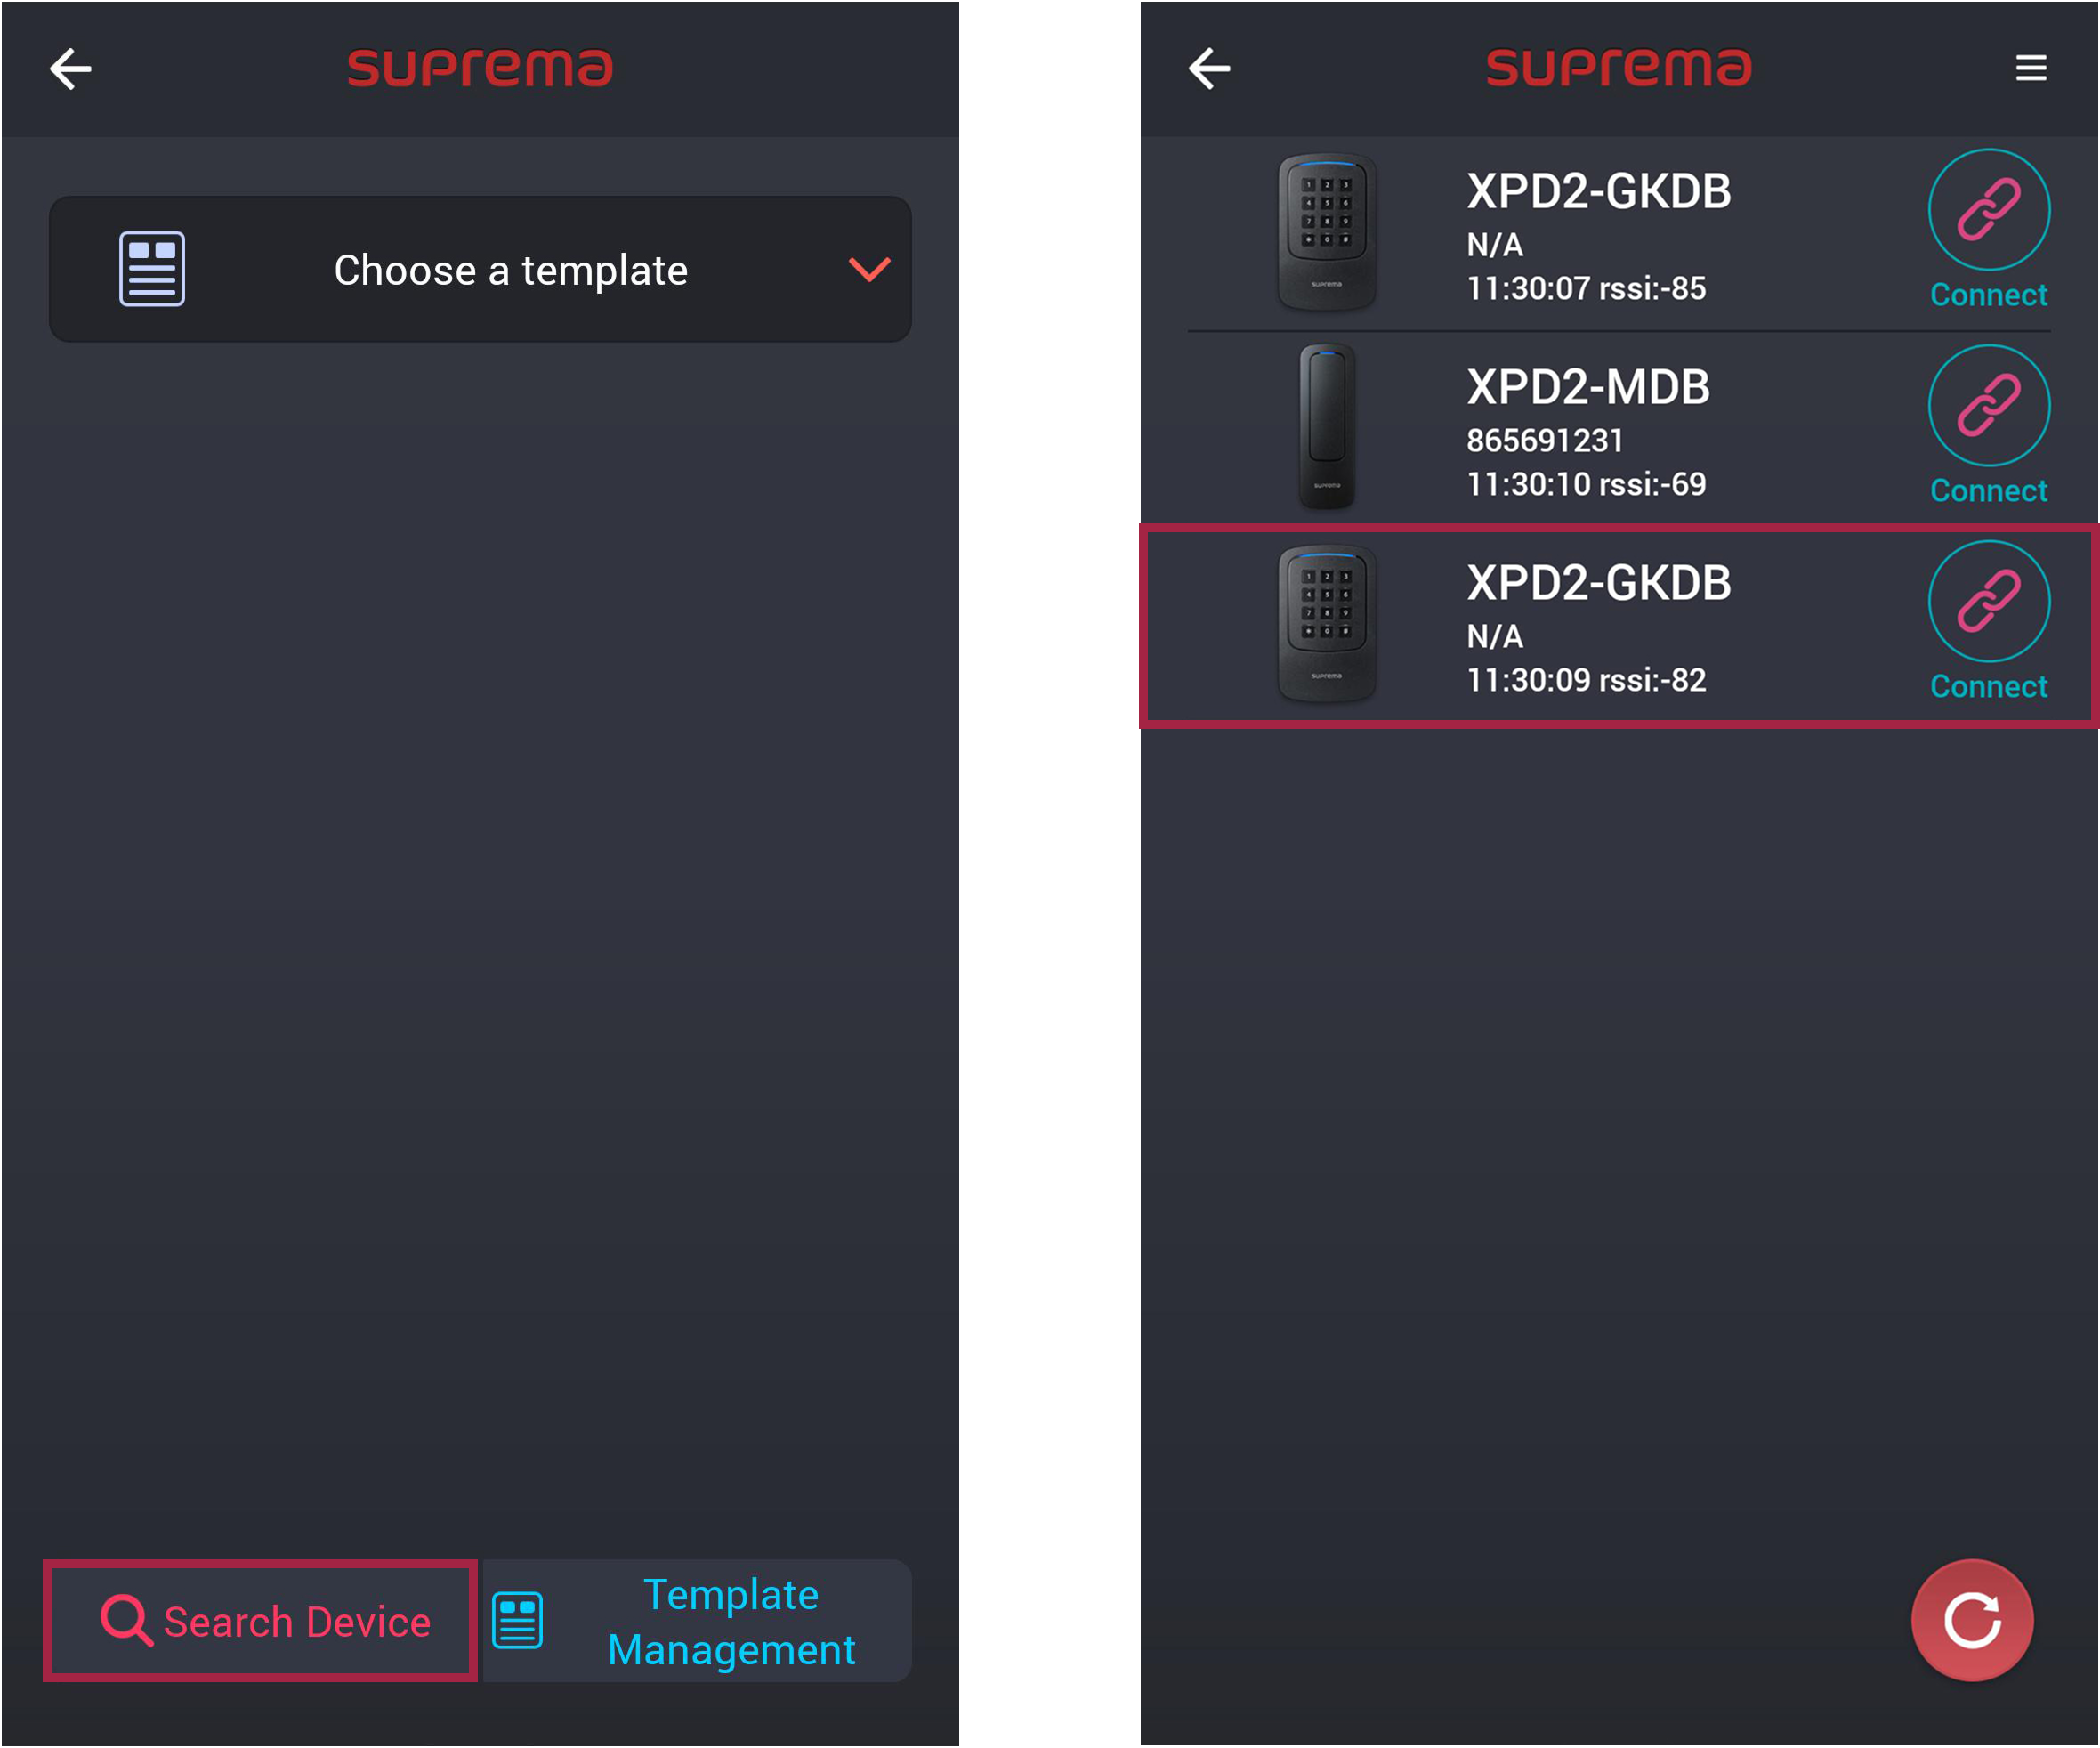
Click Search Device. A list of connectable devices will appear.
-
Select a device by checking the device ID in the device list or bring your mobile device close to the device to connect.
-
Enter the connection password. Tap
 to display the entered password.
 -
Press OK to complete the device connection.
Upgrade device firmware
You can easily upgrade the device's firmware.
-
To upgrade the firmware, you need to download the firmware file to your mobile device. The latest firmware can be downloaded from the Suprema Download Center.
-
During the firmware upgrade, keep the distance between the device and mobile device within 1m.
-
Refer to Search and connect device to connect to the device you want to upgrade the firmware.
-
Tap
 → FW upgrade.
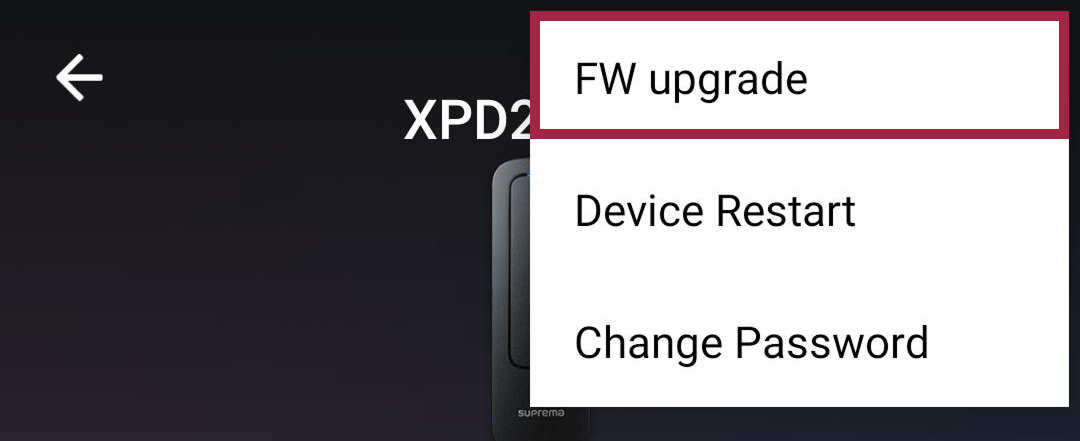
-
Select the firmware from the path where the firmware file is saved. The firmware upgrade is in progress.
-
Press OK to complete the firmware upgrade.
Restart device
You can restart the device.
-
Refer to Search and connect device to connect to the device you want to restart.
-
Tap
→ Device Restart.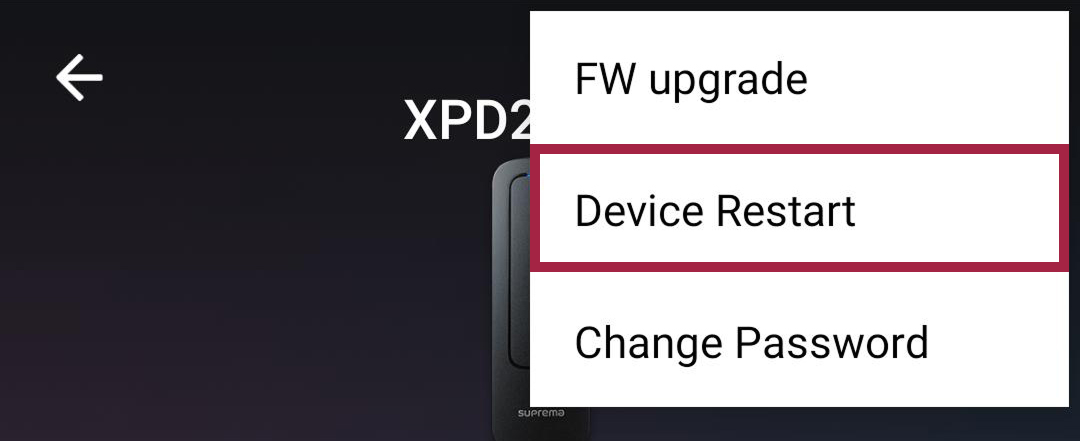
-
When you restart the device, the BLE communication connection with the mobile device will be disconnected. To reconnect automatically, enable the Auto Connect feature. For detailed configuration instructions, refer to Configuring app settings.
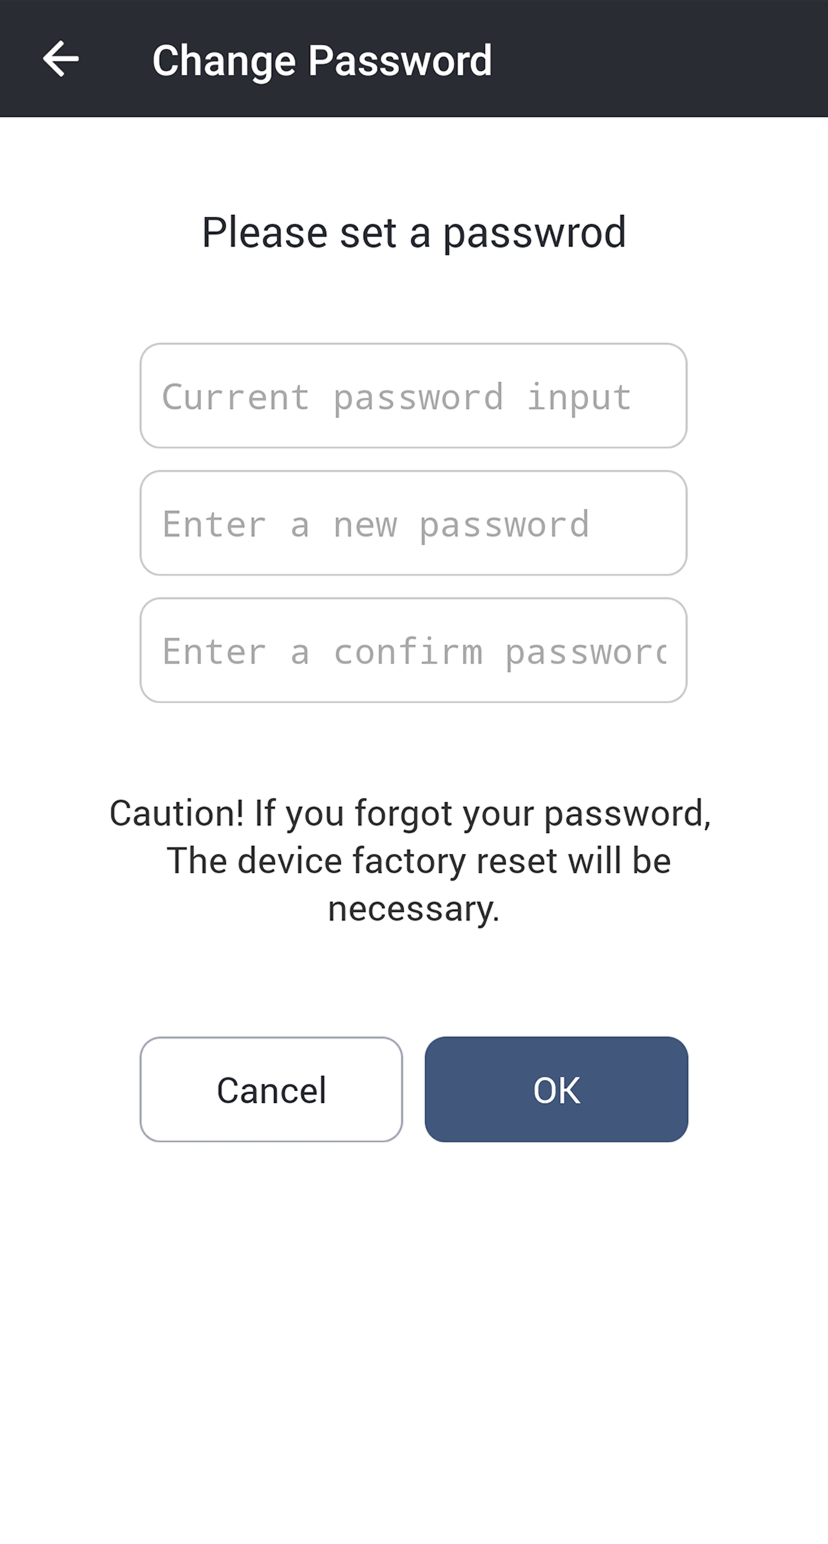
Change admin password
You can change the admin password of the template.
-
Refer to Search and connect device to connect to the device with the template where you want to change the password.
-
Tap
→ Change Password.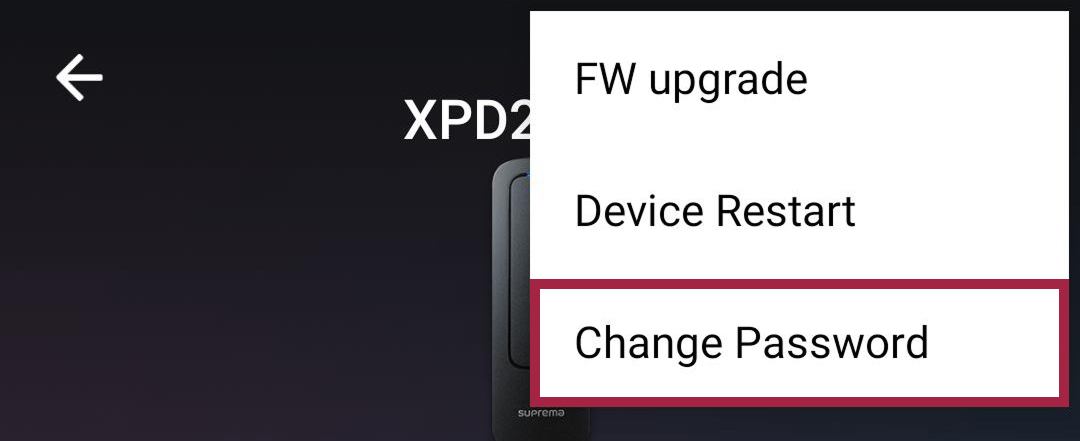
-
Enter the current password and the new password you will use.
-
Press OK to complete the password change.
-
The administrator password can be set to 6-32 digits.
-
Be careful not to lose the administrator password. If you lose the administrator password, you will need to initialize the device to connect to the device with the applied template.