Add Users
Enroll users for AI Facial Authentication. When adding a user, enter basic information and enroll a face using one of three methods.
Add users in the following situations.
-
When enrolling a new employee in the organization
-
When enrolling a user's face photo into the Facial Authentication database
-
When adding multiple users in bulk
-
When enrolling users for integration with external systems (ERP, HR management system)
-
To use the Facial Authentication feature, comply with local regulations.
-
When adding the first user, a Facial Authentication consent popup appears. The system log stores consent records; the popup does not reappear after consent.
-
If consent was completed earlier in AI Event settings, no popup appears when adding users.
Enter basic user information
If the Facial Authentication consent popup appears when adding the first user, review it and proceed. After giving consent, enter basic information in the Add User dialog.
-
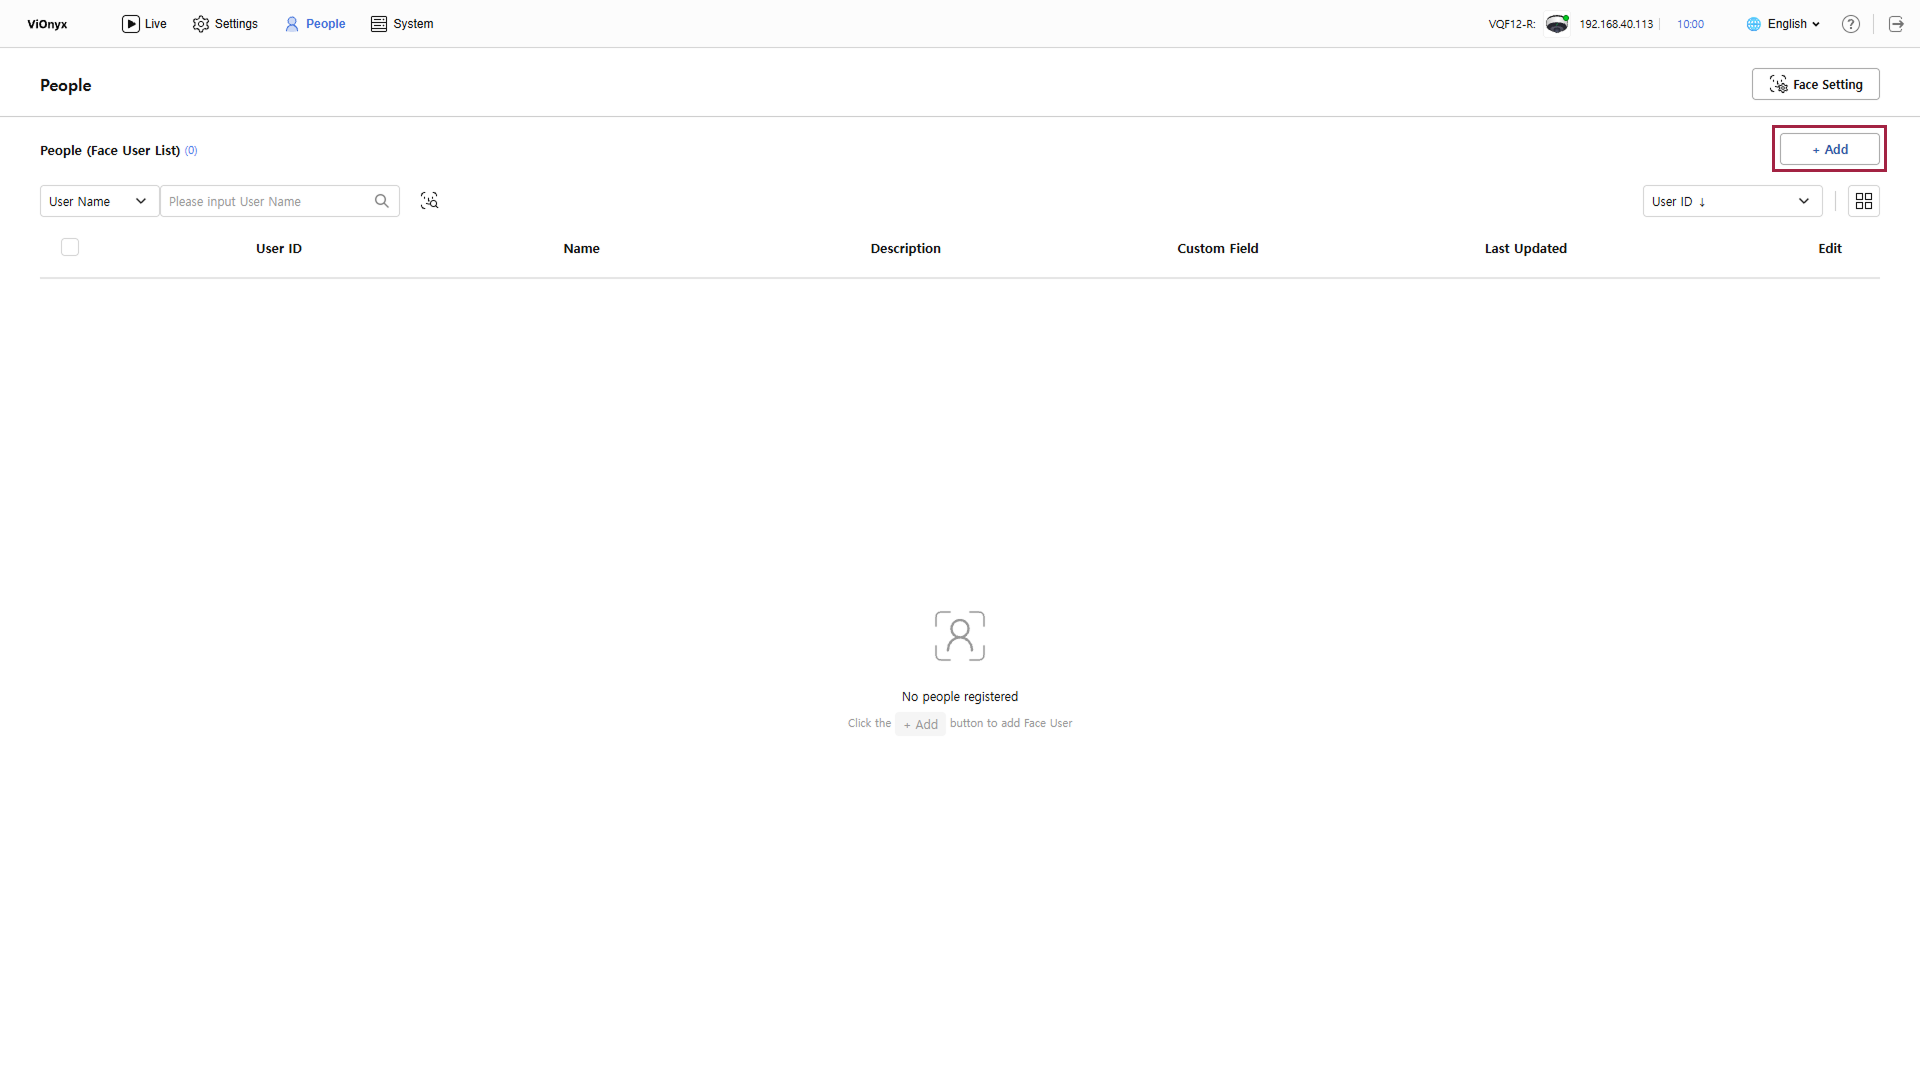
Click the People menu in the upper-left corner of the screen.
-
Click Add at the top right of the screen.
-
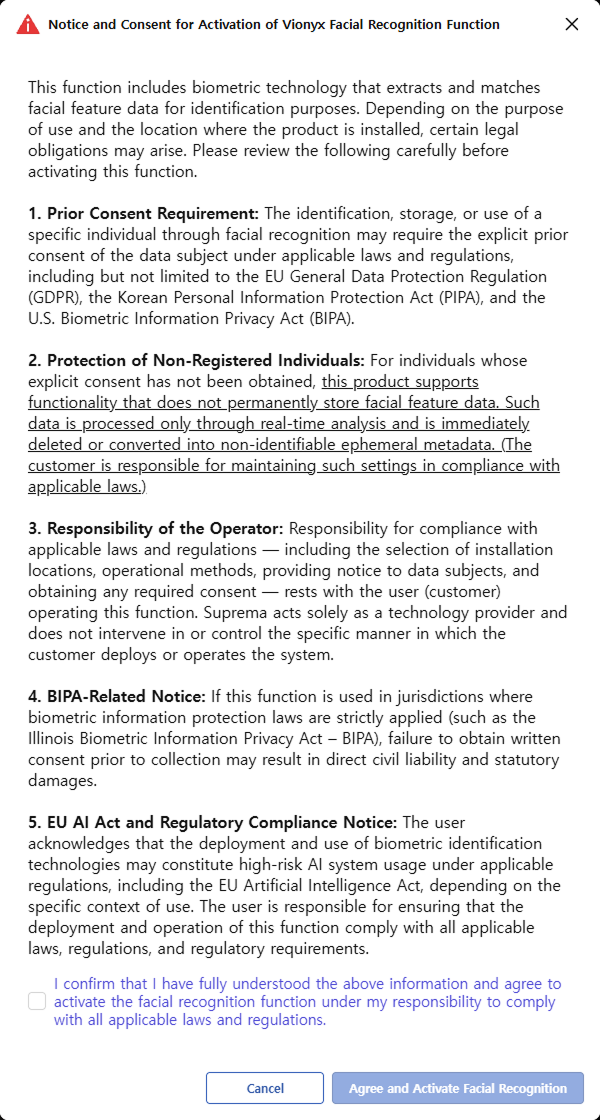
When adding the first user, if the Notice and Consent for Activation of Vionyx Facial Recognition Function popup appears, review the content, select the consent checkbox, and click Agree and Activate Facial Recognition.
-
To use the Facial Authentication feature, comply with local regulations. Cannot proceed without consent.
-
The Notice and Consent for Activation of Vionyx Facial Recognition Function popup appears only once.
-
-
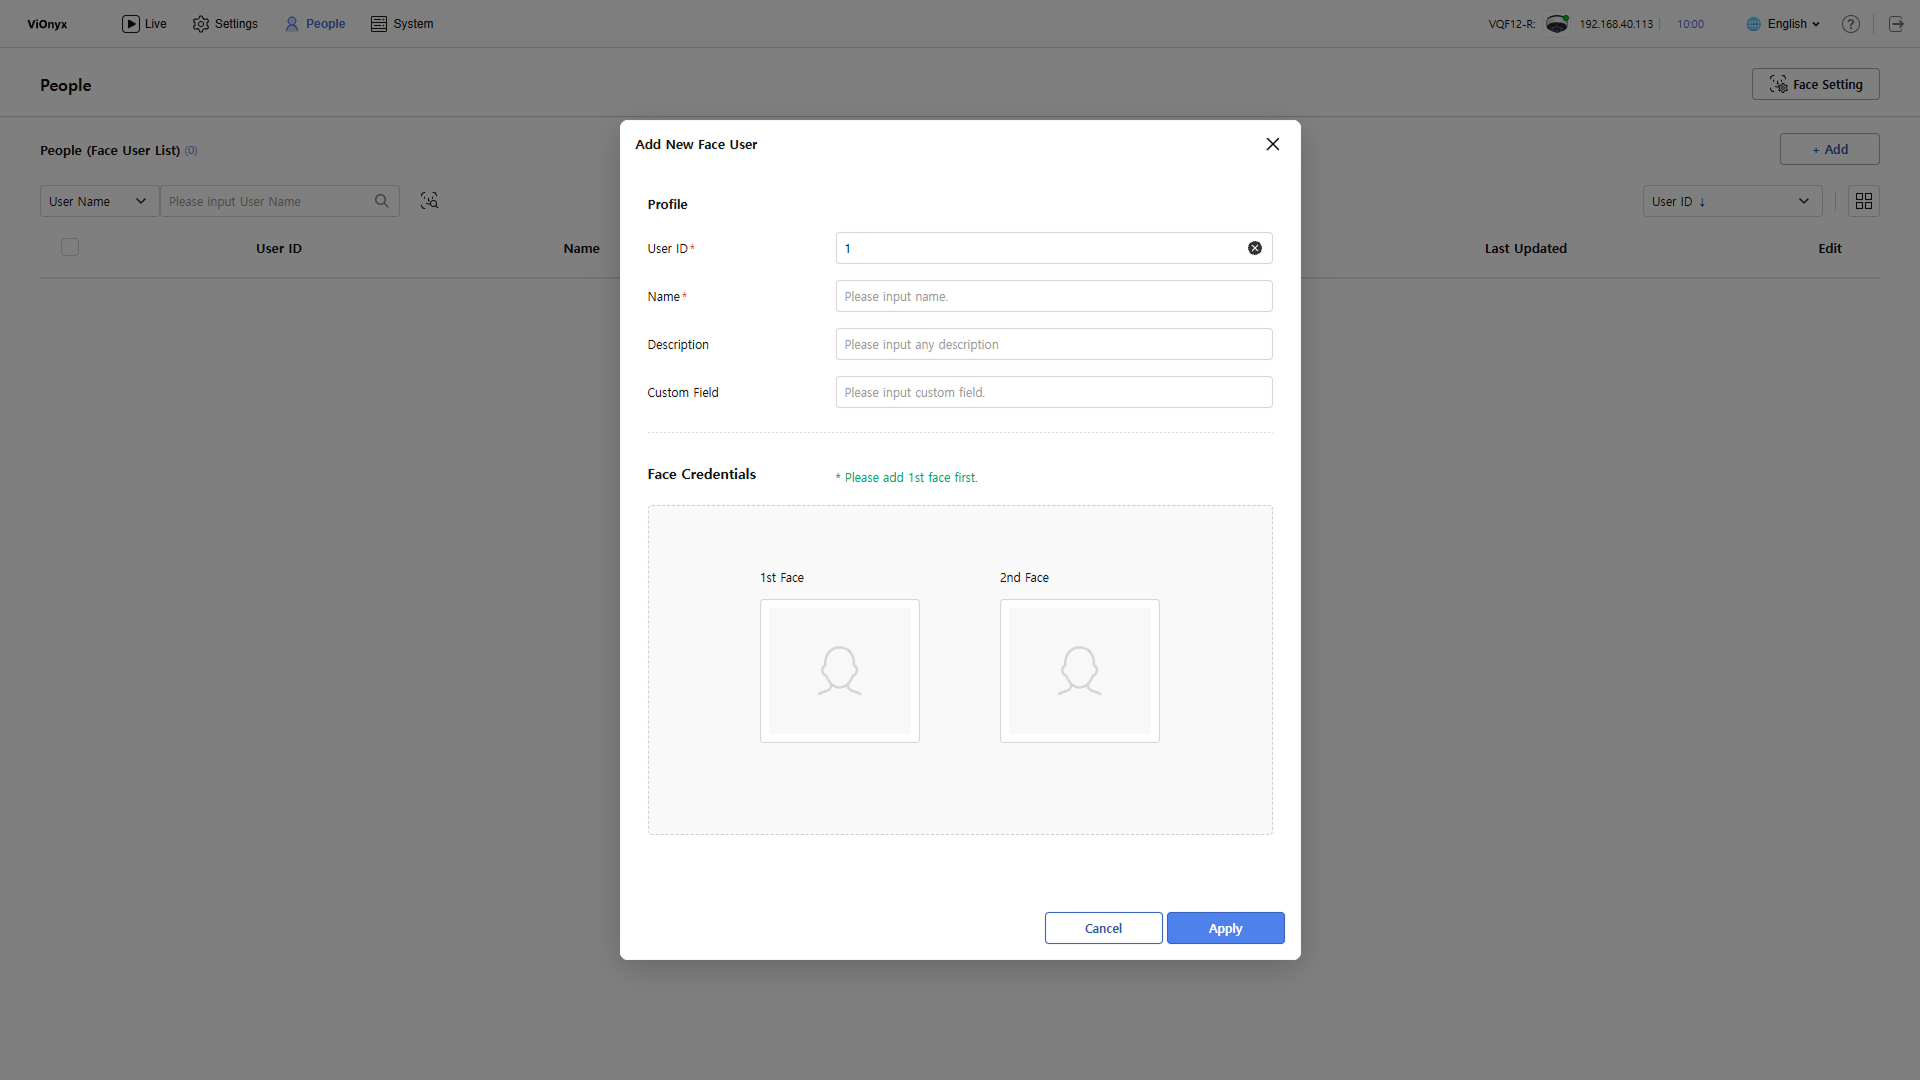
When the Add New Face User popup appears, enter the user's basic information.
-
Enter the user's unique ID in the User ID input field. User ID must be unique.
-
Enter the user's name in the Name input field.
-
Up to 64 characters.
-
It can include Korean, Japanese, uppercase and lowercase English letters, numbers, special characters (
#,-,_,.,(,)), and spaces within a word.
-
-
Enter a description of the user in the Description input field. Enter up to 256 characters.
-
The Custom Field input field lets you enter up to 64 characters of additional user-specific information. For example, enter notes in English such as department, title, or user group.
-
Click Apply to save basic user information.
Create new users without a face photo. Add a face photo later from the user's detail page.
Face enrollment
Enroll a face when adding a new user or from the user's detail page. Three methods are available.
-
Click the People menu in the upper-left corner of the screen.
-
Click Add at the top right of the screen or click an existing user in the user list to open the detail page.
-
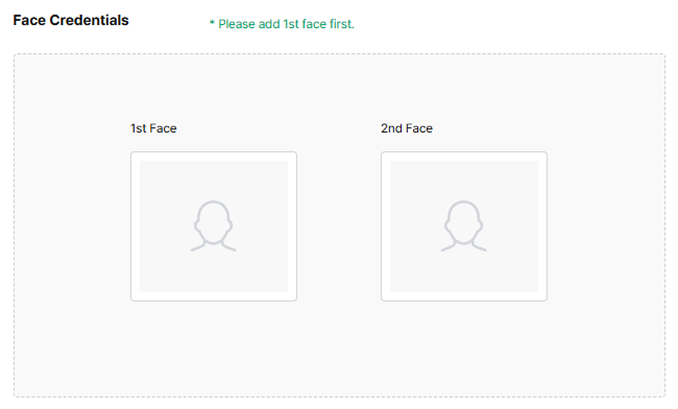
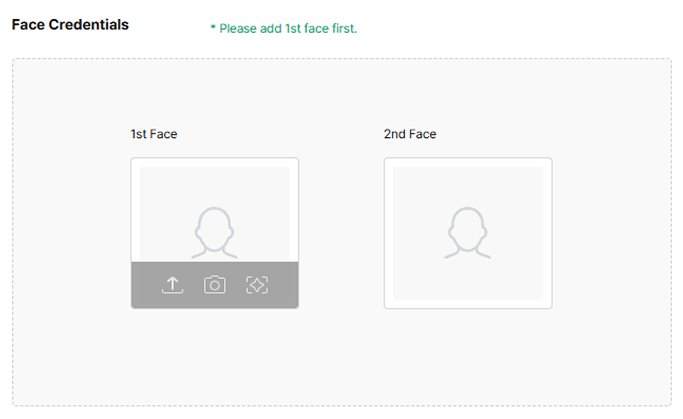
Enroll a face in the Face Credentials section of the Add User or User Detail popup.
-
Hover over 1st Face to show the enrollment options.
-
: Upload a locally saved image file to enroll a face photo.
-
: Capture a face photo with a webcam to enroll it.
-
: Select a face that matches the user from the list of unrecognized faces detected through AI events, and enroll it.
-
Select face slot 1 first. Face slot 2 is optional.
Upload face photo
Upload a locally saved image file to enroll a face photo.
-
Upload the face photo using one of the following methods.
-
Drag and drop a locally saved image file onto the face area.
-
To select a locally saved image file, click and choose the image file you want.
-
-
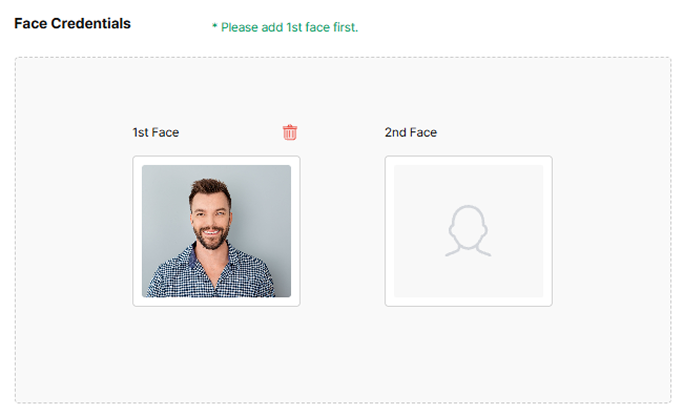
When the face is detected, the photo appears.
-
To apply the uploaded photo to the user, click Apply at the bottom.
-
Supported image formats are PNG, JPEG, and JPG.
-
The maximum size for supported image files is 10MB.
Enroll face with webcam
Use a webcam to capture and enroll a face photo.
-
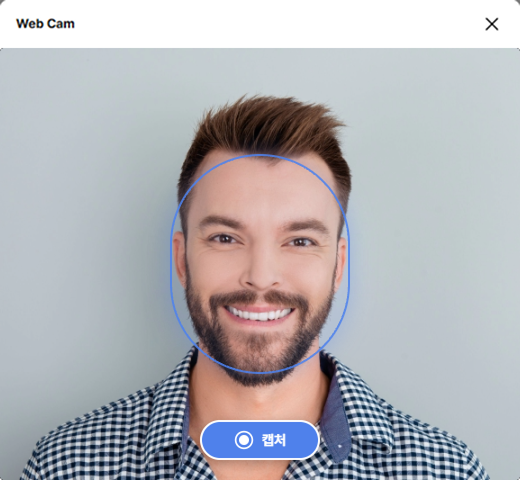
Click .
-
When the webcam capture screen appears, position your face inside the central circle.
-
Click Capture.
-
To apply the captured photo to the user, click Apply.
To capture again, click the face photo and capture it again.
Enroll AI-recommended face
Select and enroll a face that matches the user from the list of unrecognized faces detected through AI analysis.
-
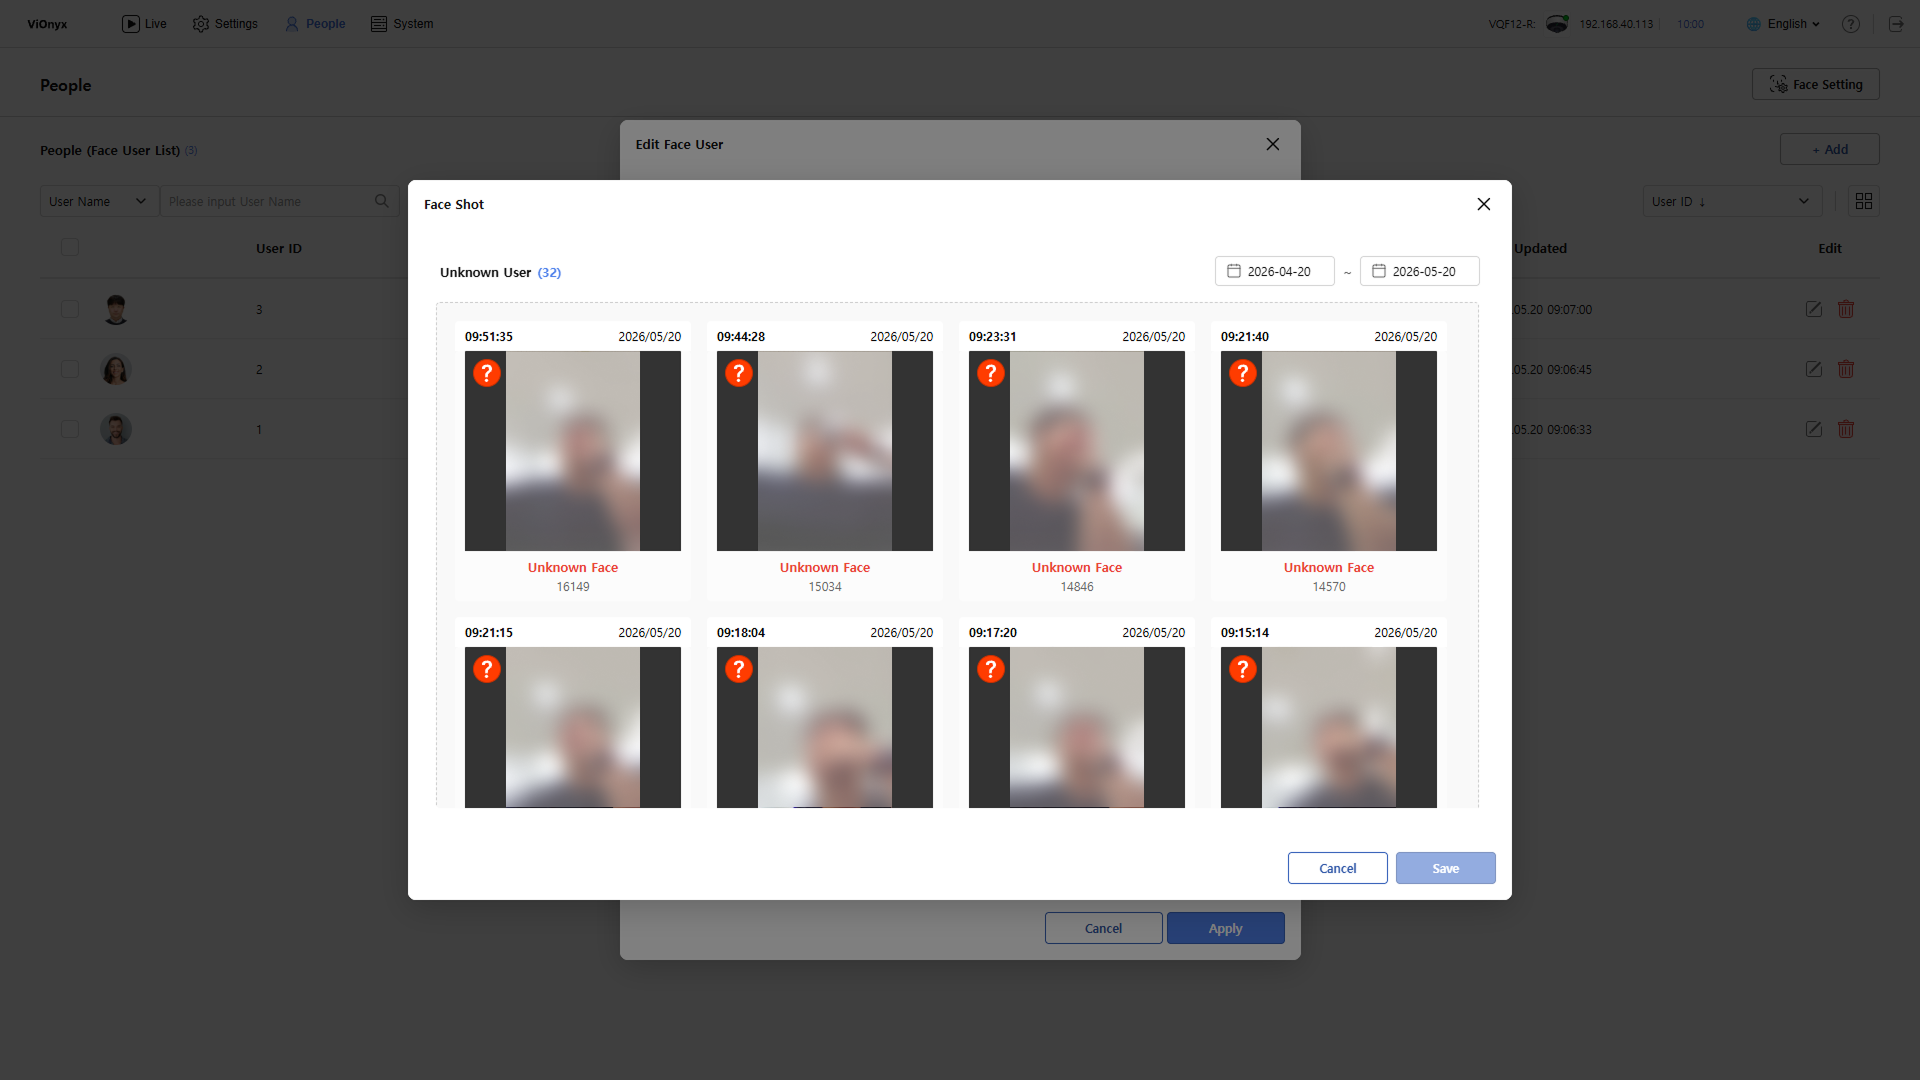
Click .
-
The Face Shot popup shows the list of recently authenticated unrecognized faces.
-
Select the face that matches the user. Only one face can be selected at a time.
-
Click Save.
-
Click Apply to apply the selected face to the user.