Configure Date and Time
Date and time settings keep the camera's clock accurate. Select a time zone and set the time manually or synchronize automatically with an NTP server. Accurate time ensures the reliability of video timestamps and AI event logs.
Check date and time settings in the following situations.
-
After installing the camera, set the time zone to match the operating region.
-
To synchronize the camera's clock by entering the exact time manually.
-
To maintain accurate time automatically over long periods via an NTP server.
-
To unify time across multiple cameras to simplify video analysis and tracking.
Inaccurate camera time reduces the reliability of AI event logs, video timestamps, and system logs. Check time settings regularly.
Time zone settings
First, set the camera's time zone to the operating region.
-
Click Settings in the upper-left of the screen.
-
In the left sidebar, click Basic → Date & Time.
-
In the Date section, select the region in Time Zone.
Example:
(UTC+09:00) Asia/Seoul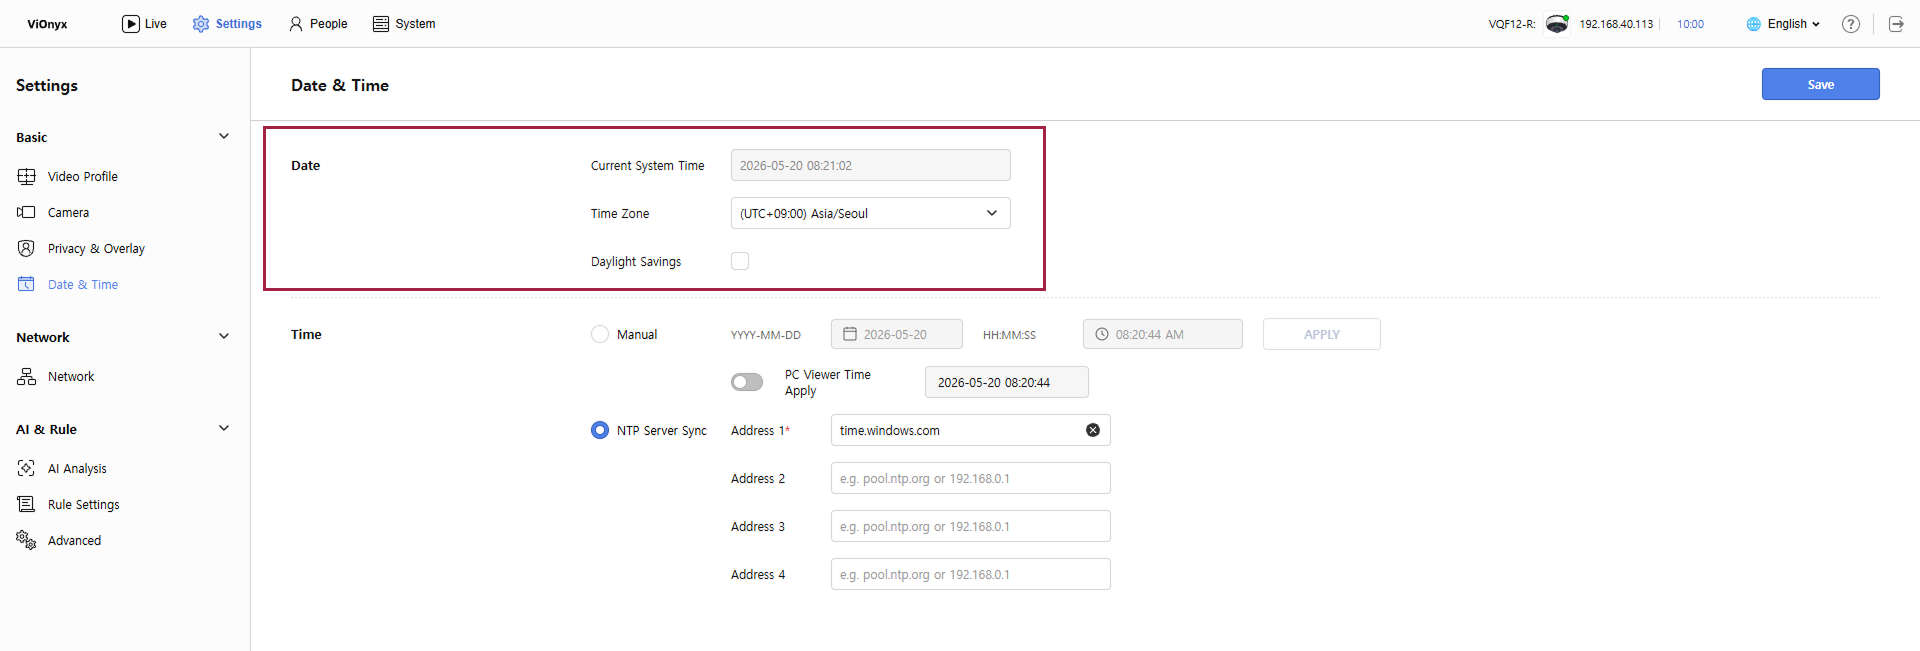
-
To apply daylight savings for the time zone, enable the Daylight Savings option by clicking its checkbox.
-
Click Save at the top right of the screen to save the selected time zone.
The default is set to (UTC+09:00) Asia/Seoul. If the operating region differs, change the time zone.
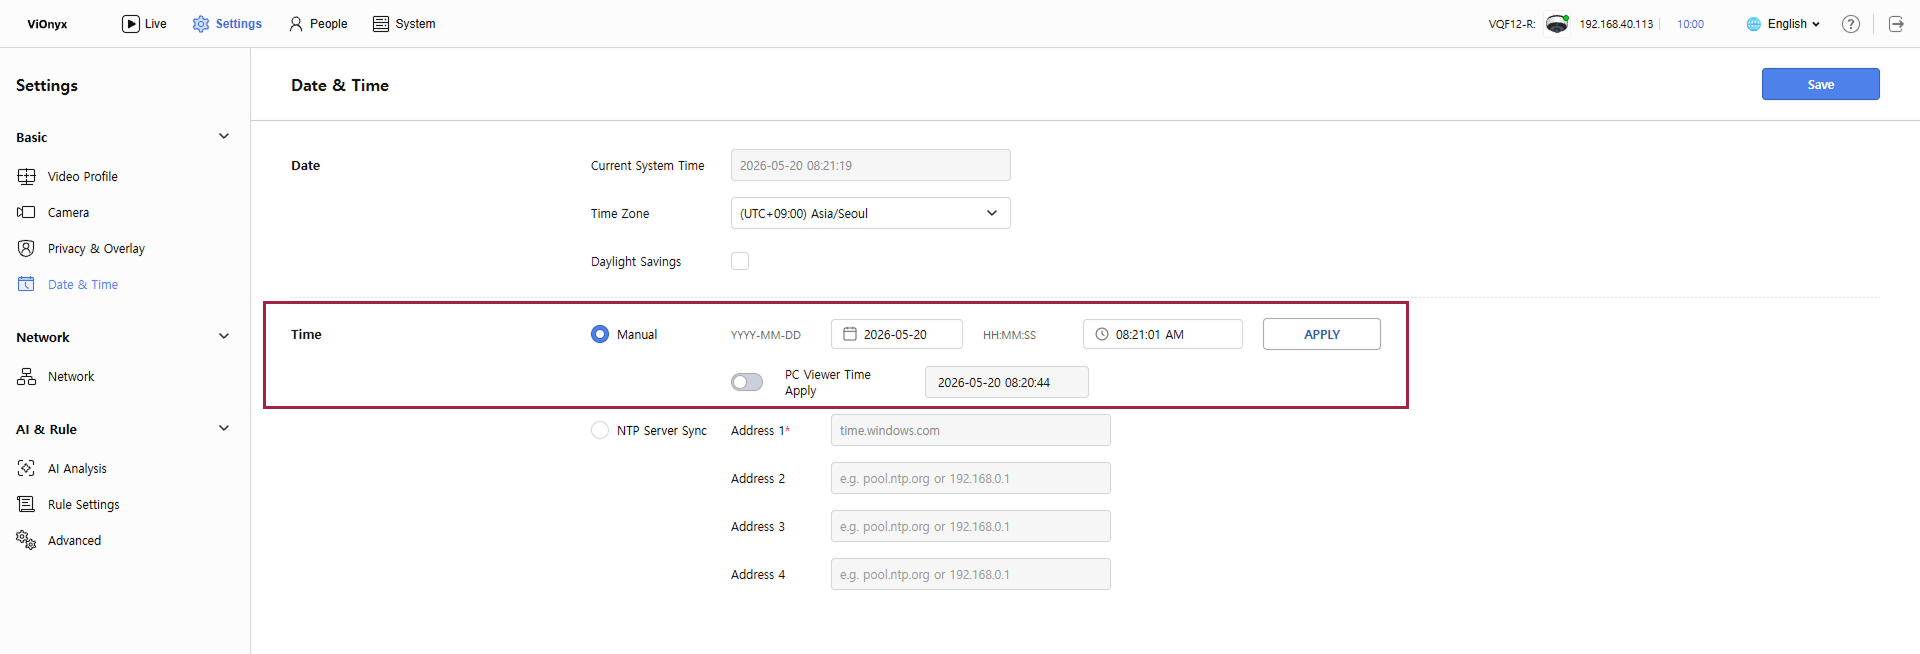
Manual time setting
Set the camera's time manually.
-
Click Settings in the upper-left of the screen.
-
In the left sidebar, click Basic → Date & Time.
-
In the Time section, select Manual.
-
Enter the current date in the Date field, or click the calendar icon to select a date.
-
Enter the current time in the Time field, or click the clock icon to select a time.
-
Click Apply to apply the manual time setting.
-
Click Save at the top right of the screen to save the time settings.
-
Enable the PC Viewer Time Apply option to apply the PC's time to the camera automatically. The system time in the web browser is applied to the camera.
-
Manual mode and NTP automatic synchronization cannot be active at the same time. Selecting manual mode disables NTP automatic synchronization.
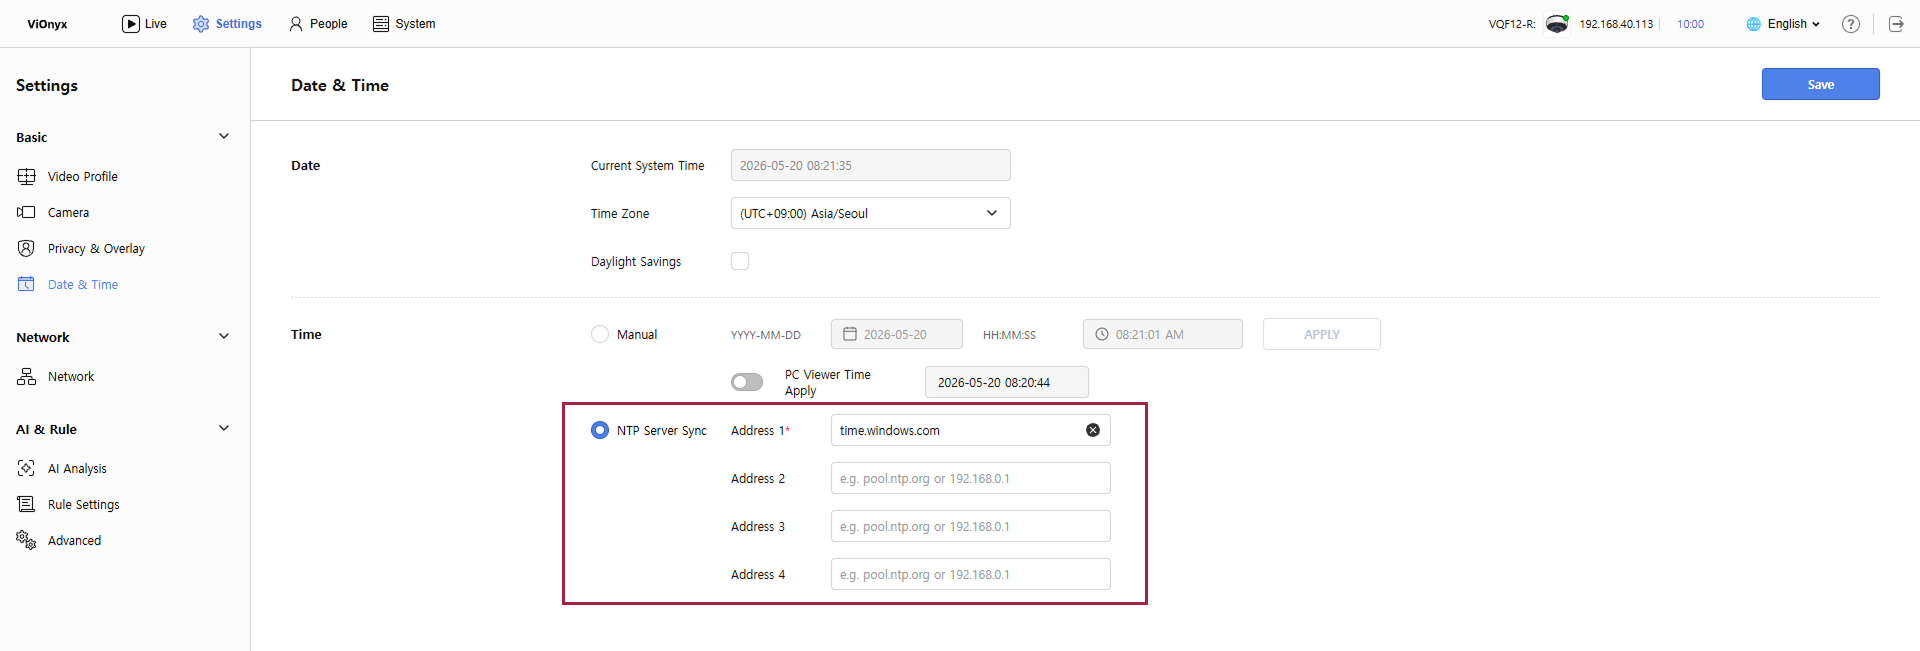
Automatic time synchronization
Use an NTP server to keep the camera's time accurate automatically. Recommended for long-term operation.
-
Click Settings in the upper-left of the screen.
-
In the left sidebar, click Basic → Date & Time.
-
In the Time section, select NTP Server Sync.
-
Enter the NTP server address in the Address 1 (required) field.
-
URL format: time.windows.com, time.nist.gov, etc.
-
IP address: 192.0.2.1, etc.
-
-
(Optional) Enter additional NTP servers in Address 2, Address 3, and Address 4 if needed.
-
Up to 4 servers are supported.
-
If Address 1 does not respond, the system automatically switches to the next server.
-
-
Click Save at the top right of the screen to save the time settings.
After setup, the camera automatically synchronizes with the NTP server and periodically updates the time.
Recommended NTP Servers
-
time.windows.com (Windows public NTP)
-
time.nist.gov (NIST public NTP)
-
pool.ntp.org (NTP Pool project)