Set Up Line-Crossing Detection Event
Setting up a line-crossing detection event detects people who cross configured virtual lines and triggers real-time events. Specify the crossing direction (A→B, B→A, or both) to monitor a specific direction only. Optionally add a face area to prioritize face tracking; enrolled users are automatically identified.
When to use this?
-
Monitor and count doorway traffic
-
Monitor entry in a specific direction only (detect one-way traffic)
-
Detect entry into specific areas outside business hours
-
Track left/right area movement relative to the line
Create line-crossing detection event
Use the Live menu to detect people crossing a configured line in a specific area and trigger events. Also, setting a face area prioritizes face tracking in that area; enrolled users are automatically identified.
Start event creation
-
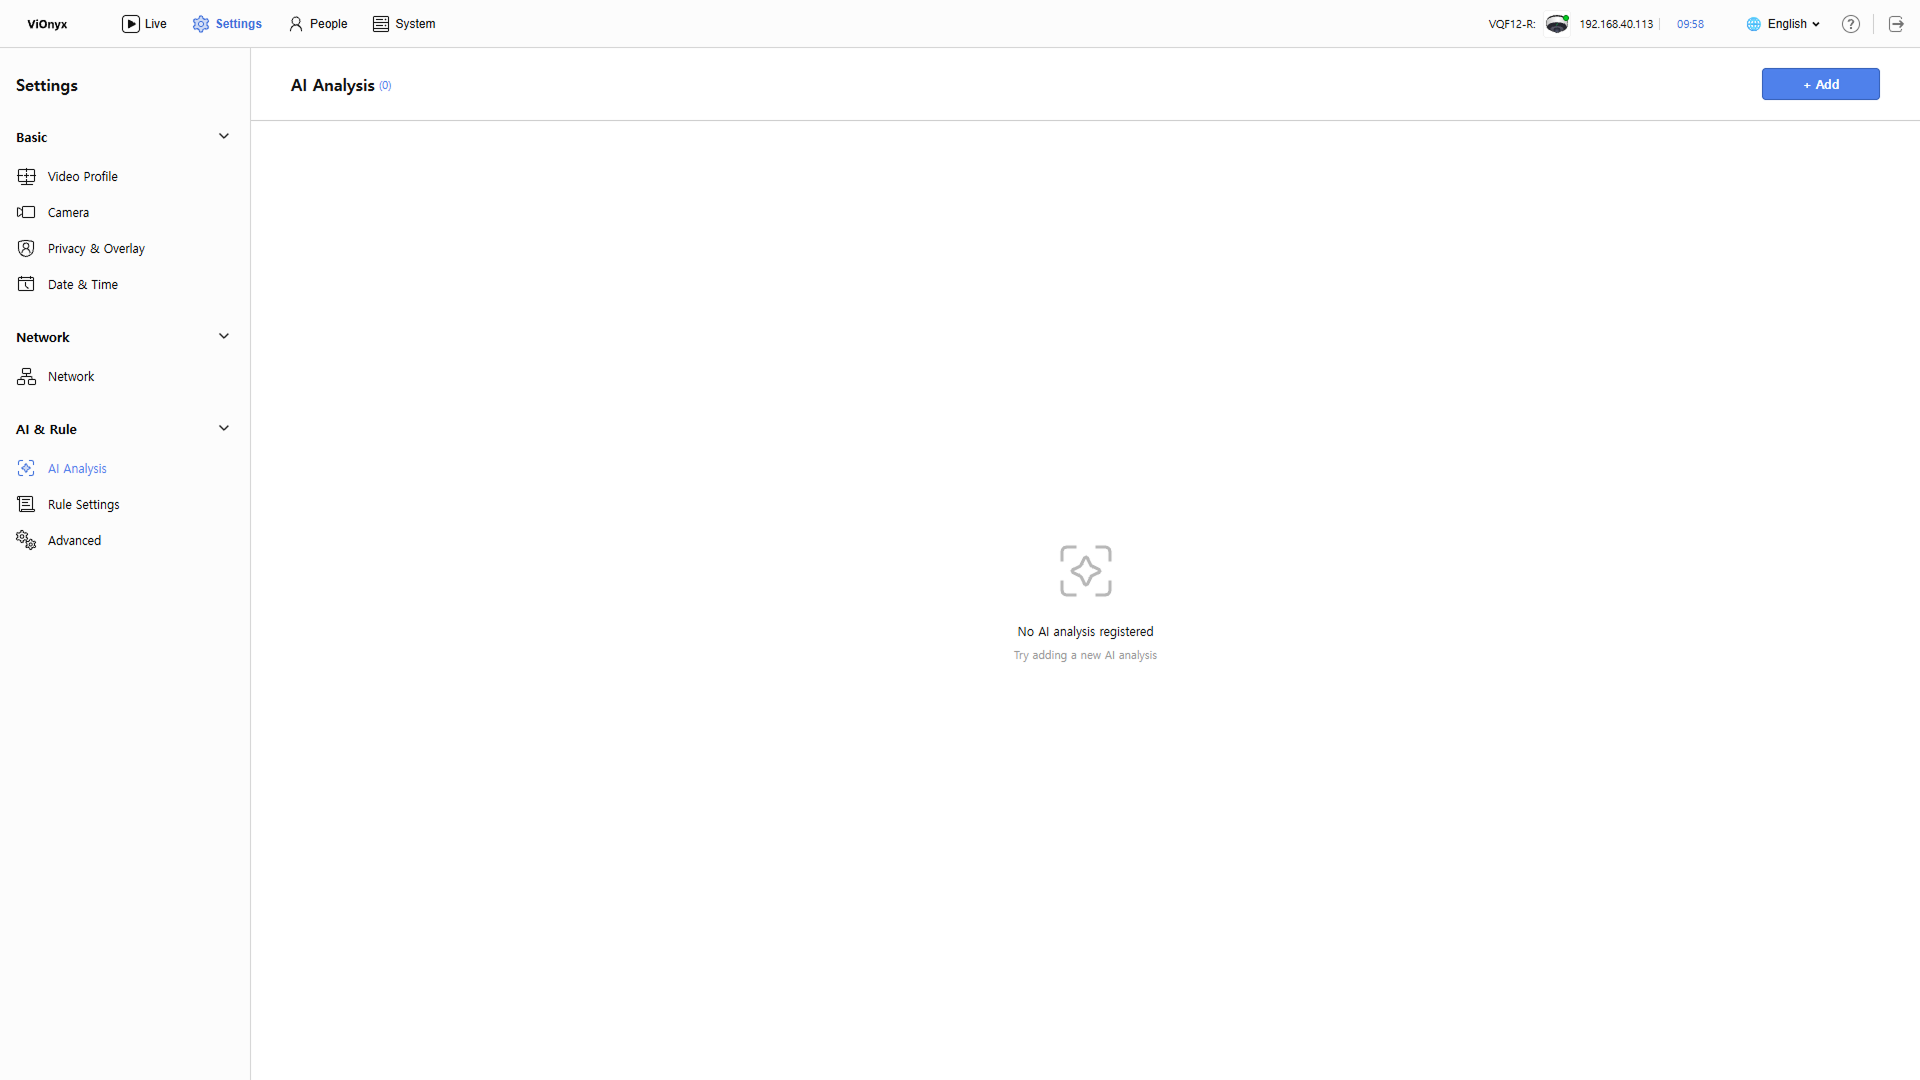
Click Settings in the upper-left of the screen.
-
Click AI & Rule → AI Analysis in the left sidebar.
-
Click + Add at the top right of the screen.
-
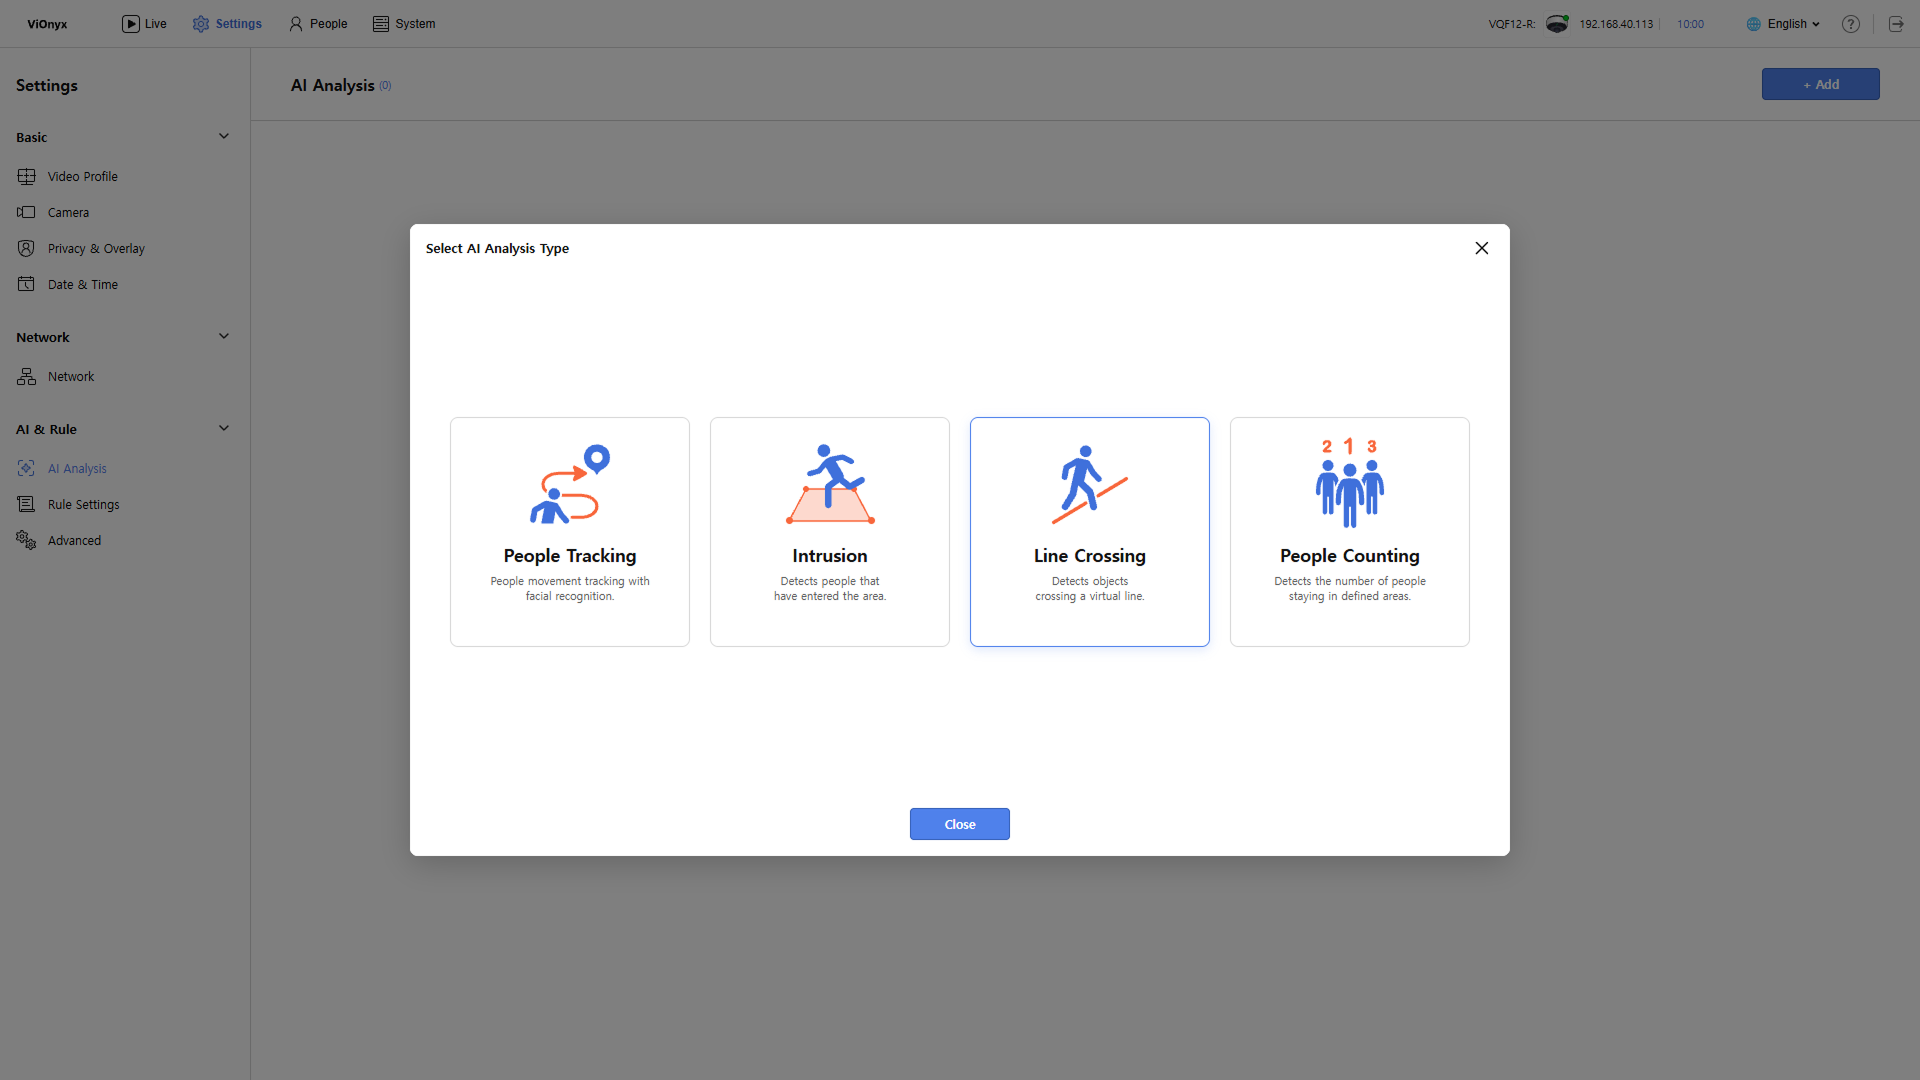
In the Select AI Analysis Type window, click Line Crossing.
-
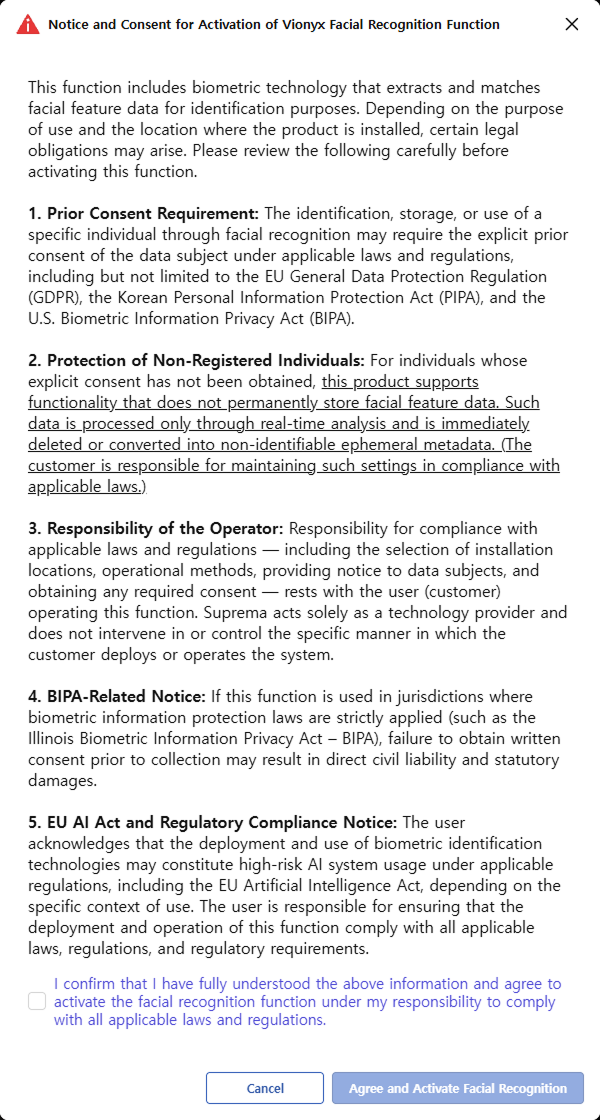
When the Notice and Consent for Activation of Vionyx Facial Recognition Function pop-up appears, review the details, select the consent checkbox, and click Agree and Activate Facial Recognition.
-
To use the Facial Authentication feature, comply with local regulations. Cannot proceed without consent.
-
The Notice and Consent for Activation of Vionyx Facial Recognition Function popup appears only once. Subsequent AI event creation assumes consent.
-
-
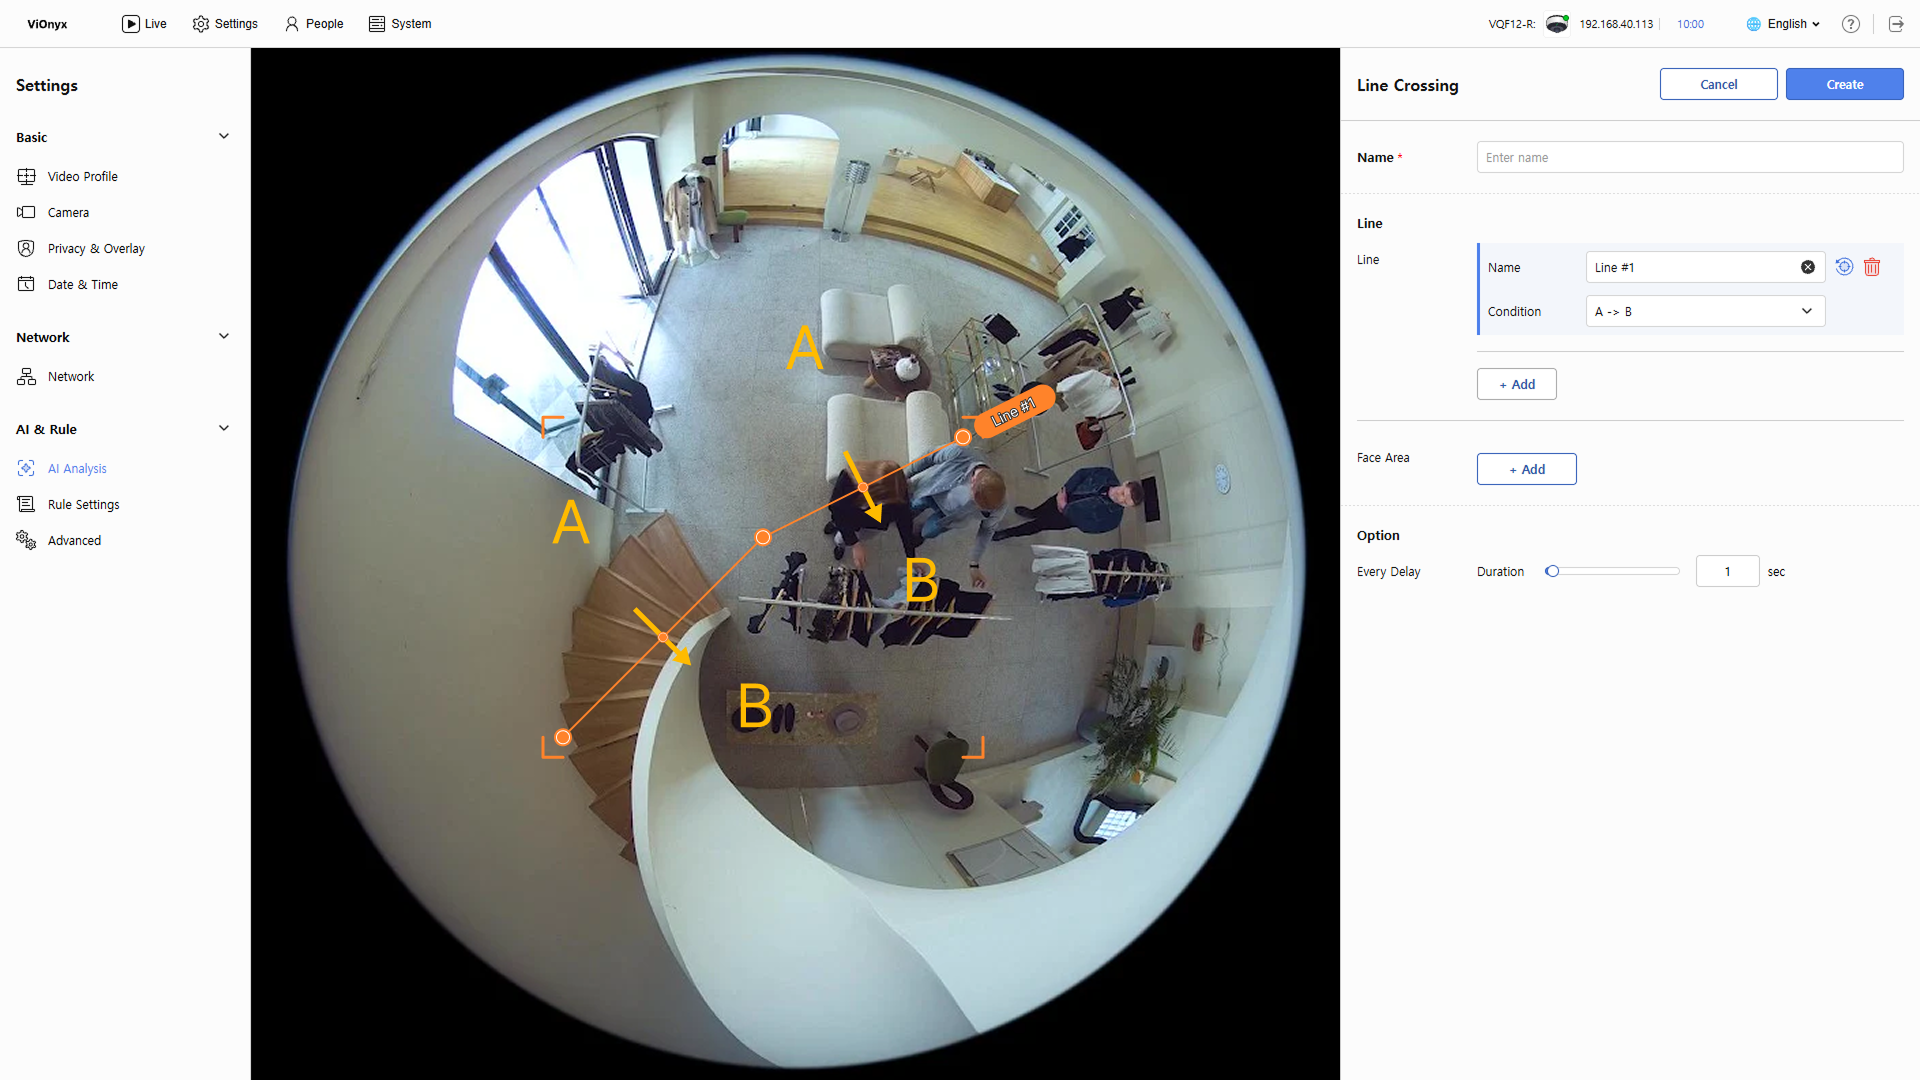
Complete the required settings in the right Line Crossing panel.
Set event name
Enter the AI event name in the Name input field. The name can be up to 64 characters long.
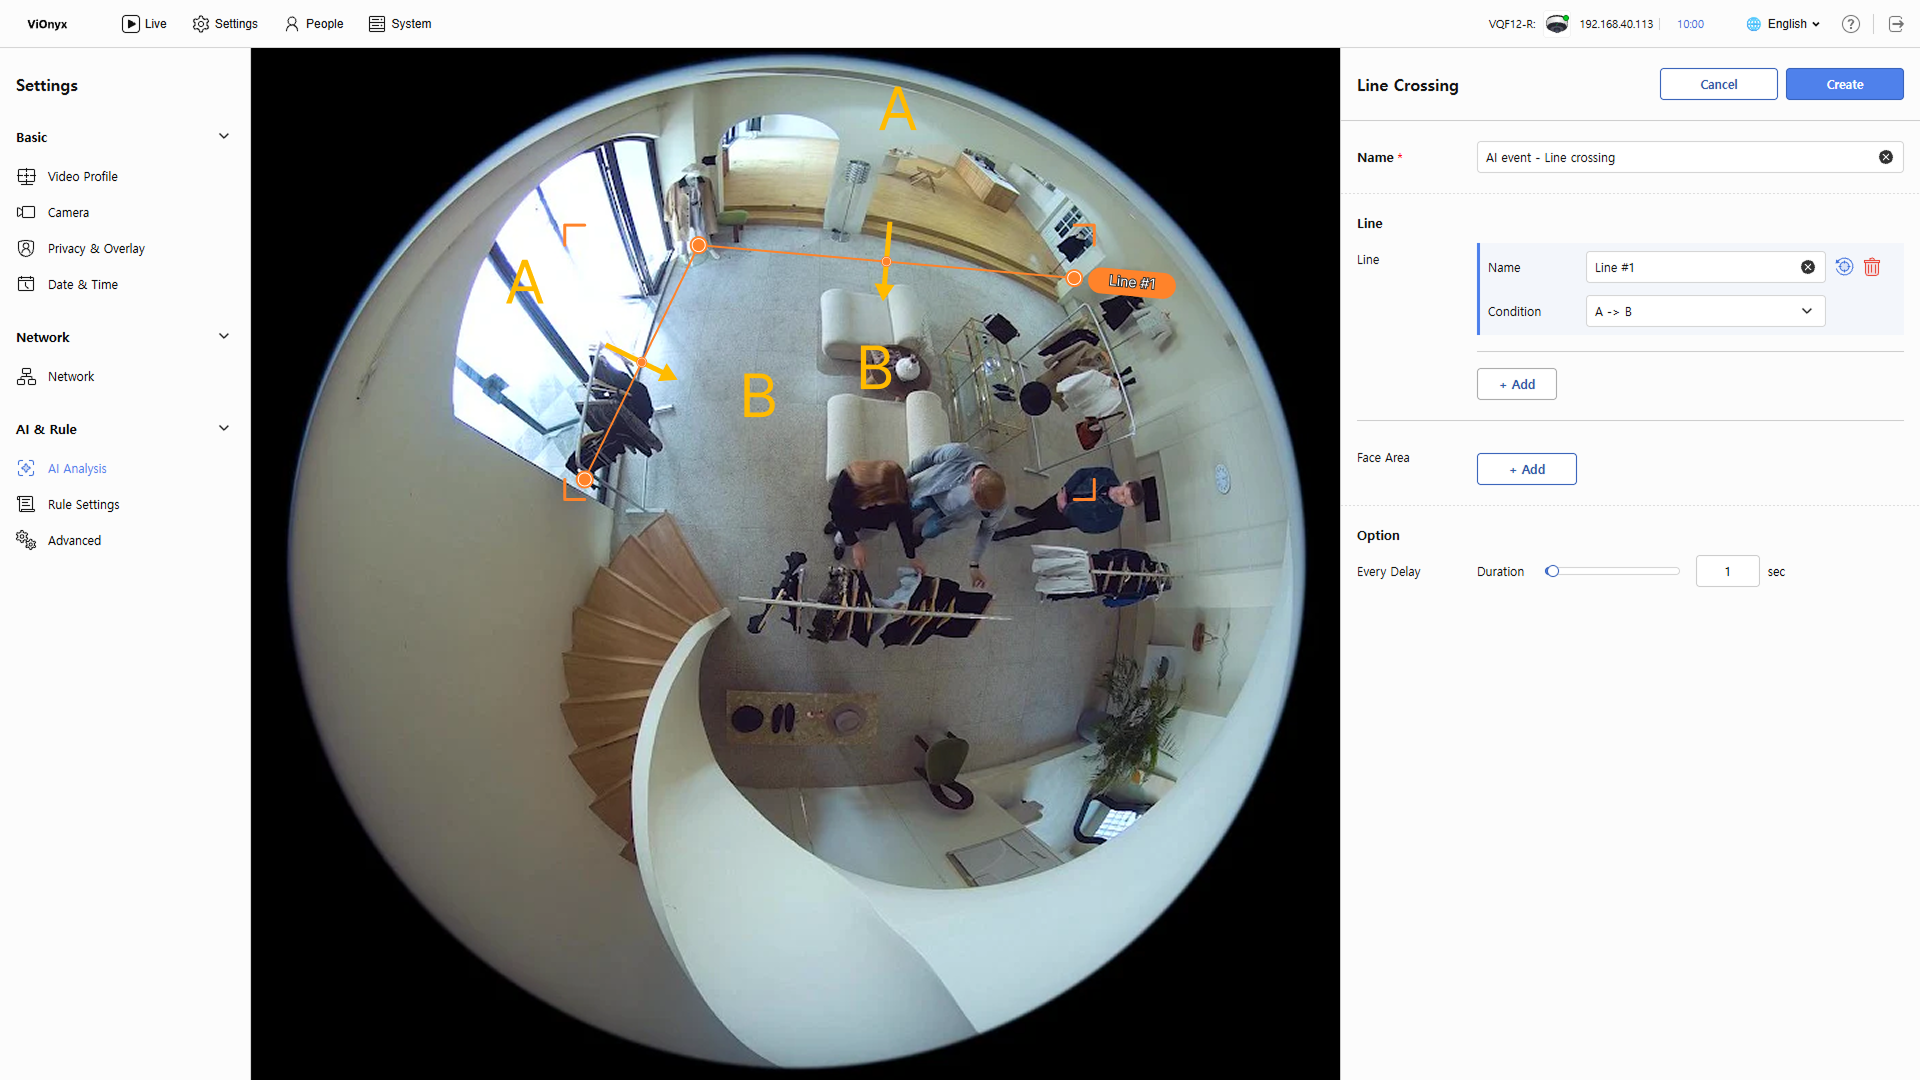
Virtual line settings
Place the virtual line at the appropriate location in Live View. The camera detects people crossing configured virtual lines and triggers events. Set at least one virtual line. Click + Add to add up to 10. An orange line appears in Live View; drag corners or points to adjust the shape. Drag the center to move the line.
-
Name: Edit the virtual line's name. Assign a clear, descriptive name. The virtual line name appears on hover in Live View.
-
Condition: Set the crossing condition for the virtual line. Select one of the three direction options below.
-
A -> B: Trigger an event when crossing from A to B.
-
B -> A: Trigger an event when crossing from B to A.
-
A <-> B: Trigger an event when crossing in both directions.
-
-
Click to reset the configured virtual line's shape and size.
-
Click to delete an added virtual line.
Face area settings (optional)
Define the area for face detection. When set, the system prioritizes face tracking in that area. Face areas can overlap with virtual lines. Click + Add to add up to 10 face areas. A blue box appears in Live View; drag corners or points to adjust the shape. Drag the center to move the line.
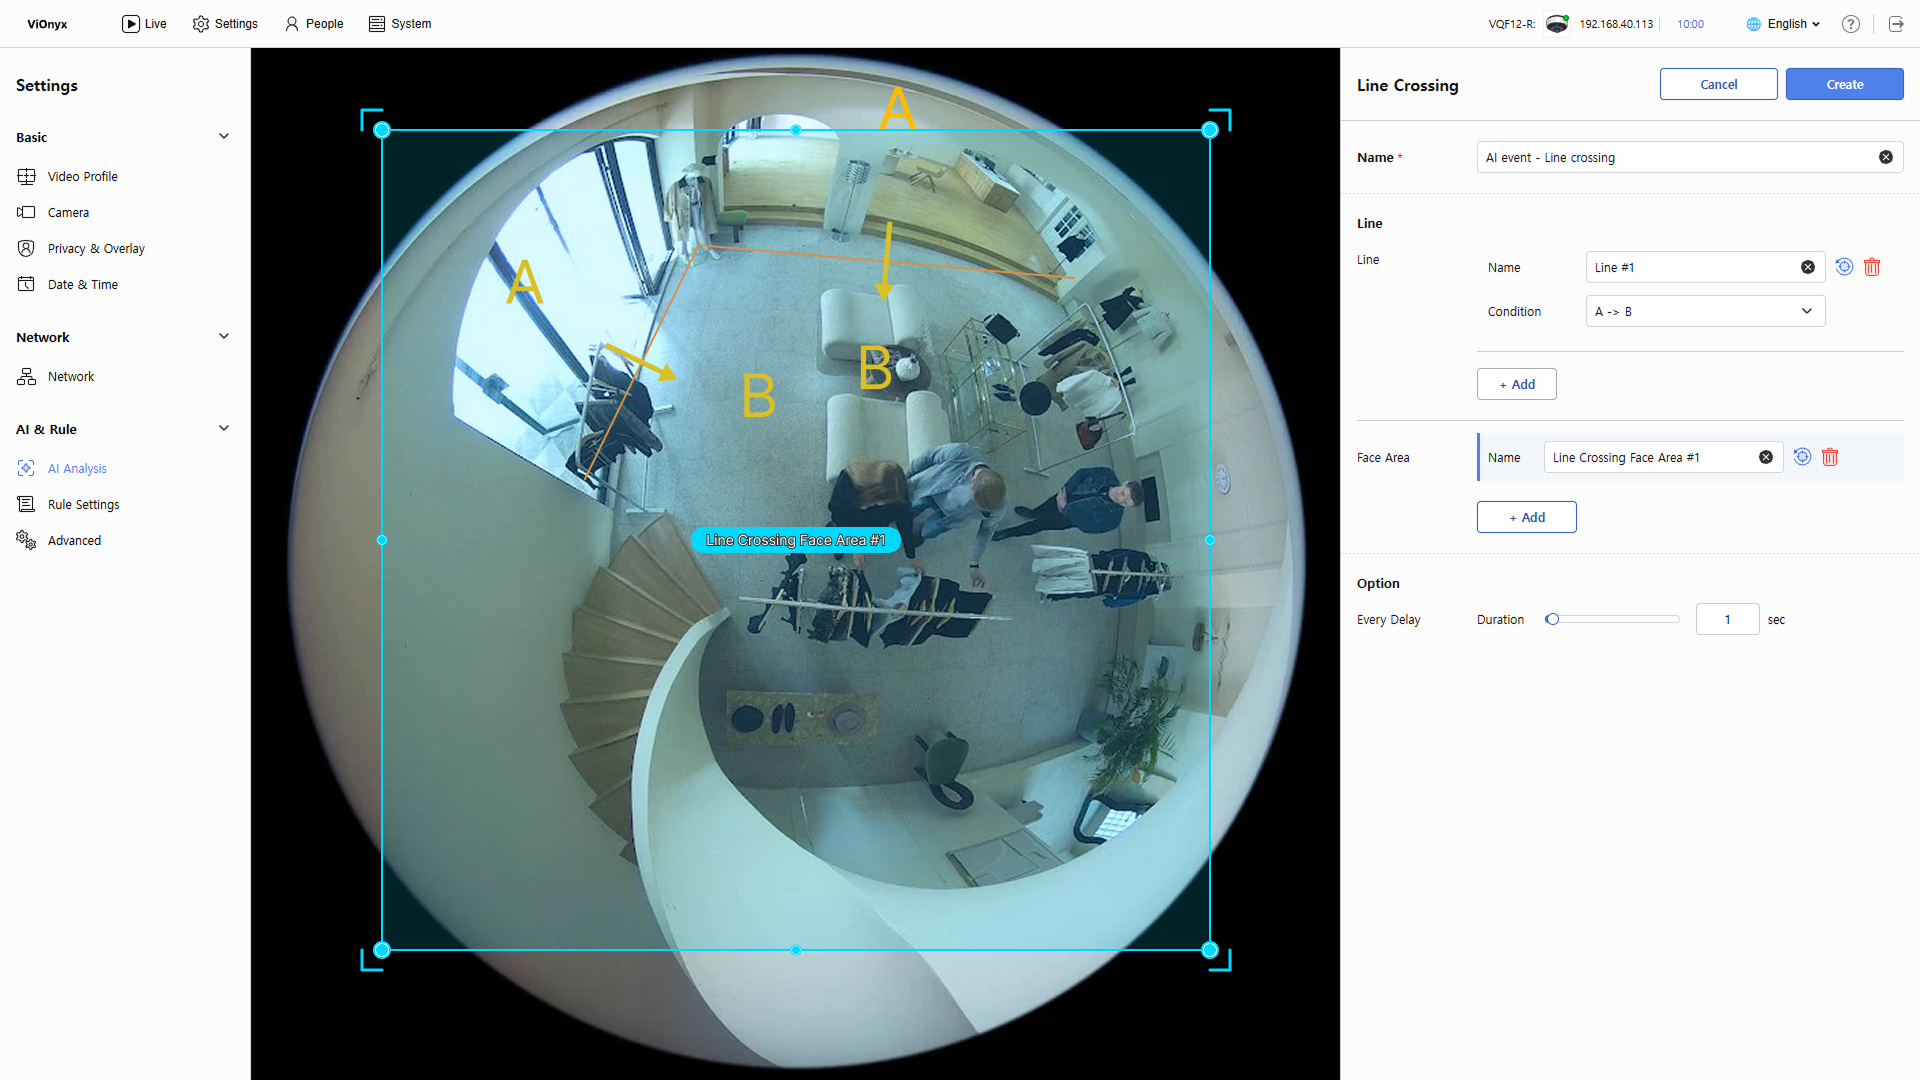
- Name: Edit the face area's name. Assign a clear, descriptive name. The face area name appears on hover in Live View.
-
Enrolled users are automatically identified in the Live menu and shown by name. Unenrolled users appear as Unknown Face.
-
Click to reset the configured face area's shape and size.
-
Click to delete an added face area.
Set event trigger conditions
Set the event trigger conditions.
- Every Delay: Set the event trigger delay. Events trigger only after the configured time elapses; set up to 60 seconds.
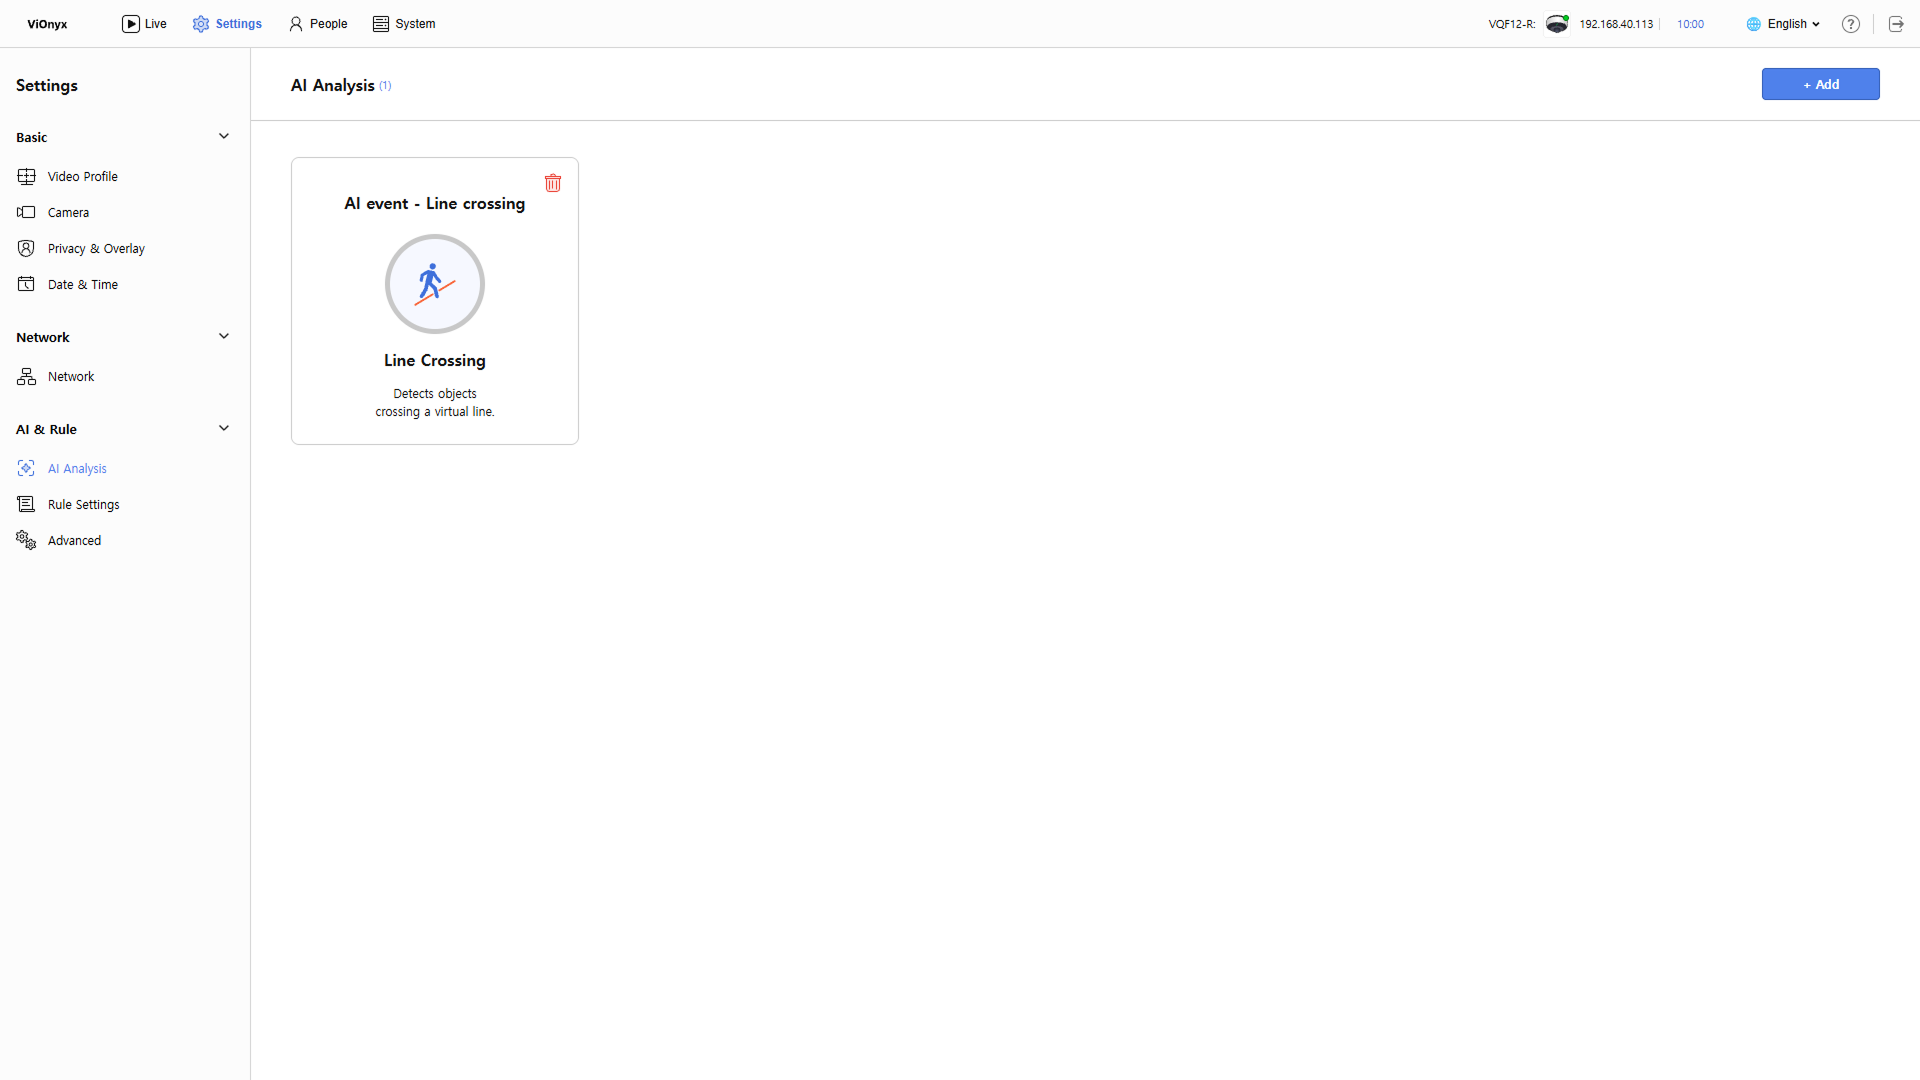
Save settings
After completing all settings, click Create in the top right. The interface returns to the previous screen, and the new AI event is added to the list.
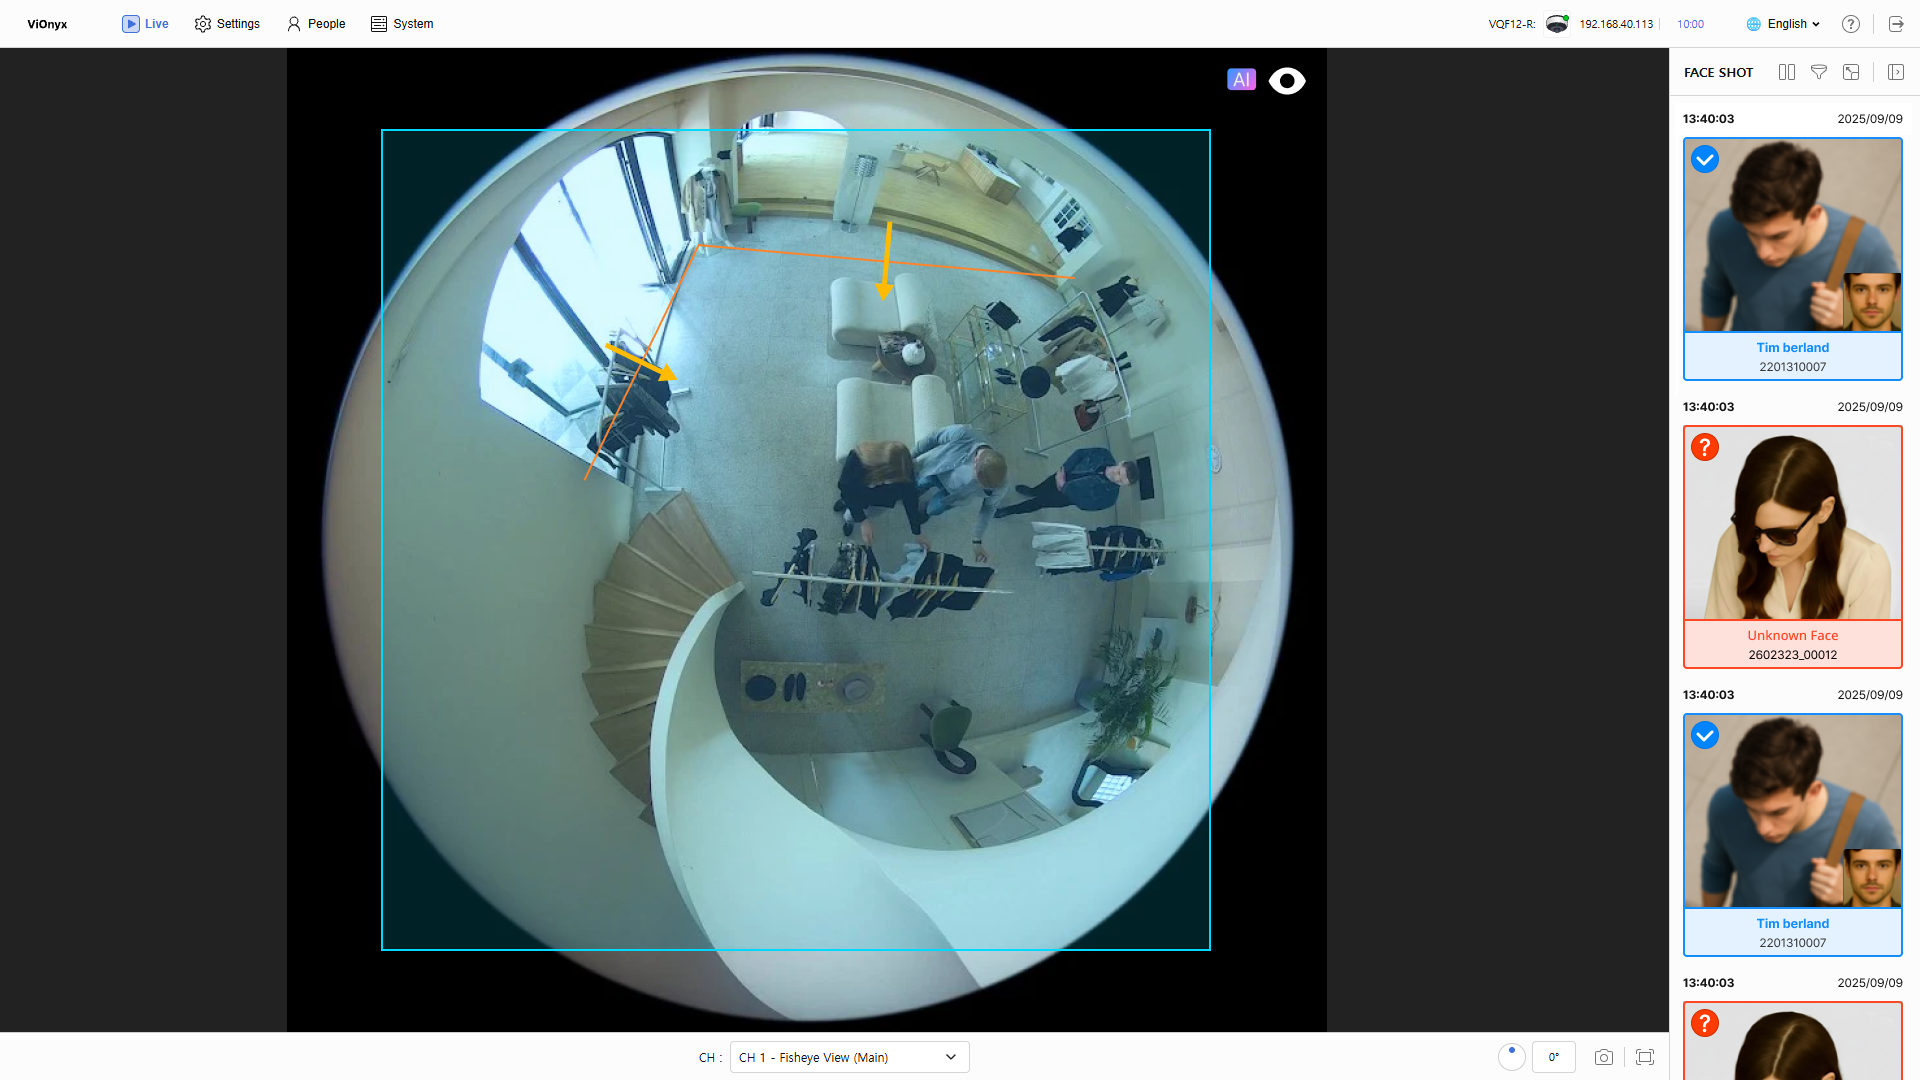
Check in Live
Click the Live menu at the top left of the screen. Confirm the  icon at the top right of the camera feed is on. Configured virtual lines and face areas are overlaid on the video. An event occurs each time a person crosses a virtual line. If face areas are set, the camera detects faces there; enrolled users are automatically identified and their names are displayed.
-
Unenrolled users appear as Unknown Face. Enrolled users appear with their name.
-
Poor lighting or backlight may prevent the camera from detecting faces. Improve area lighting or adjust the camera position and angle so faces are clearly visible.
-
Faces must face the camera to be detected. Profile or rear views may not be detected.
-
If too many events occur, adjust the Every Delay option. Increasing the event delay reduces event frequency.