Getting Started
After installing the ViOnyx camera, complete the initial setup through a web browser. This document explains all required steps, from certificate installation to setting the administrator password and logging in.
If the camera does not obtain an IP address after a factory reset, it changes to the default IP address (https://192.168.1.100). Connect to that address in your web browser.
Certificate installation
The ViOnyx Web Server uses a secure HTTPS connection. A security warning appears the first time you connect because the camera uses a self-signed certificate. Learn how to connect to the web server securely without warnings after adding the certificate to the Windows trusted store.
Download certificate
-
Connect to the camera in your web browser using the assigned IP address (
https://{IP_address}). -
If the warning message "Your connection is not private" appears, click Advanced at the bottom.
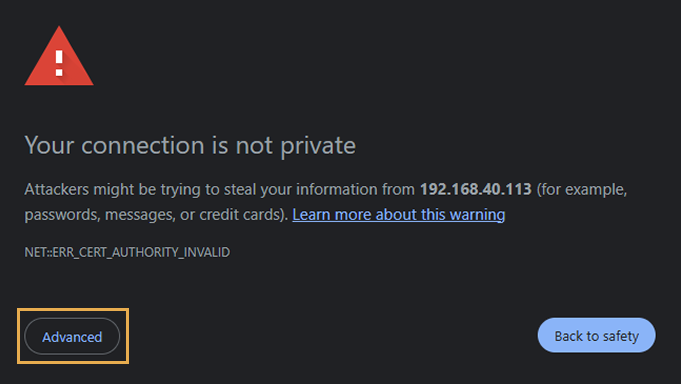
-
Expand the Advanced section, then click Proceed to
https://{IP_address}(unsafe) or a similar link to continue.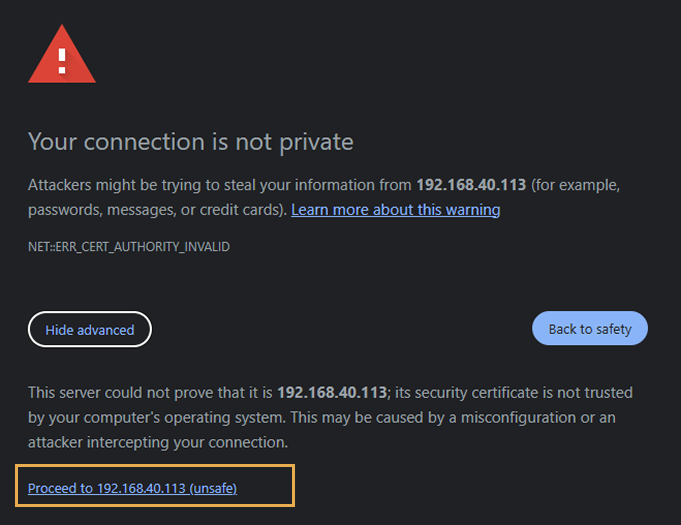
-
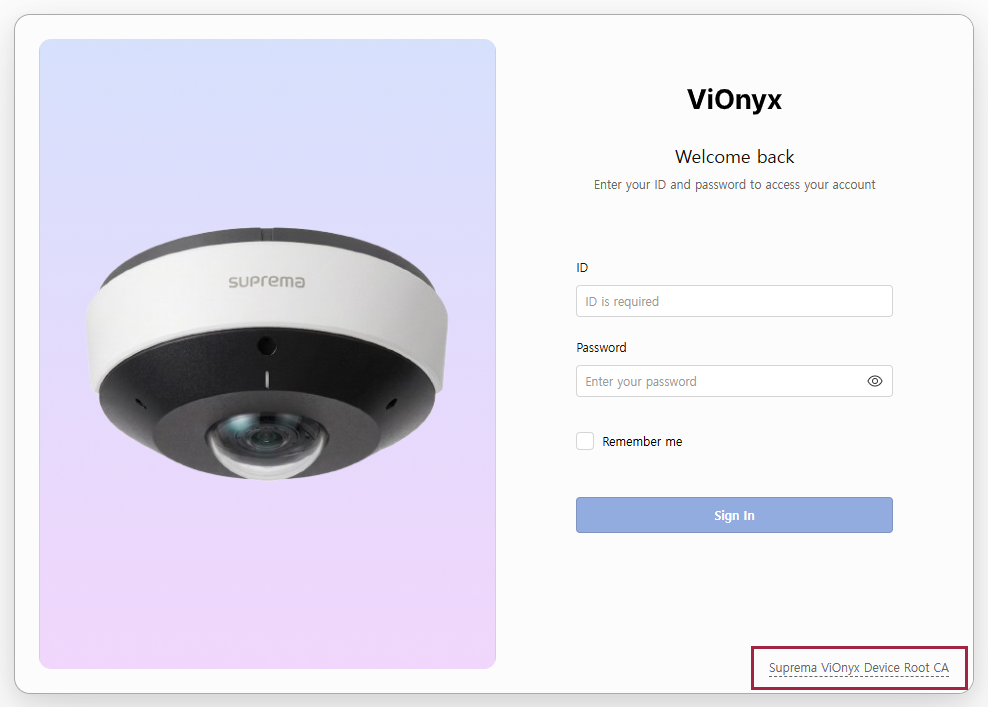
Click the Suprema ViOnyx Device Root CA link at the bottom of the password setup screen.
-
Save the certificate file
Suprema_ViOnyx_Device_{serial-number}_Root_CA.crtlocally.
Open the Windows management console
-
Press Start + R to open the Run window.
-
Type
certmgr.msc, then press Enter to open the Management Console.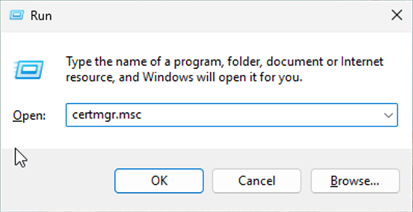
Run the certificate import wizard
-
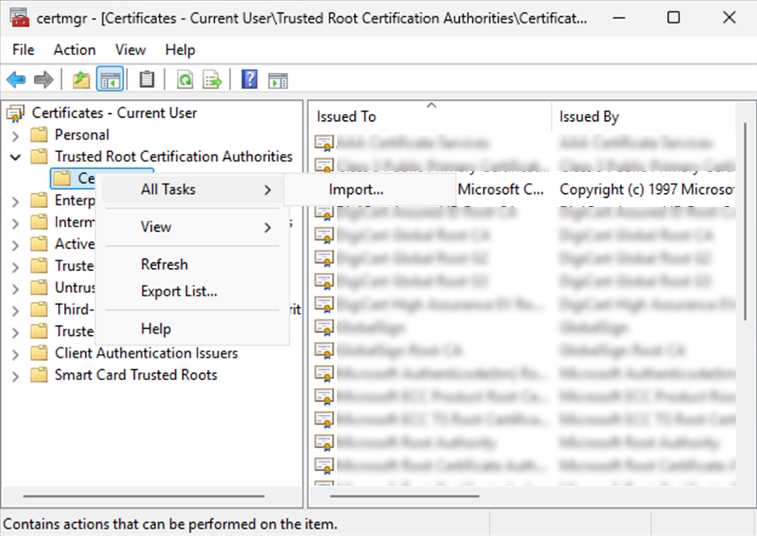
In the left pane of the Management Console, expand Trusted Root Certification Authorities.
-
Right-click Certificates under it, then select All Tasks → Import.
-
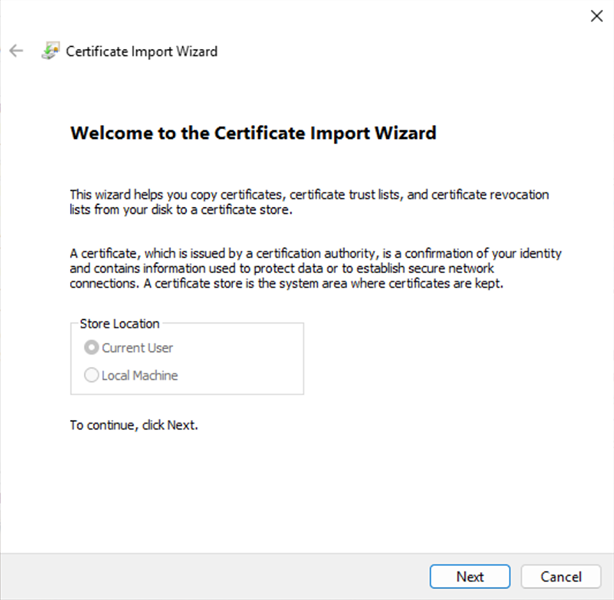
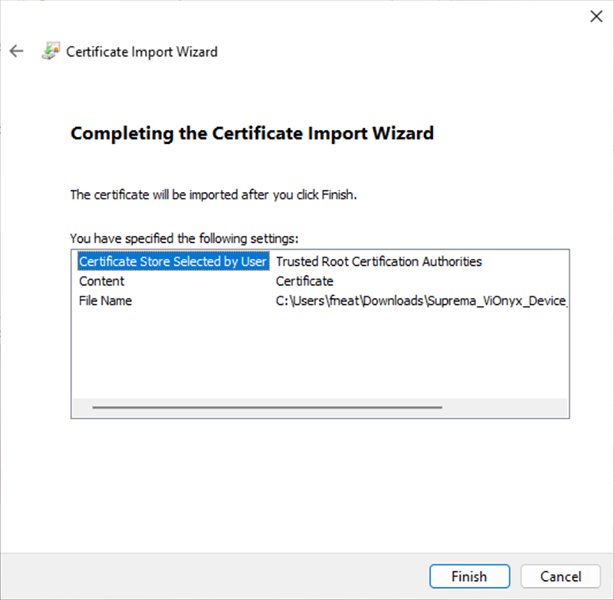
In the Certificate Import Wizard, click Next.
-
Click Browse and select the saved certificate file
Suprema_ViOnyx_Device_547849187_Root_CA.crt.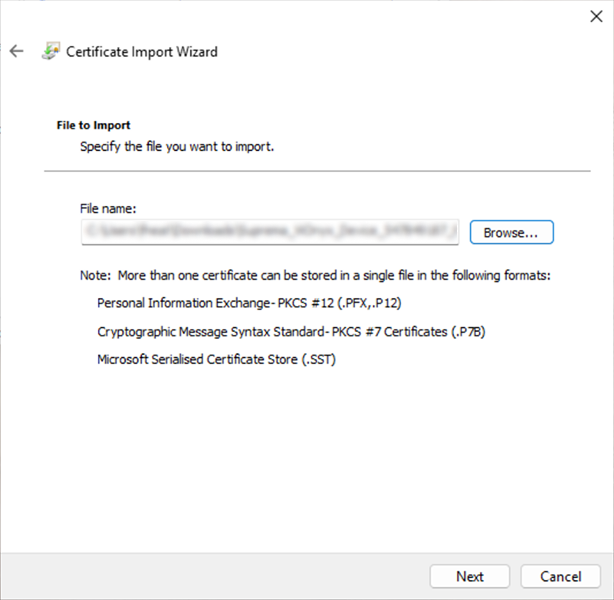
-
Click Next.
-
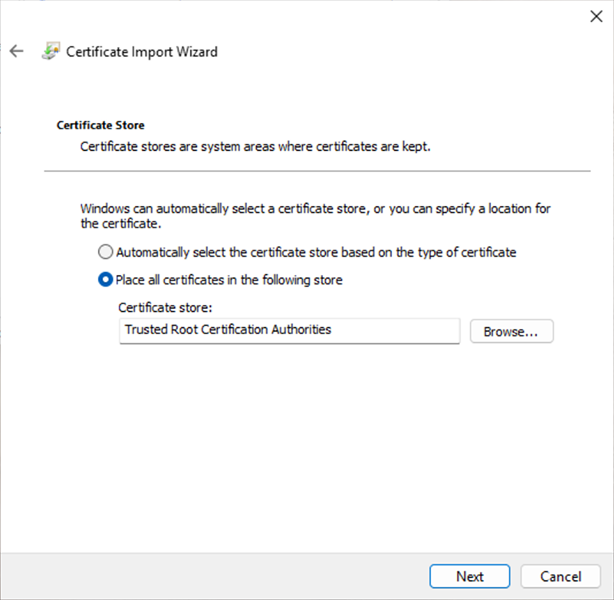
Select Place all certificates in the following store.
-
Make sure Certificate store is set to Trusted Root Certification Authorities.
-
Click Next.
-
Click Finish to complete the certificate import.
-
If a security warning appears, click Yes.
-
When the certificate import success message appears, click OK.

Verify certificate installation
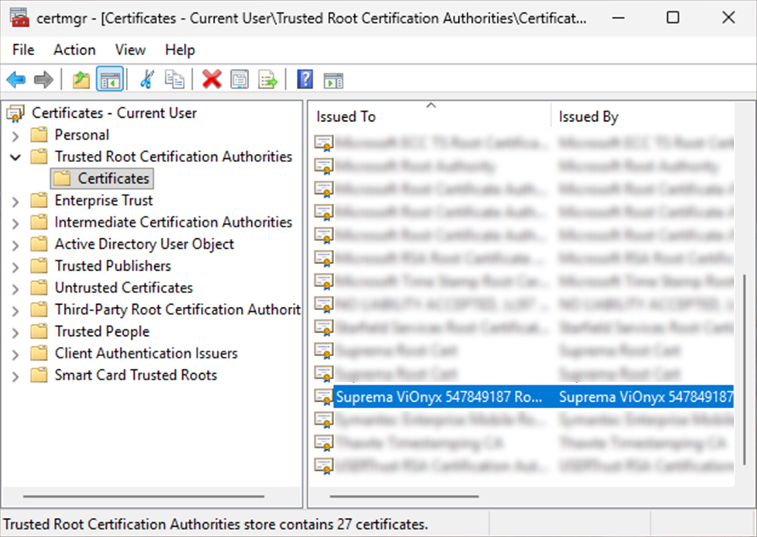
In the Management Console, select Trusted Root Certification Authorities → Certificates to confirm that the imported certificate appears in the list.
After certificate installation completes, fully close and restart the web browser, then reconnect using the camera's IP address. You now connect securely without a security warning.
Set password
Set a strong password for security when logging in for the first time. ViOnyx enforces a strong password policy to protect system security.
-
Connect to the camera in your web browser using the assigned IP address (
https://{IP_address}).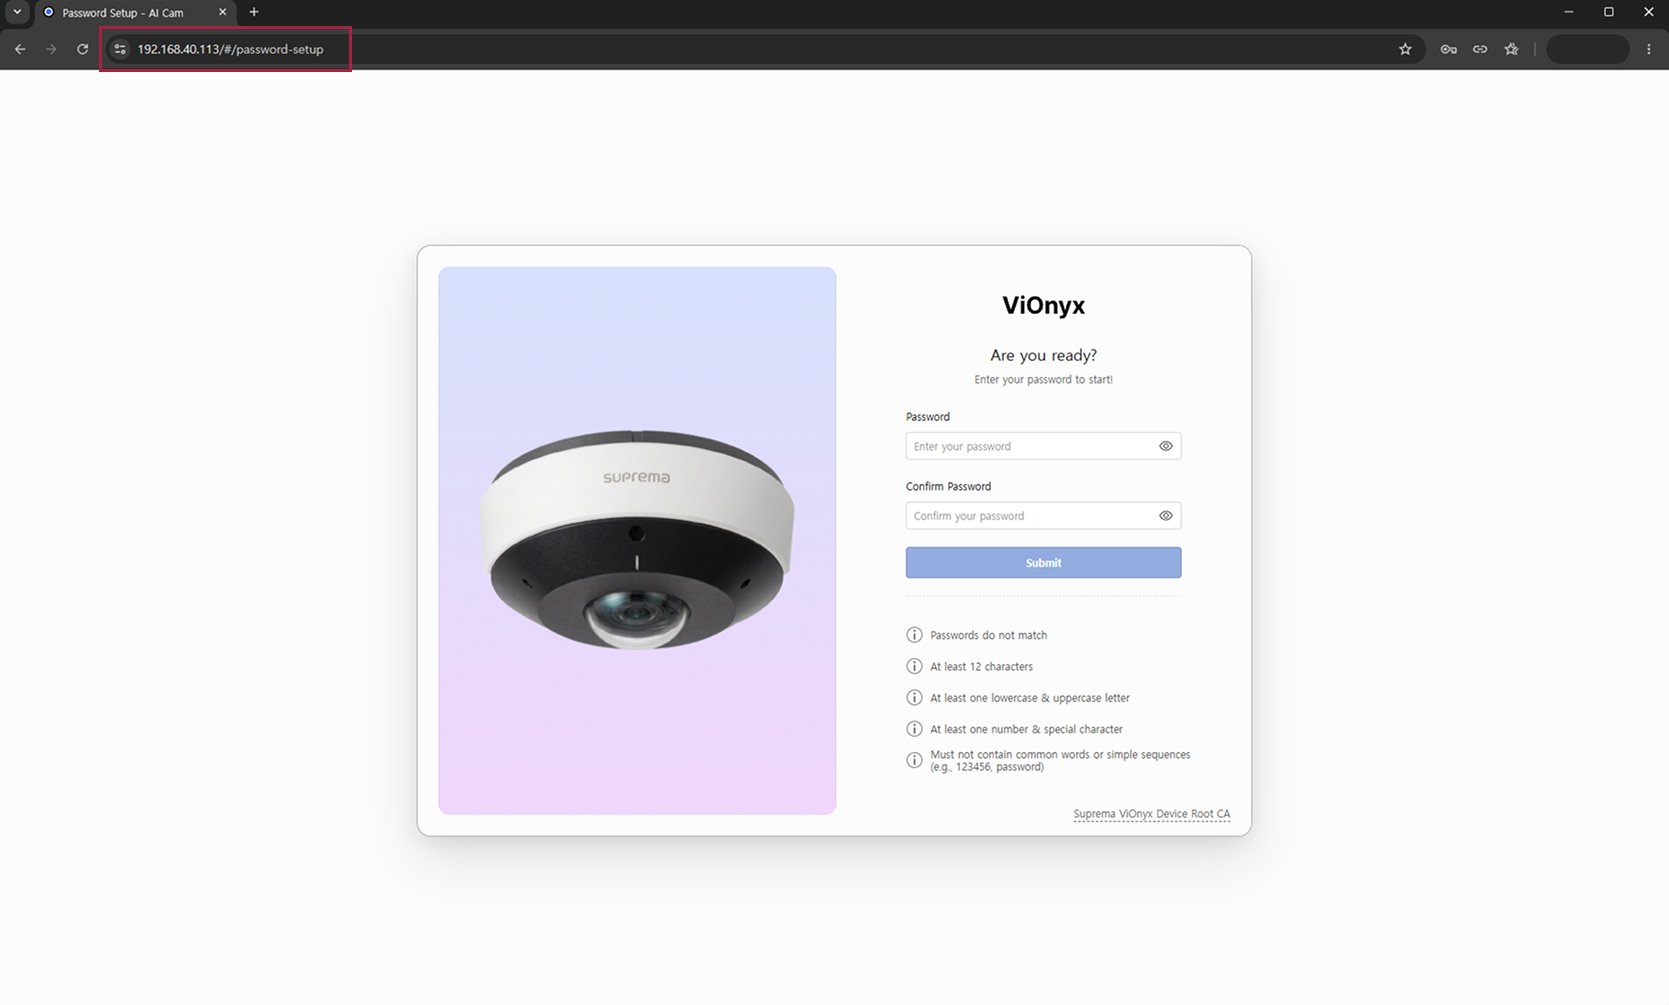
-
On the password setup page, enter a new password in the Password input field.
-
Re-enter the same password in the Confirm Password field.
-
Make sure the password you entered meets all of the following requirements.
-
When all conditions are met, Submit becomes active. Click the button to finish setting your password.
Password requirements
The password must meet all of the following requirements:
-
The values in the Password and Confirm Password fields must match exactly.
-
The password must be at least 12 characters long. Maximum length: 64 characters.
-
Include at least one lowercase letter (
a-z) and one uppercase letter (A-Z). -
Include at least one digit (
0-9) and one special character.Example special characters:
"!@#$%^&*()-_=+[]{} -
Do not include sequences of 4 or more consecutive characters (e.g.,
1234,abcd) or 4 or more identical characters. -
The username (case-insensitive) must not be included in the password.
admin, Admin, ADMIN, Admin123! etc.
-
Common weak passwords such as
password,qwerty,123456are not allowed.
Store the password you set in a safe place. If you lose the password, initialize the camera.
Sign in
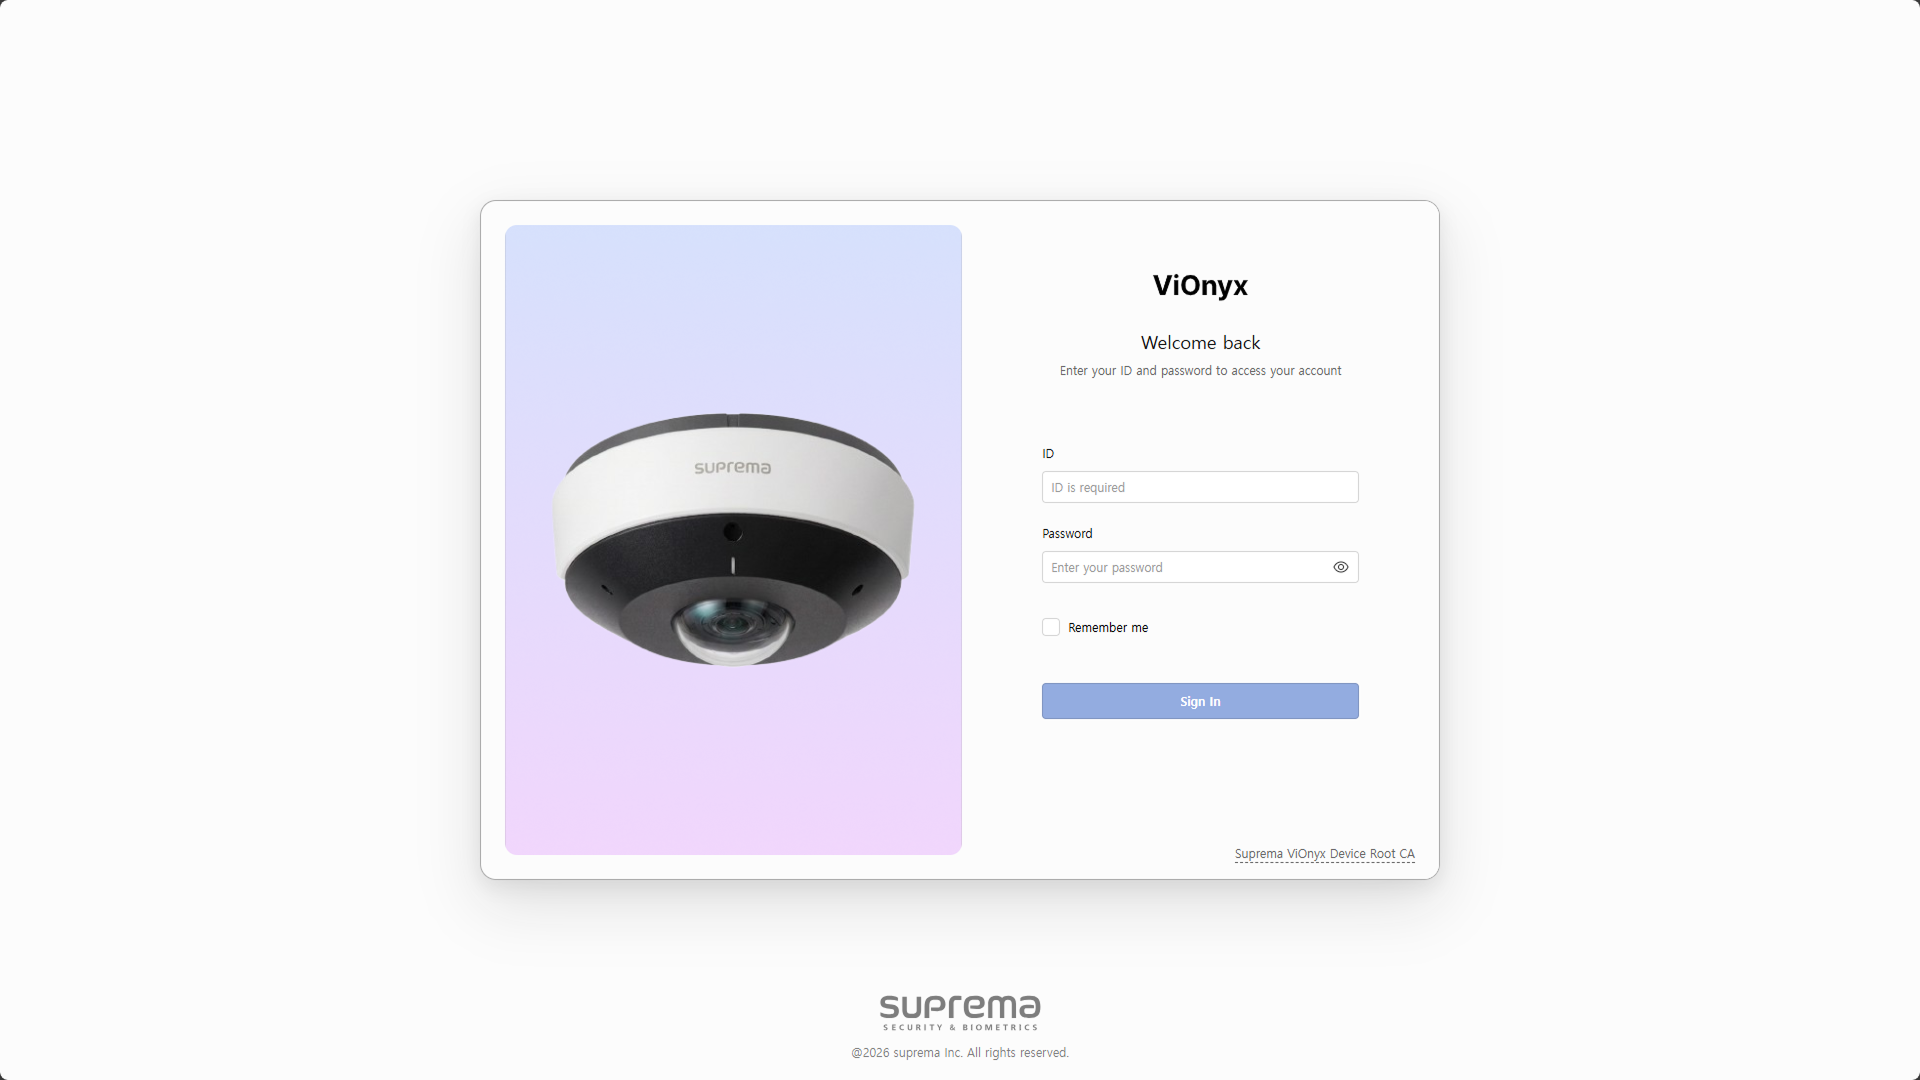
After the password is set, you will be automatically redirected to the sign in page. Enter the administrator ID and the password you set to access the ViOnyx Web server.
-
Enter admin in the ID input field.
-
Enter the password you set in the Password input field.
-
Click Sign In.
After successful sign in, the ViOnyx Web Server opens the Live page.
Change the administrator ID (admin) in System → Account.
Next step
Explains the main features and usage of the Live menu.
Configure AI events to monitor specific situations detected by the camera.
Use the camera's settings to maintain optimal image quality for the shooting environment, configure the network, and apply security and privacy policies.
Register users to enable the AI face recognition feature.
Systematically manage device information, firmware, maintenance, accounts, audio, and logs to effectively operate the camera system.