Cardholder Management
Card Enrollment
-
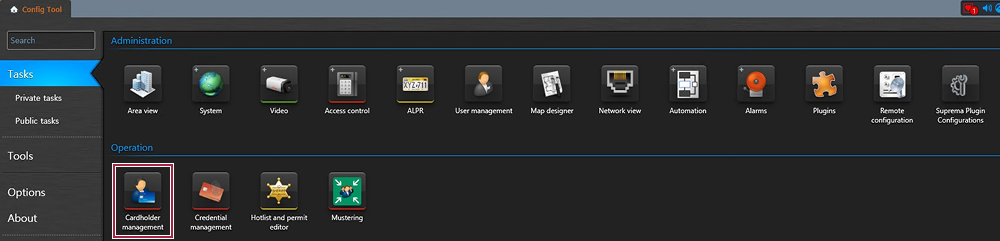
In the Config Tool, click the Cardholder management under Tasks.
-
Click the New button from the bottom.

-
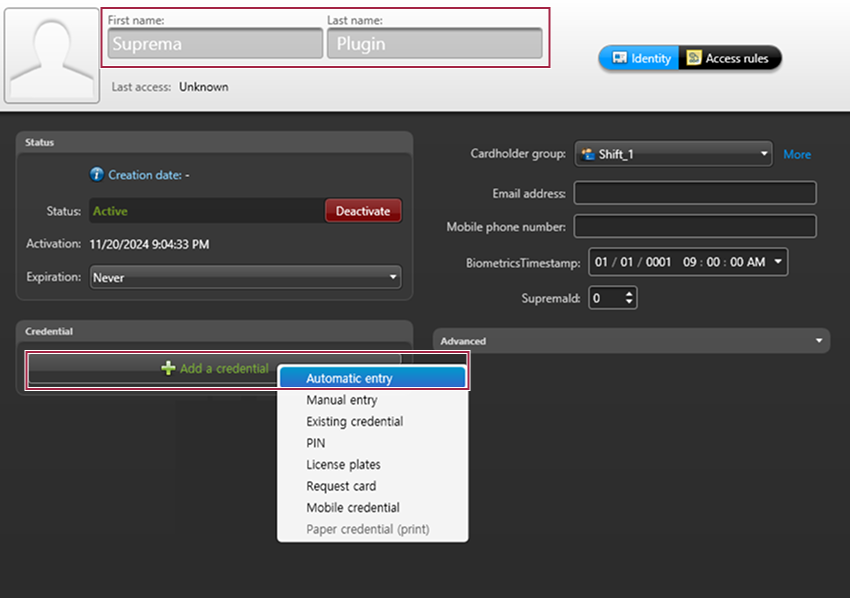
Enter the First name and Last name, then click the Add a credential button. In the popup that appears, click Automatic entry.
-
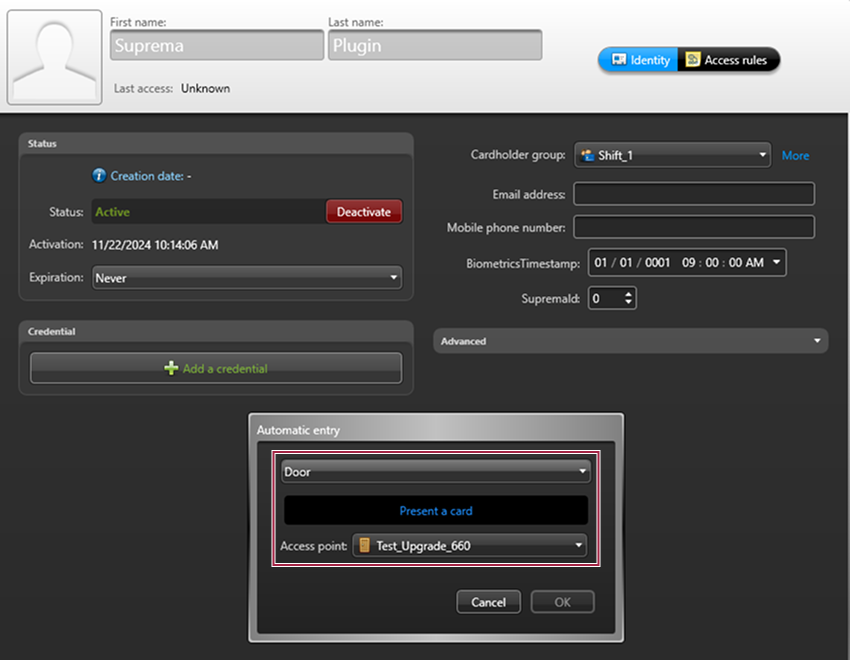
Select the Door assigned to the Suprema device as a reader, then tag a card to the device.
-
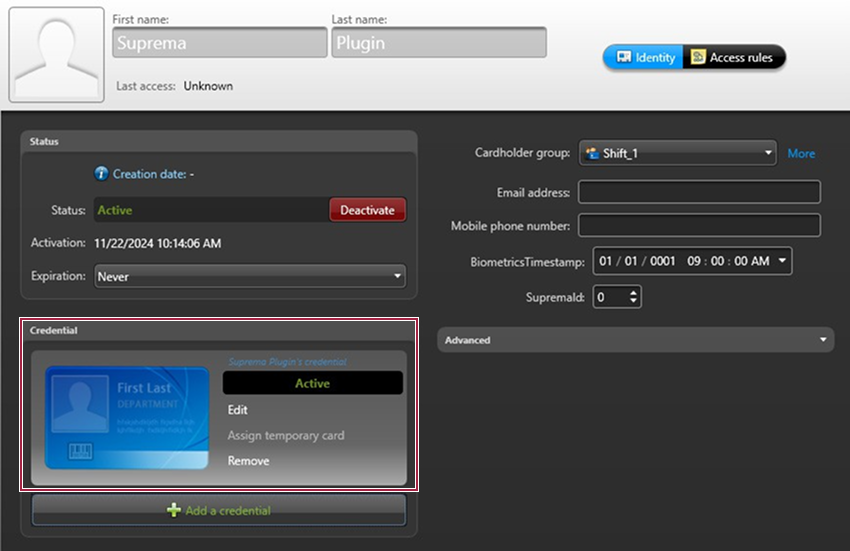
The card is automatically enrolled to the credential.
Face Enrollment
Precautions when Enrolling Face
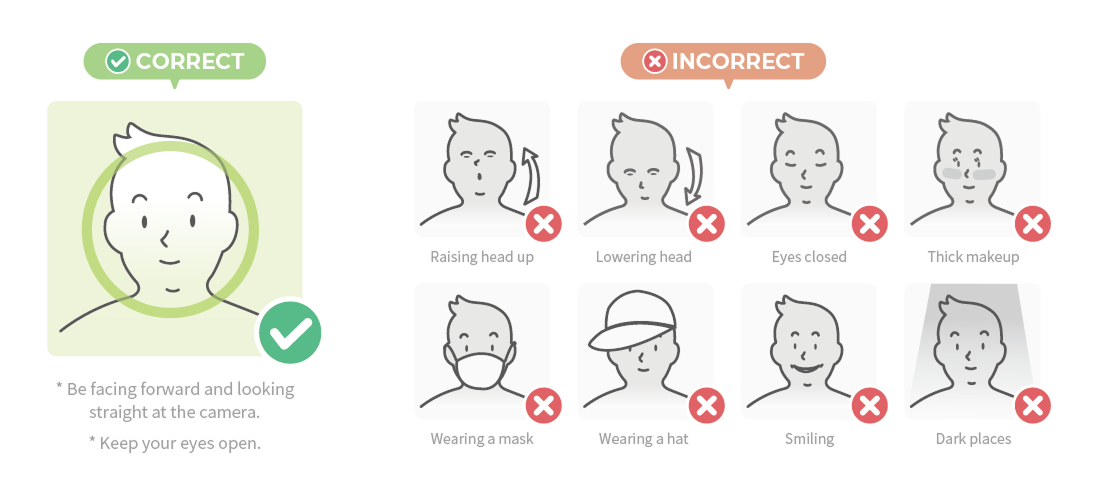
When enrolling your face for authentication, refer to the picture below to enroll your face correctly.
If you do not follow the on-screen instructions, face enrollment may take a long time or authentication may fail.
-
When enrolling a face, maintain a distance of 60-100 cm between the device and the face.
-
Make sure that your expression does not change.
-
Do not wear a mask, hat, sunglasses, or eye patches.
-
Do not raise head up or lower head.
-
Do not wear thick makeup.
-
Do not close your eyes.
-
Make sure that both of your shoulders correctly appear on the screen.
-
Do not use a corrected picture.
-
Stand still and enroll your face by staring at the screen.
-
Be careful not to display two faces on the screen. Make sure to enroll one face at a time.
-
Do not enroll your face in dark places.
-
Resolution: Larger than 250 x 250 pixels
-
Image size: Up to 10 MB
-
Supported format: JPG, JPEG or PNG only
Enroll from Device
-
In the cardholder details window, click Suprema Enrollment.
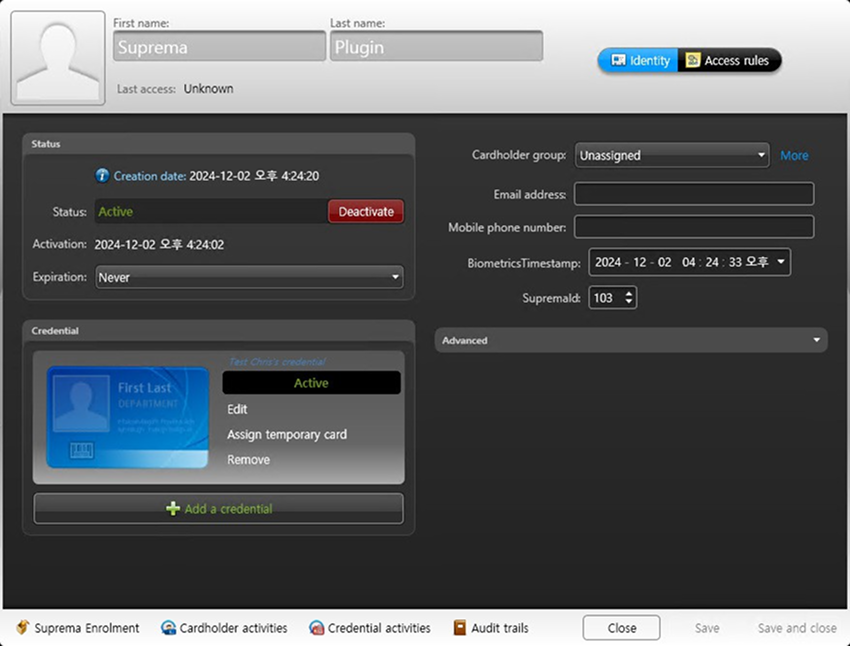
-
Click the Face-Scan.
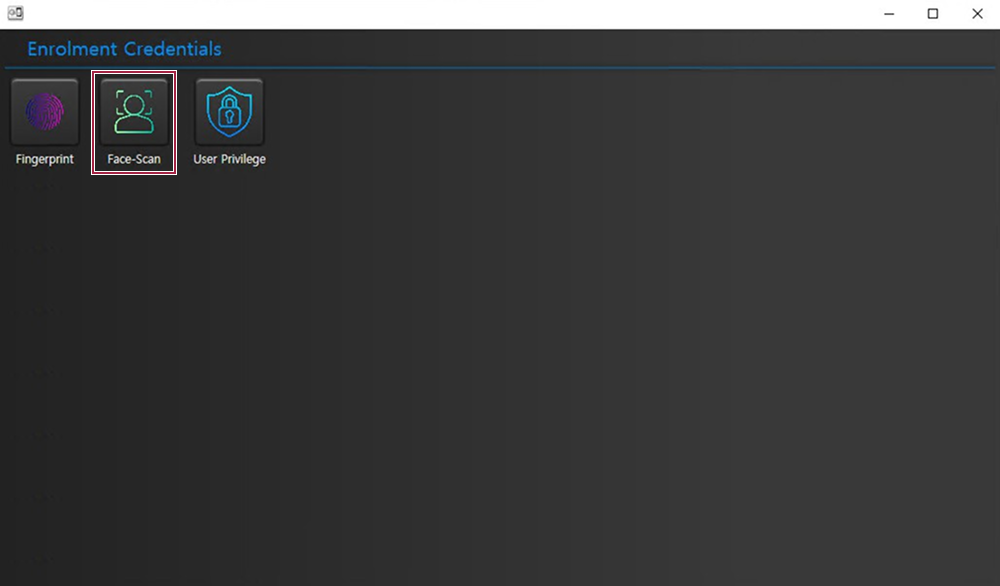
-
Select the Suprema face authentication device to enroll the face credential.
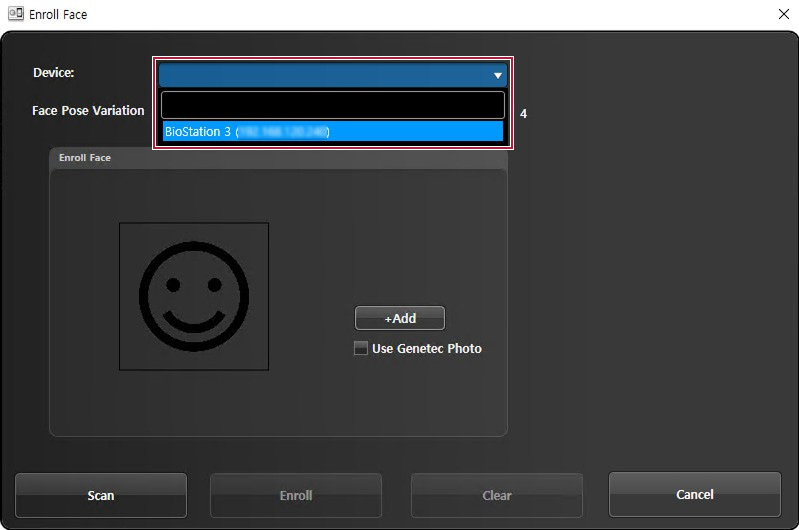
-
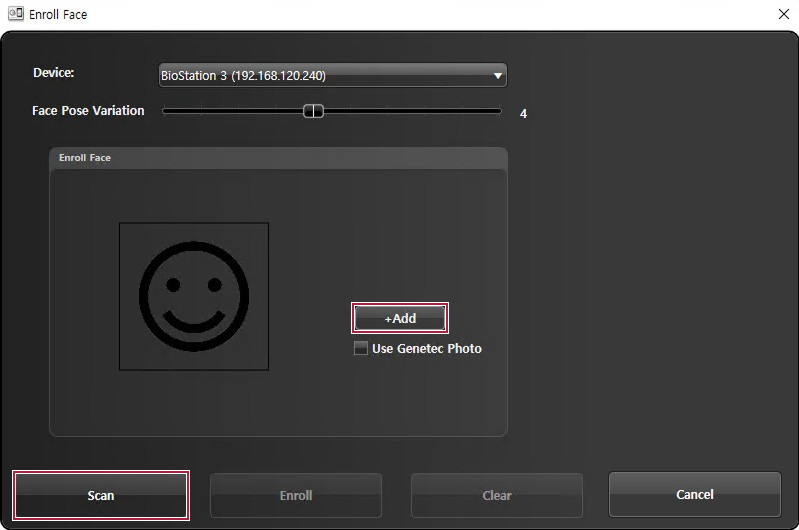
Click the +Add button to create a face template, then click the Scan button and scan the face on the device.
-
Check the face has been properly scanned, and then click the Enroll button to enroll the face.
Enroll Face Template with Genetec Profile Photo
-
In the cardholder details window, click Suprema Enrollment.
-
Click the Face-Scan.
-
Select the Suprema face authentication device to enroll the face credential.
-
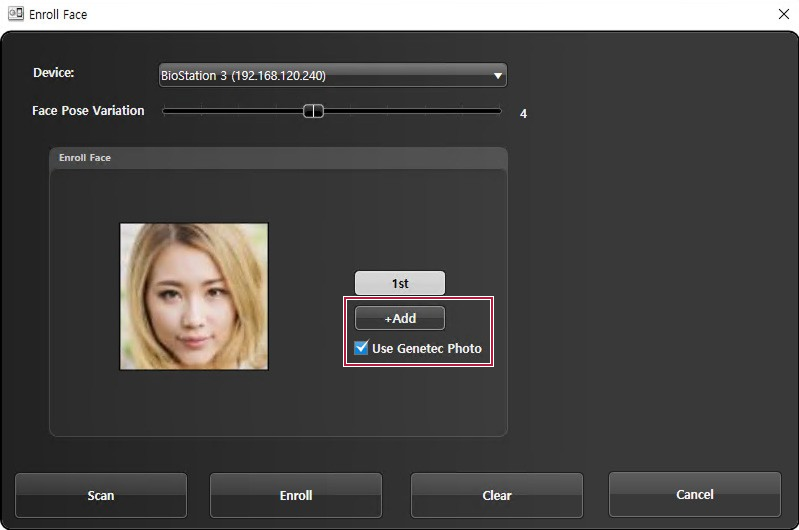
Click the +Add button to create a face template, then check Use Genetec Photo to automatically upload the user profile photo. The Suprema device extracts face templates from user profile photos.
-
Check the uploaded photo, and then click the Enroll button to enroll the face.
Bulk Enrollment
-
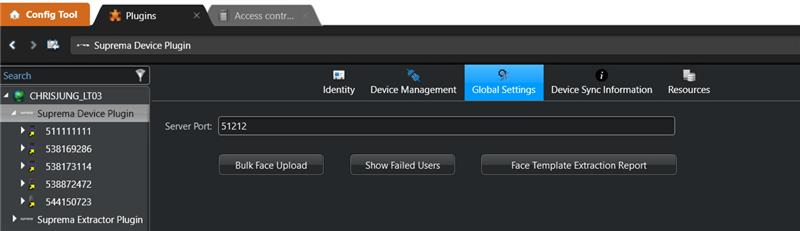
Go to Suprema Device Plugin → Global Settings.
-
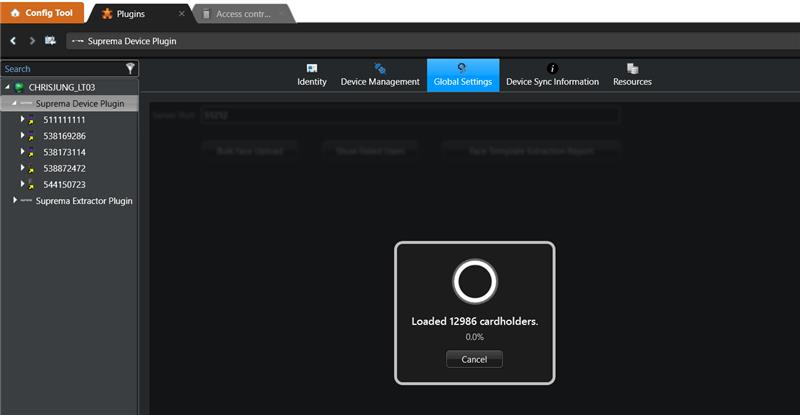
Click the Bulk Face Upload button. You can check the Face Extraction progress.
 Info
Face template extraction is performed only for GSC cardholders who have a profile image.
-
Once the process is completed, you can check the results.
-
Show Failed Users: View the list of users for whom face extraction failed.
-
Face Template Extraction Report: View the report related to face template extraction.
-
How to Search for a Cardholder with a Face Template
-
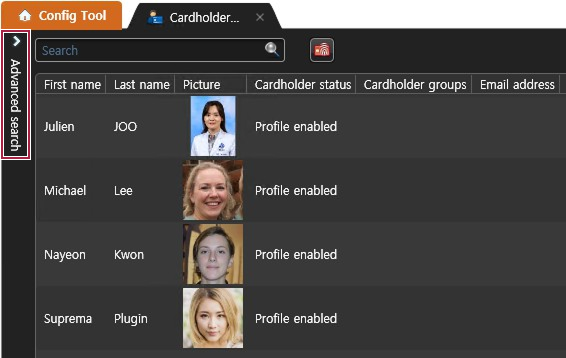
Click the Advanced search on the Cardholder management page.
-
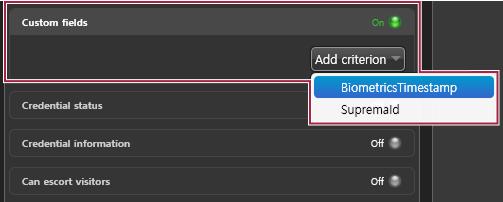
Click the Custom fields, switch it to On, and click Add criterion. Then, select the BiometricsTimestamp.
-
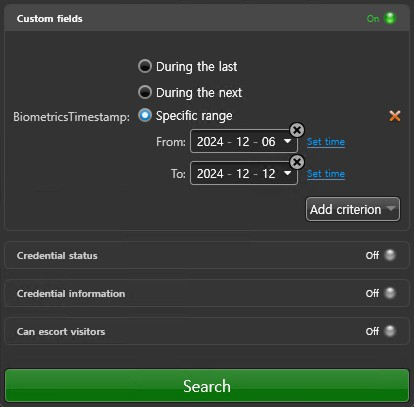
Select the Specific range and set the period to search.
Example
-
From: Plugin installation date
-
To: Today
To search by specific time, click Set time and enter the time.
-
-
Click the Search button.
-
All cardholders who have face templates appear.
Private Authentication Mode
Set a different authentication mode for each user, in addition to or instead of the device’s default authentication mode.
-
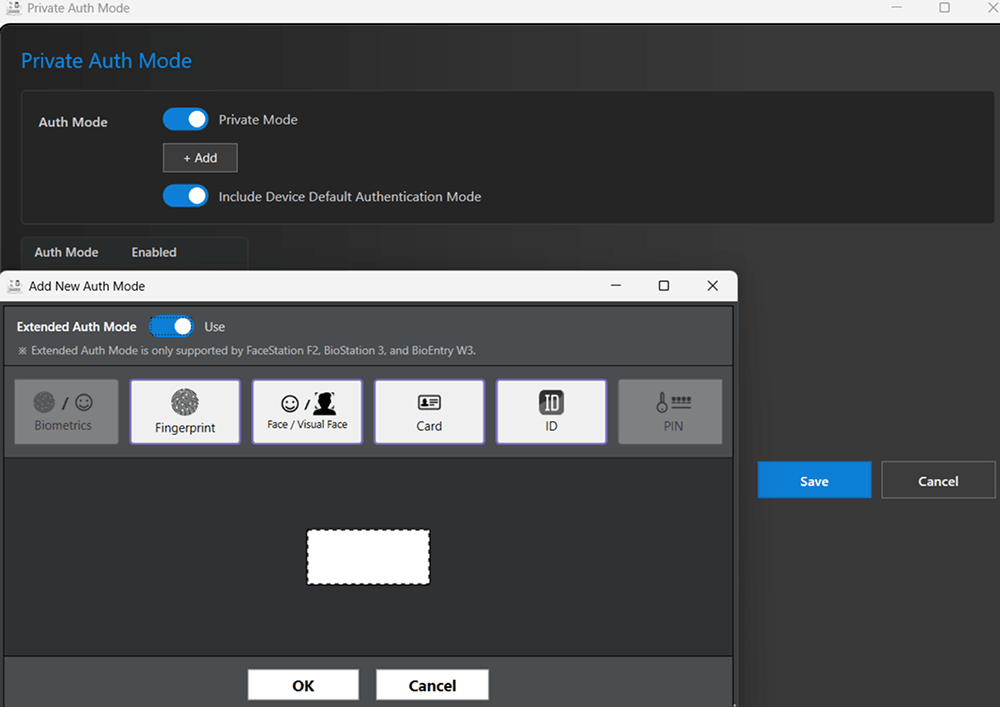
In the Enrolment Credentials window, click Private Auth.

-
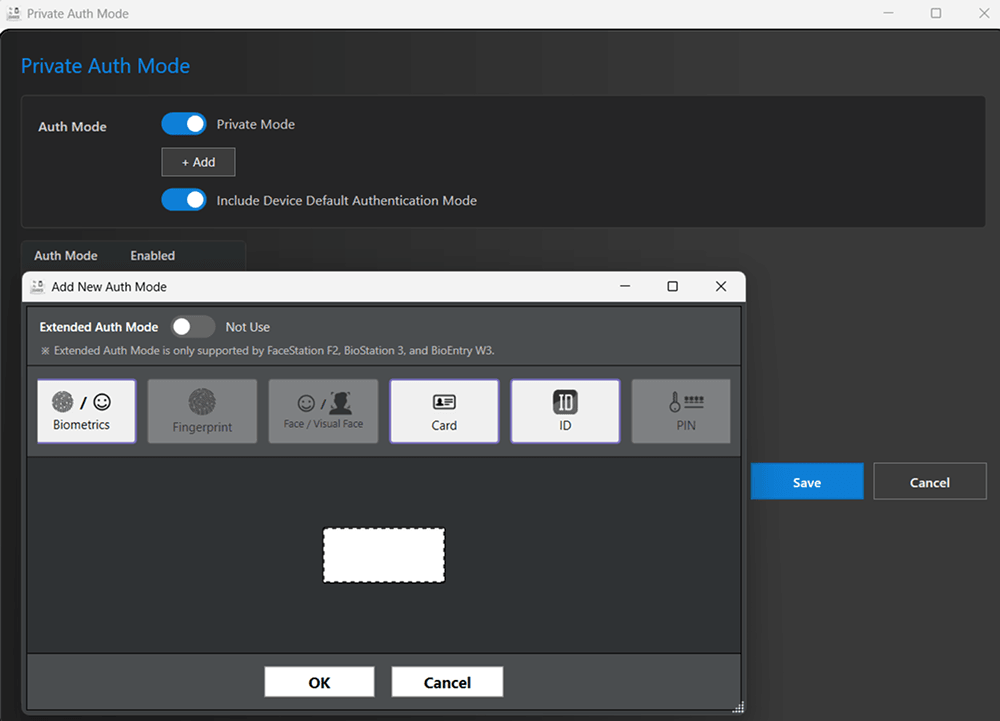
In the Private Auth Mode window, turn on Private Mode.
-
Click + Add. The Add New Auth Mode window appears.
-
Set Extended Auth Mode if needed.
-
Not Use: Biometrics (fingerprint or face) is used as one credential.
-
Use: Fingerprint and Face / Visual Face can be combined as separate credentials.
-
-
Drag the desired credentials (Biometrics, Fingerprint, Face / Visual Face, Card, ID, PIN) to the center area to make an authentication mode, then click OK.
-
Set Include Device Default Authentication Mode.
-
ON: Both the device default authentication modes and the private authentication modes are used.
-
OFF: Only the private authentication modes are used.
-
-
Check the added modes in the Auth Mode list, then click Save.
Extended Auth Mode is only supported by FaceStation F2, BioStation 3, and BioEntry W3.
AoC Enrollment (Access On Card)
Select Access On Card to store user information on the card. This includes card ID, PIN, access group, period, fingerprint template, face template, and private authentication mode.
Before issuing, configure the smart card format (Smart Card Setting) and apply it to the device used for enrollment.
-
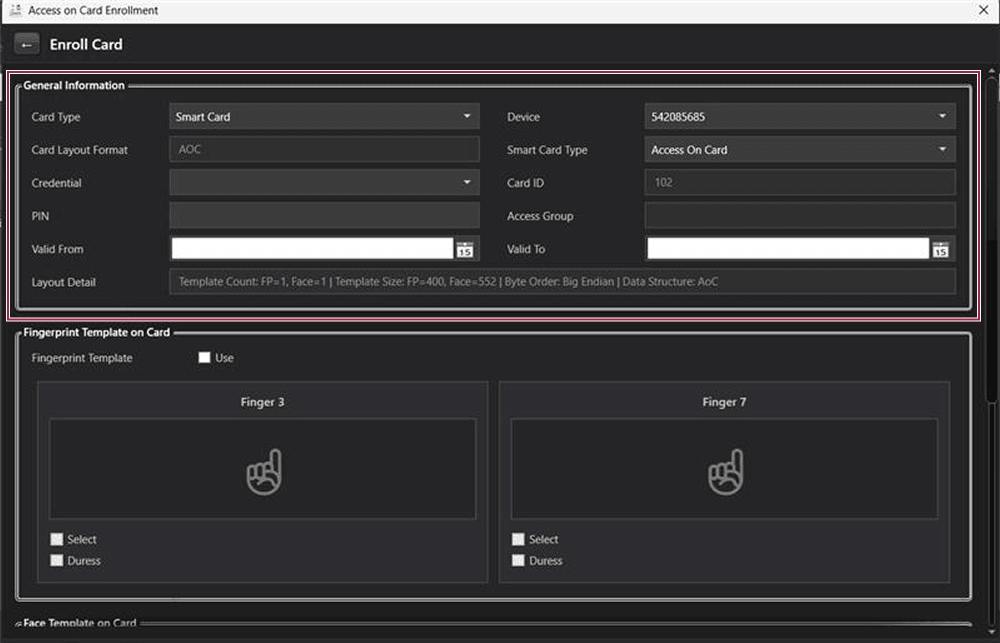
In the Enrolment Credentials window, click AoC Enrollment.

-
When the Enroll Card window appears, select Smart Card from the Card Type options.
-
Select the device for card enrollment from the Device field.
-
Once selected, the card layout format set on the device is displayed in the Card Layout Format field.
-
Select Access On Card from the Smart Card Type options.
-
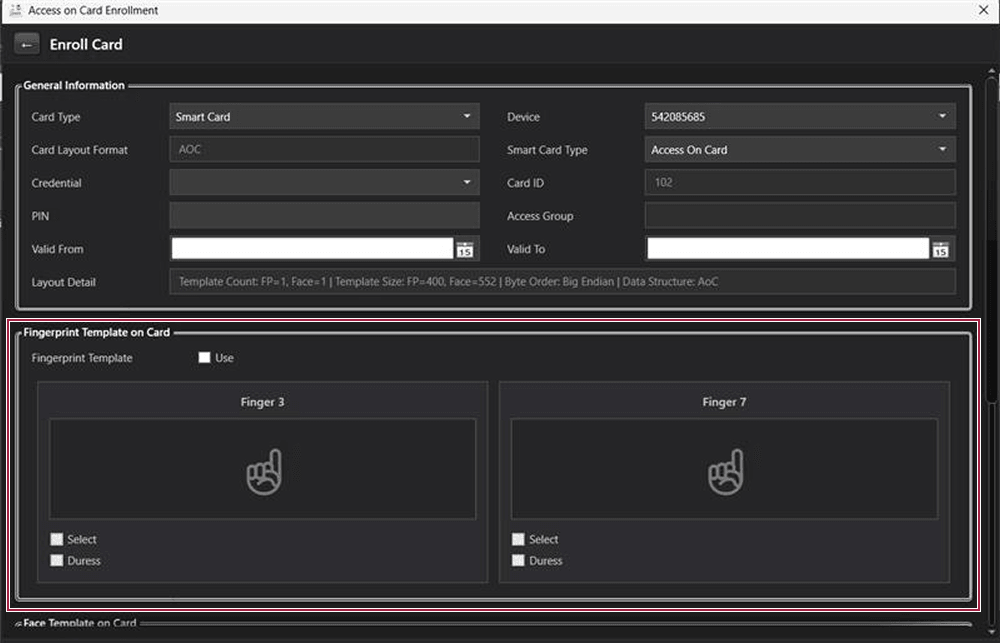
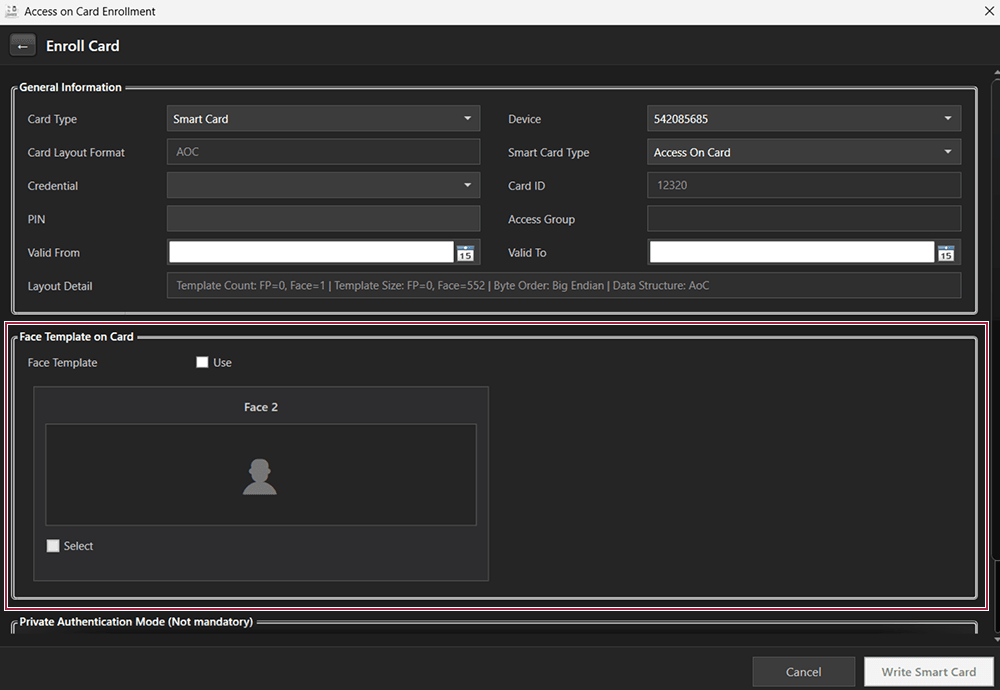
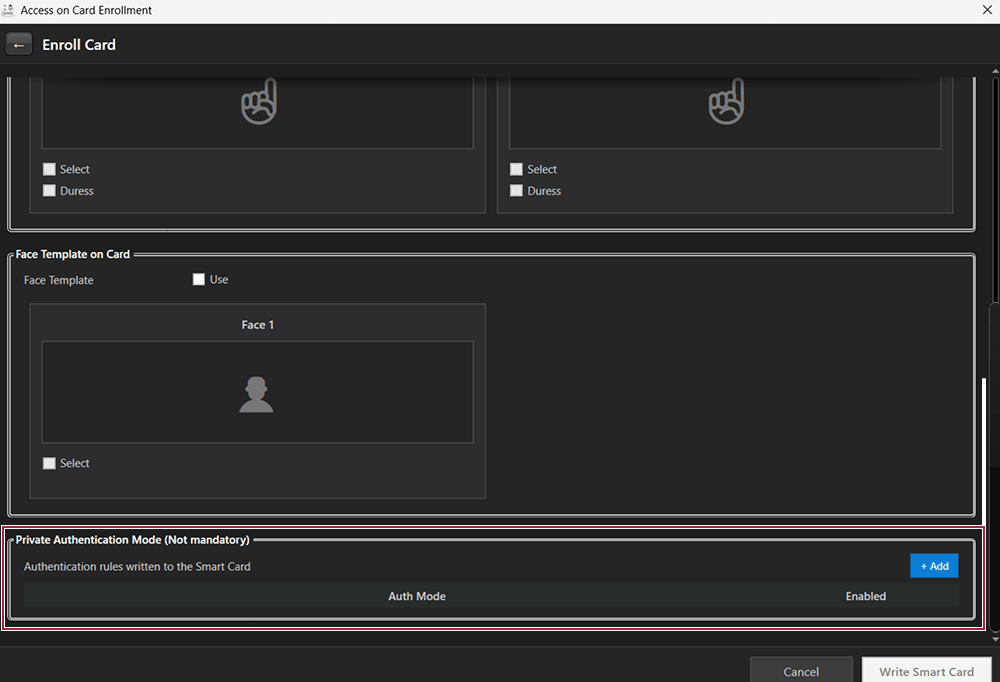
Select a fingerprint or face template if available. If no template is available, skip this step.
-
Fingerprint Template on Card: Check Use, then check Select for each finger to write. Check Duress for a duress fingerprint.
-
Face Template on Card: Check Use, then check Select for the face template to write.
-
-
(Optional) Private Authentication Mode: Click + Add to add authentication rules written to the smart card.
-
Click the Write Smart Card button.
-
The cardholder must have an access rule and biometric data (fingerprint or face) enrolled before an Access On Card can be issued.
-
Access On Card cannot set the card ID manually.
-
The Fingerprint Template on Card and Face Template on Card sections follow the card layout (Template Count, Use Face Template).