Manage Door Schedules
You can set door schedules to automatically lock and unlock doors based on time periods. Configure lock and unlock times, and utilize advanced options such as open after first authentication to set up secure and controlled access.
-
Schedules apply only to doors and devices that are connected to the internet.
-
Holiday groups ignore unlock schedules unless they are configured separately.
-
Keep at least one administrator with unrestricted access for emergencies.
When Do You Need Schedules
Door schedules are optional. Most sites operate effectively with basic access control alone. When an authorized user presents a valid credential, the door unlocks automatically—no additional schedule configuration required.
Configure schedules only in the following situations:
-
When you need to allow unrestricted access during specific time periods
-
When you need to block all users from entering during specific time periods
-
When you need to apply different access policies for different times
To avoid confusion between Unlock Schedule and Lock Schedule in BioStar Air, understand how each schedule works and when to use it.
Unlock Schedule vs Lock Schedule
| Category | Unlock schedule | Lock schedule |
|---|---|---|
| Door state during schedule | Always unlocked | Always locked |
| Authentication required | Not required, anyone can freely access | Credentials cannot unlock the door |
| Manual unlock | Possible | Only site administrator can unlock |
| Relay operation | Continuously triggered | Does not trigger |
Site administrator refers to designated administrators in the BioStar Air Admin portal or mobile app.
Unlock schedule
During the scheduled period, the door remains unlocked and the relay stays continuously triggered. No authentication is required for anyone to enter freely during this time.
Typical use cases
-
Main entrance doors in public areas
-
Shared amenities in residential communities
-
Office lobby doors during business hours
Configure unlock schedules
Configure an unlock schedule as instructed below.
-
Click Door Management → Registered Doors in the left sidebar.
-
In the list, click the checkbox for the door to configure its unlock schedule.
-
Click at the top of the door list.
-
When the Lock/Unlock Schedule Settings window appears, select a predefined schedule or create a new one in the Unlock tab.
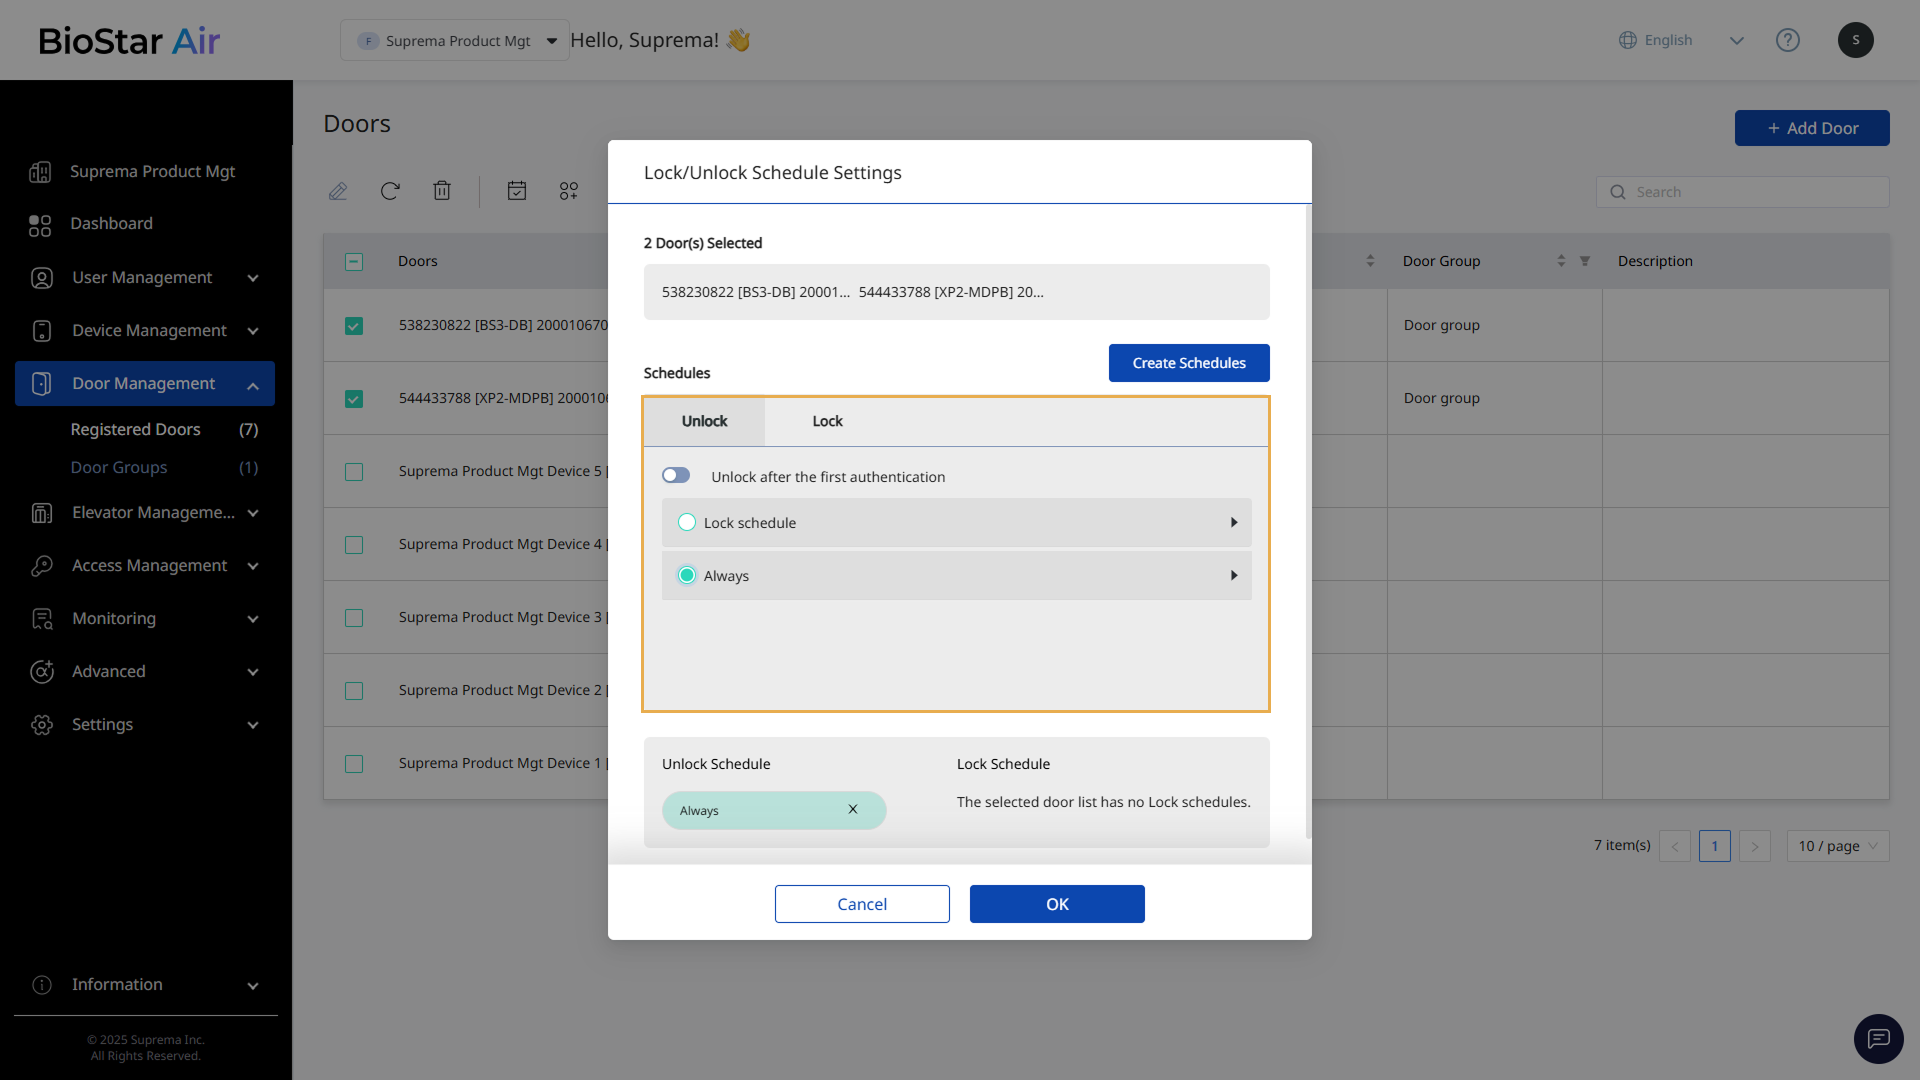
-
Click OK to apply the unlock schedule.
-
When Unlock after the first authentication is enabled, the door stays unlocked according to the selected schedule after the first user authenticates. This option can be useful in the following situations.
-
Retail stores that open only after staff arrive
-
Offices where the first employee arriving unlocks the building for others
-
Membership facilities that require staff to initiate access before members can enter
-
-
For more information on registering schedules, refer to #registeringNewSchedules.
Lock schedule
During the scheduled period, the door remains locked and the relay does not trigger. Even if a valid credential is presented, the door cannot be unlocked through authentication. Only a site administrator can manually unlock the door through the BioStar Air Admin portal or mobile app.
Typical use cases
-
Areas that must be strictly closed after certain hours
-
Facilities such as pools, gyms, or other restricted areas
Configure lock schedules
Configure a lock schedule as instructed below.
-
Click Door Management → Registered Doors in the left sidebar.
-
In the list, click the checkbox for the door to configure its lock schedule.
-
Click at the top of the door list.
-
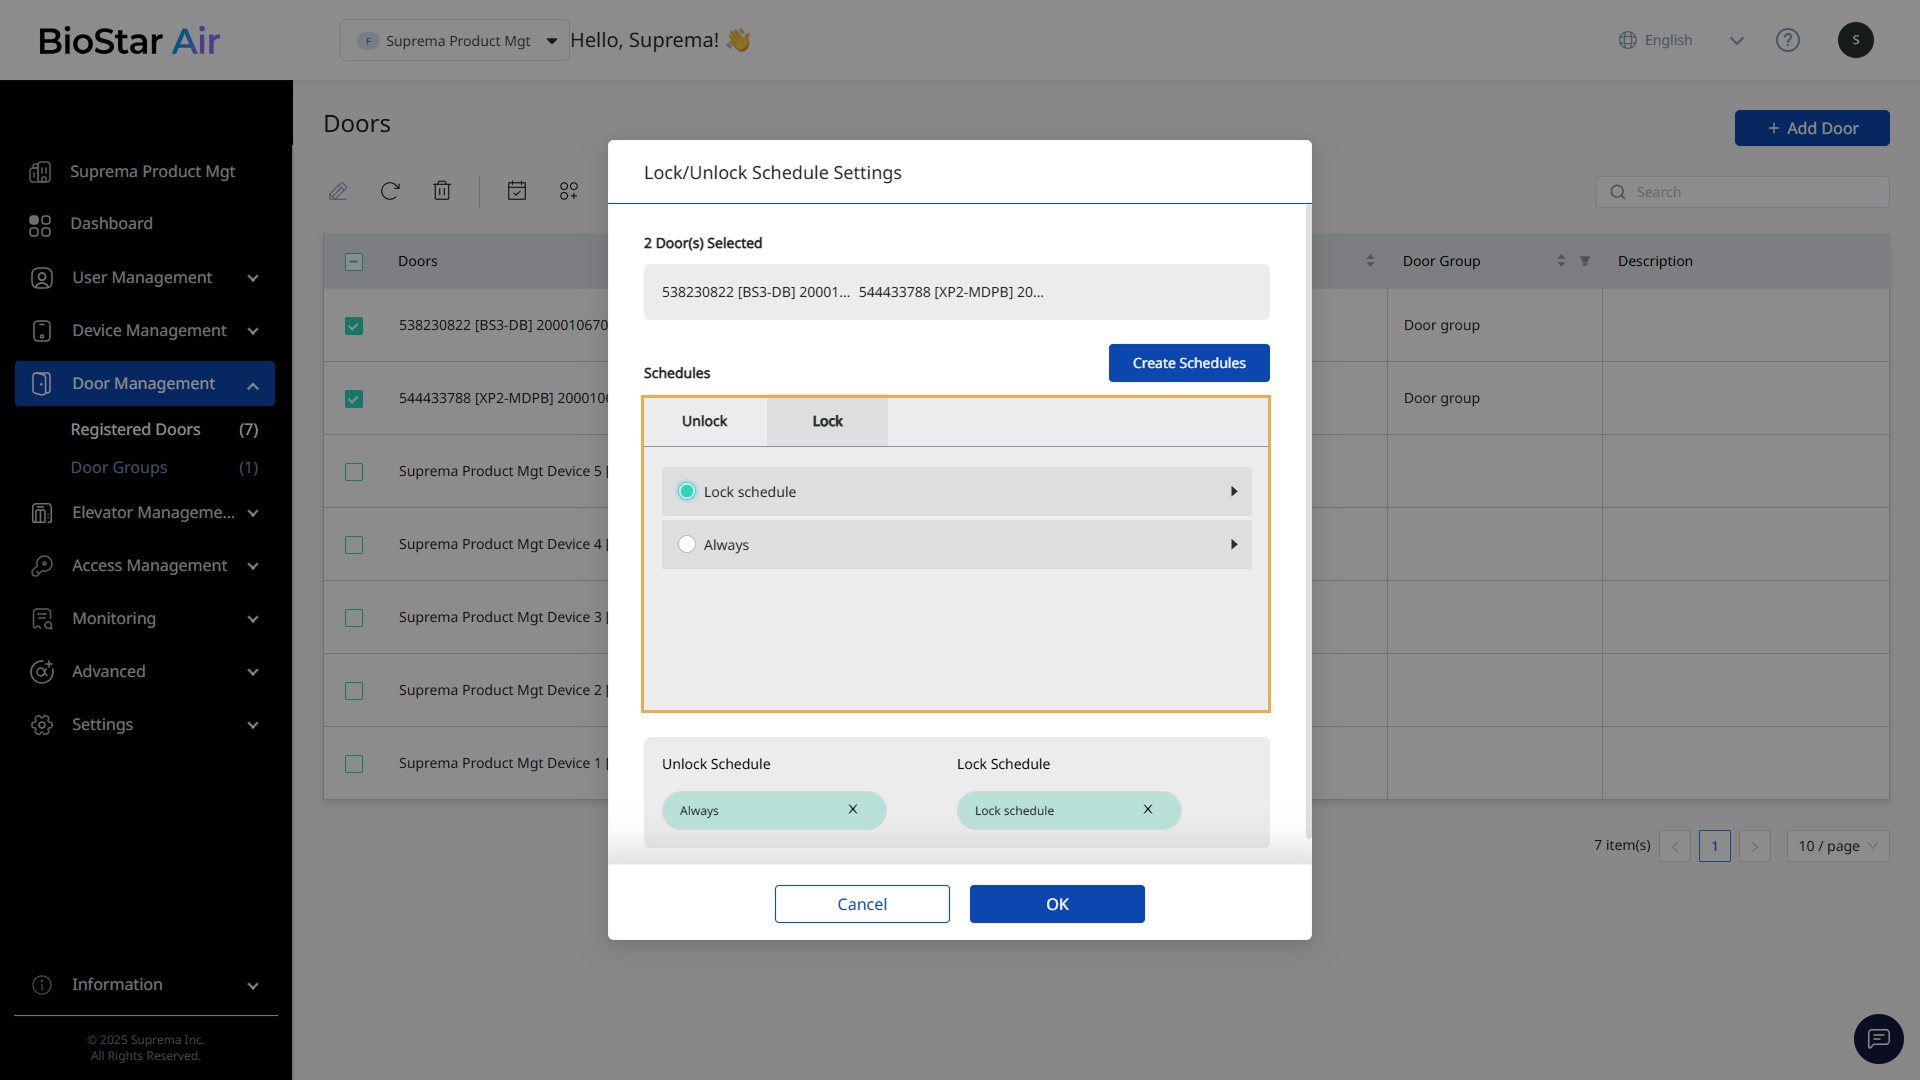
When the Lock/Unlock Schedule Settings window appears, select a predefined schedule or create a new one in the Lock tab.
-
Click OK to apply the lock schedule.
-
Because a lock schedule overrides standard access rights, users cannot set the door to unlocked during the lock period.
-
For more information on registering new schedules, refer to #registeringNewSchedules.
Register a new schedule
Follow the steps below to register a new schedule.
-
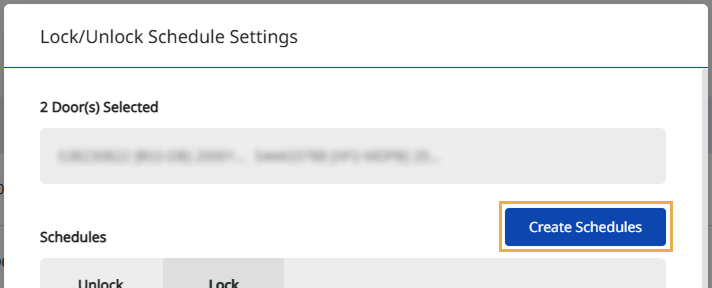
In the Lock/Unlock Schedule Settings window, click Create Schedules.
-
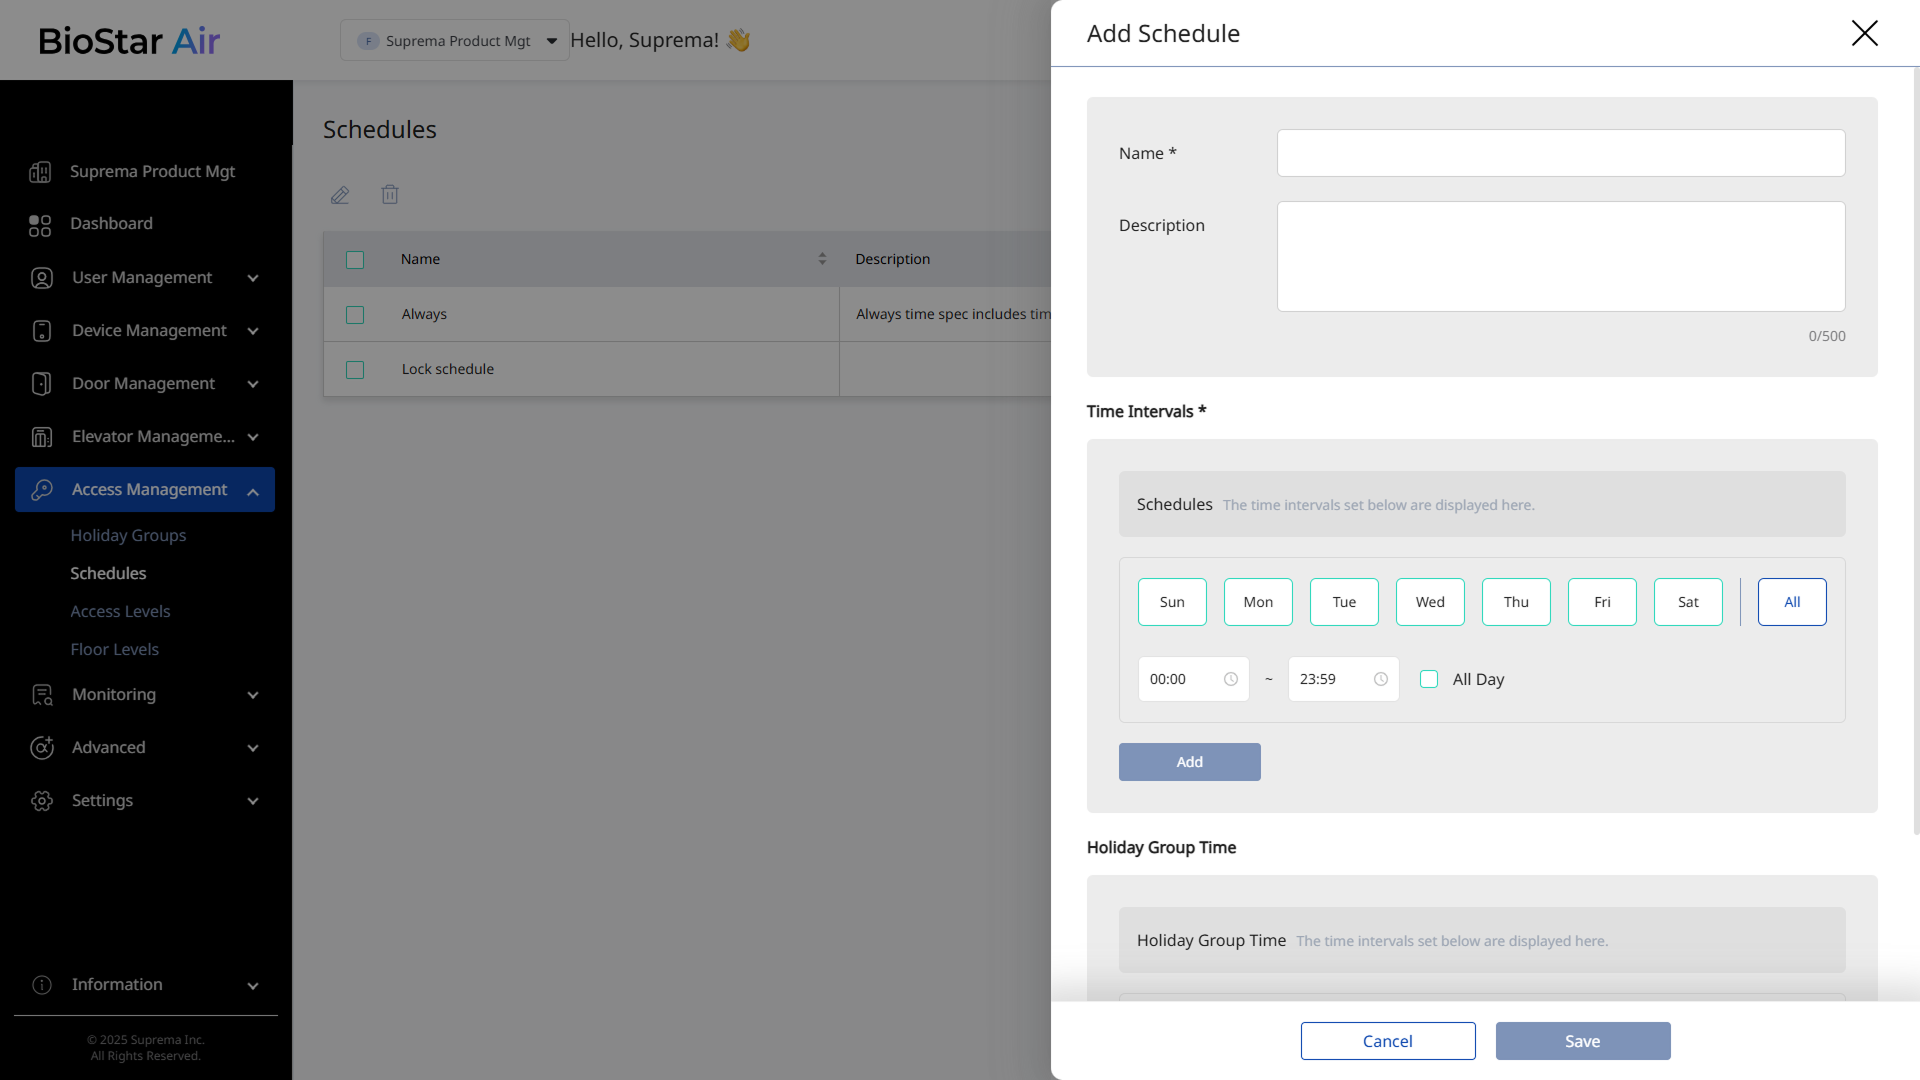
On the Add Schedule screen, enter Name and Description (optional).
-
In the Time Intervals * section, select the days and times when the door should be open without authentication, then click Add.
-
Click Save to save the schedule.
After registering a new schedule, return to Door Management → Registered Doors and configure the door schedule.