Manage Registered Doors
Assign access devices to registered doors, configure relays, and set access schedules. Systematically control access for security, fire evacuation, and time and attendance (T&A).
Watch the following video for a tutorial on registering and managing doors.
View Door List
The door list displays all doors registered in BioStar Air at a glance. View key information for each door, such as its name, assigned devices, and group. Click a door in the list to view details and modify settings.
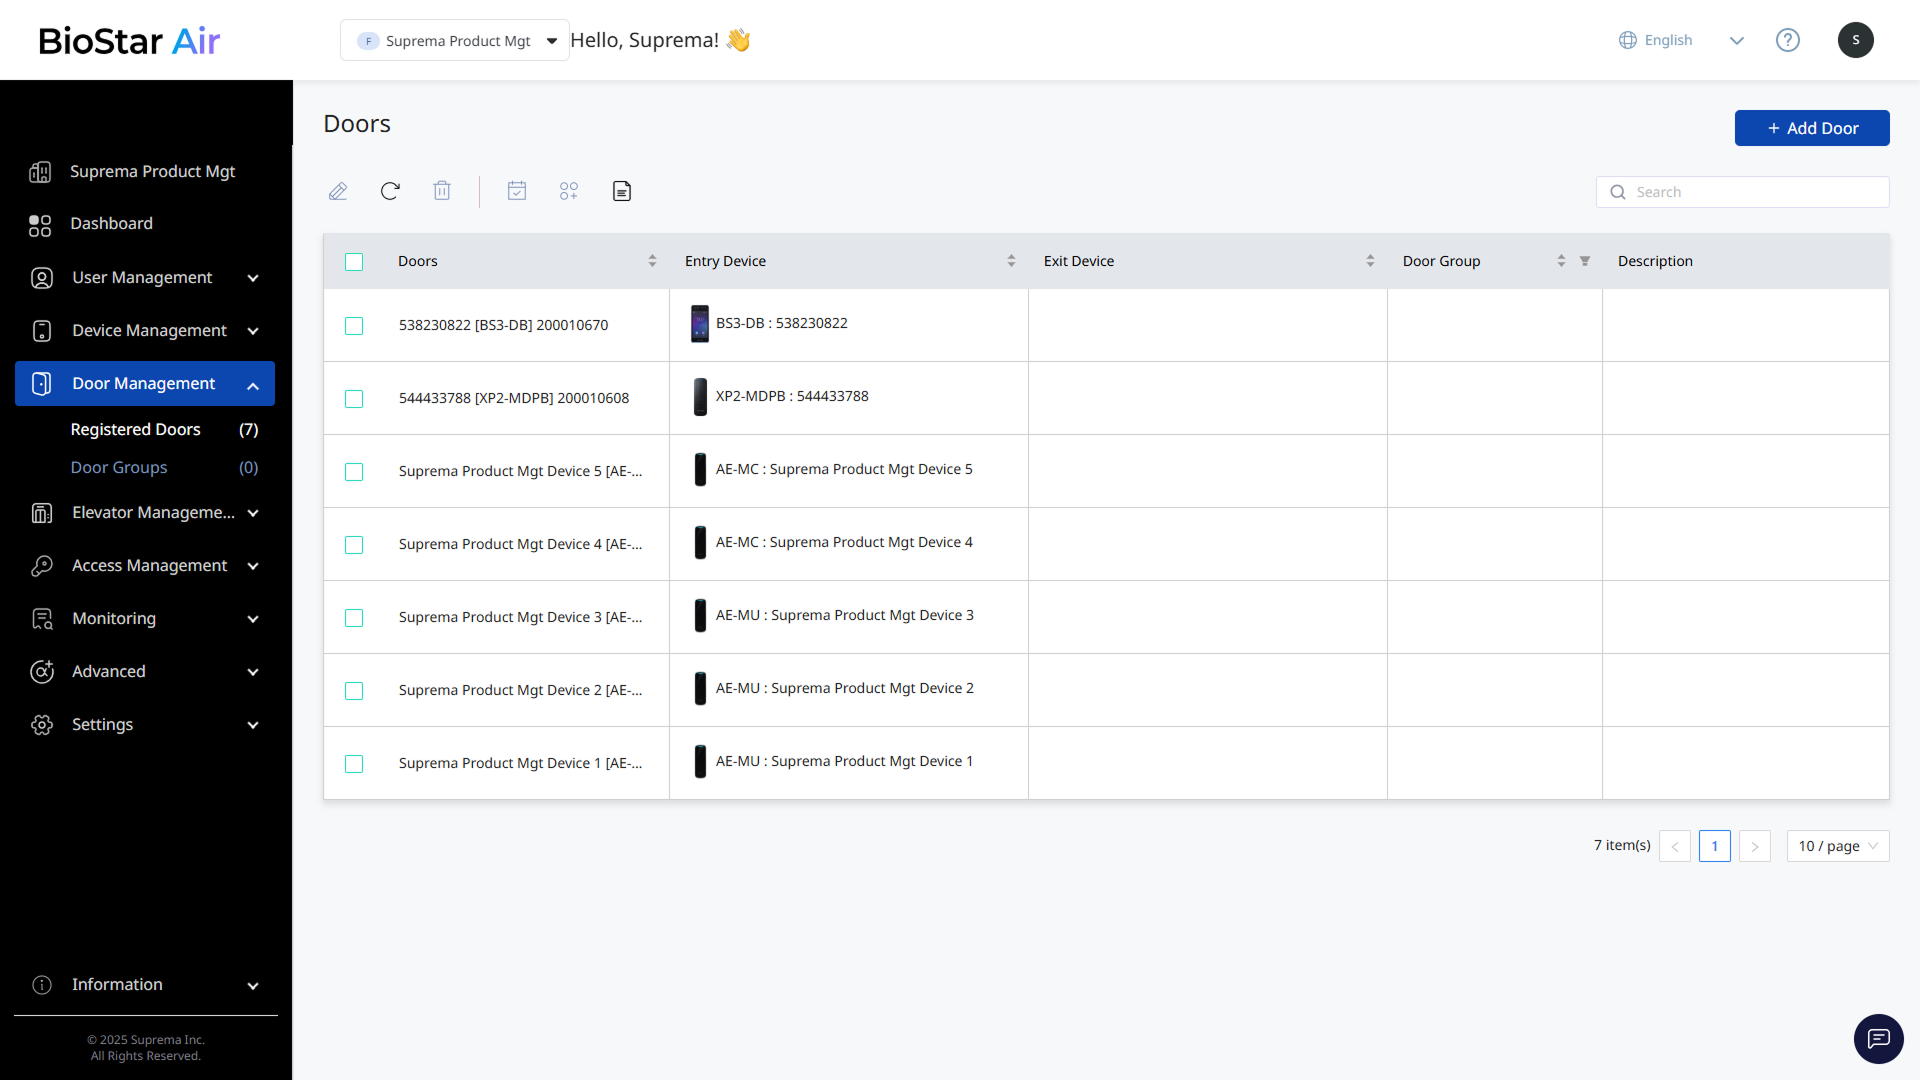
Click Door Management → Registered Doors in the left sidebar to view registered doors.
Door information
The door list provides the following information.
-
Doors: The name of the door. This is usually assigned automatically during device registration, but administrators can change the door name.
-
Entry Device: Device that authenticates users entering the door.
-
Exit Device: Device that authenticates users exiting the door.
-
Door Group: Name of the group assigned to the door.
-
Description: Description of the door.
-
Camera: Displays camera information linked to the door. Camera column appears only after you enable the Video Management feature at Settings → Site → Additional Features.
Additional features
When one or more doors are selected in the list, administrators can manage them using the following tools.
-
: Edit door information or change the settings of assigned devices. This option is available only when one door is selected. For more information, see #editingDoors.
-
: Refresh the door list.
-
: Remove the selected doors from the list.
-
: Set a schedule for door open and locked states. For more information on managing door schedules, see Manage Door Schedules.
-
: Group the selected doors. For more information on managing door groups, see Manage Door Group.
-
: Generate door reports. For more information on generating door reports, see #generatingDoorReports.
Filter
Filter the door list by door group. Click the Door Group column's button and select the desired group. Click OK to show only the doors in the selected group.
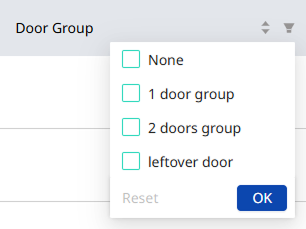
To reset the applied filters, click and select Reset.
Add doors
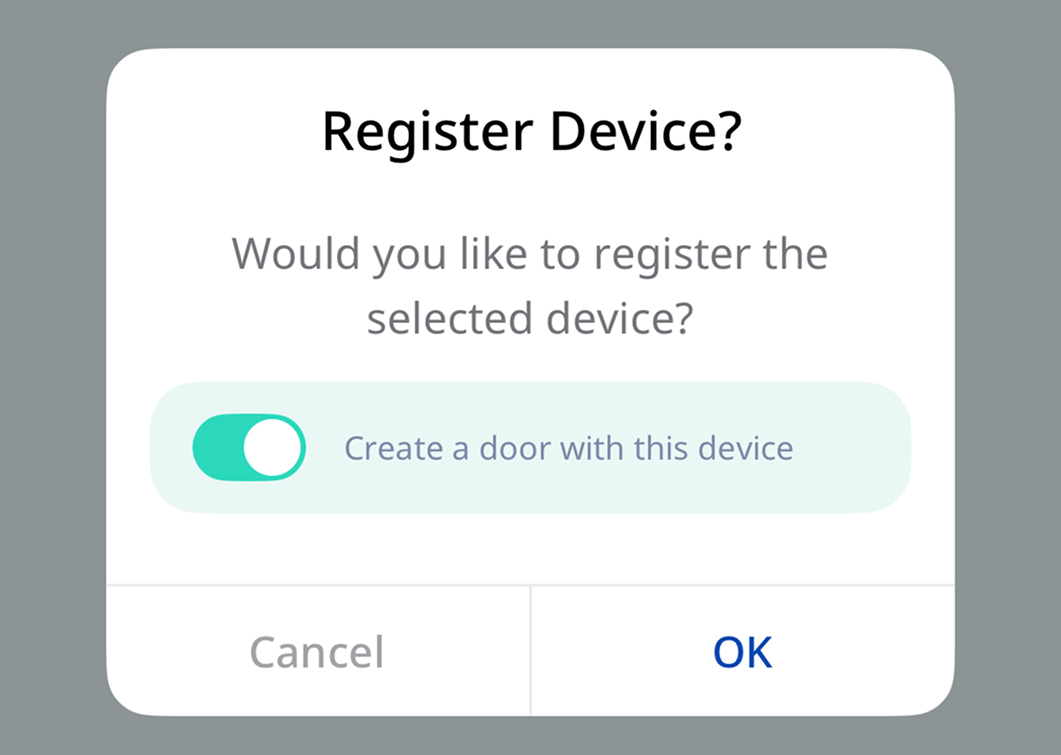
Add with a device
In the final step of device registration in the mobile app, select the Create a door with this device option to create a door. For more information on how to register a device with the mobile app, see Register and Delete Edge Devices.
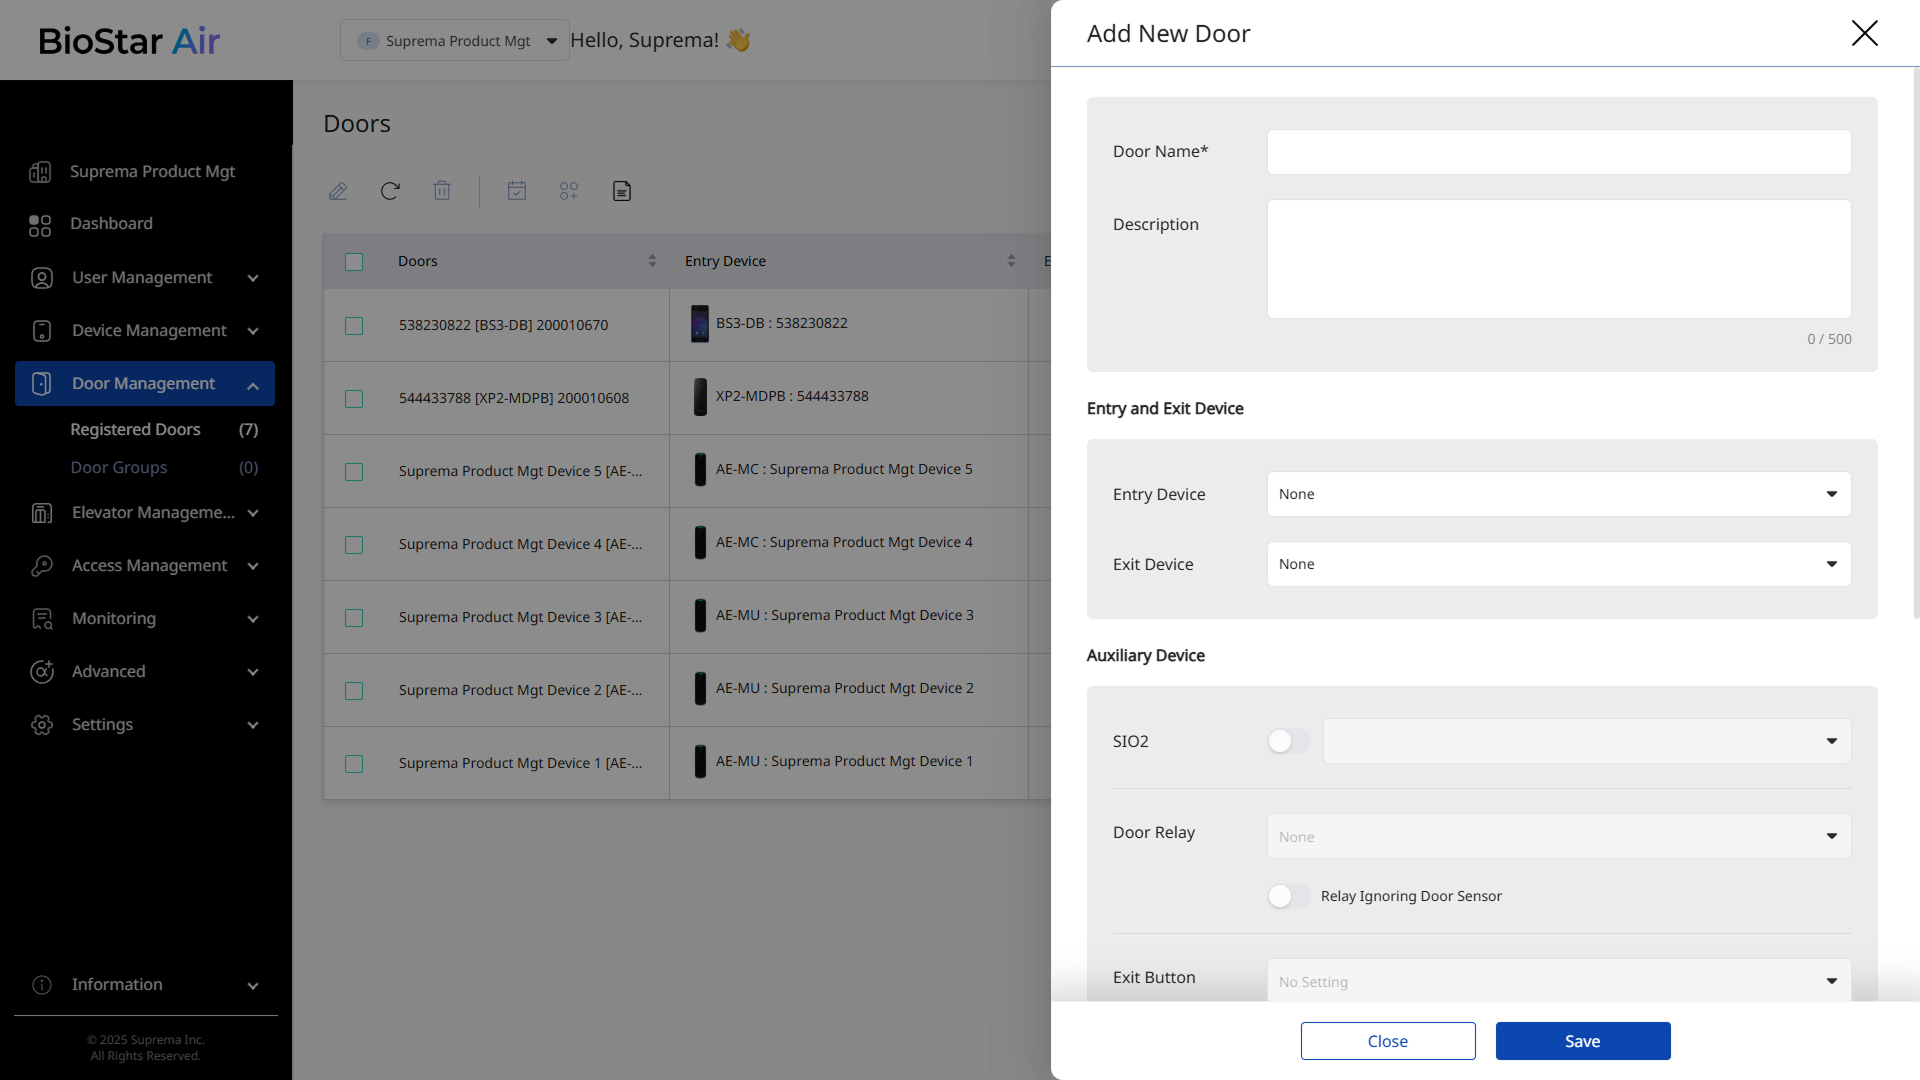
Add from the web portal
Follow the steps below to add a new door in the BioStar Air portal.
-
Click Door Management → Registered Doors in the left sidebar.
-
Click Add New Door at the top right of the screen.
-
When the Add New Door panel appears, enter Door Name.
-
Select Entry Device and Exit Device.
-
Click Save to save and add the door settings.
Rules for assigning devices to doors
-
Each device can be assigned to one door only.
-
If a device is already registered but does not appear in the available device list, check whether it is assigned to another door. If it is assigned to another door, remove it from that door and try again.
-
A device cannot be assigned to both a door and an elevator at the same time.
Doors that use primary/secondary devices
-
The door is controlled by a primary device (XPass 2 or CoreStation 20).
-
An XPass 2 configured as a primary can be assigned to only one door, regardless of how many secondary devices or modules are assigned.
-
An XPass 2 configured as a primary can have up to 31 secondary devices assigned, and it can add a new door whose relay is controlled by a secondary Secure Module (SIO2).
-
Doors that use a CoreStation 20 (CS-20) together with a Secure Module (SIO2) cannot be created.
Door configuration limitations
The following limitations apply to door configuration.
-
1 XPass D2 + SIO2 (relay owned by SIO2)
-
1 XPass 2 + XPass D2 (relay owned by XPass 2)
-
2 XPass D2 (relay owned by XPass 2)
-
1 or 2 OSDP/Wiegand devices (relay owned by CS-20)
-
Only one SIO2 is allowed per door (relay for I/O): it must be wired to the same XPass 2 as the XPass D2
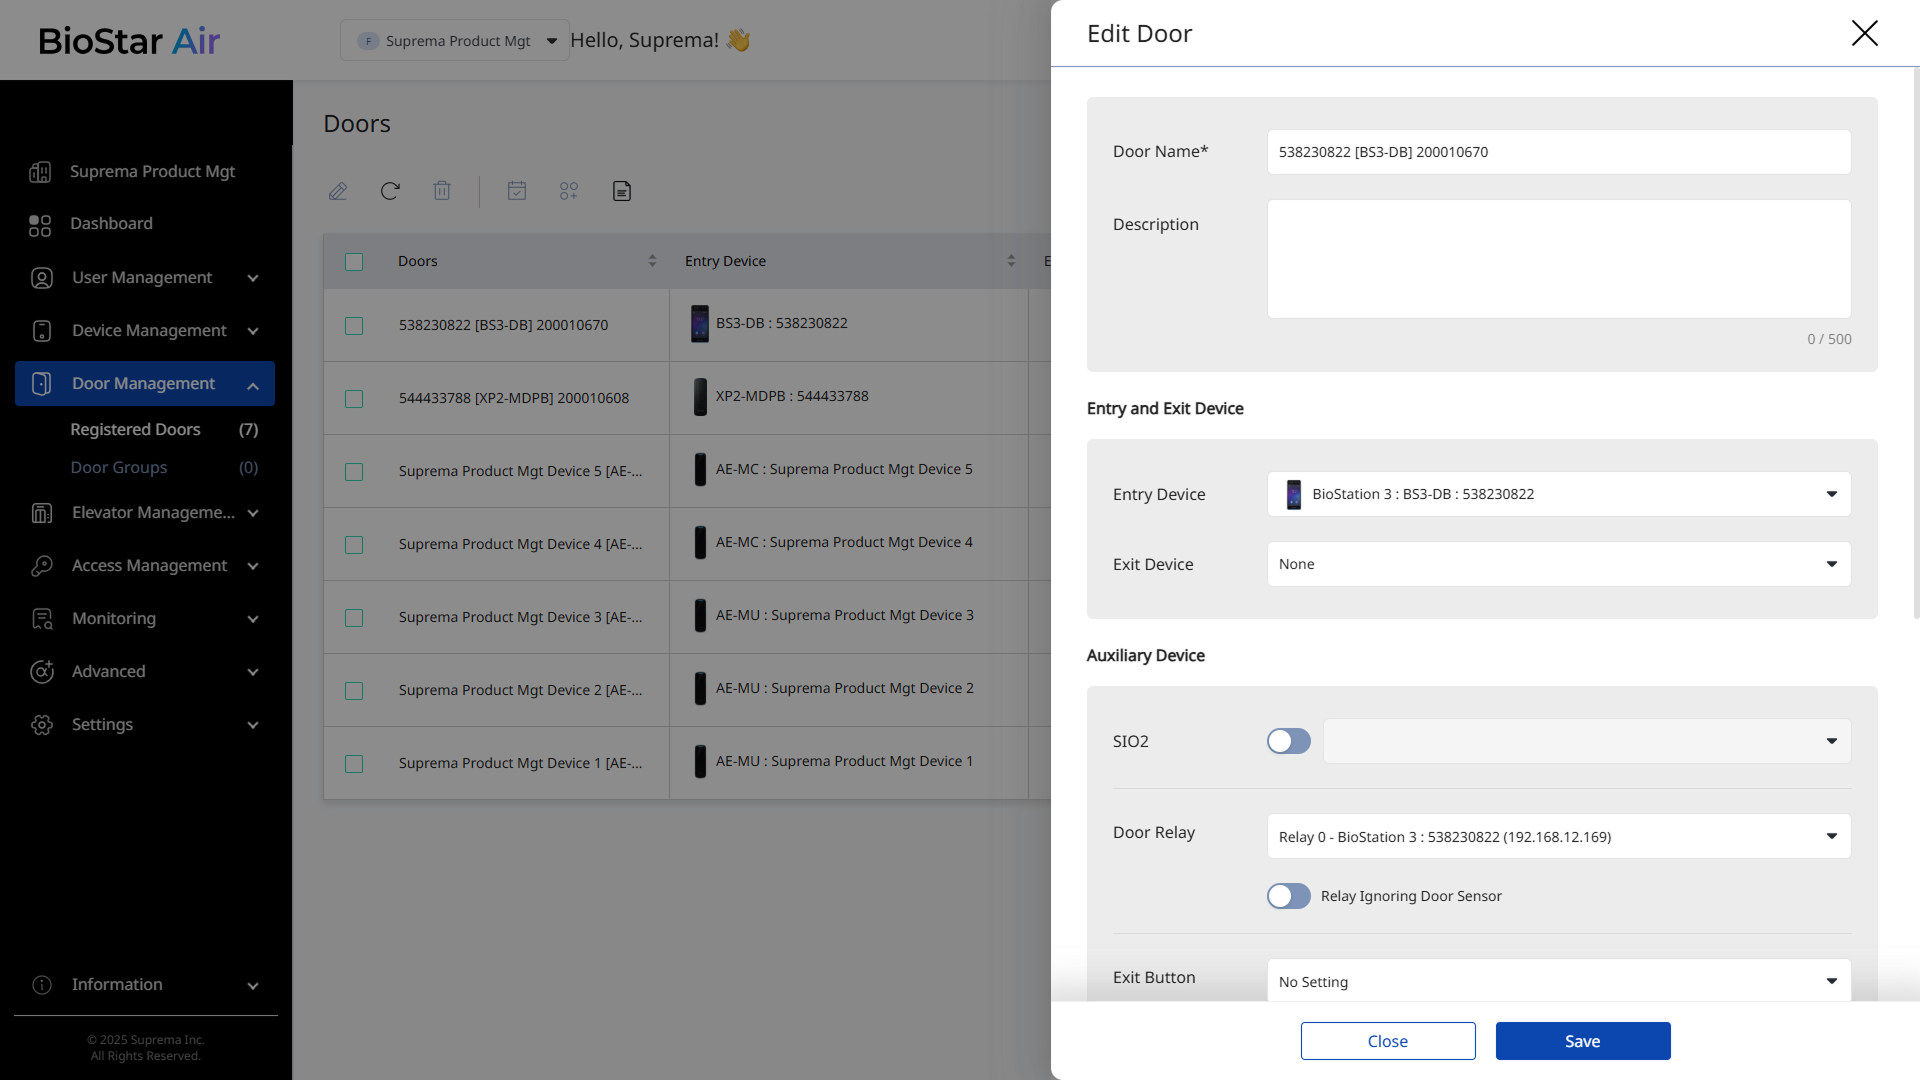
Edit doors
Follow these steps to edit door details and settings.
-
Click Door Management → Registered Doors in the left sidebar.
-
Click the door you want to edit in the list. Or select the checkbox to the left of the door and click in the top left sidebar.
-
When the Edit Door panel appears, edit Door Name and Description.
-
Select the device for door entry authentication from the Entry and Exit Device section.
-
Entry Device: Select the device that authenticates users entering the door.
-
Exit Device: Select the device that authenticates users exiting the door.
-
-
Configure the relay device in the Auxiliary Device section.
-
Camera: Connect CCTV cameras for event logs.
-
Door Relay: Select the relay device that controls the door lock.
-
Relay Ignoring Door Sensor: Set the relay to ignore the door sensor.
To use the camera, enable the Video Management feature under Settings → Site → Additional Features.
-
-
Configure additional settings.
-
If installed, select the port to set to Exit Button.
-
Select the port to set to Door Sensor.
-
Set how long the door remains open in Open Time. (Default: 3 seconds)
-
-
Click Save to apply the changes.
-
For security, the relay must always connect to the device on the secure side of the door. Use the exit device's relay or an SIO2 module.
-
When configured for a direct cloud connection, both the entry and exit devices require separate network cables.
-
When using a primary-secondary configuration, the primary device (usually the exit device) needs a network connection and the secondary device connects to the primary via RS-485.
-
For more information on configuring the SIO2 secure module, see Configure SIO2 Secure Module.
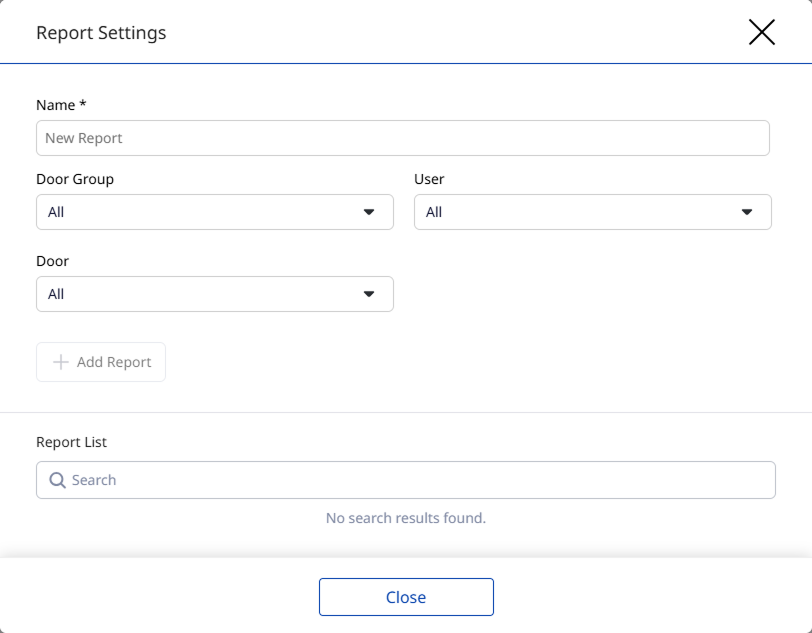
Generate door reports
Generate door reports and send them to the administrator's email. A door report provides information about users who accessed through the door.
-
Click Door Management → Registered Doors in the left sidebar.
-
Click at the top of the door list.
-
When the Report Settings window appears, enter a report name.
-
Select the items to include in the report.
-
Click Add Report to save the report.
-
A Report List is created and a download link is sent to the administrator's email.
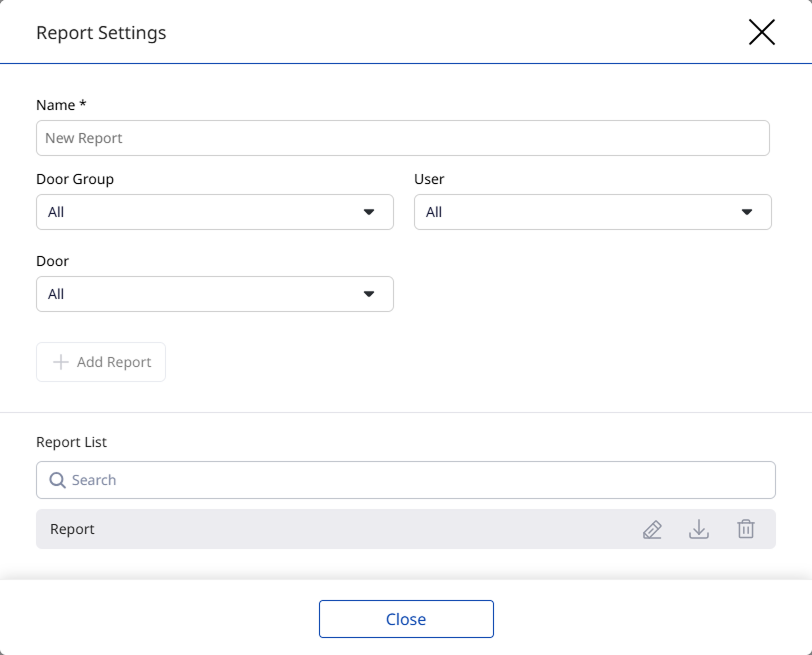
In Report List, search for, edit, download, or delete generated reports.