Invite Technicians to the Partner Portal
Using technician accounts, grant partners and installers limited access to sites without a shared admin account. Technicians are managed centrally in the Partner Portal and can be assigned to individual sites.
Key Benefits of Technician Accounts
-
Enhanced Security: Reduce the risk of unauthorized access by removing shared admin accounts
-
Compliance: Help meet privacy regulations (such as GDPR) and offer an option to restrict access to user data
-
Access Control: Configure granular permissions from device access to full administrator privileges
-
Audit Trail: Record individual technician activities in audit logs to track accountability
-
Increased Efficiency: Assign and manage technicians across multiple sites without login conflicts
-
Immediate Revocation: Revoke technician access immediately, at any time
Invite technicians
Partners must invite technicians to create technician accounts before granting site access. Technician accounts are created using an email address. Invited technicians activate their accounts by accepting the invitation sent to their email.
-
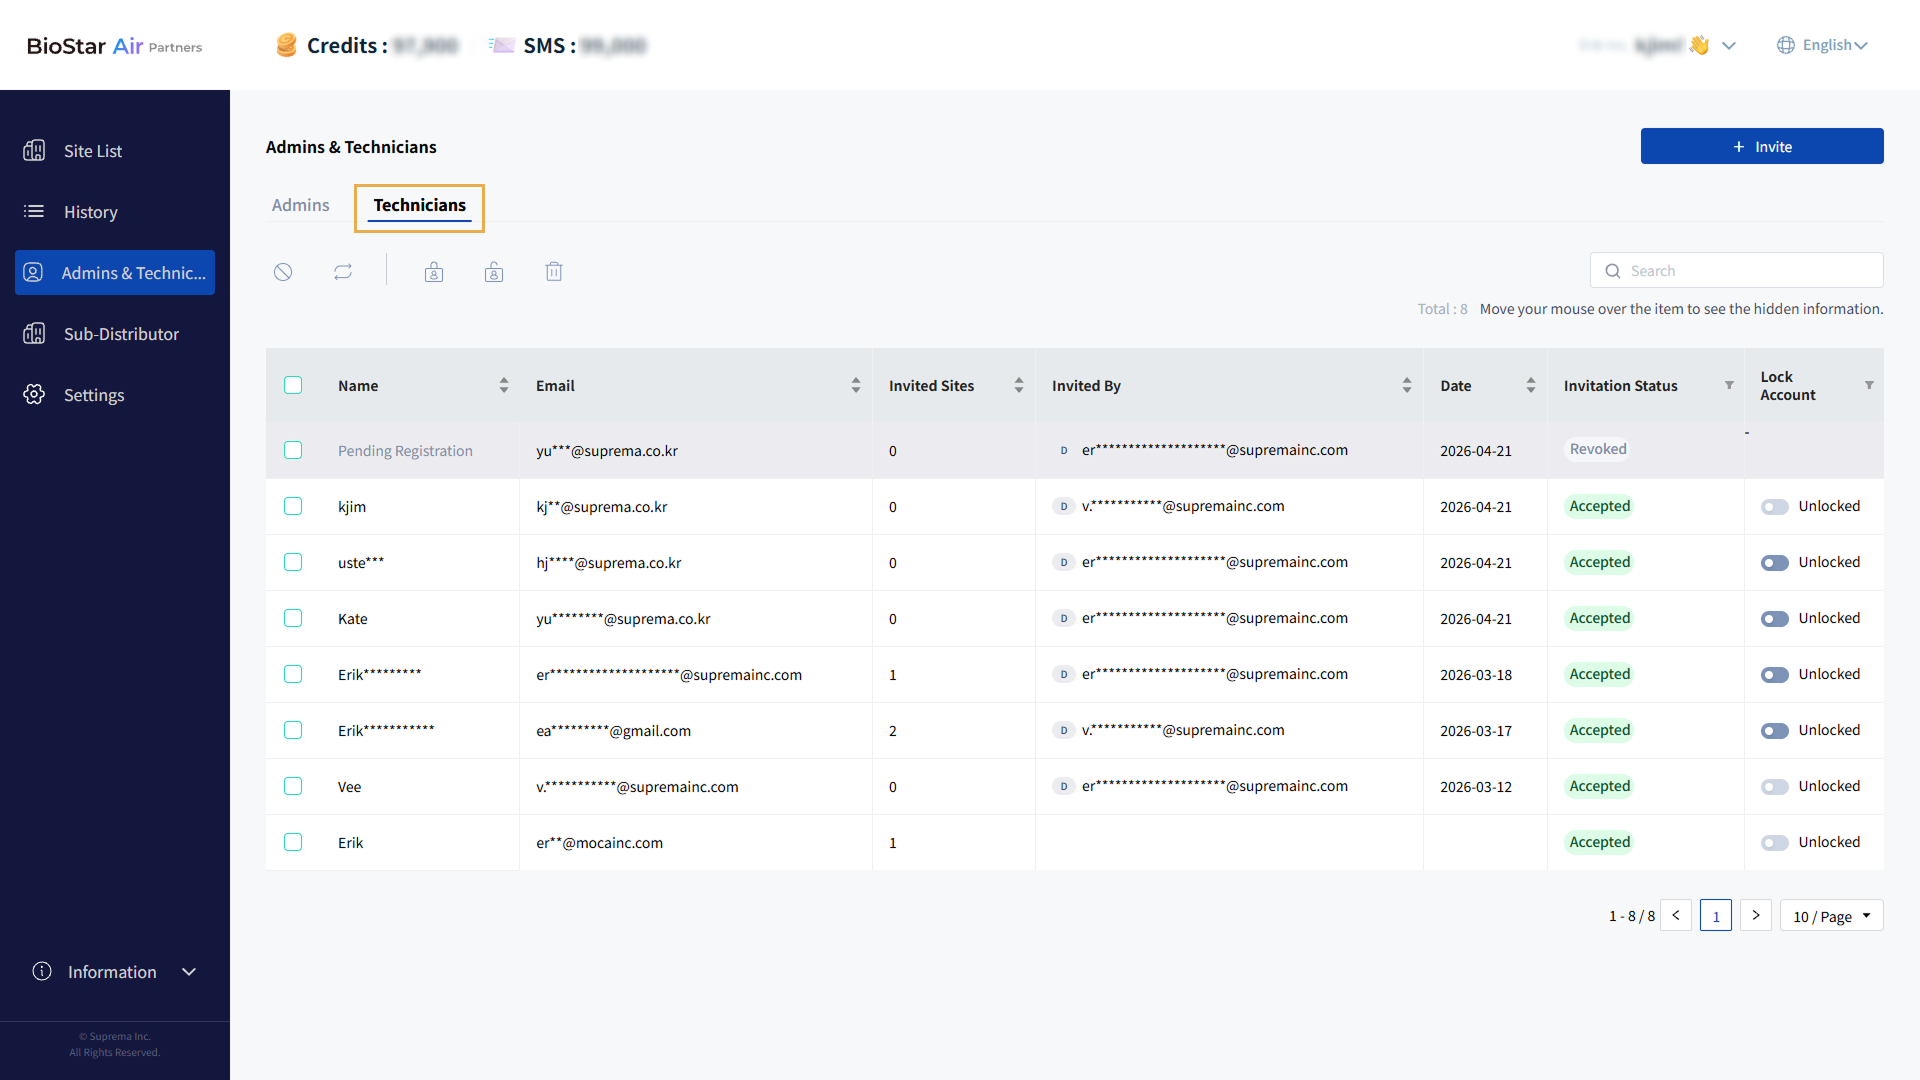
Log in to the Partner Portal.
-
Click Admins & Technicians in the left sidebar.
-
Click the Technicians tab.
-
Click Invite at the top right of the screen.
-
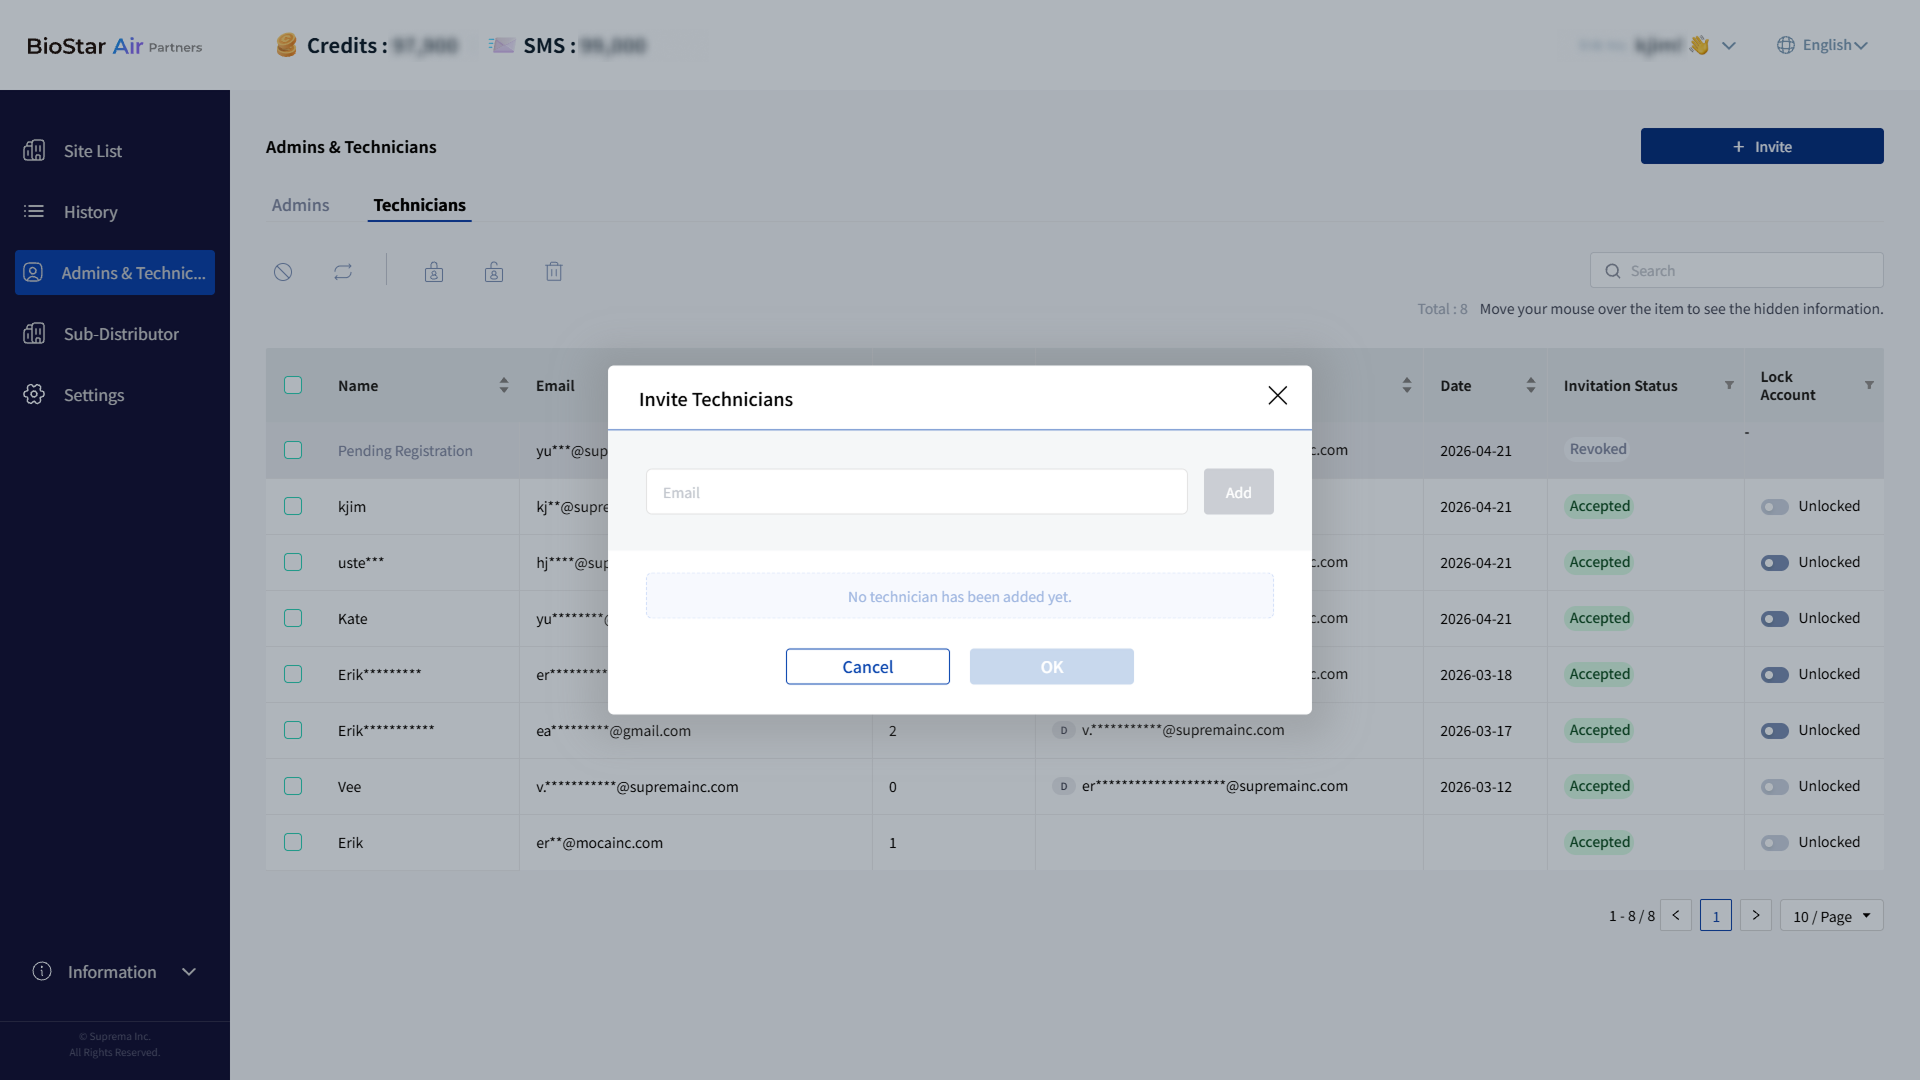
When the Invite Technicians window appears, enter the email address of the technician you want to invite.
-
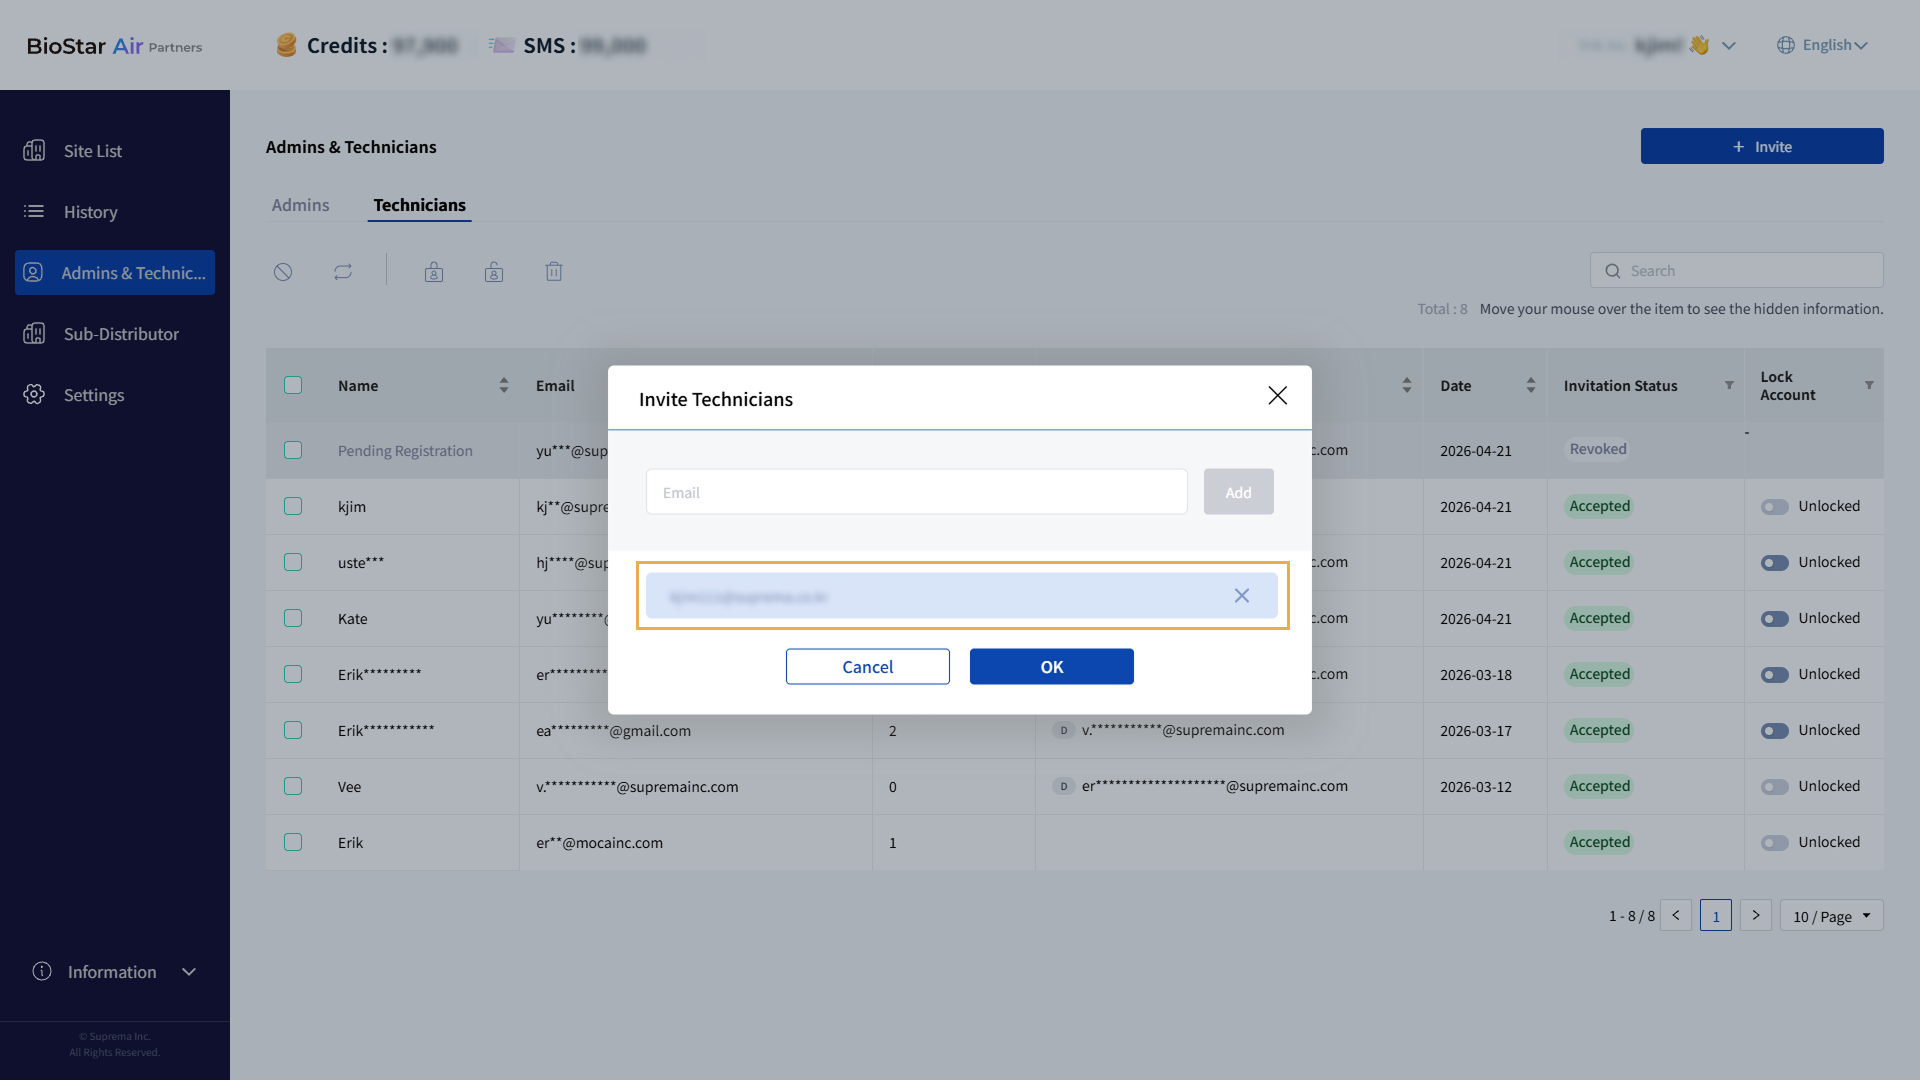
Click Add when it becomes active.
-
Added technicians appear below the email address input field. Repeat steps 5–6 to invite additional technicians.
-
After adding all technicians, click OK.
-
When the confirmation message appears, click Confirm.
-
Inviting technicians to the Partner Portal does not grant them access to sites; you must invite technicians to each site separately. For more information on inviting a technician to a site, see Assign Technicians to a Site.
-
Technicians who sign up using the invitation email can sign in to the Partner Portal, but their access to menus is limited. They can only change their own password, delete their account, and set their language.
Invitation status
After inviting technicians, partners can check each technician’s invitation status in the technician list.
Pending sign-up
The invitation status is shown as Pending until the invited technician accepts the invitation. Invited technicians can click the link in the email to register an account or sign in to the Partner Portal.

Invited technicians have up to 7 days to accept the invitation. After 7 days, the invitation expires and the status changes to Expired. If an invitation expires, partners can resend the invitation link so the technician can sign up again. For more information on resending invitation links, see #resendInvitation.
Sign-up complete
When a technician accepts the invitation email and completes sign-up, their invitation status changes to Accepted.

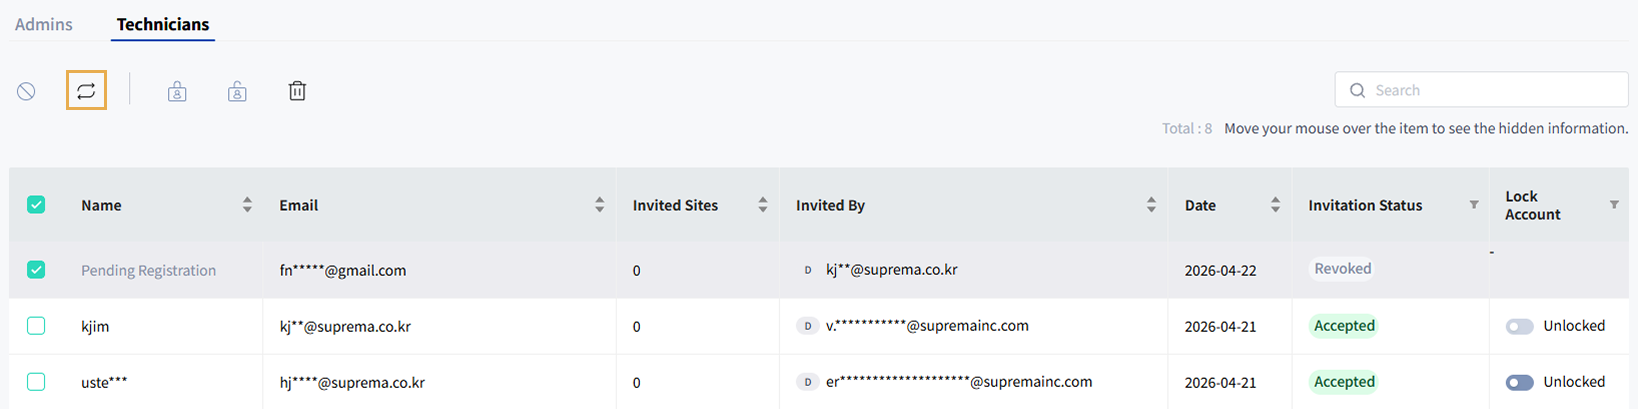
Invitation revoked
Partners can cancel an invitation if they entered the technician's email incorrectly, or if the issue has been resolved and the invitation is no longer needed. The invitation status changes to Revoked. For more information on revoking a technician's invitation, see #revokeInvite.

Invitation revoked
Partners can cancel an invitation if they entered the technician's email incorrectly, or if the issue has been resolved and the invitation is no longer needed. After you cancel an invitation, the user will not be able to use the invitation link to sign up.
-
In the technician list, select the checkbox for each technician whose invitation status is Pending. You can select 1 or more technicians.
-
Click at the top left of the technician list.
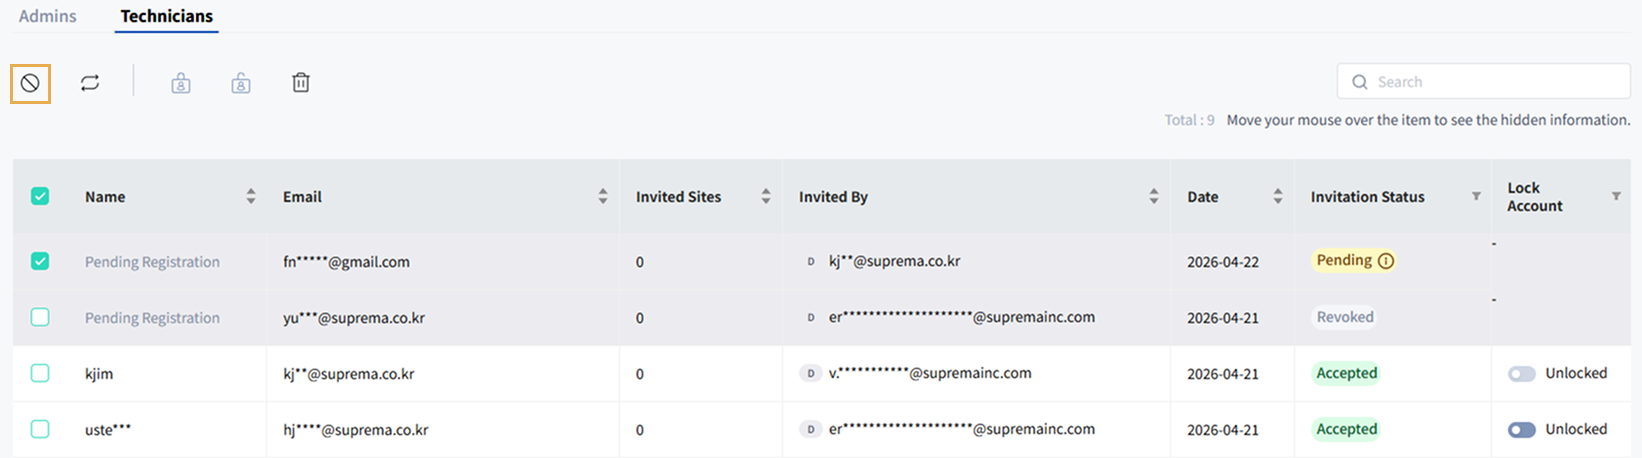
Only technicians with status Pending can have their invitations revoked.
-
If a popup message appears, review the message and click Yes.
-
When the success message for the canceled invitation appears, click Close.
The invitation status of a revoked technician changes to Revoked in the technician list.
Resend invitation link
Resend the invitation link if an invited technician did not receive the invitation email, lost it, or the invitation link has expired.
-
In the technician list, select the checkbox for each technician whose invitation status is Pending, Expired, or Revoked. You can select 1 or more technicians.
-
Click at the top left of the technician list.
-
If a popup message appears, review the message and click Yes.
-
When the success message for resending the invitation link appears, click Close.
After resending a technician's invitation link, their invitation status changes to Pending in the technician list.
Manage technicians
After the invited technician accepts the email invitation and completes sign-up, partners can manage the following items in the technician list.
-
Lock or unlock technician accounts
-
Edit site access
-
Delete technician accounts
Lock or unlock technician accounts
Partners can lock or unlock technician accounts using the Lock Account option. Locking a technician account prevents the technician from logging into the Partner Portal and assigned sites. Account information is retained, allowing reactivation when needed.
In the Lock Account column, locked technicians are shown as Locked, and unlocked technicians are shown as Unlocked.

-
The accounts of technicians who have completed the sign-up process are unlocked by default.
-
Although a Partner Portal admin account may appear in the technician list if it has technician access to certain sites, that admin account cannot be locked or unlocked from the technician list.
Lock or unlock an individual technician account
In the technician list, click the toggle button in the Lock Account column to lock or unlock an individual technician account.
-
In the technician list, click the toggle in the Lock Account column.

-
If a popup message appears, review the message and click Yes.
-
When the success message confirming the account lock or unlock appears, click Close.
Lock or unlock multiple technician accounts
Select multiple technician accounts in the technician list to lock or unlock them in bulk.
-
In the technician list, click the checkbox for each technician to lock or unlock. You can select 1 or more technicians.
-
Click or in the upper left corner of the screen.

-
If a popup message appears, review the message and click Yes.
-
When the success message confirming the account lock or unlock appears, click Close.
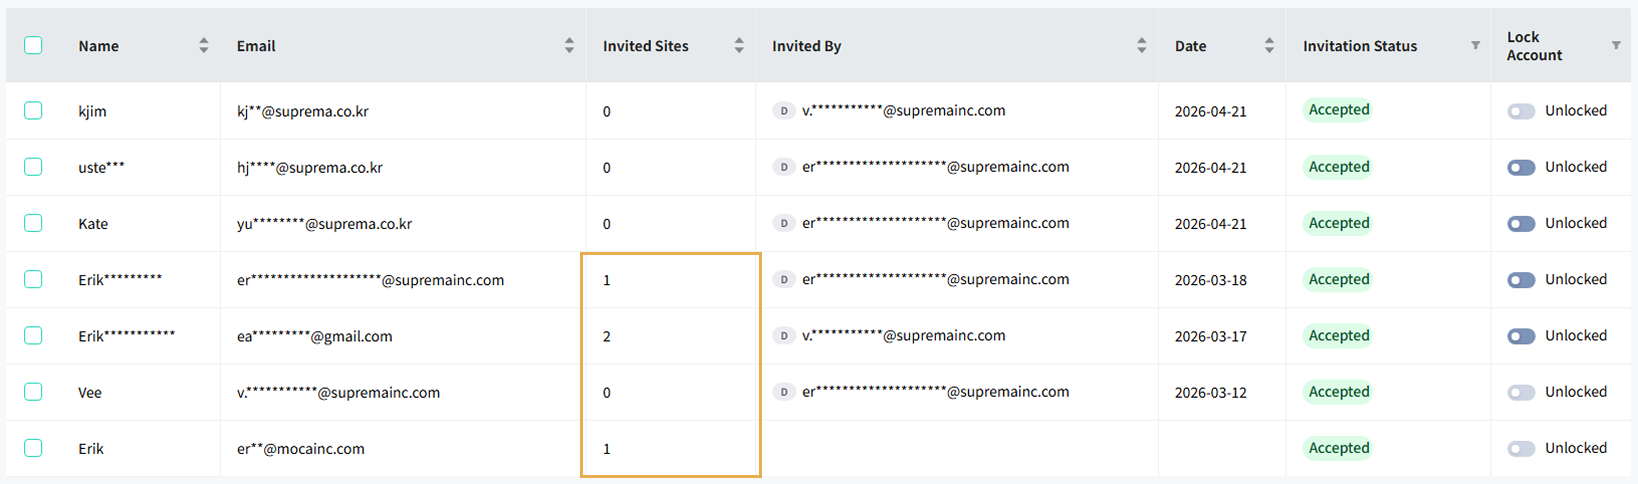
Edit site access
You can modify a technician's site access.
-
In the technician list, click a technician whose Invited Sites column indicates 1 or more sites.
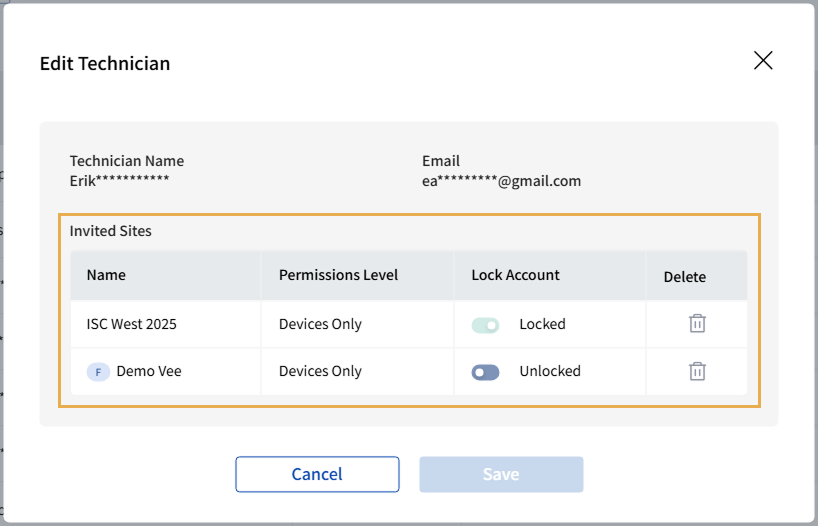
-
When the Edit Technician window appears, check the list of sites the technician is invited to in Invited Sites.
-
Click the toggle button in the Lock Account column to allow or block site access.
-
Click Save to save the changes.
-
When a success message appears confirming the site access changes, click Close.
-
Once a technician is assigned to a site and permissions are set in the Partner Portal, only an administrator account can change those permissions in the BioStar Air admin portal.
-
If a site administrator locks a technician's site access in the BioStar Air portal, it cannot be unlocked from the Partner Portal. To modify a technician's site access, use an account with administrator privileges for that site in the BioStar Air portal.
-
For more information on granting site access to a technician, see Assign Technicians to a Site.
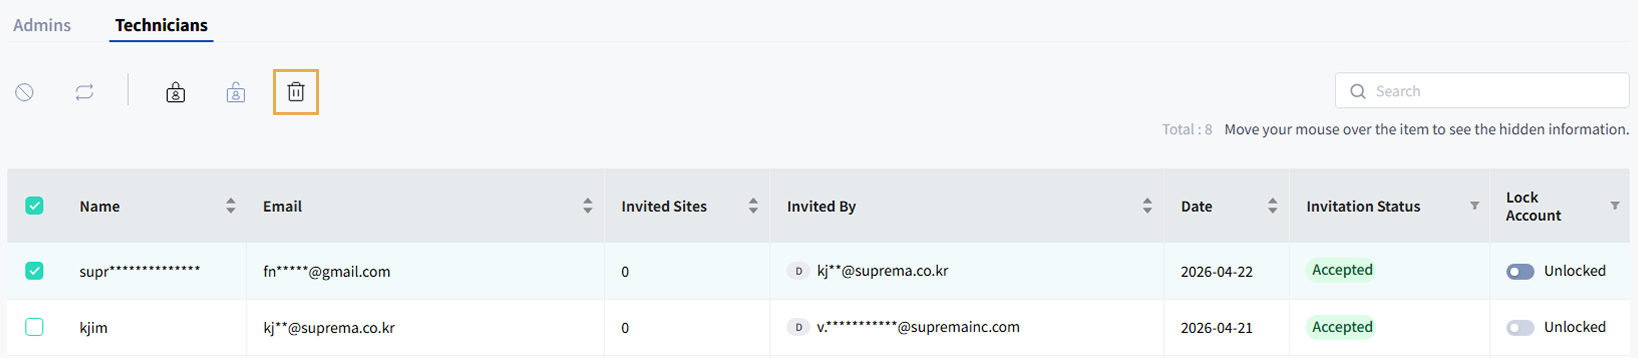
Delete technician accounts
If you no longer need technician's support, you can delete their account. Deleting a technician account prevents the technician from logging in to the Partner Portal and permanently removes all information associated with the account from the system.
-
In the technician list, click the checkbox of the technician you want to delete. You can select 1 or more technicians.
-
Click in the upper left of the screen.
-
If a pop-up message appears, review it and click Confirm.
-
When the account deletion success message appears, click Close.
Deleted technician accounts no longer appear in the technician list.