Register Users
Guidelines for registering new users. You can enter information such as the user's photo, name, email, and phone number, and set the user's access permissions and biometric information.
Enter user information and set access permissions, then enroll credentials.
-
Click User on the Launcher page.
-
Click the New User button in the upper right corner of the User page.

-
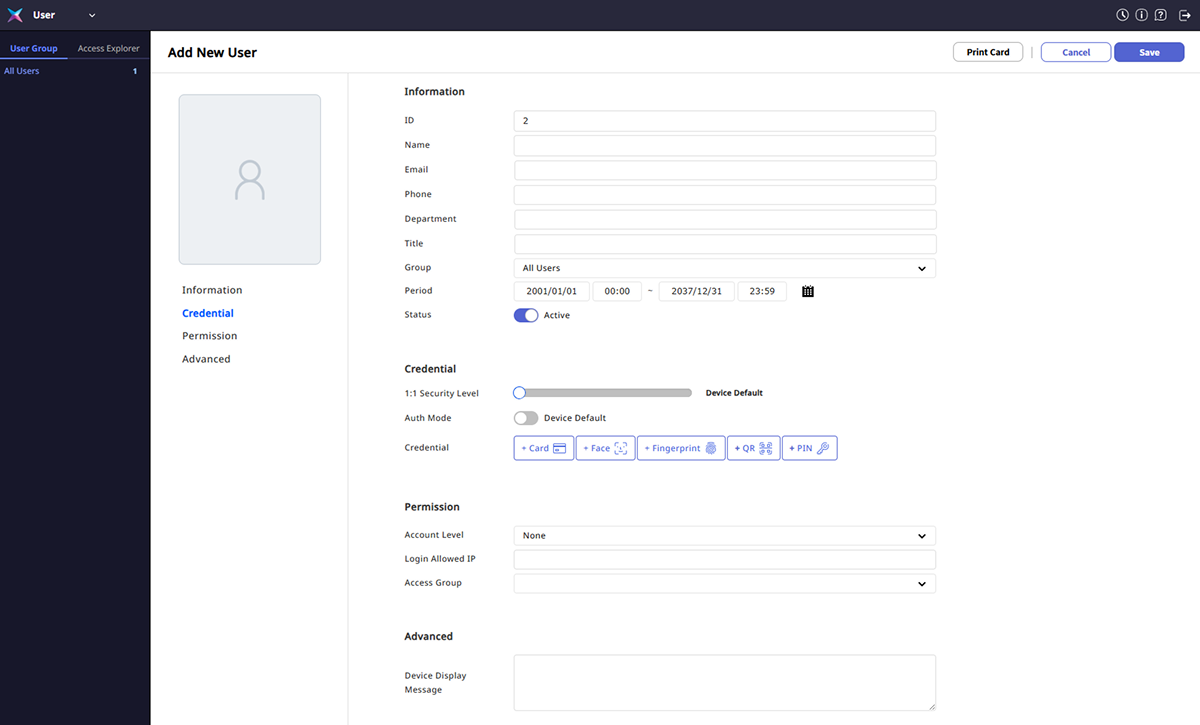
Enter user information on the Add New User screen.
-
Enter the user's basic information in the Information section.
-
Enroll the user's biometric information in the Credential section.
-
Set BioStar X operation and access permissions for the user in the Permission section.
-
In the Advanced section, you can enter a message to display on the device when the user accesses it.
-
Enter all information and click Save in the upper right corner of the screen.
The registered user appears in the user list. For detailed information on input and settings by section, refer to the below.
Enter the user's basic information in the Information section. You can check the detailed information for each field.
Enroll the user credentials and set access authentication method in the Credential section.
Check how to set the user's access permissions in the Permission section.
In the Advanced section, you can set the message to display on the device when the user accesses it or exclude that user from synchronization when linking with Directory Service.
-
Access permissions and biometric information are optional. You can modify or add after saving the basic information.
-
To print user information as a card using the card template, click Print Card at the top right of the screen. For more information, see Card Printer.
-
Click Cancel at the top right of the screen to cancel user registration.