Register and Edit Users by Scanning an ID
Instead of entering user details one by one, you can scan an ID to get the user’s name and ID photo, then register or edit the user.
Before you start
-
Connect the DESKO ID Scanner to the client PC to use scan ID.
-
Before registering a user with a ID scan, select the data to get from the ID. For more information on Scan ID settings, see Set Up ID Scan.
The Scan ID feature currently supports only passport scans.
Register a user by ID scan
-
Click User on the Launcher page.
-
Click New User in the upper right corner of the User page.

-
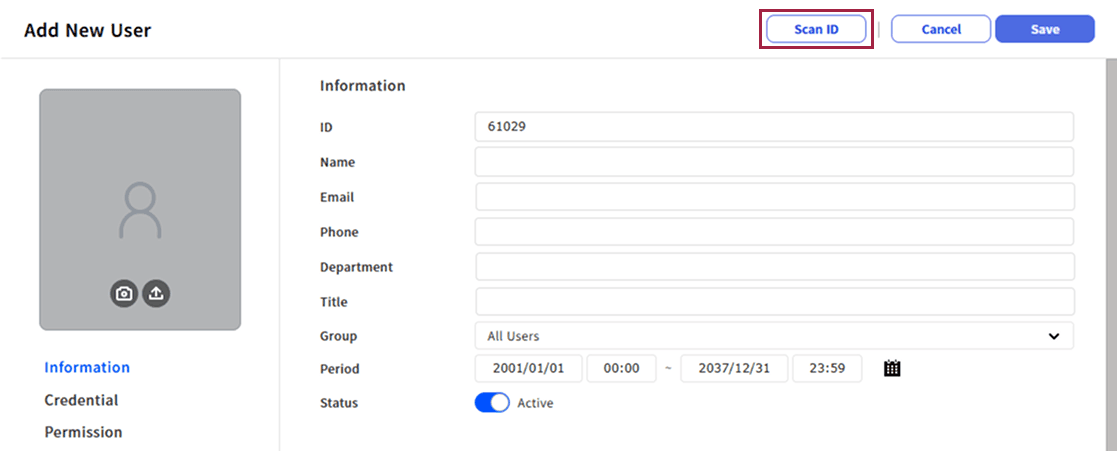
Click Scan ID in the upper right of the Add New User screen.
-
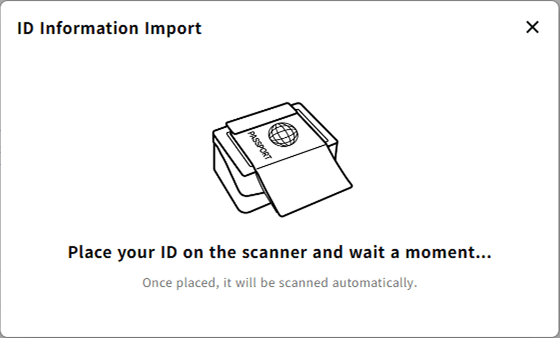
When the ID Information Import window appears, place the ID on the scanner.
-
After the ID scan success message appears, select whether to enroll the ID photo as a facial credential.
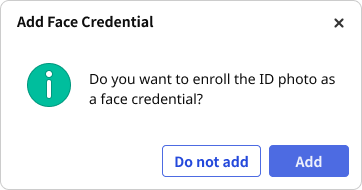
This message appears when Face Credential is set to Require Confirmation under Settings → Account → ID Scanning. If you set the Do Not Ask option, this message will not appear and it will be enrolled immediately as a facial credential.
-
Review the information from the ID scan and edit it if needed.
-
Click Save in the upper right corner of the screen to save the user.
Edit a user by ID scan
-
Click User on the Launcher page.
-
In the user list, double-click the user to edit with a ID scan.
-
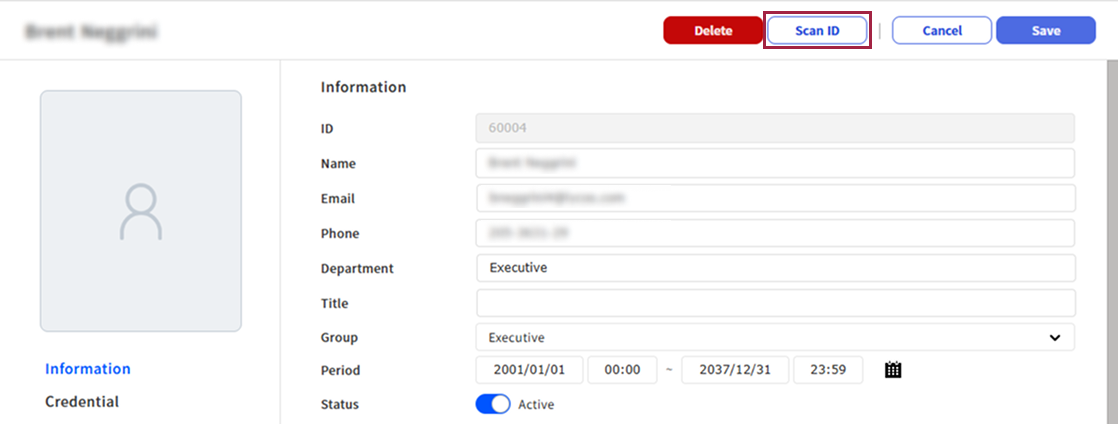
Click Scan ID in the upper right of the edit user screen.
-
When the ID Information Import window appears, place the ID on the scanner.
-
After the ID scan success message appears, select whether to enroll the ID photo as a facial credential.
This message appears when Face Credential is set to Require Confirmation under Settings → Account → ID Scanning. If you set the Do Not Ask option, this message will not appear and it will be enrolled immediately as a facial credential.
-
Review the information from the ID scan and edit it if needed.
-
Click Save in the upper right corner of the screen to save the updates from the scan.
If the user has 2 or more facial credentials enrolled, editing via ID scan overwrites the first enrolled facial credential.
Error messages
If a problem occurs while scanning a ID, a message appears with the cause and solution. Use the information below to resolve the error.
Scan failed
If a problem occurs while the system automatically reads the ID on the scanner, one of the following messages appears.
| Cause | Error message |
|---|---|
| ID security feature (UV pattern, etc.) verification failed | Invalid ID. Check the ID and try again. |
| The ID was not recognized within the specified time | The ID was not scanned in time. Please try again. |
| Other scan errors, such as the ID moving during scanning or page detection failure | Unable to scan the ID. Check the ID and scanner, then try again. |
If this message appears, click Retry and scan again. Check that the ID is placed correctly on the scanner, then try again.
Click Retry to restart automatic recognition from the Place your ID on the scanner and wait a moment... instructions.
Scanner connection error
If the scanner connection fails, the following message appears. This error does not provide a retry button. Follow the instructions, then click Scan ID again to start scanning from the beginning.
| Scenario | Error message | Solution |
|---|---|---|
| The scanner is not connected to the client PC | The scanner is not connected. Please check the device connection and try again. | Check the connection between the ID Scanner and the client PC. |
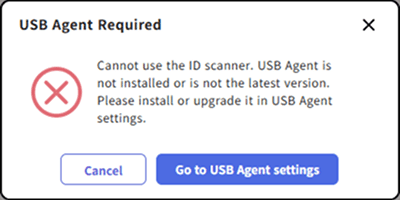
USB Agent Required
Install the latest version of USB Agent before using the ID Scanner. If USB Agent is missing or outdated, an error dialog appears after clicking the Scan ID button.
-
Cancel: Close the error window and do not scan.
-
Go to USB Agent settings: Go to Settings → Device → USB Agent. On that screen, upgrade USB Agent to the latest version, then try scanning again.