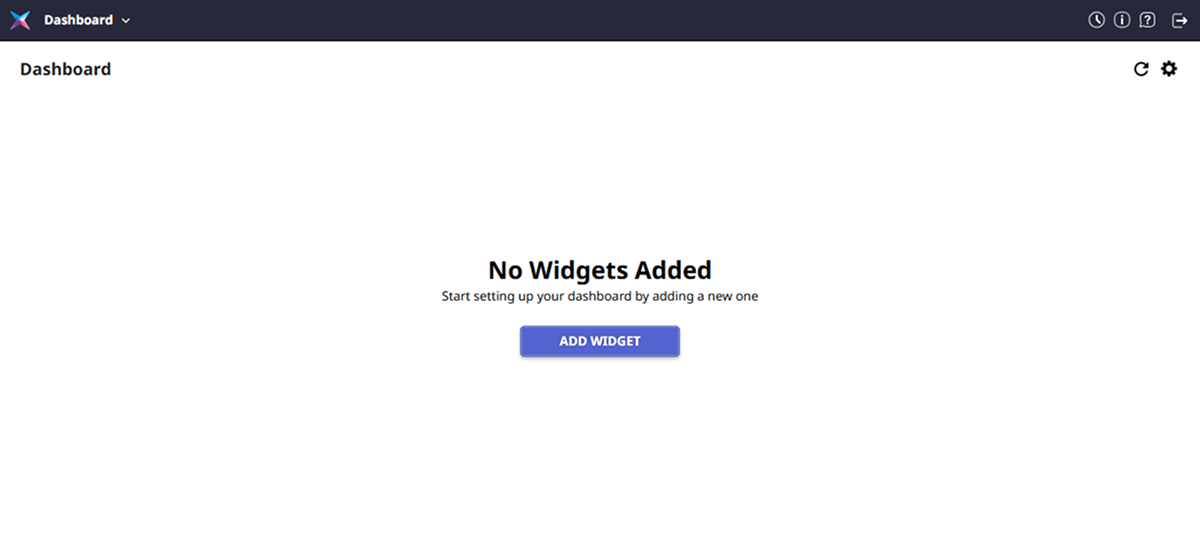
Add Widgets
The BioStar X dashboard is a customizable monitoring screen where users can freely arrange the information they want. By adding various widgets, you can configure the key information of the access control system according to your work environment.
The types of widgets that can be added are as follows.
-
Chart: Visualize access event data in bar, line, or pie charts
-
Counter: Display the number of events per day/week in numbers
-
Real-time events: Monitor all events occurring in BioStar X in real-time
-
Real-time access monitoring: Display authentication success user information for specific devices in real-time
-
System usage status: Display registration status of users, devices, access points, etc. in numbers
-
Door control: Check the status of selected access points and control them remotely
-
Text: Place custom text such as announcements or widget titles
You can gain the following advantages from the widgets placed on the dashboard.
-
Customized configuration: Select only the information needed for work and arrange it on one screen
-
Real-time monitoring: Instantly check access events and system status
-
Intuitive visualization: Visual representation of data through charts and counters
-
Efficient management: Improve work efficiency by integrating monitoring and control features
Add widgets
You can add widgets to Dashboard to check the information you want.
-
Click Dashboard in the Launcher page.
-
Click the Add Widget button.
-
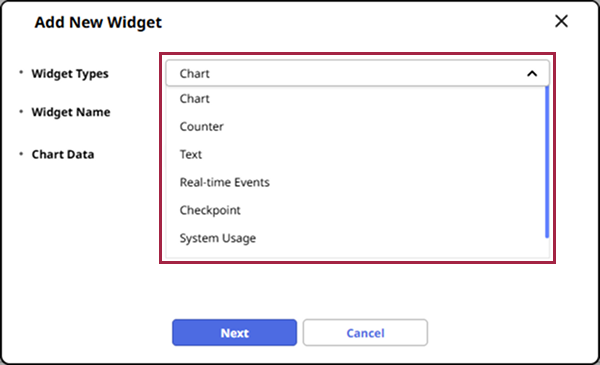
When the Add New Widget window appears, select the desired item in Widget Type and enter or set the required fields.
-
Complete the widget settings and click the Apply button.
-
When the widget is created in the widget display area, adjust its size or place it in the desired location.
-
Once you have completed all settings, click Apply in the upper right corner of the screen.
If a widget has already been added, click the icon in the upper right corner of the screen. Once you enter Dashboard Settings mode, click the Add Widget button.
Types of widgets
-
The default widget size is set differently for each widget and is optimized to look best at the default.
-
All widgets can be resized by dragging the lower-right corner.
The image above is an example screen and may differ from the actual screen.
Chart
Selecting desired chart data enables the display of the number of events that occurred in a chart.
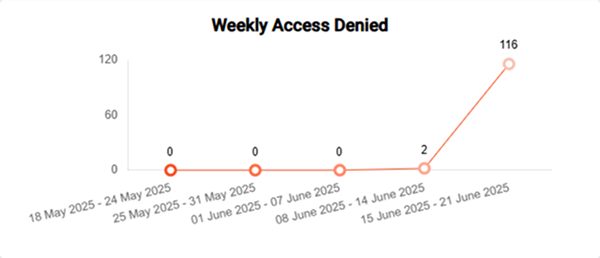
-
Chart Data: From the daily or weekly event list, select the desired chart data.
- Daily Access Granted, Daily Access Denied, Daily Communication Issue, Daily APB Violation, Weekly Access Granted, Weekly Access Denied, Weekly Communication Issue, Weekly APB Violation
-
Chart Type: Select the desired type among Vertical Bar, Horizontal Bar, Line, and Pie.
-
Color Schemes: Select the desired color among 5 color schemes.
The charts shown when selecting Color Schemes are random values for preview, not actual values.
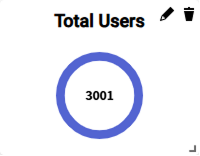
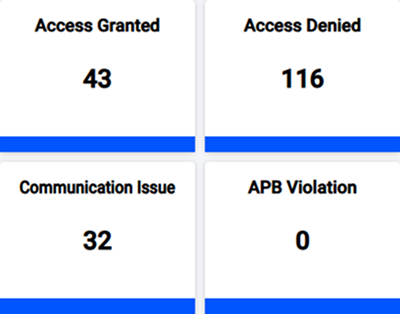
Counter
Selecting desired counter data enables the display of the number of events that occurred as a number.
-
Counter Data: From the daily or weekly event list, select the desired counter data.
- Daily Access Granted, Daily Access Denied, Daily Communication Issue, Daily APB Violation, Weekly Access Granted, Weekly Access Denied, Weekly Communication Issue, Weekly APB Violation
Text
You can input and place the desired text in the widget area of Dashboard. After creation, you can place it in the required location and use it as a title for a widget or as a notice.
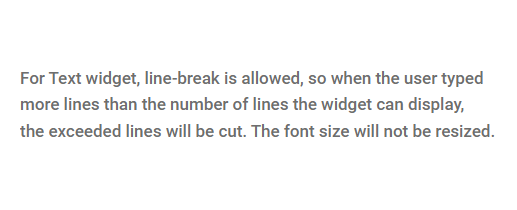
If you select the Remove Background option while creating a Text widget, transparency will be applied to the background.
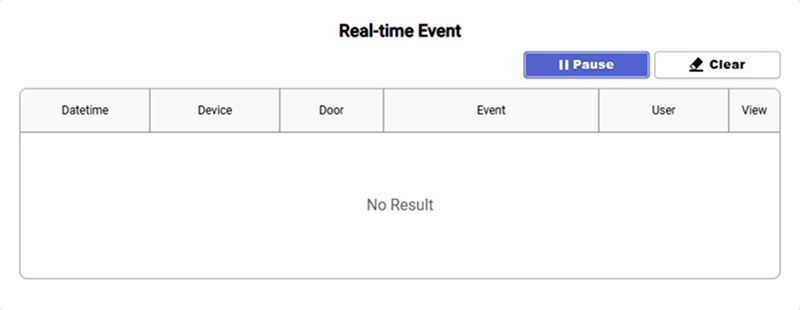
Real-time events
Shows events occurring in BioStar X in real-time. You can check events by filtering specific events, users, doors, and devices.
-
Pause: To pause the real-time event.
-
Play: Resume a real-time event that stopped.
-
Clear: The entire captured record will be removed.
If you navigate to another page and then return to Dashboard, the list will be cleared and events will be recorded again.
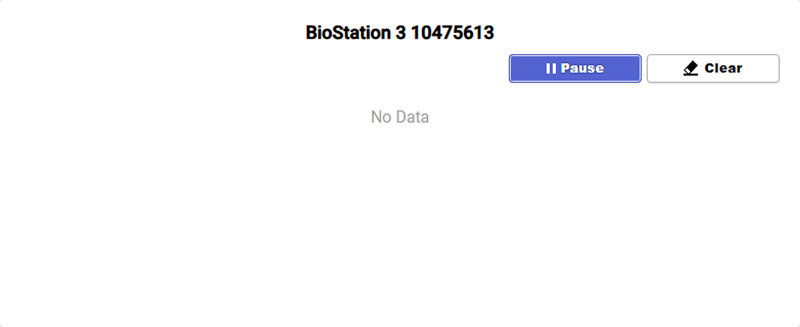
Real-time access monitoring
Select one device and display the profile photo and information (User, Date, Device) of the user who successfully authenticated to the selected device in real time.
-
Pause: To pause the checkpoint.
-
Play: To resume the checkpoint that paused.
-
Clear: The entire captured record will be removed.
Checkpoint are recorded for up to 5 people.
System usage status
The various usage statuses of BioStar X are displayed in numbers.
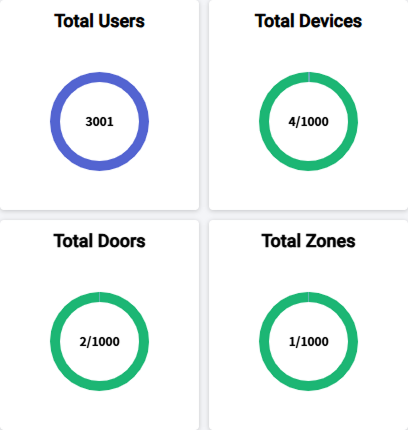
The System Usage that can be displayed is as follows:
- Total Users, Total Cards, Total Fingerprints, Total Faces, Total Faces, Total QR/Barcode, Total Mobile Access, Total Devices, Total Doors, Total Advanced ACs, Total Access Groups, Total User Groups, Total Device Groups, IR Face
Door control
Select one door to check and control its status.

The following items can be controlled with the Actions buttons:
- Open, Normalize, Manual Lock, Manual Unlock, Clear Alarm, Clear APB
The name of the Door Control widget is automatically assigned to the name of the door and cannot be modified.
Set widget data refresh interval
You can set the data refresh interval of widgets added to the dashboard.
-
Click Dashboard in the Launcher page.
-
Click the icon in the upper right corner of the screen.
-
Once you enter Dashboard Settings mode, set Auto Refresh Interval in the general settings at the bottom of the screen.