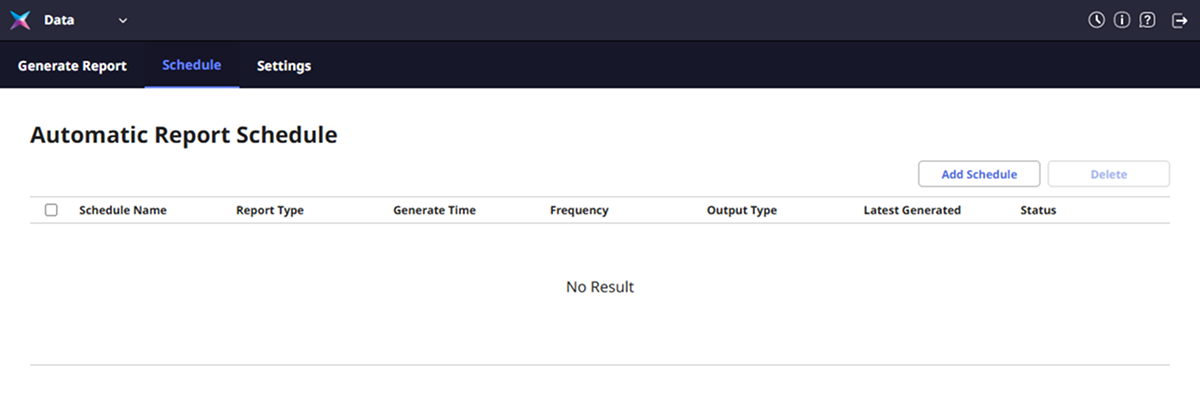
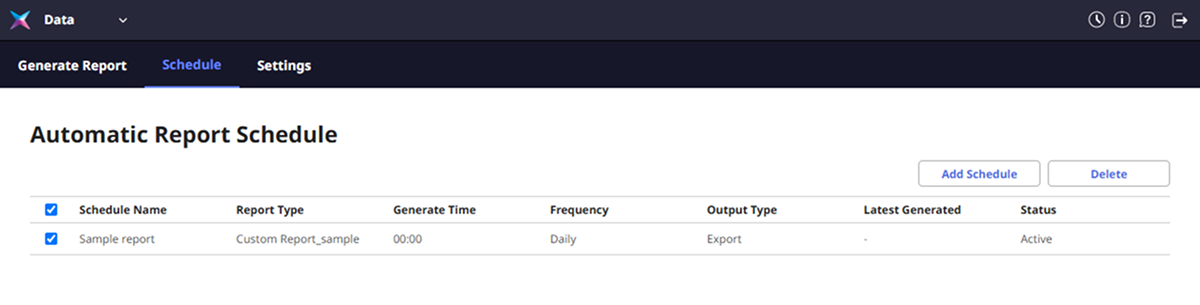
Automatic Report Schedule
Set a schedule to automatically generate Custom Report created by setting the DYNAMIC period.
Add auto-generated schedule
-
Click Data or select Data from the shortcut list at the top left of the screen on the Launcher page.
-
Click Schedule tab.
-
Click Add Schedule at the top right of the screen.
-
When the Add Automatic Report Schedule screen appears, set each item.
Information setting
Set basic information of Automatic Report Schedule.

- Schedule Name: Enter the schedule name.
Report and schedule settings
Set the schedule to be automatically generated for each report.

-
Report: Select a custom report to automatically generate. Only custom reports set to DYNAMIC period will appear.
-
Frequency: Set the frequency to automatically generate reports.
-
Generate Time: Set the time to automatically generate reports.
For more information on creating custom reports, see Generate Report.
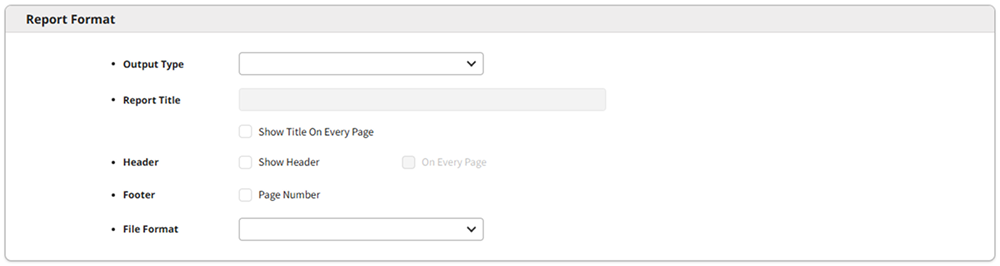
Report format settings
Set the format for each report.
-
Output Type: Set the automatically generate method of reports.
-
Report Title: Select Show Title On Every Page to display the report name as the title on every page.
-
Header: If Show Header is selected, the header is displayed when the report is created. Select On Every Page to display the header on every page.
InfoThe header may vary depending on the reports.
-
Footer: Set whether to display page numbers.
-
File Format: Set the file format for exporting reports.
- Click Apply to save the settings.
If all settings are complete, set the path to save the report. For more information, see Settings.
Delete auto-generated schedule
-
Click Data or select Data from the shortcut list at the top left of the screen on the Launcher page.
-
Click Schedule tab.
-
Click the checkbox of the schedule to delete from the auto schedule list.
-
Click Delete at the top right of the screen.