Enroll Face
You can enroll the user's face as a means of authentication for access control. Facial enrollment is an authentication method that captures the user's face with a camera. The user's facial information captured by the camera can be enrolled remotely on a mobile device.
Precautions when enrolling face
- Keep the distance between the device and your face at 60-100 cm when enrolling your face.
-
Do not change your face expression.
-
Do not wear masks, hats, or eye patches.
-
Do not enroll a face wearing a mask. It may increase the False Acceptance Rate (FAR) if both faces with and without a mask are enrolled.
-
Do not raise head up or lower head.
-
Do not wear thick makeup.
-
Do not close your eyes.
-
Make sure that both of your shoulders correctly appear on the screen.
-
Stand still and enroll your face by staring at the screen.
-
Be careful not to display two faces on the screen. Enroll one person at a time.
-
If you do not follow the instructions on the screen, the face enrollment may take longer or may fail.
You can use the import from CSV feature or enroll multiple users' faces at once, or send an email link to multiple users for them to enroll their faces directly on a mobile device. For more information, see Batch Enroll Faces.
Enroll by device
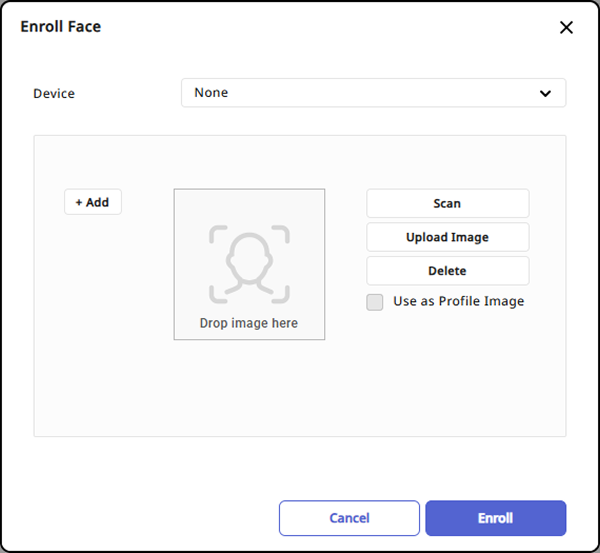
Click + Face in the Credential section. When the Enroll Face window appears, set each item and click Enroll.
-
Device: Select the device for enrolling the face.
-
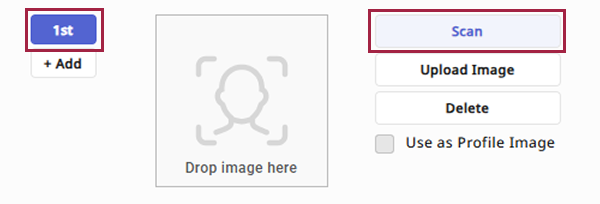
+ Add: Click to enroll the face. A maximum of 2 faces can be added.
-
Scan: Click the added N-th button to scan the face. Follow the on-screen instructions to scan the face.
-
Upload Image: You can upload a face image without scanning.
-
The maximum file size for supported image types is 10MB.
-
Supported image formats include JPG, JPEG, and PNG.
-
-
Use as Profile Image: Select this option to use the enrolled face image as the profile image.
-
Delete: You can delete the face credential. Select the number to delete and click the button.
-
Devices that can enroll faces are as follows:
-
BioStation 3 Max
-
BioEntry W3
-
BioStation 3
-
FaceStation F2
-
-
If the face authentication rate is low, delete face information and enroll a new face.
Enroll with a webcam or photo image
You can take a photo with a webcam connected to your PC, set the captured photo as a user profile picture, and enroll the face as a credential. Or you can enroll the uploaded photo as a face credential.
-
Connect the webcam to the PC.
-
Hover over the profile image area at the top right of the screen and click the button that appears.
To upload an image saved on your PC, click the button.

-
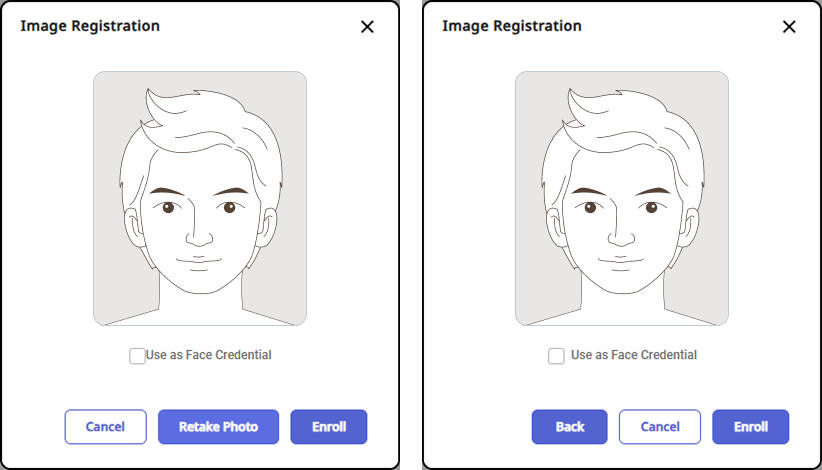
When the Image Registration window appears, click Take Photo or Upload Photo.
-
If you take a photo with the webcam, the photo displays, and if you upload a photo from the PC, it displays the uploaded photo.
-
To enroll the photo taken with the webcam or the uploaded photo as a face credential, click the checkbox for the Use as Face Credential option.
-
To complete facial enrollment, click Enroll.
-
If you are using the webcam for the first time, a pop-up asking for camera permission from the browser appears. To utilize the webcam functionality, granting permission for the browser's camera is required.
-
The process of allowing camera access may differ depending on the browser.
-
It may take a few seconds to click the Take Photo button and take the photo.
-
It is recommended to use Google Chrome version 100 or higher.
-
The maximum size for an image file to upload is 10MB.
-
Supported image formats include JPG, JPEG, and PNG.
-
Cautions for enrolling a visual face with a webcam
-
Maintain a reasonable distance from the webcam.
-
Enroll your face straight ahead without moving.
-
Do not change your face expression.
-
Do not wear masks, hats, or eye patches.
-
Do not raise head up or lower head.
-
Do not wear thick makeup.
-
Do not close your eyes.
-
Make sure both shoulders are visible.
-
Be careful not to display two faces on the screen. Enroll one person at a time.
-