Export/Import User Information
You can utilize user information from a previous version or a different server by exporting or importing user data.
Export or import CSV
Save selected user information as a CSV file, or load saved CSV files. This allows for easy transfer of user information using CSV files.
-
If there are custom user fields not added to BioStar X, the CSV file cannot be imported correctly. For more information on adding custom user fields, see Server Detailed Settings.
-
If user information is entered in a language other than English or Korean, save the CSV file in UTF-8 format.
Export CSV
-
Click User on the Launcher page.
-
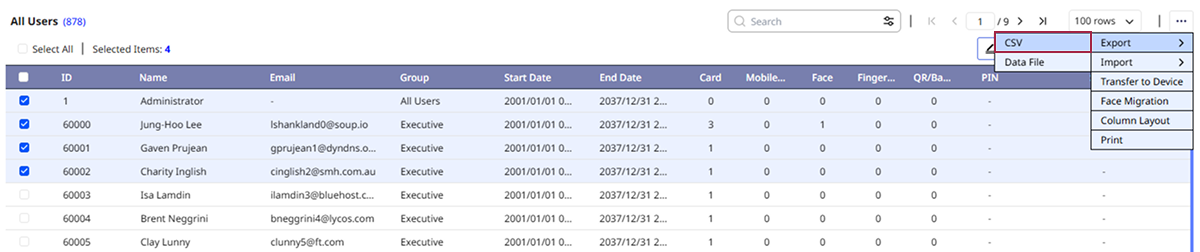
Click the checkbox next to the users you want to save as a CSV file from the user list. You can select more than one user.
-
Click the button in the upper right corner of the screen and select Export → CSV.
-
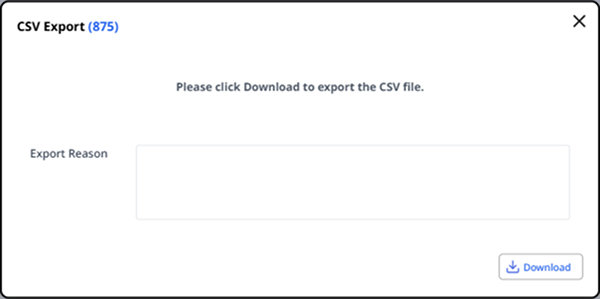
When the CSV Export window appears, enter Export Reason (optional), and click Download.
-
Save the CSV file to your desired location on your local path.
Export Reason is optional. View Export Reason records under Settings → System → Audit Trail.
Import CSV
-
Click User on the Launcher page.
-
Click at the top right of the screen and select Import → CSV.
-
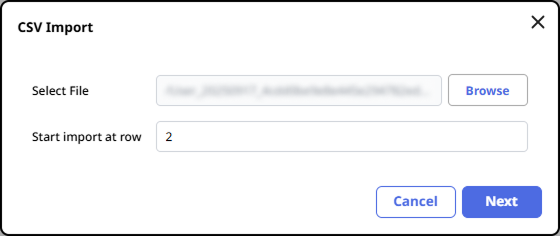
Select the CSV file saved locally.
-
Set Start import at row in the CSV Import window and click the Next button.
-
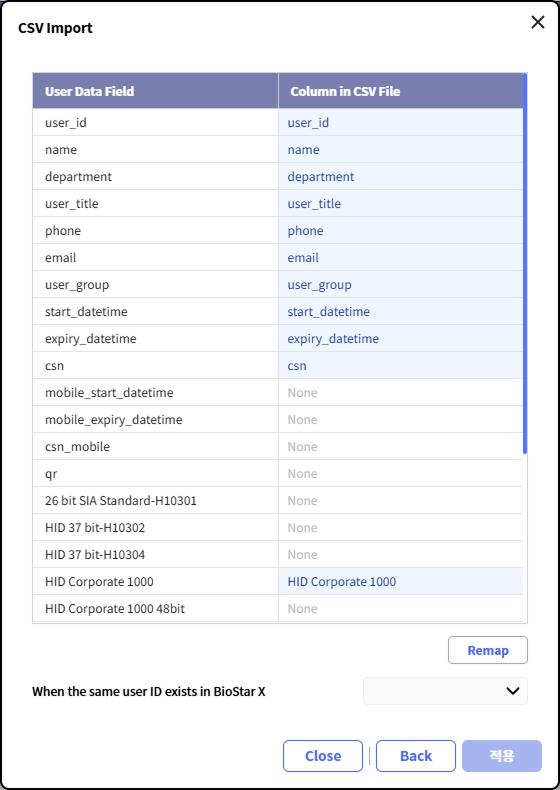
User data fields from the CSV file will automatically map to user data fields in BioStar X. Click Remap to remap fields with the same name.
-
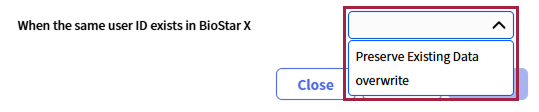
Choose whether to keep user data already registered with user IDs in BioStar X or to overwrite it with the information from the CSV file and click Apply.
If an error occurs while importing the CSV file, you can recheck and upload only the CSV data that caused the error.
-
Mobile access cards can be issued through CSV import. When using the regular site, one credit will be deducted from the Airfob Portal for each mobile access card issued upon completion of the import. To avoid issuing mobile access cards, disable mapping.
-
If the CSV file contains identical data to mobile access cards already issued to users registered in BioStar X, you can choose to maintain or overwrite the data, in which case existing mobile access cards will be retained.
-
If the CSV file contains different data from mobile access cards issued to users registered in BioStar X, maintaining the data will keep existing mobile access cards, while overwriting will issue new mobile access cards to the respective users.
-
When issuing mobile access cards through CSV import on a dynamic site, ensure to input values for the
mobile_start_datetimeandmobile_expiry_datetimefields. -
BioStar X QR cannot be issued through CSV import.
-
User facial data can be enrolled through CSV import. For more information, see Batch Enroll Faces.
-
User PINs can be enrolled through CSV import. For more information, see Enroll PIN.
-
If you add columns that do not match the saved CSV file, you cannot import the file into BioStar X.
Export or import data files
User information can be stored on external storage (USB) for import into BioStar X or devices. Up to 500,000 user records can be transferred from the server to devices or between devices.
-
Data exported from devices using outdated firmware cannot be imported into BioStar X. Always use the latest version of the firmware.
-
Data cannot be imported if different fingerprint template formats are used. For example, data exported from devices using the Suprema fingerprint template format cannot be imported into devices using the ISO fingerprint template format.
-
When importing user data, if fingerprint and face credentials stored on the BioStar X server already exist, it will be overwritten by the existing data.
-
Data cannot be imported from devices with outdated firmware versions. Upgrade the device firmware to a compatible version.
View compatible devices and firmware versions
-
BioStation 2 Firmware version 1.9.0 or higher
-
BioStation A2 Firmware version 1.8.0 or higher
-
FaceStation 2 firmware version 1.4.0 or higher
-
FaceStation F2 Firmware version 2.2.0 or higher
-
X-Station 2 firmware 1.0.0 or higher
-
BioStation 3 Firmware version 1.3.1 or higher
-
BioStation 2a Firmware version 1.0.0 or higher
-
Export data
-
Click User on the Launcher page.
-
Click the checkbox next to the users you want to export from the user list. You can select more than one user.
-
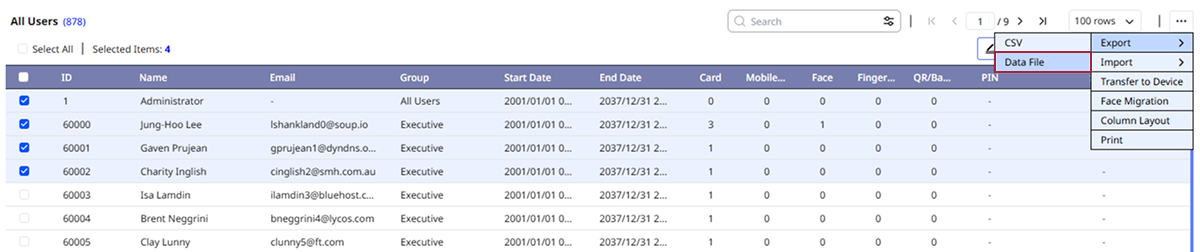
Click in the top right corner of the screen, then select Export → Data File.
-
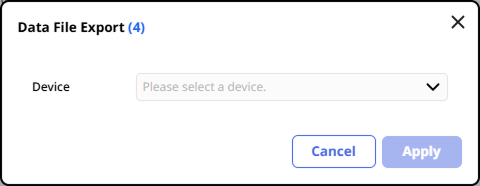
In the Data File Export window, select the device to apply the data file.
-
Enter Export Reason (optional) and click Apply.
-
Save the data file in your desired local path.
-
The data file export includes user profile photos, IDs, names, validity periods, access groups, PINs, private authentication modes, credentials (face, fingerprint, card, mobile card, face, QR/Barcode), and one-to-one security level information.
-
Selecting the incorrect device to apply the data file may cause it to be unrecognized by that device.
-
Export Reason is optional. View Export Reason records under Settings → System → Audit Trail.
To import file exported from BioStar X into devices, you must rename the file as follows so that the device can recognize it. The file name format will be adjusted to be automatically recognized through future device firmware updates.
BioStarX_YYYYMMDD_HHMMSS.tgz → BioStar2_YYYYMMDD_HHMMSS.tgz
- Export Reason is optional. View Export Reason records under Settings → System → Audit Trail.
Import data
-
Click User on the Launcher page.
-
Click in the top right corner of the screen, then select Import → Data File.

-
Select the data file (.tgz) saved locally.
A message will appear on the screen if the data file is successfully imported.