Upgrade
This document provides a step-by-step guide on how to upgrade BioStar 2 to BioStar X. Check the system requirements and precautions before starting the upgrade.
Before you start
Check the following before upgrading from BioStar 2 to BioStar X.
Minimum requirements
-
Before proceeding with the upgrade, refer to System Minimum Requirements to confirm that the server specifications meet the requirements.
-
If you are in an environment of BioStar 2 v2.9.11 or higher, you can upgrade to BioStar X.
-
If you are using a version of BioStar 2 lower than v2.6.4, you must upgrade sequentially up to v2.9.11 before upgrading. For instructions on upgrading BioStar 2 step-by-step, refer to the BioStar 2 Admin Guide.
-
You cannot upgrade on versions of BioStar 2 below v2.9.10.
-
-
If the following devices are connected to BioStar 2, the upgrade to BioStar X is not supported.
- XPass S2, XPass, BioEntry W, BioEntry Plus, BioLite Net
License
-
You must contact your dealer to prepare at least one BioStar X license before upgrading to BioStar X.
-
A different licensing policy applies when upgrading to BioStar X compared to BioStar 2.
-
If you upgrade while having an Advanced or higher grade license of BioStar 2 AC license activated, the following service features and settings will be deleted.
-
Graphic Map
-
Cloud
-
-
To use the BioStar 2 T&A service on BioStar X, you must purchase the BioStar X T&A license separately.
Upgrade installation guide
-
Go to the Suprema Download Center, log in, and download the installation package (BioStar X Setup.X.Y.Z.BB.exe).
-
Run the downloaded installation file.
-
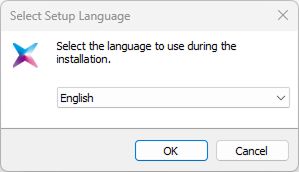
Select the language to use and select the OK button.
-
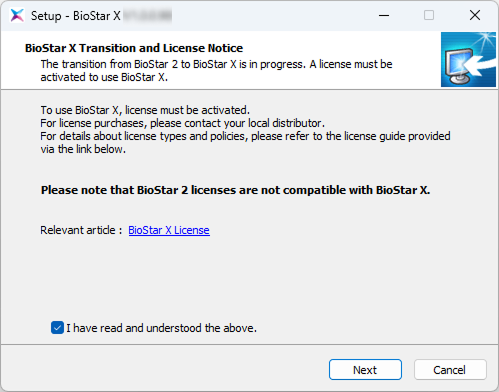
Agree to the licensing policy of transitioning from BioStar 2 to BioStar X. Click the checkbox and select the Next button.
-
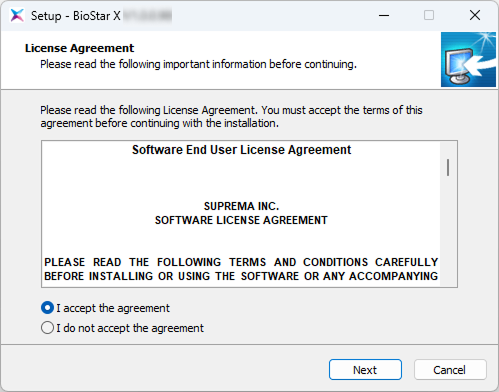
To continue the installation, select I accept the agreement and click the Next button.
-
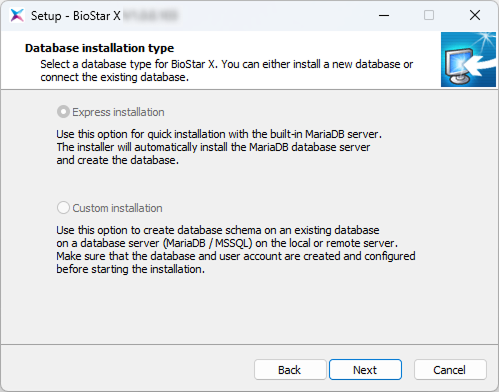
When upgrading from BioStar 2, the existing database will be connected to proceed with the installation. Click the Next button.
-
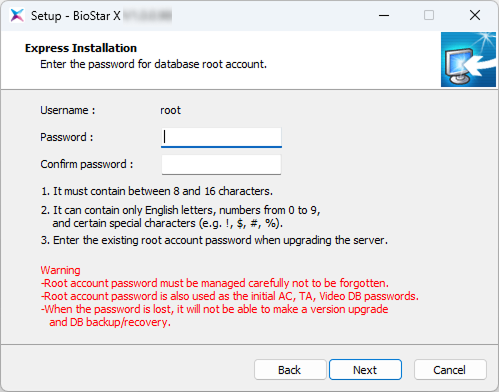
Enter the root account password of the existing database and click the Next button.
-
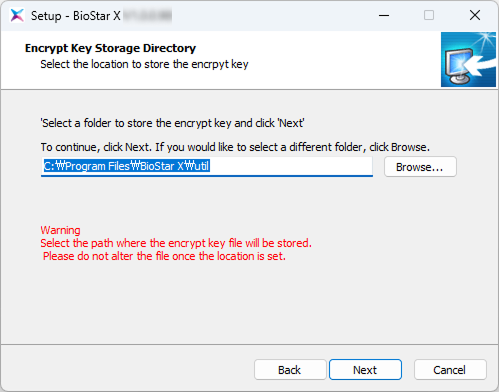
Set the path to store the encryption key and click the Next button.
-
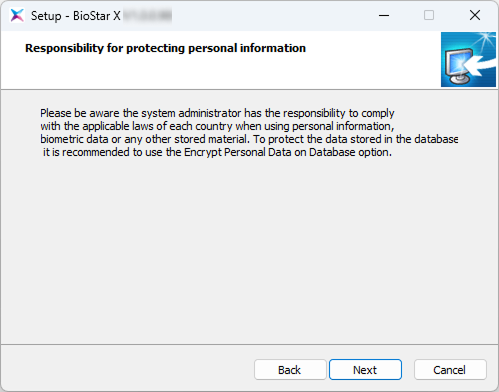
Read the information about the management and responsibility of personal information stored in the database, and click the Next button to continue the installation.
-
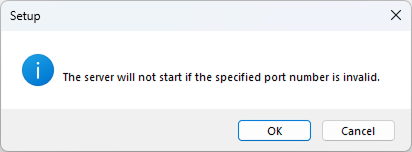
If a port number related message appears, click OK.
-
Set the port for BioStar X communication and click the Next button.

-
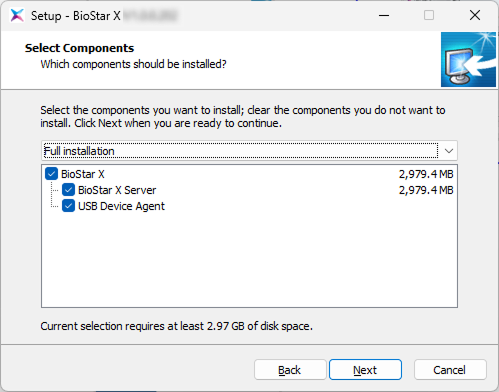
Select the components of BioStar X and click the Next button. If you select USB Device Agent, the USB Agent and driver for using BioMini, BioMini Plus 2, BioMini Slim 2, and DUALi DE-620 will be installed together.
-
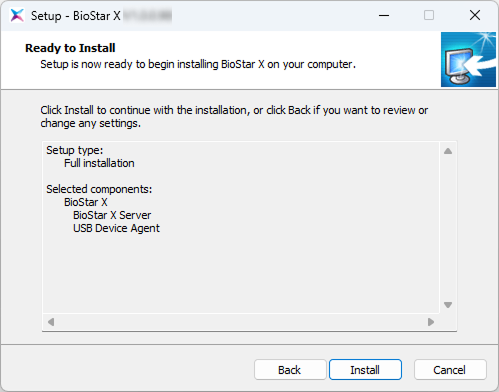
When all preparations for installation are complete, click the Install button.
-
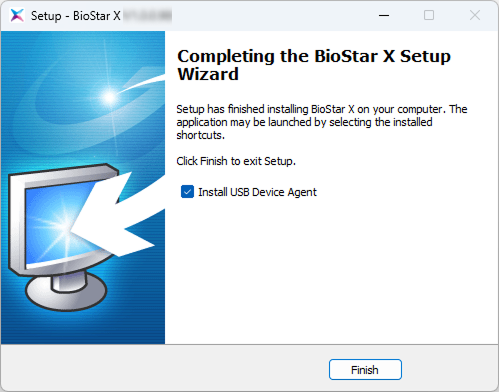
Select whether to install additional programs and click the Finish button.
-
Complete the installation of USB Device Agent by following the instructions on the installation screen.
-
In the downloaded file name,
X.Y.Zis the version information andBBis the build number. -
The administrator account password is used when logging in for the first time after installing BioStar X.
-
The root account password for the database is used as the initial password for AC, TA, and Video DB.
-
The storage path for the encryption key can be changed. If you modify or move the encryption key file after changing the path, a system error may occur.
-
When BioStar X is deleted, the encryption key file is also deleted.
-
The provided USB Device Agent certificate can only be applied to the local network.
-
If another program is using port 443, the BioStar X Setting program runs automatically and allows you to change the port number. For more information on changing the port number, see Change the Port.
-
For more information on changing database settings, see Change the Database.
-
Be careful not to lose the administrator or root account password for the database.
-
If you lose the password, version upgrade and DB backup/restore may not be possible.