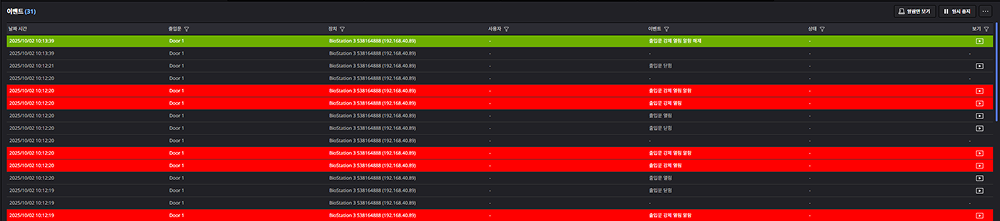
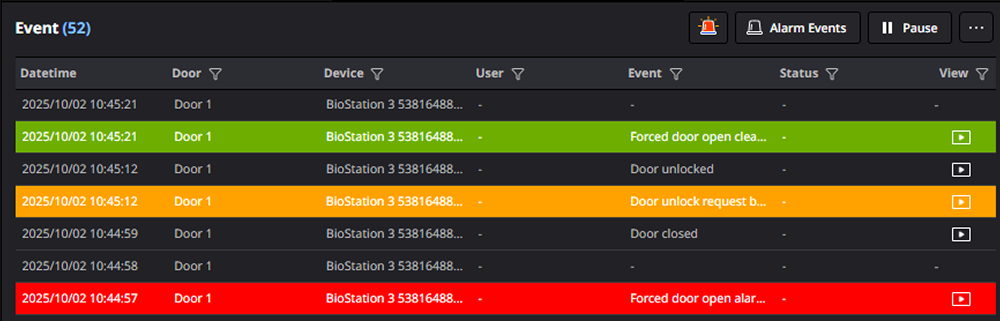
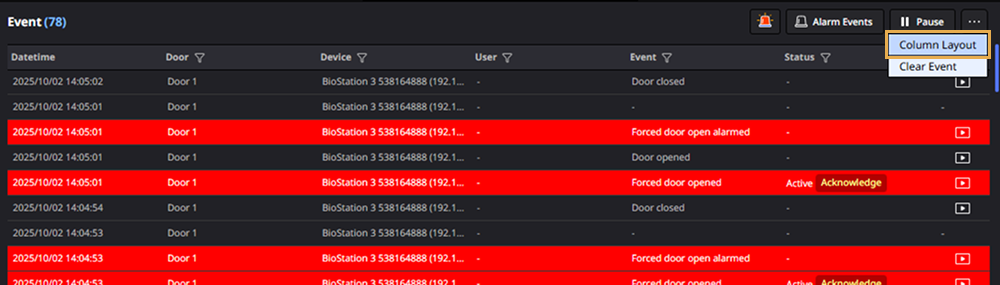
Monitor Event
In the Event section at the bottom of the monitoring page, you can check and manage real-time events. Efficient event management is possible through various features such as event status, alarm event handling, filtering, and color coding. Specifically, you can monitor events related to doors, devices, and users in real time and take prompt actions as needed.
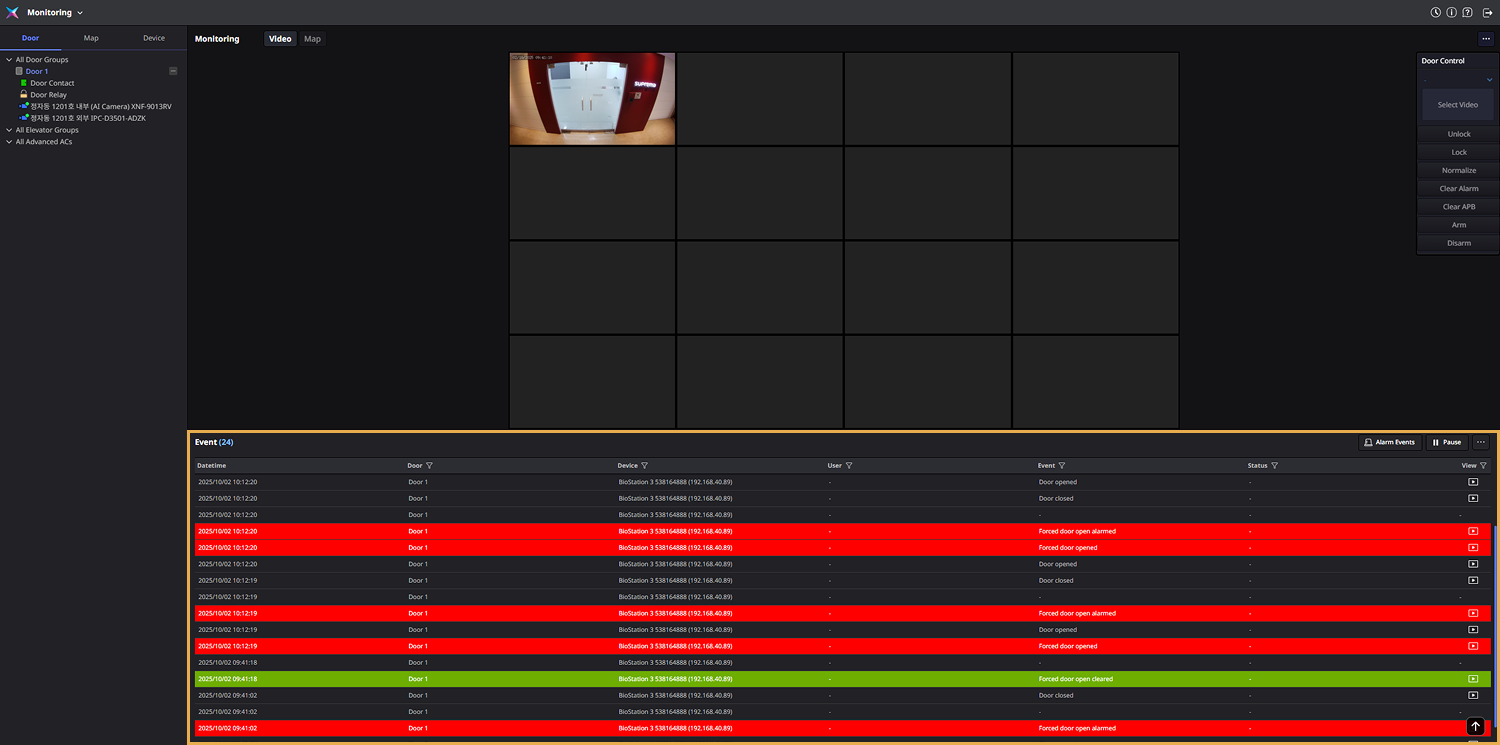
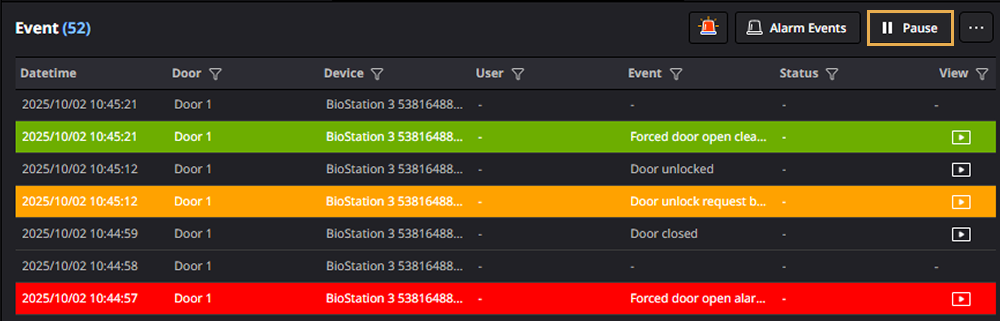
Checking the event list
In the Event section, you can view events as they occur in real time. Each event includes the following information:
-
Datetime: The date and time the event occurred.
-
Door: The door where the event occurred.
-
Device: The device on which the event occurred.
-
User: The user who triggered the event.
-
Event: Detailed information about the event.
-
Status: The event status. Active events are displayed as Active. Alarm events have a Acknowledge button displayed. Click Acknowledge to resolve the event.

-
View: If the event includes video information from the camera connected to the door, a video icon () is displayed. Clicking this icon lets you view the video.
-
Clicking on an individual event will display detailed information on the right side of the screen. This detailed information includes the time of the event, area, door, device, user group, user, port, and event details.
-
If the event includes video or image information from a camera connected to the door, you can also view video and image logs.
Distinguishing events by color
Events in the event list can be distinguished by color:
-
No Color: Normal event.
-
Orange: Caution event. This indicates events that need attention, such as unauthorized access attempts in restricted areas or doors being left open.
-
Red: Alarm event. This indicates a warning event requiring action within the system.
-
Green: Resolved alarm event.
Checking alarm events
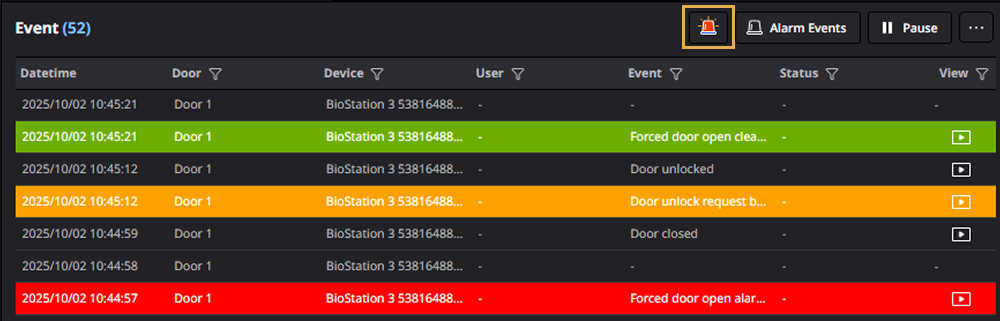
Only alarm events can be viewed in the Event section. Click Alarm Events in the upper right corner of the Event section. The event list will display only alarm events, which are indicated in red. Alarm events are displayed in red.
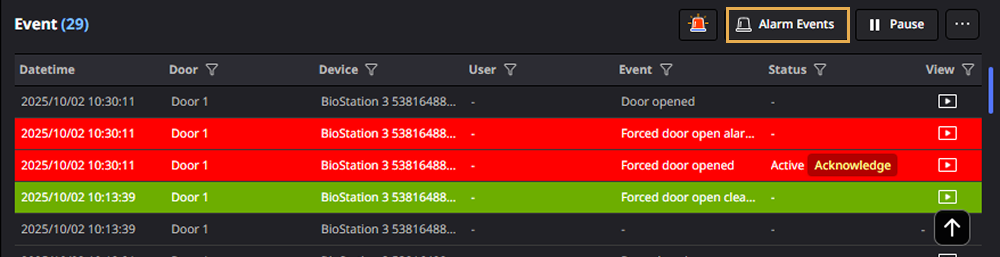
To view all events, click All Events in the upper right corner of the Event section.
Real-time events
The event list in the Event section allows you to check events as they occur in real time. To stop real-time events, click Pause in the upper right corner of the Event section. Click Play to resume real-time events.
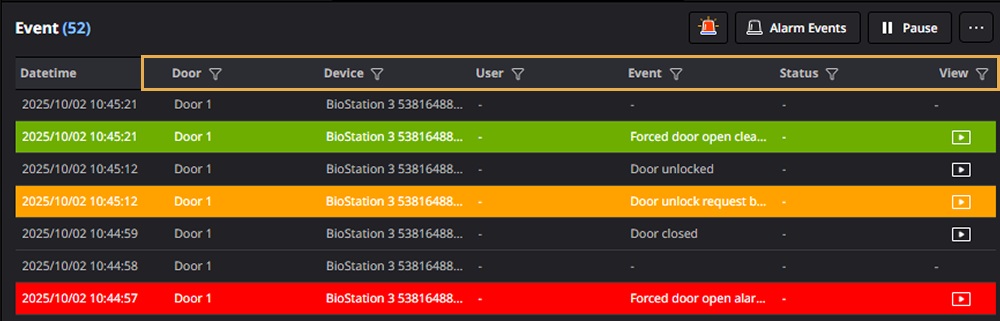
Filtering events
Applying filters
Users can filter the event list according to their desired criteria, allowing for quick identification of relevant events. This allows you to quickly check events based on the desired conditions.
-
Click on each header column in the Event section.
-
When the filter window appears, select the desired item from the left list.
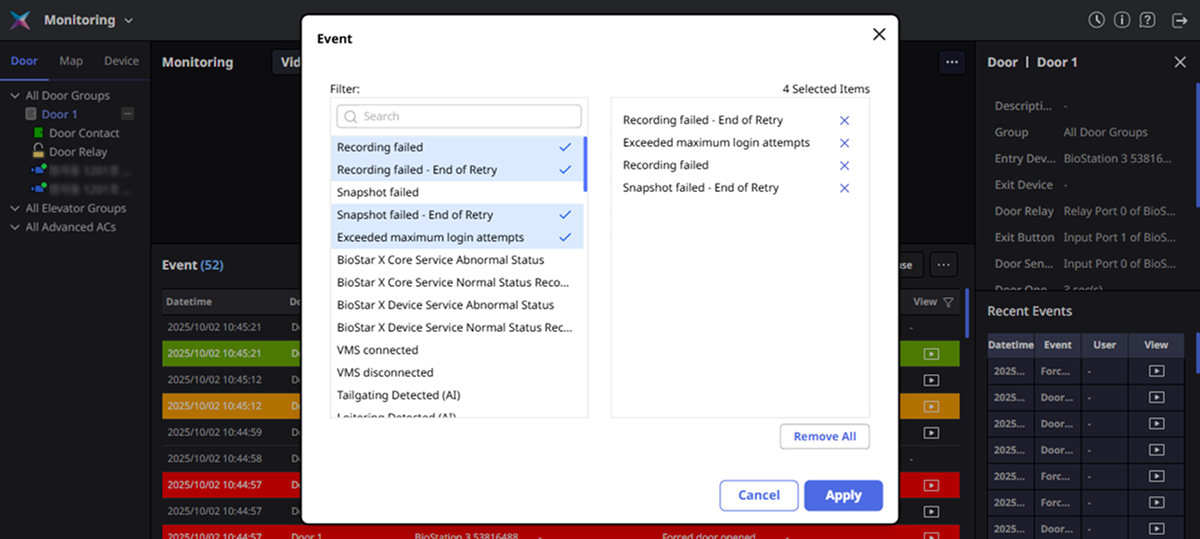
To deselect an item, click . To clear all items, click Remove All.
-
Once all settings are complete, click Apply.
Only events that meet the set conditions will be displayed in the event list.
-
You can also quickly search for desired items using the search input field in the filter window.
-
Multiple conditions can be set for each header column, applying an
ANDcondition if more than one condition is specified. When setting more than one condition, apply theANDcondition. -
The items that can be filtered may vary by header column.
-
When filtering conditions are applied, the icon color in the header column changes to blue.
Remove filters
You can clear the applied filter conditions.
-
Click on the header column where filters were applied in the Event section.
-
When the filter window appears, click next to the item you wish to remove from the right list. To clear all filters, click Remove All.
-
Once all conditions to be cleared are set, click Apply.
-
You can also quickly search for desired items using the search input field in the filter window.
-
When filtering conditions are cleared, the icon color in the header column will revert to its original state.
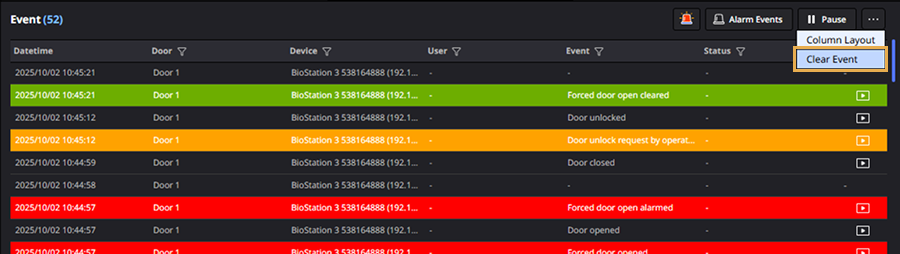
Clear the event list
In the Event section, you can clear events. Click in the upper right corner of the Event section and select Clear Event from the popup menu. If there are many unnecessary events accumulated in the event list, you can use the Clear Event feature to clean up.
Check alarm and record action
When an alarm event, such as forced opening of the door, occurs, an alarm message window appears. The alarm message window includes detailed information about the triggered alarm event. At this time, the administrator can record their acknowledgement of the triggered alarm event and any actions taken.
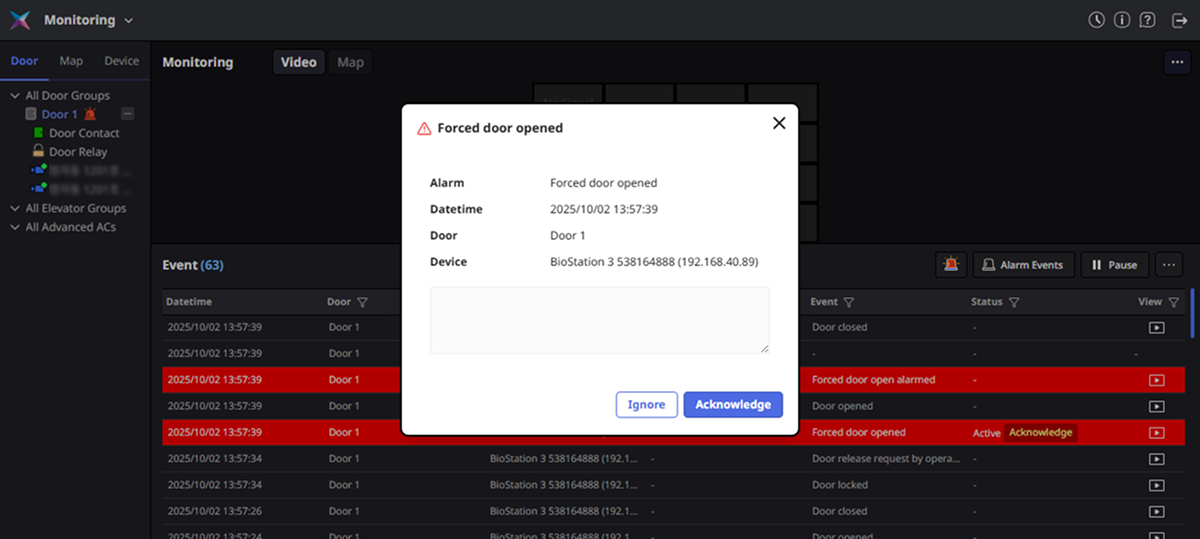
The Ignore All button is displayed only when two or more alarm events occur.
Record action for alarm event
Enter actions regarding the alarm event in the message input field. You can enter up to 500 characters. Enter actions and click the Acknowledge button. Records acknowledgement and actions regarding the alarm event. The alarm message window will close.
Pending acknowledgment of alarm event
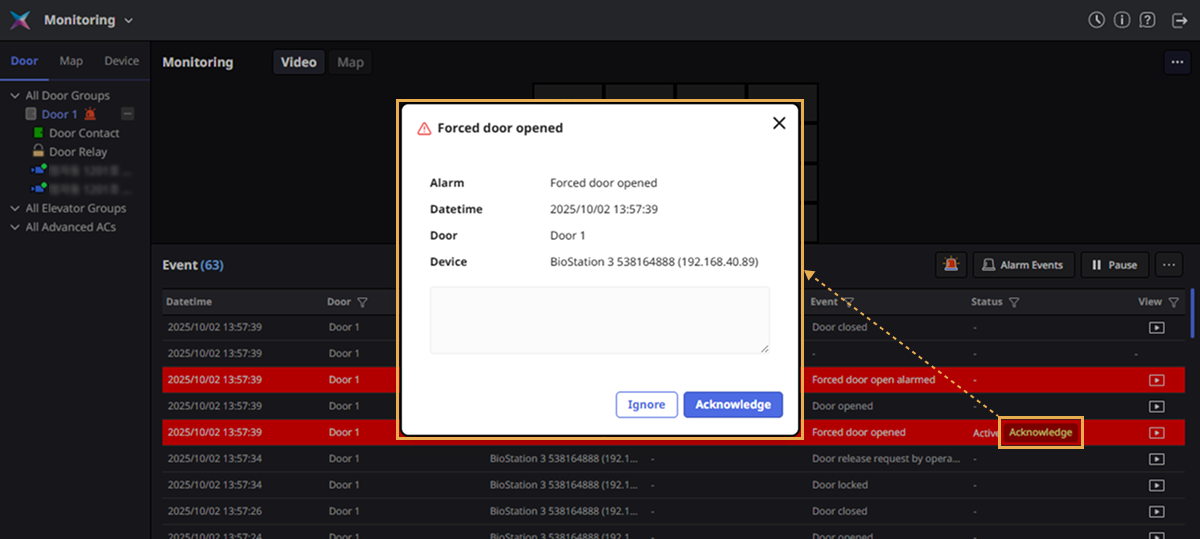
You can also defer acknowledgement of the alarm event by clicking the Ignore button. Actions taken can be recorded. The alarm message window will close. Deferred alarm events are displayed in the event list as Active status, and the Acknowledge button can be used.
![]()
Checking alarm events in the event list
Clicking the Acknowledge button displayed in the Status column of the event list allows recording of the acknowledgement and actions regarding the triggered alarm events. Complete your entry and click the Acknowledge button.
Viewing unacknowledged alarm events
This feature allows you to view unacknowledged alarm events at once and record actions taken. It is especially useful when multiple identical alarm events occur.
-
Click in the upper right corner of the Event section.
-
When the Active Alarm Events window appears, select the alarm event to record actions from the left list. To select all events, click the checkbox on the far left of the header column.
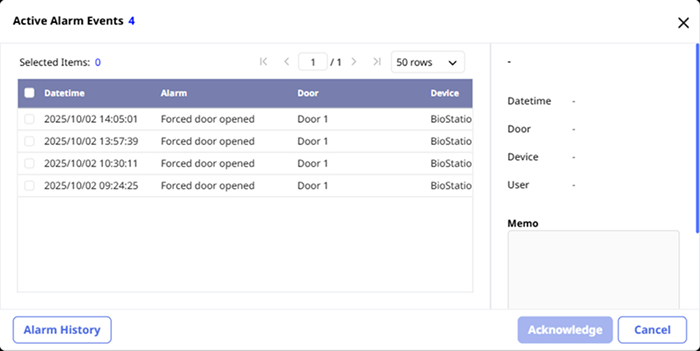
-
Enter actions regarding the alarm event in the Memo input field.
-
Click Acknowledge.
Records the actions taken for the selected event. A popup window will appear where you can enter your acknowledgement of the alarm event and any actions taken.
You must select more than one event from the alarm event list for the Acknowledge button to be activated.
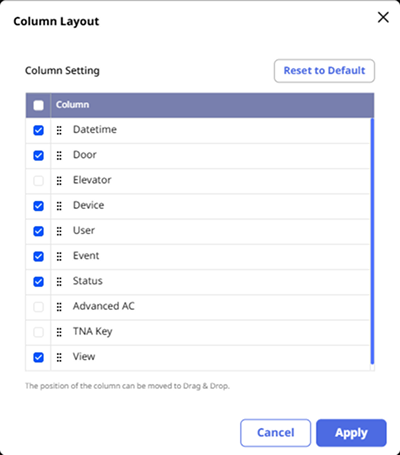
Event list column settings
You can add columns to display in the event list, rearrange them, and set them to hidden.
-
Click → Column Layout at the upper right of the Event section.
-
When the Column Layout window appears, you can click the checkboxes of the columns to display them or set them as hidden. You can also change the order of columns via drag and drop.
-
After making all changes to column settings, click the Apply button.
To initialize the column settings, click the Default Column button.