Monitor Map
This guide explains how to monitor and control the real-time status of doors and cameras by zone and floor using the map monitoring feature. Map monitoring allows for easy navigation of areas and floors through a visual interface integrated with Google Maps, enabling various features such as access door control and camera video playback.
To access the Monitoring page, click Monitoring in the Launcher or select Monitoring from the menu at the top left of the screen.
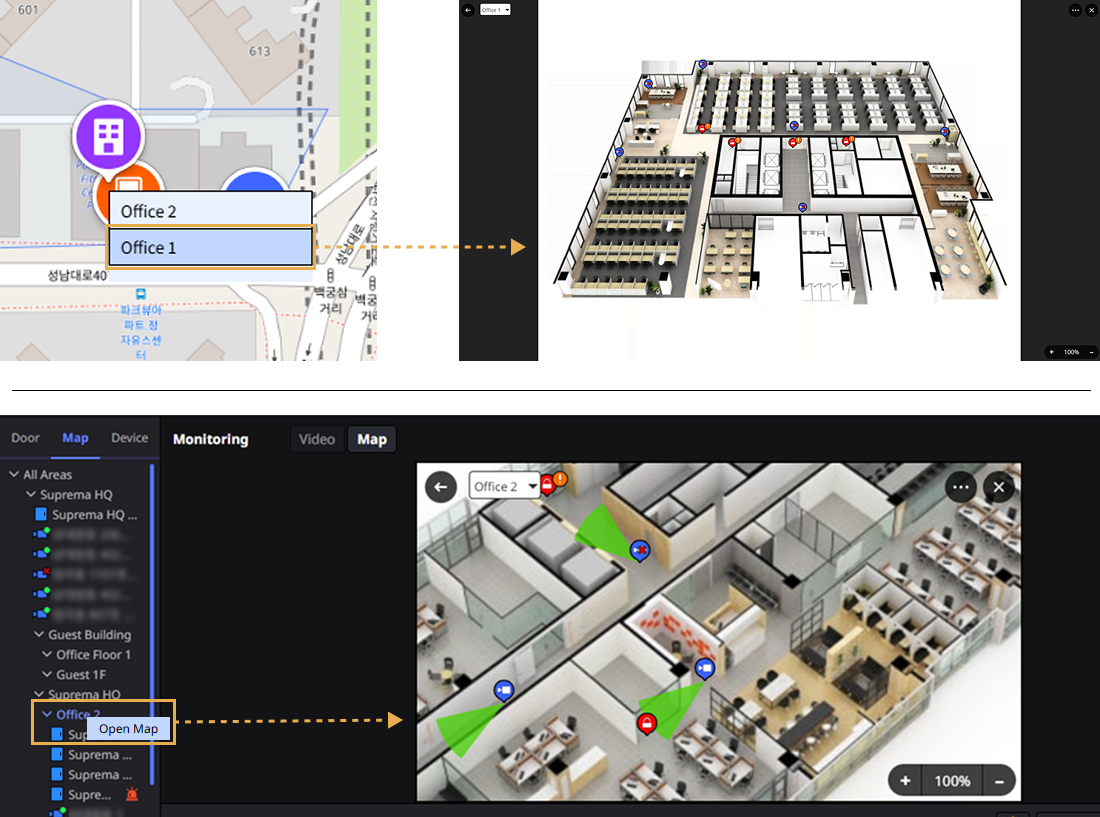
Multiple facilities can be configured within a single area in BioStar X. Each facility can have multiple floors configured. In one floor, you can set up the door and camera based on the drawing for monitoring. Please refer to the below.
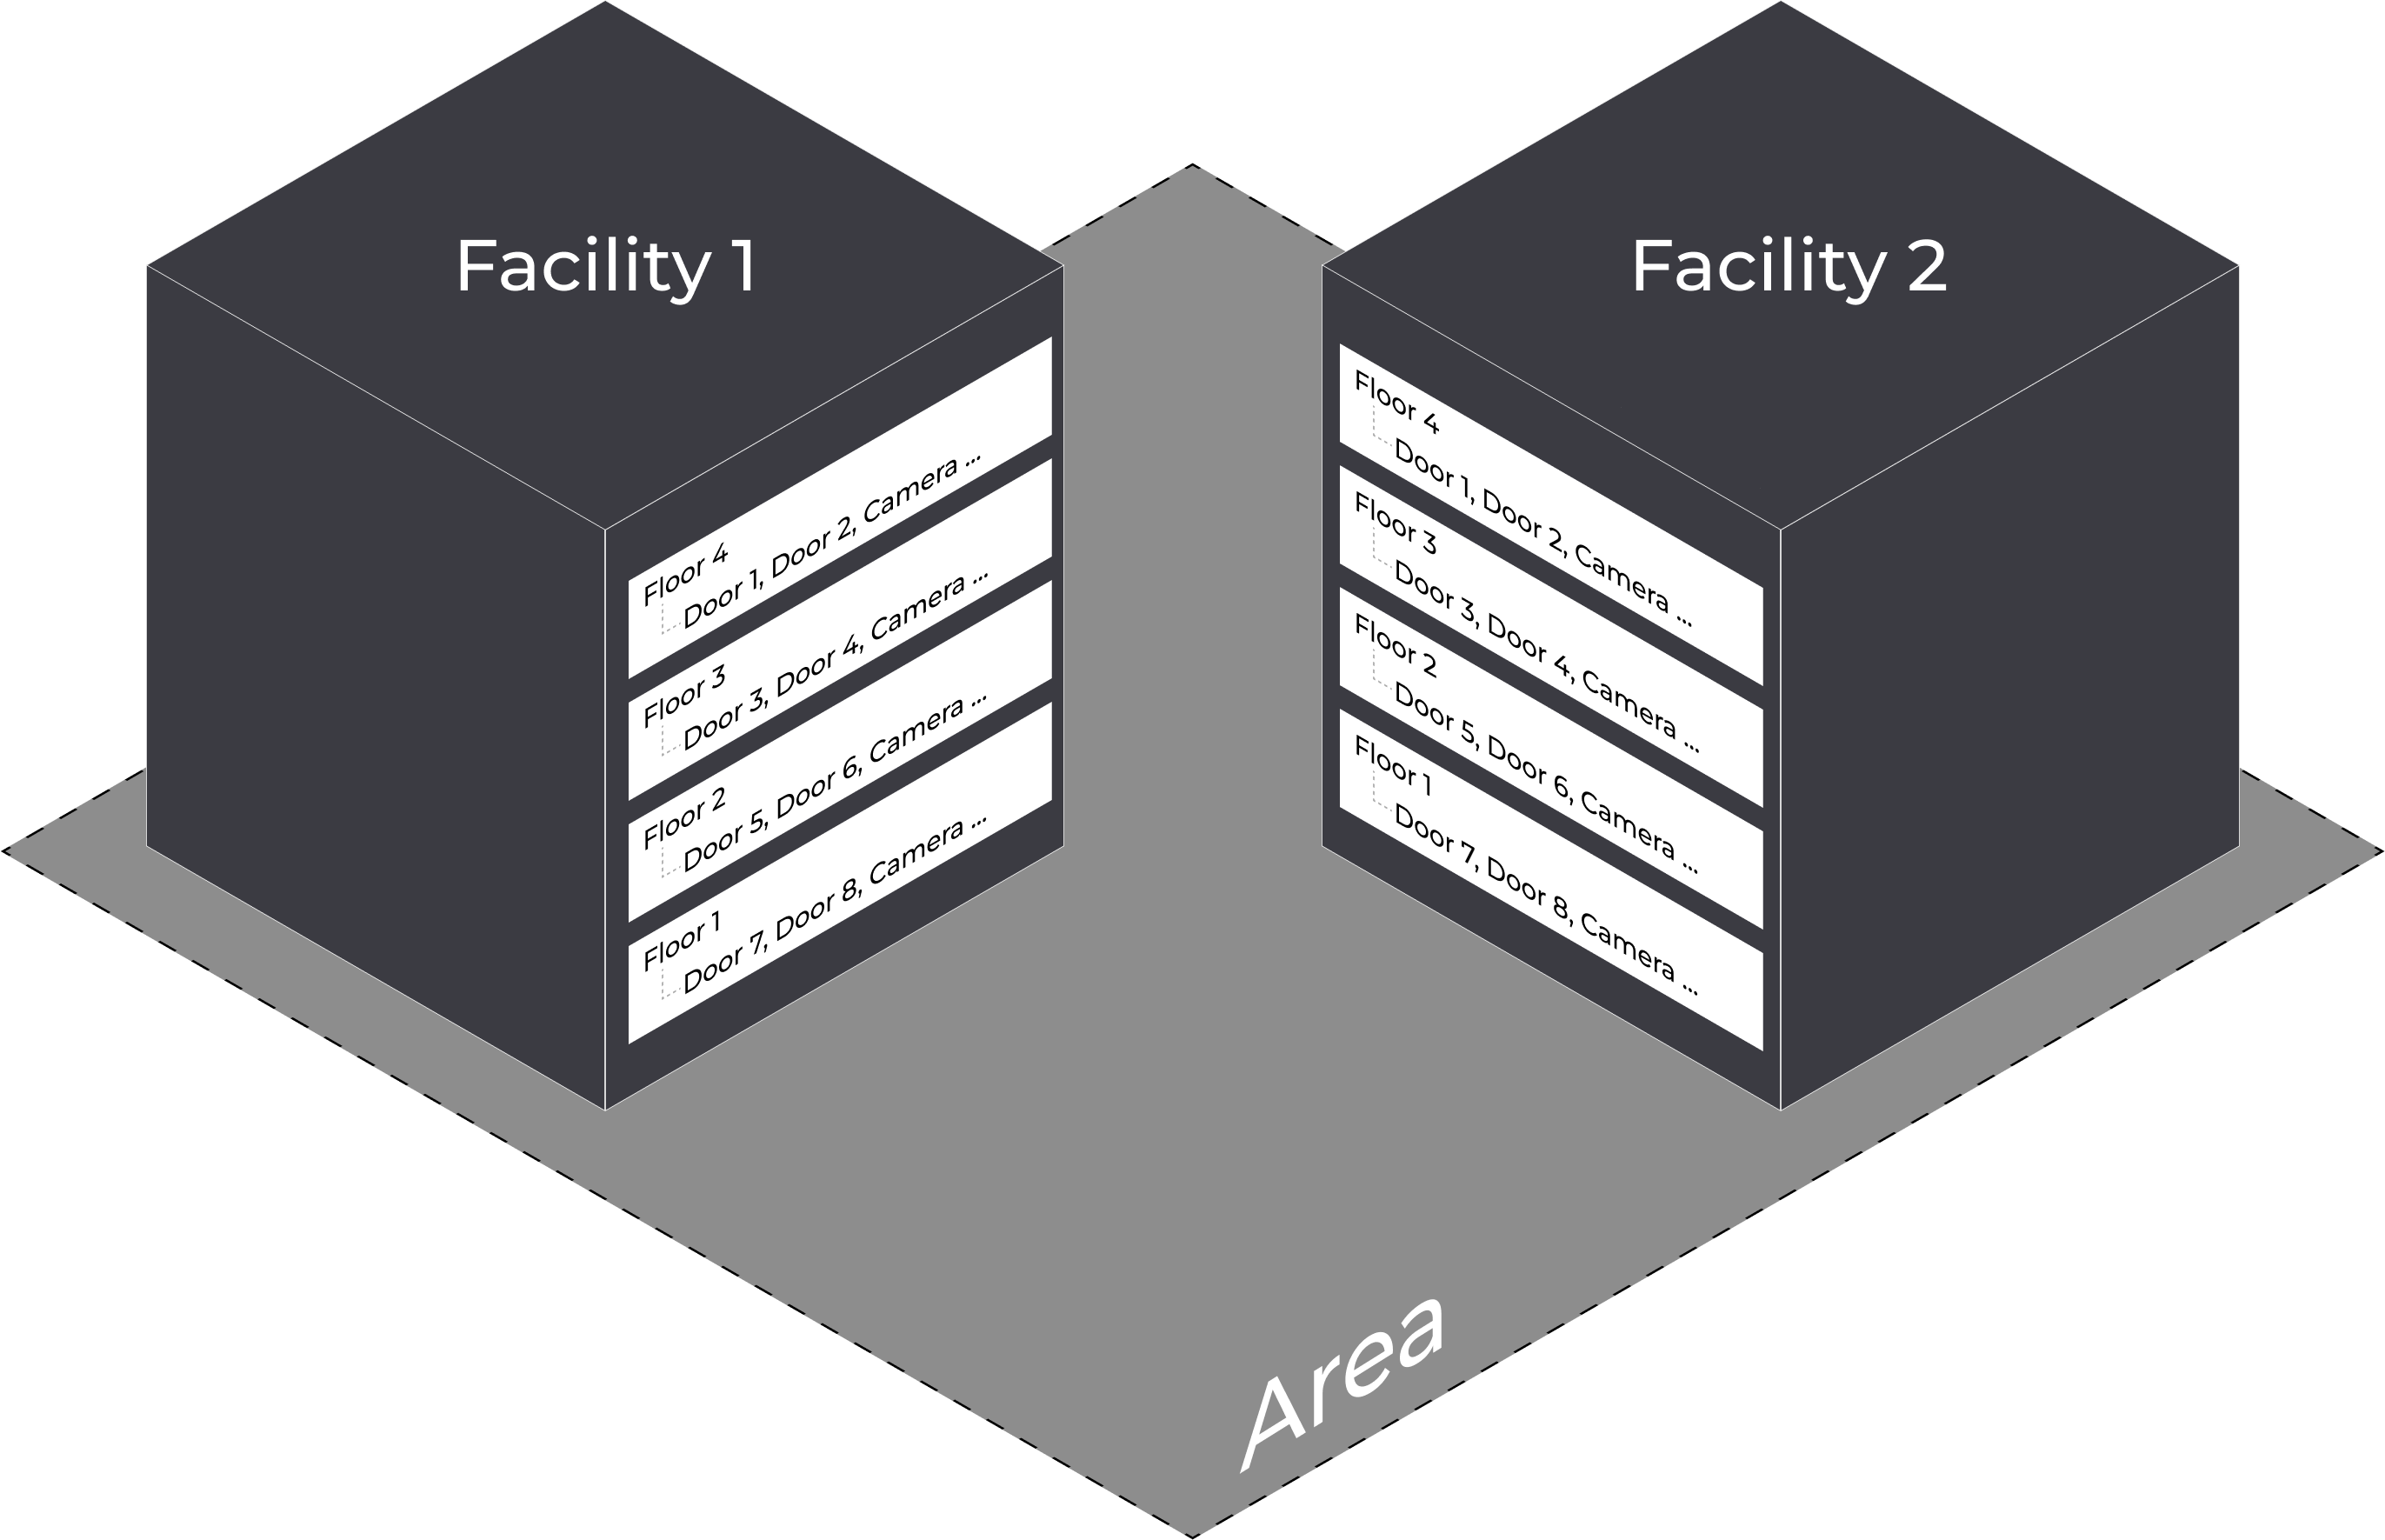
You can access the configured area on the GIS map in the order of Area → Facility → Floor, as shown in the image, to monitor and control doors and cameras. This structure can also be seen in the sidebar of the Monitoring page.

For more information on configuring the map, see Manage Map.
Components and options
Component
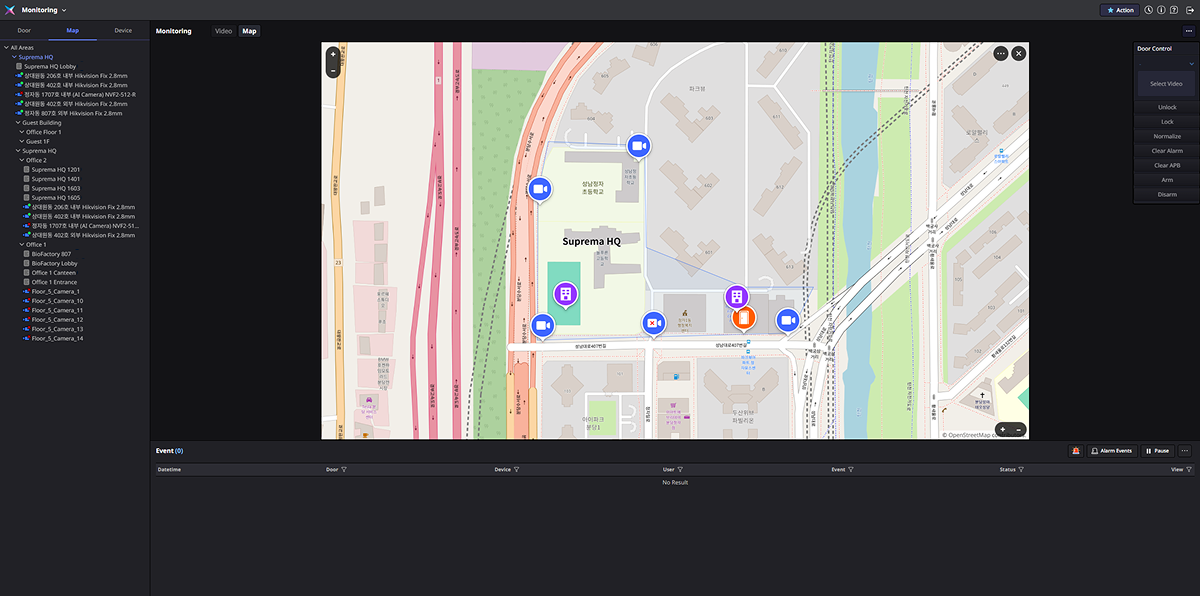
Components displayed on the map include the area, facilities, and cameras connected to the facilities. You can access the floor through the facility. You can check the door and camera on the floor.
| Component | Description |
|---|---|
| Facility: Click on a facility placed on the map to enter the corresponding configured floor. | |
| Door: Click on a door placed on the map to display a popup menu for controlling that door. For more information on the available features, see Door Control. | |
| Camera: Click on the camera to play the video of the corresponding facility or floor. | |
| Camera Error: This message appears when the camera is not connected or powered off. | |
| Open Door: The door placed on the floor is in an open state. | |
| Locked Door: The door placed on the floor is in a locked state. |
Options
The options feature provided in the map or layer is as follows.
| Feature | Description |
|---|---|
| You can zoom in and out by clicking the buttons located at the top left and bottom right of the map. You can also use the mouse wheel to zoom in or out of the map. | |
| You can zoom in and out by clicking the buttons located at the bottom right of the floor. | |
| Click the button to access additional features. | |
| To close the map or floor positioned on the video tile, click the button at the top right. | |
| By clicking and dragging while holding down the icon, you can move the map to another location. |
-
You can move the position by dragging the mouse while clicking on the map. You can zoom in or out using the mouse wheel.
-
Double-click the map to expand it to full screen. Double-click again or press the ESC key to return to the original size.
Check status
In the left sidebar, you can check the status of each door and camera for the facilities or floors. Refer to the information below for the status of each icon.
| Status Icon | Description |
|---|---|
| There is a communication server error or the connection is lost. | |
| An alarm has occurred at the door. If loitering or intrusion is detected, the corresponding icon will be displayed. | |
| The camera is connected. | |
| The camera is off or disconnected. |
Open map
If the area is linked to the GIS map, you can display the map in the Monitoring section.
-
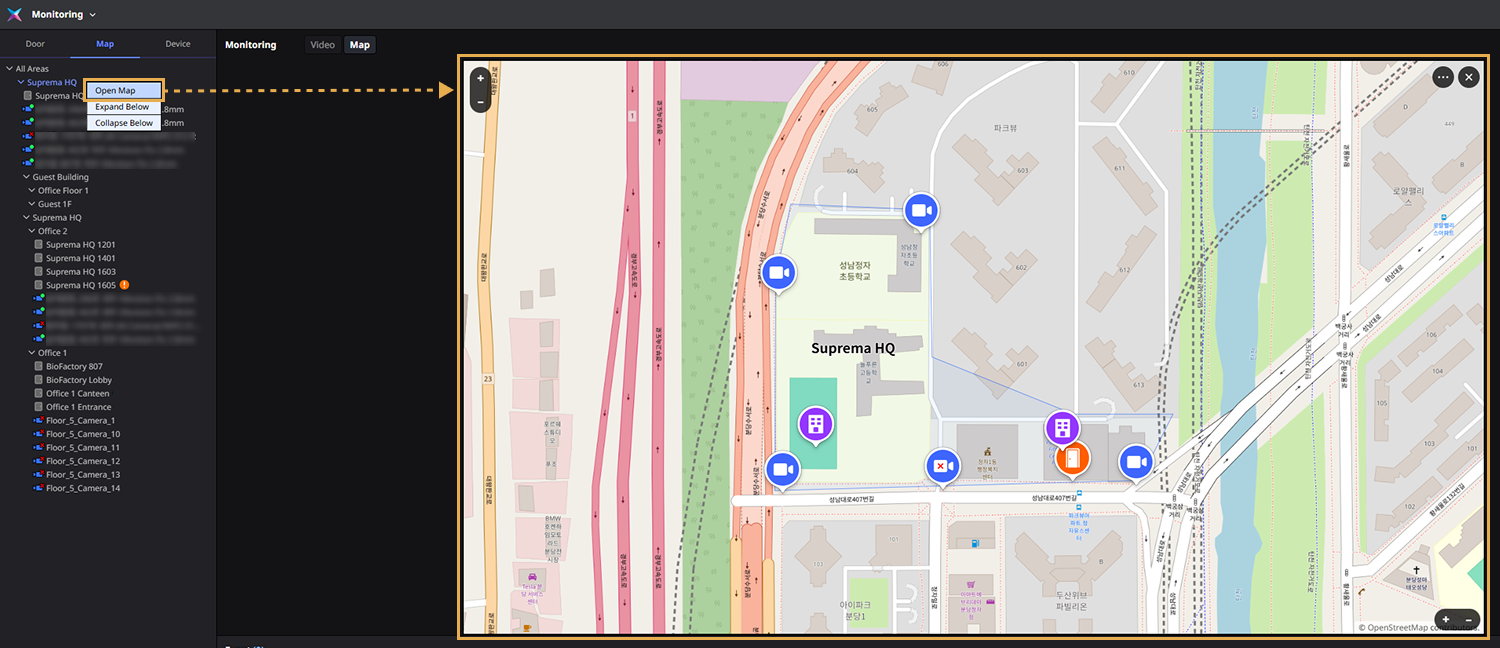
In the left sidebar, select the facility to view on the map.
-
Right-click.
-
Click Open Map in the popup menu.
The map of the selected area will be displayed in the video tile of the Monitoring section.
-
You can also open the map by double-clicking the corresponding facility in the left sidebar.
-
The image is an example screen. The actual screen may differ.
-
For more information on configuring areas linked to the GIS map, see Configure Area.
Map size adjustment and relocation
To adjust the size of the map, click on an empty area on the map. Handles for resizing will appear at each corner. Click and drag the handle to adjust to the desired size.
To move the map to another location while resizing, click on the icon over the map and drag it to the desired position.
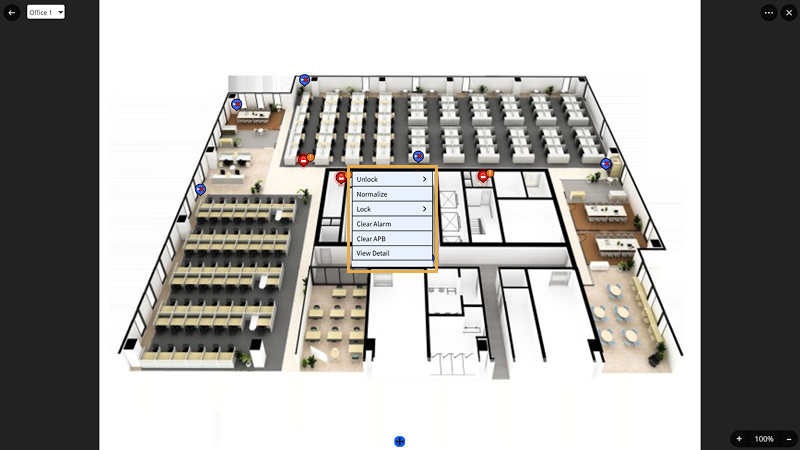
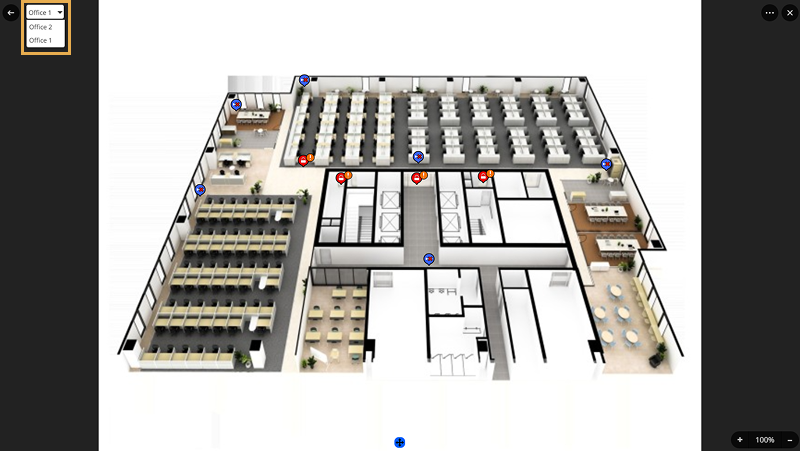
Enter the floor
To enter a floor on the map, click on the facility. When the list of floors accessible from the popup menu is displayed, select the desired floor. You can check the drawings, doors, and cameras on the selected floor.
Or, double-click the floor in the left sidebar or right-click it and select Open Map from the popup menu.
-
Clicking the door will display a popup menu that allows you to control that door. For more information on the available features, see Door Control.
-
Double-clicking the camera allows you to play the live feed.
-
For more information on setting up doors and cameras on a floor (Floor), see Configure Floors.
-
To navigate to the map displaying the facility, click the button at the top left.
-
For more information on video controls and the tools displayed in the video, see Monitor Video.
-
The image is an example screen. The actual screen may differ.
Move to another floor
To move to a different floor, click on the selection option in the upper left corner of the map and select the floor you want to move to.
-
To navigate to the map displaying the facility, click the button at the top left.
-
The floor selection option at the top left of the map displays only the floors configured for the facility. If the floor is not configured in the facility, it will not be displayed in the list. For more information on configuring floors within a facility, see Configure Facility.
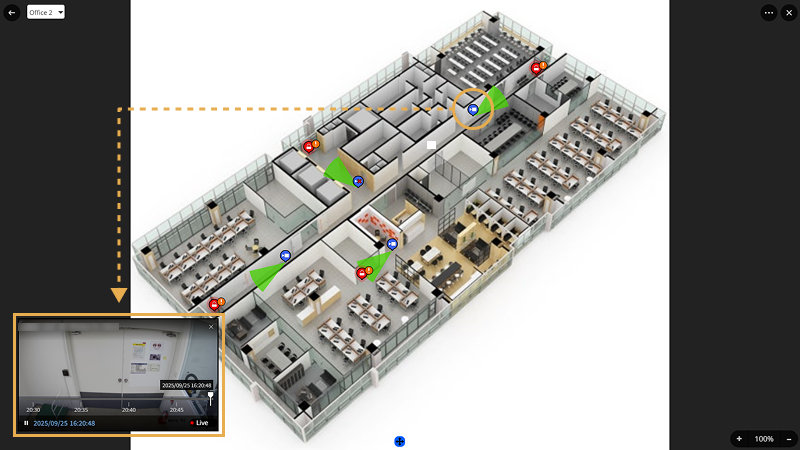
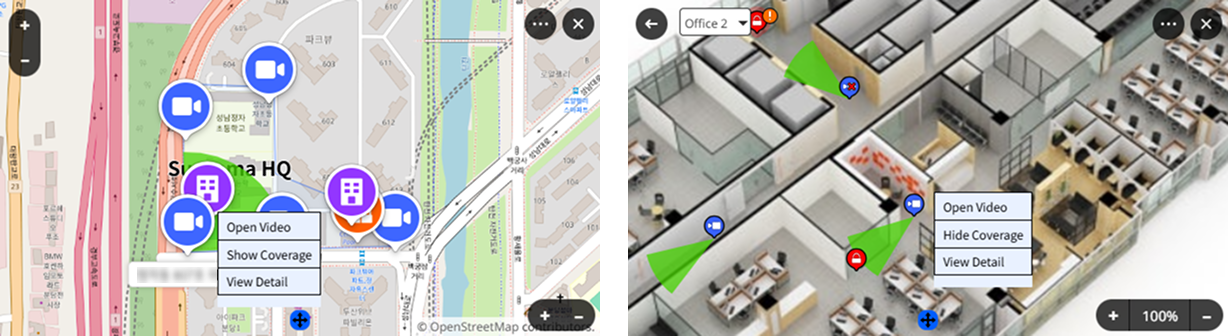
Controlling camera
-
To control the camera on the map or floor, click the camera icon. Select the desired feature from the pop-up menu.
-
Open Video: You can check the camera video in real-time.
-
Show Coverage / Hide Coverage: You can display or hide the shooting range of the camera.
-
View Detail: You can check detailed information about the camera. Displays the name, group, ID, IP address, etc., of the camera in the right panel.
-
-
To place and play the camera feed on the video tile, double-click the camera in the Map list on the left sidebar of the screen. Or right-click and select Open Video from the popup menu.

To view detailed information such as the camera's name and group, click View Detail from the popup menu.
-
Video tiles are added in order from the top left of the screen. If there is no space to add more, an error message appears.
-
For more information on video controls and the tools displayed in the video, see Monitor Video.
-
If a camera isn't visible on the map, check the camera group's permissions. If the administrator for a custom permission hasn't configured the camera group permissions, the camera may not be visible. For more information on configuring camera group permissions, see Set Up the Camera.