Plugin
What are plugins?
BioStar X plugins are extensions of the BioStar X platform that provide additional features to meet customer requirements or to integrate with existing systems.
-
A plugin license is required to use plugin features. For more information on the licensing policy, see License Policy.
-
For more information on developing plugins, see BioStar X Plugin Developer Guide.
BioStar X plugins
List of plugins available through the license add-on option.
For more information on licensing policies, see License Policy.
Key use cases
You can integrate various external systems through the BioStar X plugins system. The representative use cases are as follows.
-
Attendance Management System: Integration with external T&A (Time & Attendance) solutions
-
Visitor Management System: Integration with separate visitor registration and management systems
-
Reporting Solution: Integration with customizable reporting and analysis tools
-
Third-Party System Integration: Data integration with existing business systems such as ERP and HRM
Register plugin
-
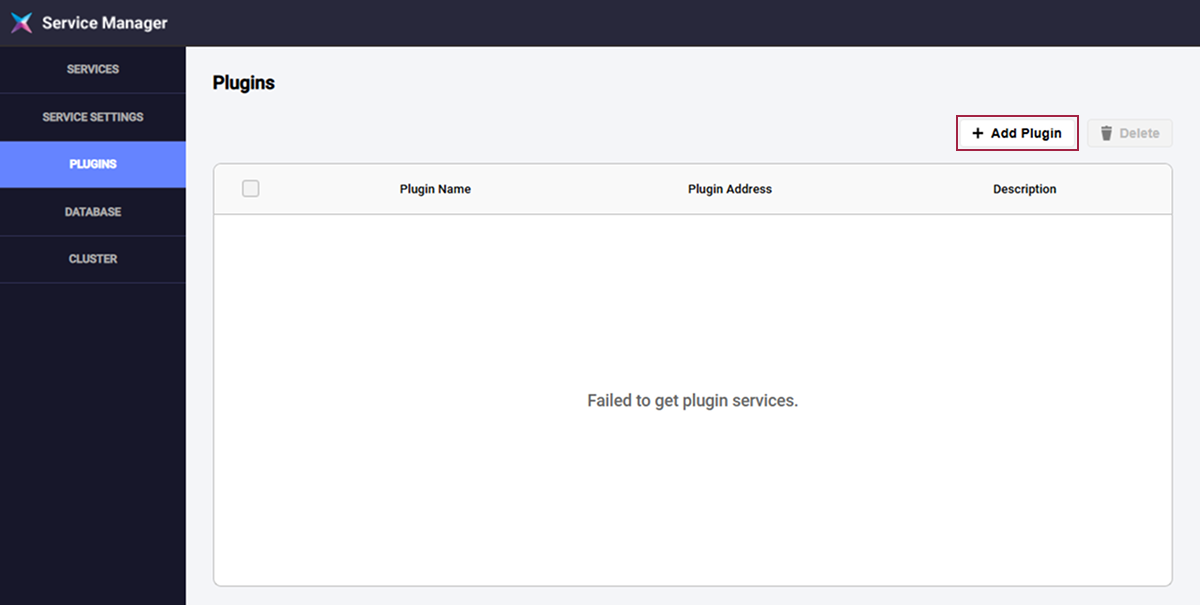
Click Start → BioStar X → BioStar X Service Manager on Windows.
-
Click PLUGINS in the left side menu.
-
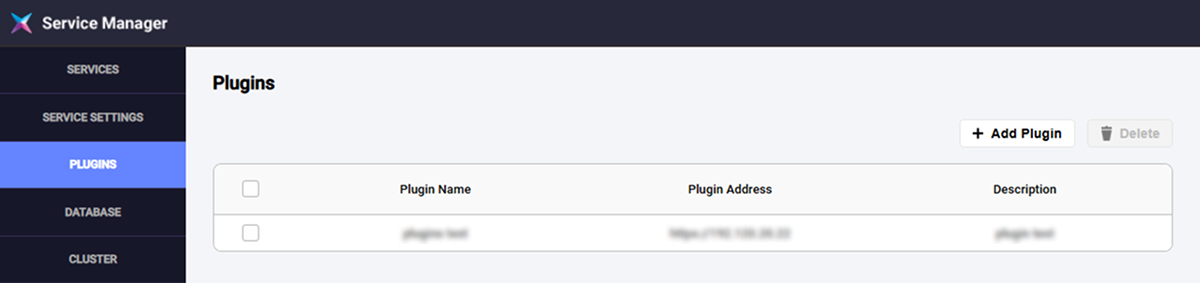
Click the Add Plugin button in the upper right.
-
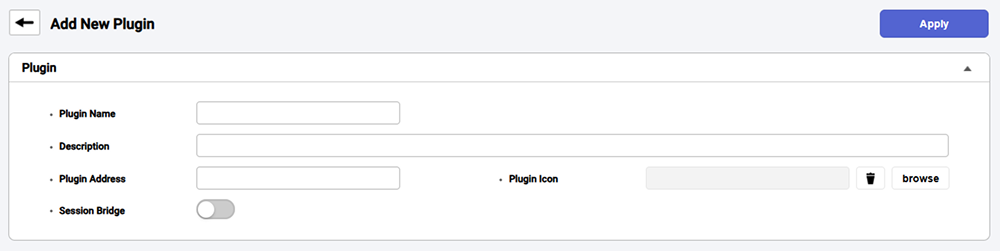
Enter plugin information on the Add New Plugin screen.
-
Enter plugin information and click Apply to complete registration.
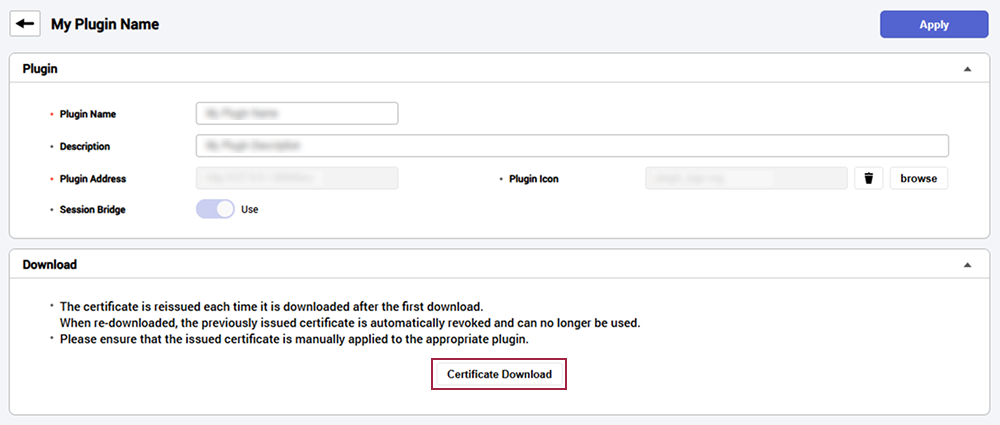
If you have activated Session Bridge, you can download the certificate at the bottom of the screen. The certificate is required for secure communication between BioStar X and the plugin. If you lose the certificate, you can download it again. At this time, the existing certificate will be invalidated.
Enter plugin information
-
Plugin Name: Enter the name of the plugin. You can enter up to 48 characters. You cannot use the same name as an existing registered plugin.
-
Description: Enter a description of the plugin. You can enter up to 500 characters.
-
Plugin Address: Enter the address of the plugin. It must be a valid URL starting with
http://orhttps://, and you cannot use the same address as an existing registered plugin. -
Plugin Icon: Upload the plugin's icon.
-
Supported formats are JPEG, PNG, SVG, GIF.
-
The maximum file size is 1MB, and 0KB empty files cannot be uploaded.
-
Uploaded images will be automatically resized to 104×104 pixels.
-
-
Session Bridge: Activate to use the session bridge. Using this feature automatically inherits permissions for BioStar X users, so no separate login is required when accessing the plugin.
-
If you do not upload an icon, an icon will be generated automatically from the first letter of the plugin name. The uploaded icon can be deleted by clicking the button, and it will be replaced with the automatically generated icon upon deletion.
-
Once Session Bridge is activated, it cannot be deactivated, and the plugin address cannot be changed for security reasons.
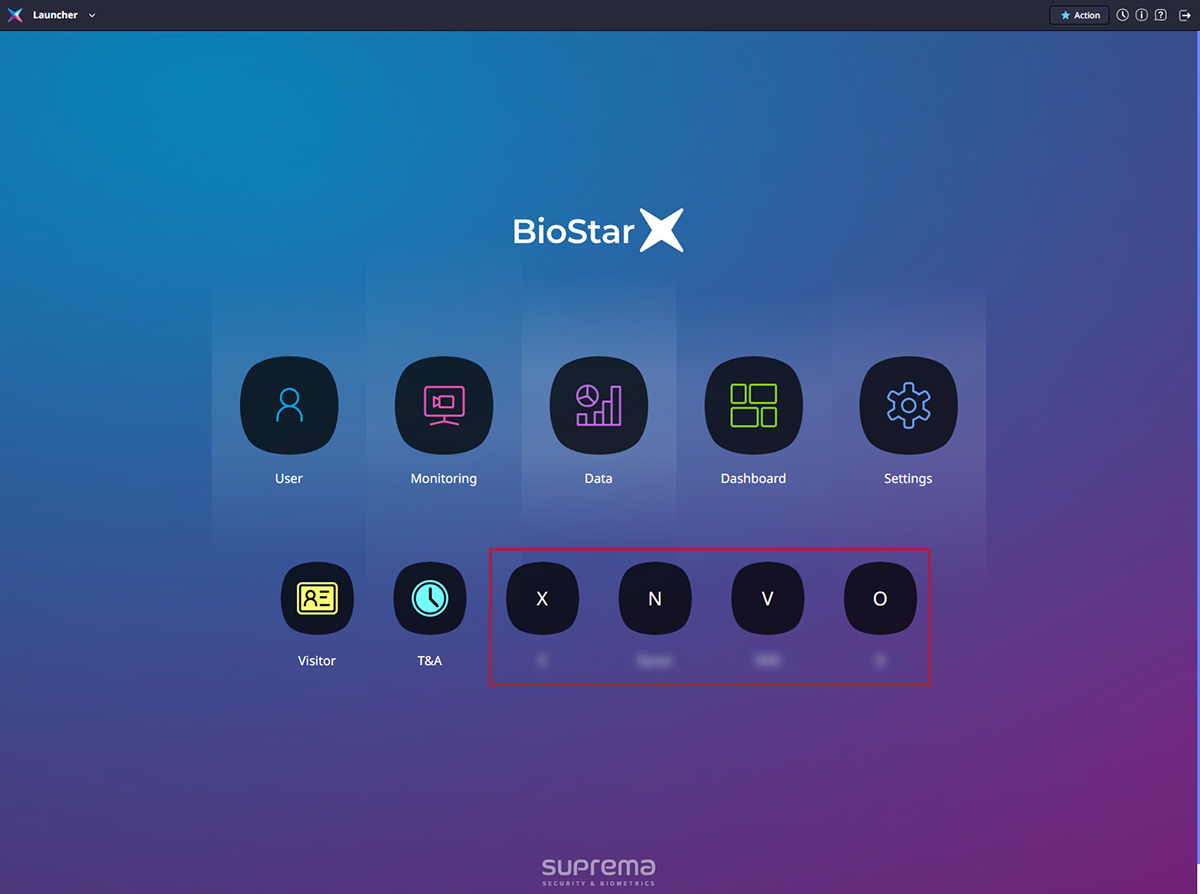
Check on the launcher screen
You can see the added plugins on the Launcher screen of BioStar X.
Plugin management
You can manage the plugins installed through BioStar X Service Manager.
Click Start → BioStar X → BioStar X Service Manager on Windows. Click PLUGINS in the site menu of the BioStar X Service Manager screen.
Check plugin list
You can see all the plugins registered by the user.
Edit plugin
Click the plugin you want to edit from the plugin list. The plugin information edit screen appears. You can edit the plugin name (Plugin Name), description (Description), and icon (Plugin Icon).
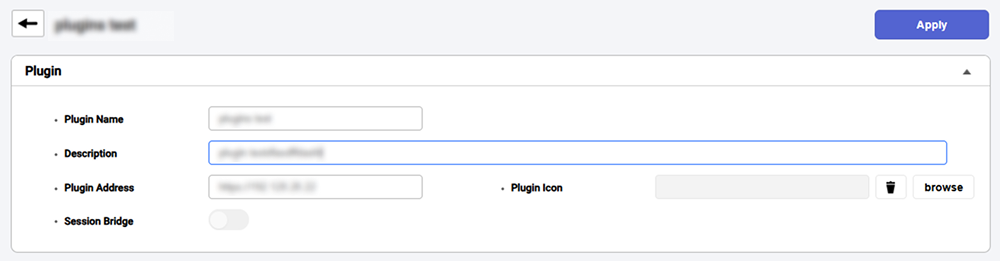
Plugin Address cannot be edited when Session Bridge is enabled.
Delete plugin
-
Select the plugin to delete by clicking the checkbox on the far left of the plugin list.
-
Click Delete in the upper right corner of the screen.
-
When the confirmation message appears, click OK.
-
The time and attendance (T&A) plugin added with the time and attendance license cannot be deleted.
-
The time and attendance management plugin is available as an additional option. For more information on licensing policies, see License Policy.