Register Device
This guide explains how to register a device in BioStar X. Registering a device allows BioStar X to monitor and manage the status of that device. Ensure the device is properly connected before searching for it. It’s convenient to know the location, ID, IP address, and other details in advance when adding multiple devices at once.
-
When registering a new device, change the device key value to the server's data encryption key value. All user data on the device will be deleted during the key conversion.
-
To delete all setting information and user data stored on the device and resend them, click Delete Data & Sync Device. You can find the Delete Data & Sync Device option by selecting the device from the device list and clicking the button.
-
To register all devices in the Waiting Device group, right-click the group name and click Add All Waiting Devices. To register devices individually, right-click on the device name and click Add Waiting Device.
-
If the user ID type on BioStar X differs from the device, change the device settings according to BioStar X’s user ID configuration.
-
If the user ID type on BioStar X is set to alphanumeric, some devices may not be usable or may have restrictions. For more information, see Server Detailed Settings.
-
To register a device and configure its details, see Device Settings.
-
Up to 1,000 devices can connect via Ethernet (TCP/IP).
-
Obtain a Device Manager or higher license to register devices. For more information on the licensing policy, see License Policy.
Before you start
Check the following before registering the device.
-
Set access levels, access groups, and floor levels for access control. For more information, see Access Control Settings.
-
Create a group to manage devices efficiently. For more information, see Manage Device Groups.
Quick registration
Devices on the same network as BioStar X can be automatically searched and registered.
-
Click Settings on the Launcher page.
-
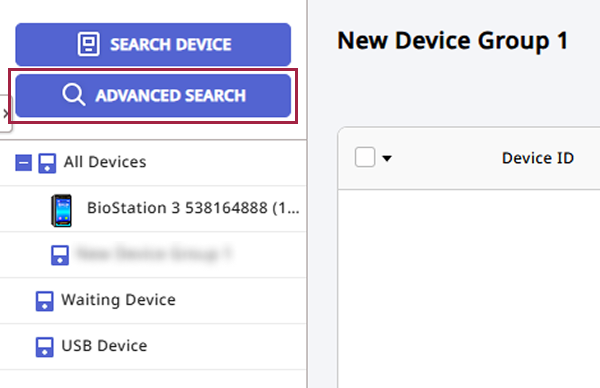
Click Device in the left sidebar.
-
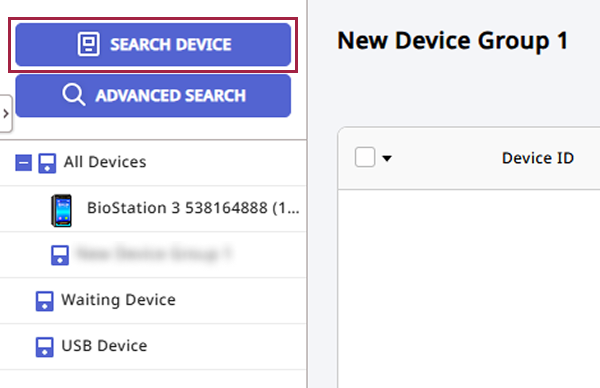
Click Search Device in the device list.
-
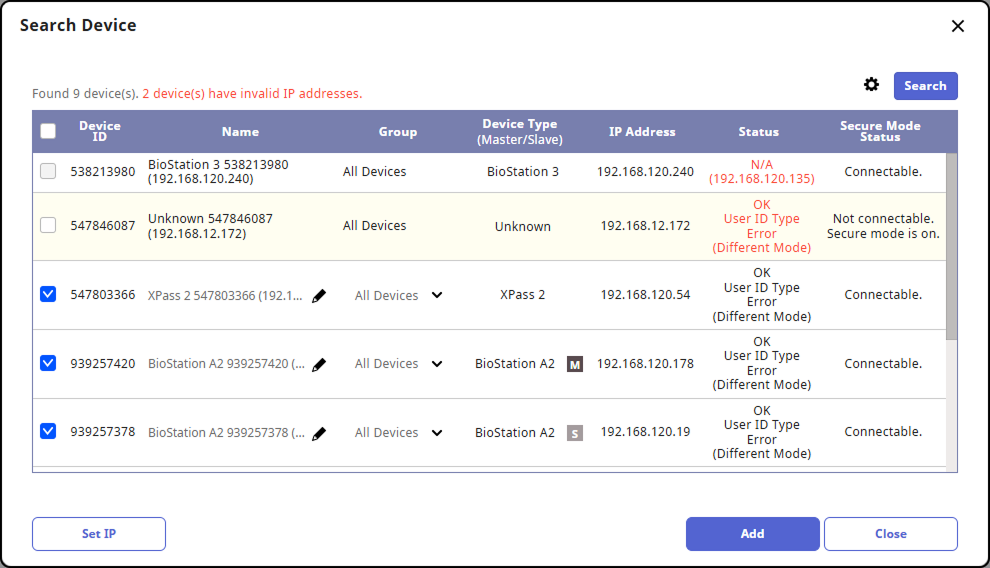
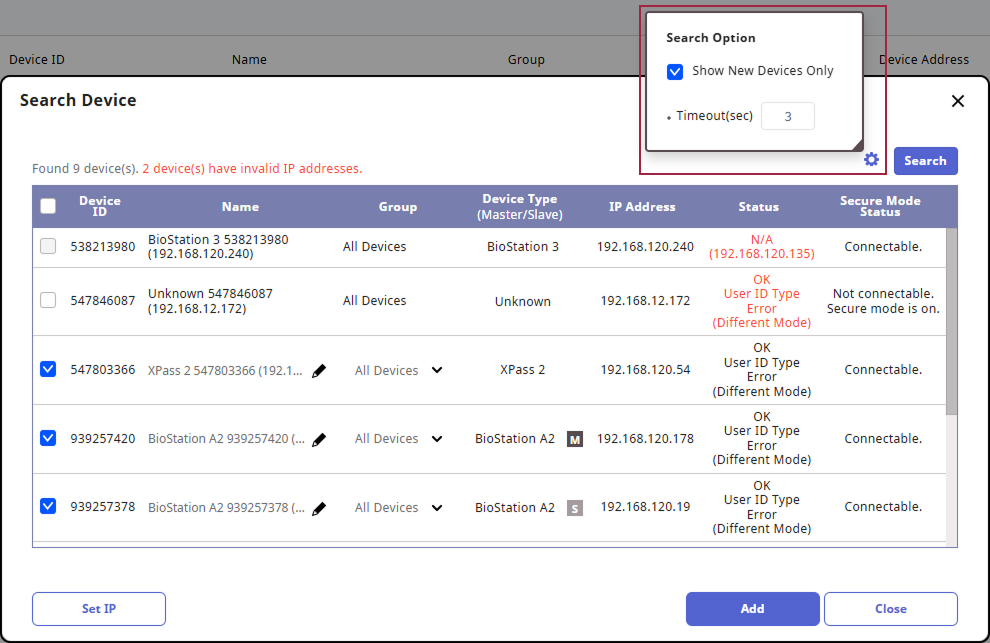
When the Search Device window appears, a list of all devices that can be registered will be displayed. If the desired device is not in the list, click Search in the top right corner.
-
Select the devices to register from the device list or deselect devices to not register.
-
To change the name of the device to be registered, click in the Name column and make the change.

-
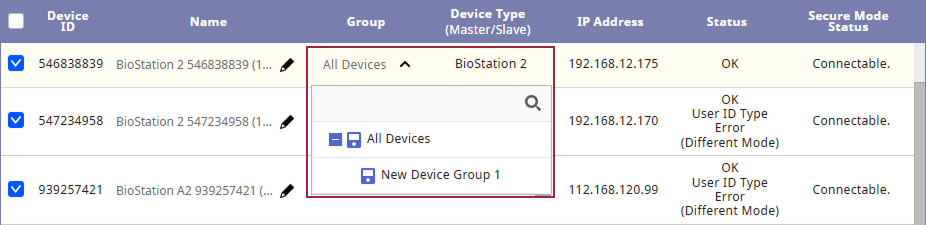
To specify the group for the device to be registered, select it in the Group column.
-
Once all settings for the selected devices are complete, click Add.
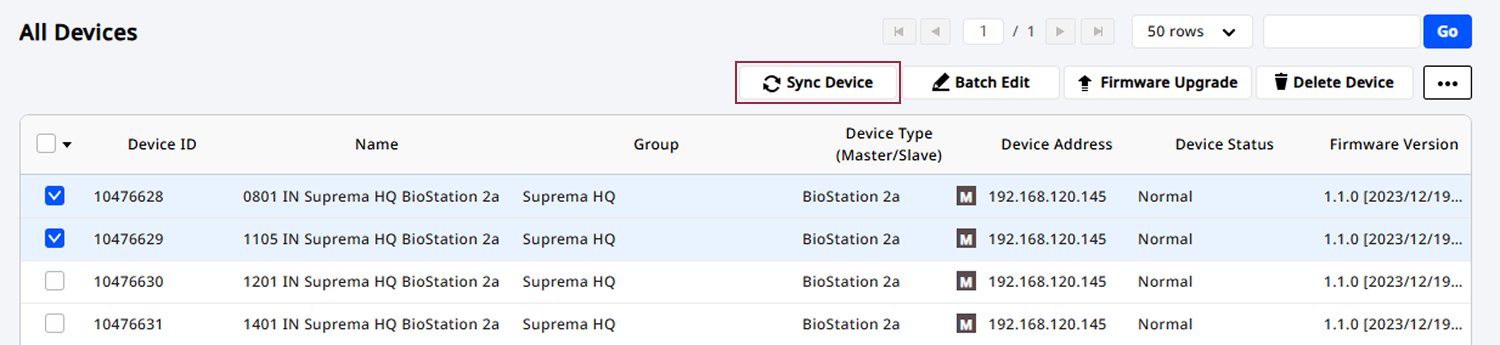
The added devices will appear in the device list. Select the added device and click Sync Device.
Devices for which the IP address is unavailable or needs to be changed can be modified by clicking Set IP. For more information, see #setipaddress.
IP address setting
You can change the IP address of the device to be registered. Click Set IP at the bottom left of the Search Device window. When the Set IP window appears, select the device to change the IP address.

-
Use DHCP: Select this option to allow the device to automatically obtain an IP address via DHCP. Selecting this option may result in the IP address changing each time the device connects to the network.
To manually enter the IP address, subnet mask, gateway, etc., deselect this option.
-
Device ▶ Server Connection: Select this option to configure the device to connect to the BioStar X server. You will need to enter the IP address and port number of the server where BioStar X is installed.
After completing all IP settings and saving changes, click Apply. To cancel changes, click Cancel.
Device search options
You can set device search options by clicking at the top right of the Search Device window.
-
Show New Devices Only: Select this option to display only newly discovered devices in the search list.
-
Timeout(sec): Set the desired time to exclude devices that do not respond for a certain period from the search list. This can be set in seconds, with a default of 3 seconds.
Advanced search
You can specify the IP address and port number of a specific device to register it.
-
Click Settings on the Launcher page.
-
Click Device in the left sidebar.
-
Click ADVANCED SEARCH in the device list.
-
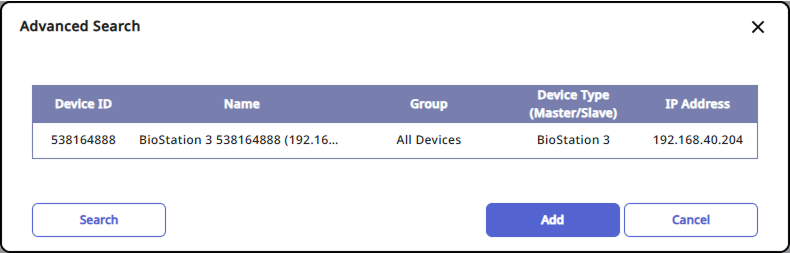
When the ADVANCED SEARCH window appears, enter the IP address and port number of the device to be registered.

-
Click Search to display devices matching the entered criteria.
-
To register the device, click Add.
The added devices will appear in the device list. Select the added device and click Sync Device.