Intrusion Alarm
This guides you on how to set up security. The intrusion alarm settings provide capabilities to lock doors or trigger alarms when intrusion is detected.
Intrusion Alarm Zone: A zone set to emit a warning sound or relay signal if an unauthorized person attempts an intrusion after Arm. This zone normally begins monitoring after the day's work, and emits a preset alarm or signal when an intrusion attempt is detected.
Add intrusion alarm
-
Click Settings on the Launcher page.
-
Click Advanced AC in the left sidebar.
-
Click ADD ADVANCED AC.
-
Select Intrusion Alarm and click Apply.
-
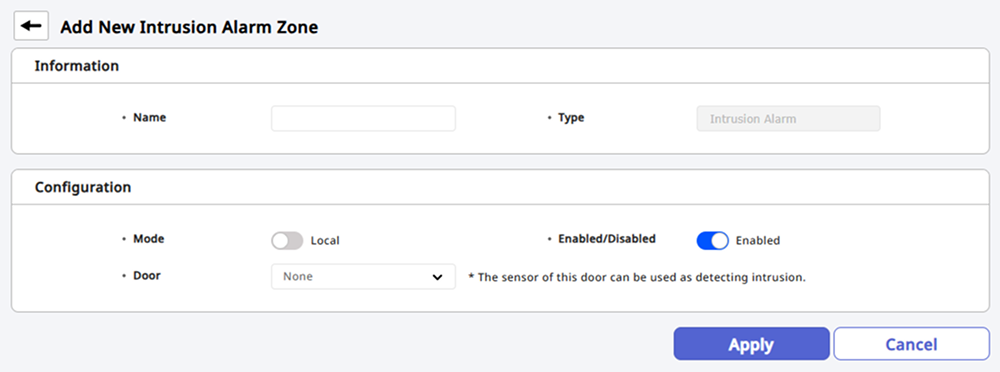
Enter the name of the intrusion alarm setting to add in the Info section.
-
Set the details of the intrusion alarm settings in the Settings section. For more information, see #setting.
-
Add authentication settings for arming and disarming in the Arm / Disarm Setting section. For more information, see #armConfiguration.

The Arm / Disarm Setting section appears when you select a door in the Info section.
-
Set up intrusion detection signals in the Intrusion Setting section. For more information, see #intrusionSetting.

-
Set the actions to be performed when specific events occur in the Alarm section.
-
After completing all settings, click Apply at the bottom of the screen.
The Arm / Disarm Setting, Intrusion Setting, and Alarm sections are available only if the Door option is set in the Settings section.
Setting options guide
The details for intrusion alarm settings are as follows.
-
Mode: Set the application range. The intrusion alarm settings only support the Local mode and can only be set with devices connected via RS-485 and entry devices.
-
Enabled/Disabled: You can activate or temporarily deactivate the settings.
-
Door: Select the door to apply the intrusion alarm feature.
Arming or disarming settings
You can add authentication settings for arming and disarming.
-
Set the delay time until arming or disarming with Delay Time. This means that the arming is the delay time after authentication until the alarm starts, and the disarming is the delay time before the alarm is triggered after an intrusion is detected.
-
Add cards authorized for arming or disarming with Arm/Disarm Card. You can register up to 128 arming/disarming cards.
-
Select groups authorized for arming or disarming with Arm/Disarm Group. You can register up to 128 arming/disarming groups.
-
Set the arming/disarming by the device or input signal with Arm/Disarm Setting. Click the + Add button and configure each item.
Add arming/disarming by device
Click the + Add button in the Arm/Disarm Setting (Device) option. Select the device to control the intrusion alarm feature and choose Arm Type.
Input Type can select Card, Key, or Card or Key. Devices without an LCD screen can only use Card for input type.

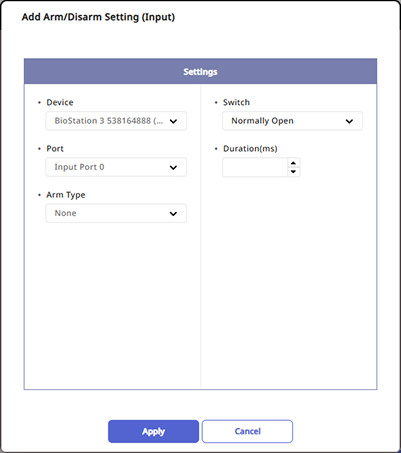
Add arming/disarming by input signal
Click the + Add button in the Arm/Disarm Setting (Input) option. Select the device to control the intrusion alarm feature. Click Port to choose the input port of the selected device.
After choosing Arm Type, set the type of switch and the duration of the signal.
Intrusion detection settings
You can set up the intrusion detection signals. Click + Add and set it as shown below to recognize an intrusion when an N/O sensor connected to input port 0 of the BioStation 3 device sends a signal for 100(ms).
