Advanced Settings
This section provides guidance on configuring items in the Advanced settings. You can check how to configure various advanced features such as Master Administrator, administrator permission management, attendance events, screen and sound, operating conditions and actions, image logs, Wiegand, security tamper, and the meaning of each option. Apply settings suitable for your environment to effectively manage the device.
-
The available network options may differ depending on the device type.
-
If the user has made any arbitrary changes, click the Apply button. Changes will not be applied to the device if not saved.
Add master administrator
Master Admin feature enhances the overall administrator permissions of the device to improve security and prevent unauthorized access and settings changes. A new device must register a Master Administrator through this feature, and only the registered Master Administrator can enter the administrator menu and change settings.
Select two types of desired credentials to enroll from the Advanced → Administrator Master Admin menu.
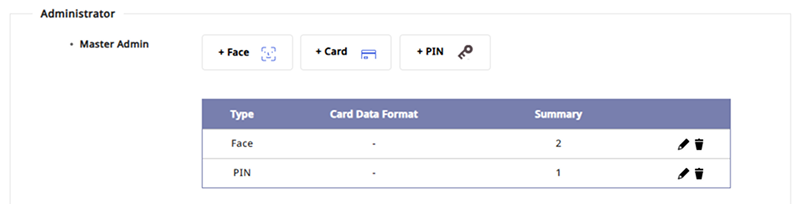
The credentials that can be enrolled as Master Admin are as follows:
| Credential Type | Number of Enrollments | Conditions |
|---|---|---|
| Card | Up to 4 | Supports only CSN and Wiegand types, and cannot enrollmnet duplicates of the same type. |
| Face | Up to 2 | Can only enroll on devices equipped with the same algorithm. |
| Fingerprint | Up to 2 | - |
| PIN | 1 | Must enter at least 8 digits. |
-
To change the enrolled credential, click the button to the right of that credential.
-
To delete the enrolled credential, click the button to the right of that credential.
Enrollment conditions
-
You must enroll at least two types of credentials.
-
The same conditions apply to both new devices and firmware upgrade devices.
-
All credentials supported by the device can be used as authentication means.
-
This feature is only available on Suprema products that support user interfaces via LCD screens.
-
Existing devices that have had their firmware upgraded do not show the Master Admin menu in BioStar X's device settings.
-
Existing devices that have been upgraded do not provide Master Admin settings, however, you can enhance the overall administrator permissions to improve device security using the Two-step Authentication option. For more information on setting up Two-step Authentication, see #two-step-authentication.
-
For more information on devices and firmware versions that support this feature, see Master Admin Setup Guide.
Two-step authentication setting
Existing devices that have been upgraded do not provide Master Admin settings, however, you can enhance the overall administrator permissions to improve device security using the Two-step Authentication option.

If you set the Two-step Authentication option to Use, you must use two or more credentials for overall administrator authentication on the device. For example, if both a card and PIN are enrolled, you must scan the card and enter the PIN to authenticate successfully during overall administrator authentication.
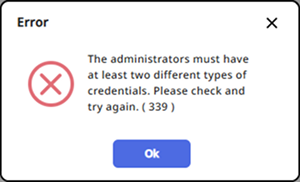
If there are not two types of credentials enrolled for all administrators, activation fails and an error message is displayed. Enroll two types of credentials for all administrators and try again.
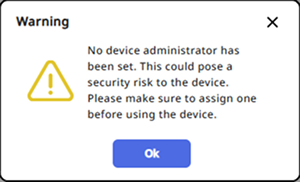
If the overall administrator is not set on the device, the following popup message will appear. Add administrators for all permissions in Advanced → Administrator.
If you activate Two-step Authentication and then delete all administrators' credentials to less than two types, you will not be able to access the administrator menu on the device when unable to connect to BioStar X. Therefore, you need to be particularly careful when deleting administrator credentials.
Add administrators
In the Administrator group, you can manage the device's administrators by permission level.
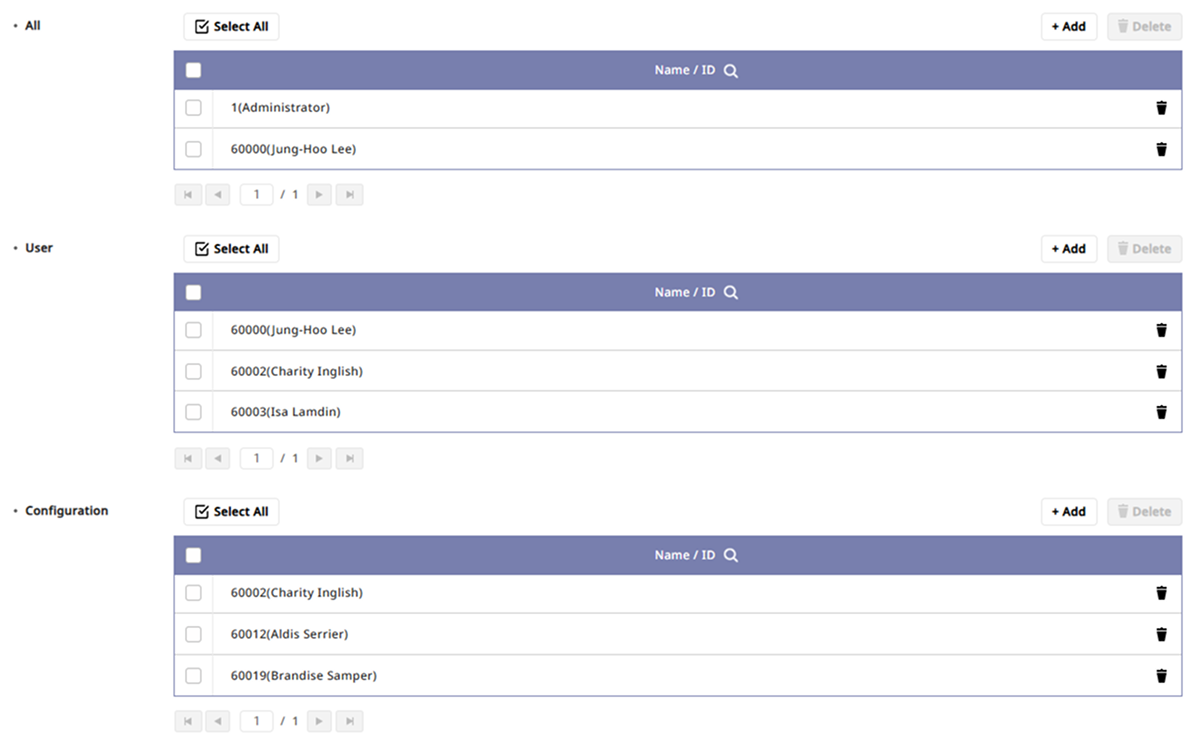
To add an administrator by permission level, click the + Add button. When the user list appears, select the desired user. You can also search for the desired user by clicking the button in the user list.
Refer to the permissions for each level below.
| Level | User Information Management | Device Settings |
|---|---|---|
| All | ✔️ | ✔️ |
| User | ✔️ | ❌ |
| Configuration | ❌ | ✔️ |
-
Up to 1,000 administrators can be added. The number of administrators that can be added may vary depending on the device firmware version.
-
To search for the registered user, click the button in Name / ID.
-
Device Settings allows changes to settings for screen and sound, network, RS-485, etc.
-
To delete an administrator, click the button to the right of the administrator.
-
Administrators set for each device do not affect BioStar X permissions.
Attendance management
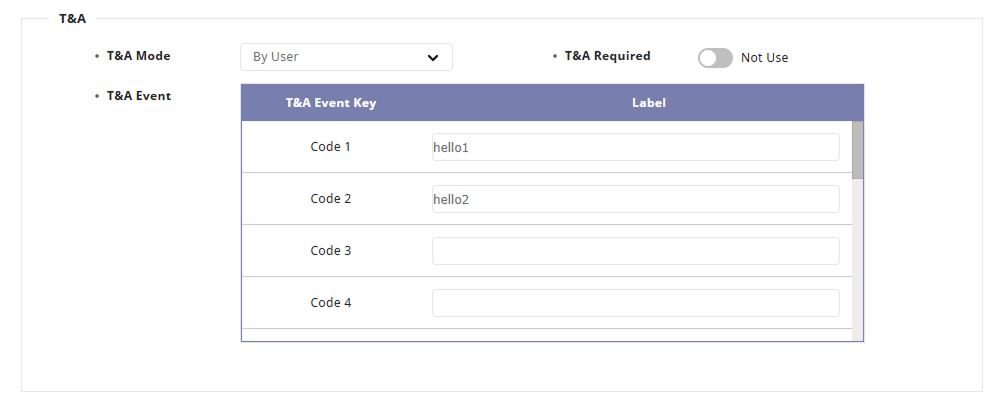
The T&A group allows you to change attendance event names or set attendance modes.
-
T&A Mode: Set how attendance events are registered.
-
Not Use: Attendance events cannot be recorded.
-
By User: The user can select the desired attendance event when authenticating.
-
By Schedule: Attendance events automatically change according to a set schedule. You can select a schedule to apply to attendance events.
-
Last Choice: The last used attendance event can continue to be used.
-
Fixed: Only the selected attendance event can be used. Choose the fixed attendance event to use.
-
-
T&A Required: Set it to require the user to register an attendance event when authenticating.
This option can be used when the T&A Mode option is set to By User.
-
T&A Event: You can modify the names of attendance events or add schedules used when the T&A Mode option is set to By Schedule.
-
T&A Event Key: This is a list of keys that can be used to register attendance.
-
Label: You can change the name of the attendance event based on T&A Event Key.
-
Schedule: You can set a schedule for automatic changes when the T&A Mode option is set to By Schedule.

-
-
Devices without an LCD screen can set attendance modes to Fixed and By Schedule and can register fixed attendance events or attendance events that change according to a pre-set schedule. Supported devices are XPass Q2, XPass 2, XPass D2, BioEntry P2 and BioEntry W2.
-
For more information on setting up a new schedule, see Schedule Settings.
Screen and sound settings
You can change settings related to the device's screen and sound. Available options may vary depending on the device.
XPass 2, XPass D2, BioEntry P2, BioEntry W2
-
Sound: You can turn the sound on or off.
-
LED/Buzzer: Select and set the event items that will activate the LED or buzzer.
-
Keypad Backlight: You can turn the keypad backlight on or off. When this option is activated, the light behind the keypad turns on, making it easier to identify keys in dark environments. You can easily identify keys even in dark environments.
The Keypad Backlight option is available on XPass D2 hardware V02M and firmware version 1.7.1 or higher.
FaceLite, BioLite N2, BioStation L2, BioStation 2
-
Language: Set the language to be displayed on the device's screen. Click the Update Resource button to send language resource files to the device.
-
Device Volume: Set the default sound level produced by the device.
-
Menu Timeout: Set the time it takes to switch from the menu screen to the idle screen.
-
Theme: Change the style of the home screen of the device.
-
Backlight Timeout: Set the time before the screen light automatically turns off.
-
Message Timeout: Set the time before messages automatically disappear.
-
Voice Instruction: You can use voice guidance instead of notification tones.
-
Background: Set items to be displayed in the device's home screen background.
-
Logo: Users can display images they registered on the device's home screen. Click the Add button to register an image.
-
Notice: Administrators can display their input on the home screen.
-
Slide Show: Users can display up to 10 registered images as a slideshow on the home screen. Click the Add button to register an image.
-
To reflect changes in real time on the device, click the Update button.
-
If you change the type of background wallpaper, clicking the Update button will not apply it to the device. At the bottom of the screen, click the Apply button.
-
The options Notice and Slide Show are supported by the BioStation 2 model.
-
-
Sound: Set sound effects to play upon starting, successful authentication, and authentication failure events. Select *.wav files up to 500Kb in file size. Click the Browse button.
To reflect changes in real time on the device, click the Update button.
BioStation 3 Max, BioStation 3, X-Station 2, FaceStation F2, FaceStation 2, BioStation A2
-
Language: Set the language to be displayed on the device's screen. Click the Update Resource button to send language resource files to the device.
-
Device Volume: Set the default sound level produced by the device.
-
Intercom Speaker Volume: Set the volume of sound output from the device when using the IP intercom feature.
-
Intercom Microphone Volume: Set the volume of sound input into the device when using the IP intercom feature.
-
Menu Timeout: Set the time it takes to switch from the menu screen to the idle screen.
-
Backlight Timeout: Set the time before the screen light automatically turns off.
-
Message Timeout: Set the time before messages automatically disappear.
-
Server Private Message: Set whether to use a private message that will be displayed on the screen when the user authenticates.
-
Screensaver: Reduces unnecessary power consumption by reducing LCD screen brightness when the device is not in use. If this feature is not enabled, even if the Screensaver option is enabled on the device, authentication success messages will not be displayed.
This option is supported on BioStation 3 Max, BioStation 3, X-Station 2, FaceStation F2, and FaceStation 2.
-
Voice Instruction: You can use voice guidance instead of notification tones.
-
Home Screen: Set items to be displayed in the device's home screen background.
-
Normal: Displays the default image on the home screen.
-
Logo: Users can display images they registered on the device's home screen. Click the Add button to register an image.
-
Notice: Administrators can display their input on the home screen.
-
To reflect changes in real time on the device, click the Update button.
-
If you change the type of background wallpaper, clicking the Update button will not apply it to the device. At the bottom of the screen, click the Apply button.
-
Setting the home screen as Logo and Slide Show allows displaying up to 10 images as a slideshow on the home screen. Click the Add button to register an image.
-
-
Sound: Set sound effects to play upon starting, successful authentication, and authentication failure events. Select *.wav files up to 500Kb in file size. Click the Browse button.
To reflect changes in real time on the device, click the Update button.
XPass Q2
LED/Buzzer: Select and set the event items that will activate the LED or buzzer.
Trigger conditions and actions settings
In the Trigger & Action group, you can set action conditions and actions based on specific situations. For example, you can configure all alarms to sound when authentication fails or the device becomes unusable if the RS-485 connection is lost.
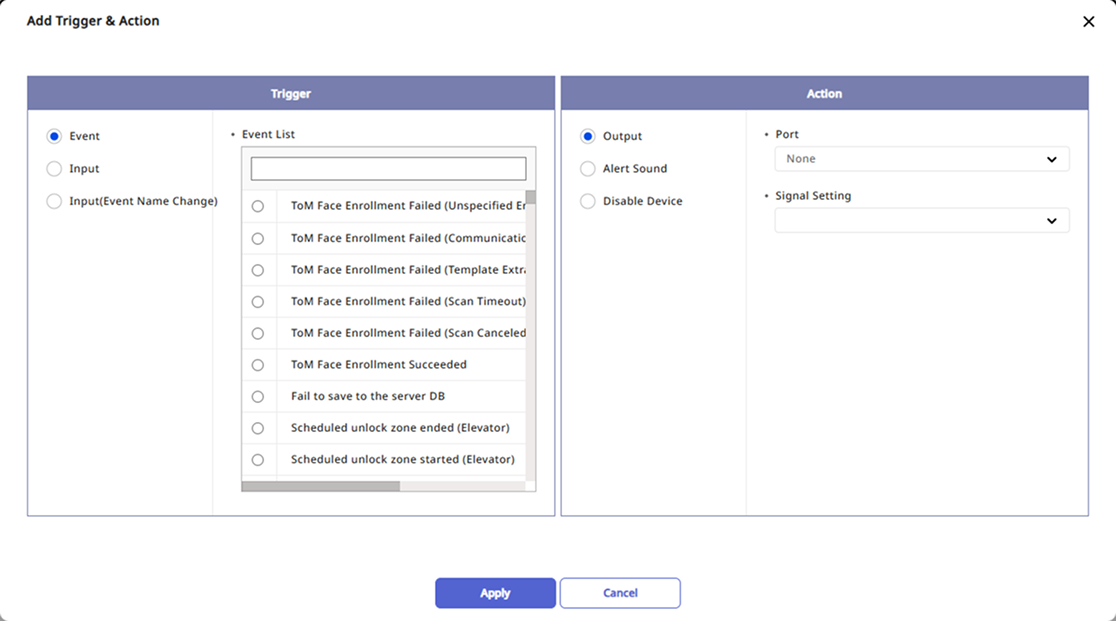
You can register events by selecting them for action conditions and actions or set conditions and actions according to user preferences. Click the Trigger & Action group and then click the Add button on the right.
Trigger
You can select predefined events or add custom conditions.
-
Event: Select a predefined event.
-
Input: Set custom conditions by selecting each item within the option.
-
Input(Event Name Change): Set custom conditions by selecting each item within the option. You can configure it to only detect inputs without separate actions.
-
When Trigger is set to Event, you can select only one event from the event list.
-
When selecting the Input or Input(Event Name Change) options to set custom conditions, if your desired schedule is not available, click + Add Schedule. For more information on schedule settings, see Schedule Settings.
-
If the desired event name is not available when selecting the Input(Event Name Change) option to set custom conditions, click Add Event Name. When this event occurs, the event name will be displayed in the event log and real-time log.
-
Event names can be entered with a maximum of 64 characters.
Action
You can select predefined actions or add custom actions.
-
If you select the Output option to set custom actions and your desired signal setting is not available, click + Add Signal to configure it.
-
If you selected Trigger as Input(Event Name Change), you can set Action as Port None.
Image log settings
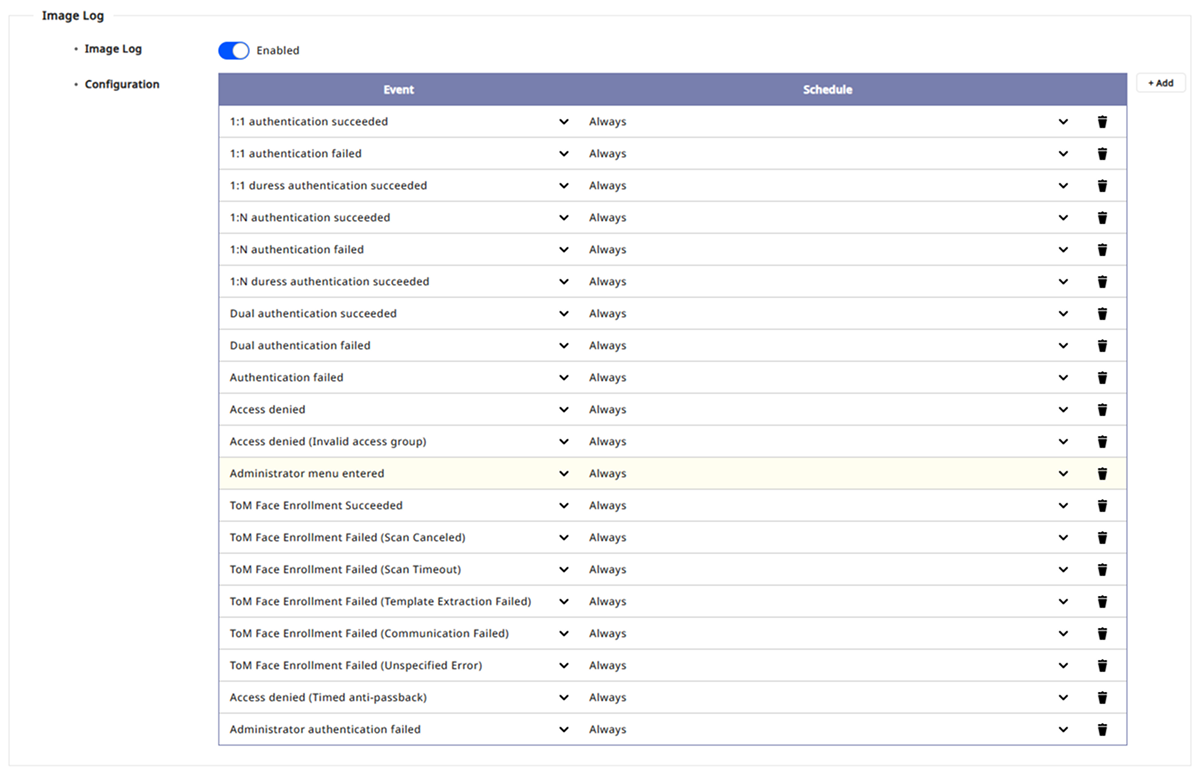
In the Image Log group, you can set image log events and schedules used by the device.
-
Set the Image Log option to Use.
-
Click Configuration and then click + Add to set your desired events and schedules.
-
This feature is supported on BioStation 3 Max, BioStation 3, X-Station 2, FaceStation F2, FaceStation 2, and BioStation A2.
-
For more information on default image log settings, see Image Log Settings.
Wiegand settings
In the Wiegand group, you can configure input and output details related to Wiegand devices.

-
Input/Output: Select the input and output mode.
-
Pulse Width(μs): Set the pulse width for the Wiegand signal.
-
Wiegand Input Format: Change the Wiegand format designated for the device.
-
Pulse Interval(μs): Set the pulse interval for the Wiegand signal.
-
Output Mode: Configure the Wiegand signal output mode.
-
Normal: Scan cards using the configured Wiegand format. You can set error codes and select values to be sent if Wiegand card authentication fails.
-
Bypass: Send CSN regardless of Wiegand authentication. Set this if you are using it as a device without door control functionality.
-
-
Output info: Select the information that will be output to the device during authentication.
For more information on Wiegand format settings, see Set Wiegand Card Format.
Security tamper settings
If a tamper event occurs on the device, you can set it to delete all user information, logs, and security keys stored on the device. To activate the Secure Tamper feature, set it to On.

Analog intercom settings
You can set whether to use an analog intercom. To use the intercom connected to the device, click Interphone group and select Use.
This feature is supported only by the BioStation 2 model.
Camera settings
You can set the camera frequency. Incorrectly setting the frequency in environments with fluorescent lights can cause flickering in images. Set the frequency for the local area in the Camera group.
-
This feature is supported by the FaceStation F2 and BioStation A2 models with firmware version 2.1.4 or higher.
-
Camera frequencies vary by geographic location. The USA typically uses 60Hz, while most other regions use 50Hz. For the camera frequency in your area, consult your dealer.