Network Settings
Here are the network settings for the registered device. In the Network section, you can set the device's TCP/IP, RS-485, and server communication network.

-
The available network options may differ depending on the device type.
-
If the user has made any arbitrary changes, click the Apply button. Changes will not be applied to the device if not saved.
TCP/IP settings
In the TCP/IP group, you can set the device's IP address.
For more information on IP address settings when registering a device, see Register Device.
Dynamic IP settings
To set the device to use dynamic IP, click the checkbox for the Use DHCP option. The device will automatically receive an IP address from the DHCP server, which may change. In this case, the IP address of the device may change.
Static IP settings
To set the device's IP address statically, uncheck the checkbox for the Use DHCP option. You can enter the device's network information in the details below.
-
OSDP ID: Enter the OSDP address of the device. This should be a number between 0 and 126.
-
Subnet Mask: Enter the device's subnet mask.
-
Gateway: Enter the device's gateway address.
-
Device Port: Enter the device's port number.
-
DNS Server Address: Enter the device's DNS server address.
View devices and firmware versions that can accept DNS server addresses
-
BioStation 3 Max firmware 1.0.0 or later
-
XPass Q2 firmware 1.0.0 or later
-
BioEntry W3 firmware version 1.0.0 or higher
-
BioStation 3 firmware 1.0.0 or higher
-
X-Station 2 firmware 1.0.0 or higher
-
FaceStation F2 firmware 1.0.0 or higher
-
XPass 2 firmware 1.0.0 or higher
-
FaceLite firmware 1.0.0 or higher
-
BioLite N2 firmware 1.0.0 or higher
-
FaceStation 2 firmware 1.0.0 or higher
-
BioStation L2 firmware 1.0.0 or higher
-
BioStation A2 firmware 1.0.0 or higher
-
BioStation 2 firmware 1.2.0 or higher
Wireless LAN settings
In the WLAN group, you can enable or disable the device's wireless LAN settings. Detailed settings are available in the device's user guide.
Refer to the following devices that support wireless LAN settings:
-
BioStation 2
-
BioStation A2
-
FaceStation 2
-
BioStation 3
Server communication settings
In the Server group, you can configure how the device communicates with the BioStar X server.
-
Device ▶ Server Connection: Selecting this option allows you to enter the IP address and port number of the BioStar X server the device will connect to.
-
Server Address: Enter the IP address or domain name of the BioStar X server.
-
Server Port: Enter the port number of the BioStar X server.
This feature is useful when the IP address of the BioStar X server changes. By pre-configuring this option on multiple devices before changing the server's IP address, the devices will automatically connect to the updated IP address.
View devices and firmware versions that allow entering domain names in Server Address
-
BioStation 3 Max firmware 1.0.0 or later
-
XPass Q2 firmware 1.0.0 or later
-
BioEntry W3 firmware version 1.0.0 or higher
-
BioStation 3 firmware 1.0.0 or higher
-
X-Station 2 firmware 1.0.0 or higher
-
FaceStation F2 firmware 1.0.0 or higher
-
XPass 2 firmware 1.0.0 or higher
-
FaceLite firmware 1.0.0 or higher
-
BioLite N2 firmware 1.0.0 or higher
-
BioEntry P2 firmware 1.0.0 or higher
-
FaceStation 2 firmware 1.0.0 or higher
-
BioEntry W2 firmware 1.0.0 or higher
-
BioStation L2 firmware 1.0.0 or higher
-
BioStation A2 firmware 1.0.0 or higher
-
BioStation 2 firmware 1.2.0 or higher
Serial communication settings
In the Serial group, you can set the mode, transmission performance, and display authentication results for devices connected via RS-485.
-
RS485: Set the RS-485 mode.
-
Baud Rate: Set the RS-485 communication performance.
-
Authentication Result: Choose the authentication result to display on the device’s screen when using the device with a third-party controller.
-
Display Result from Controller: You can display the authentication result from the third-party controller on the device.
-
Display Device Matching Result: You can display the device’s authentication result.
-
The Authentication Result option is enabled when the RS485 option is set to Slave or Default.
Intelligent slave settings
In the Intelligent Slave group, when a user authenticates using a fingerprint in an environment where Suprema devices are connected to third-party controllers, the authentication result is sent as Open Supervised Device Protocol (OSDP) card data to support numerous 1:1 or 1:N matching.
-
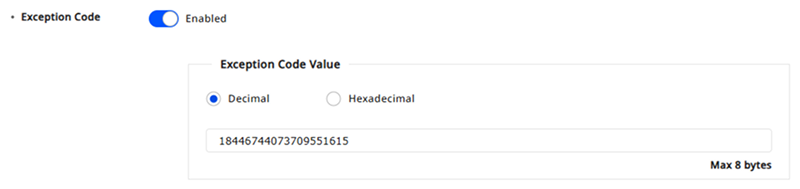
Exception Code: When using the intelligent slave, if an exception occurs such as authentication failure, enter the exception code in decimal (0-18446744073709551615) or hexadecimal (0-FFFFFFFFFFFFFFFF) format to record an accurate log. Hexadecimal can be input using numbers or letters.
-
Output Info: You can output the card ID or user ID upon successful authentication.
-
OSDP ID: Enter the OSDP address of the device. This should be a number between 0 and 126.
-
You can input data of up to 8 bytes for Exception Code.
-
The Intelligent Slave option is enabled when the RS485 option is set to Default.
View devices and firmware versions that support the Intelligent Slave option
-
BioStation 3 Max firmware 1.0.0 or later
-
XPass Q2 firmware 1.0.0 or later
-
BioEntry W3 firmware version 1.0.0 or higher
-
BioStation 3 firmware 1.0.0 or higher
-
X-Station 2 firmware 1.1.0 or higher
-
FaceStation F2 firmware 1.1.2 or higher
-
XPass 2 firmware 1.2.3 or higher
-
BioLite N2 firmware 1.4.1 or higher
-
BioEntry P2 firmware 1.4.1 or higher
-
BioEntry W2 firmware 1.6.3 or higher
-
BioStation L2 firmware 1.6.1 or higher