How to Use a Wireless Door Lock
A wireless door lock lets CoreStation control access without wiring to the door. The wireless door lock communicates wirelessly with the OSDP antenna connected to CoreStation.
This document explains how to use a wireless door lock, from activating a device license to adding the OSDP antenna and wireless door lock, setting authentication modes, and managing status.
Before you start
Add a wireless door lock to a CoreStation registered in BioStar X. For more information on registering CoreStation, see Register Device.
Supported versions and devices
-
CoreStation v1.7.1 or later, BioStar X v1.0.0 or later
-
OSDP antenna: U&Z CX8936 (OSDP v2.2 or later)
-
Wireless door lock: U&Z CX217x (Handle), CX212x (Knob)
-
Card: CSN card, MIFARE or DESFire type
Connection limits
Connect an OSDP antenna to CoreStation before connecting a wireless door lock.
-
Up to 2 OSDP antennas per 1 CoreStation
-
Up to 6 wireless door locks per 1 OSDP antenna (up to 12 wireless door locks per 1 CoreStation)
Prerequisites
-
Wireless lock device license (contact your BioStar X reseller)
-
SERVICEKEY card (provided by the wireless door lock supplier)
You can issue a device license for up to 12 devices, equal to the number of wireless door locks you want to connect. The total cannot exceed 12 devices, regardless of the number of device licenses.
Add wireless door lock
Activate a device license
Enrolling and using the wireless door lock requires a separate device license.
Use BioStar X to activate wireless door lock device licenses on a CoreStation.
-
Click Settings on the Launcher page.
-
Click License → Device License on the left sidebar.
-
Click Browse.

-
Load the wireless door lock device license you received.
-
Check Device List, and to activate the device license, click Activate.
-
If license activation fails, check the error message and try again.
-
The device license file is an encrypted file and cannot be modified arbitrarily.
-
The serial number (S/N) determines the device license. If you change the device serial number (S/N) without authorization, Suprema does not provide warranty service for the license.
-
For more information on device licenses, see License Policy.
Add OSDP antenna
To add a wireless door lock to CoreStation, add the OSDP antenna first.
-
Click Settings on the Launcher page.
-
Click Device → Device on the left sidebar.
-
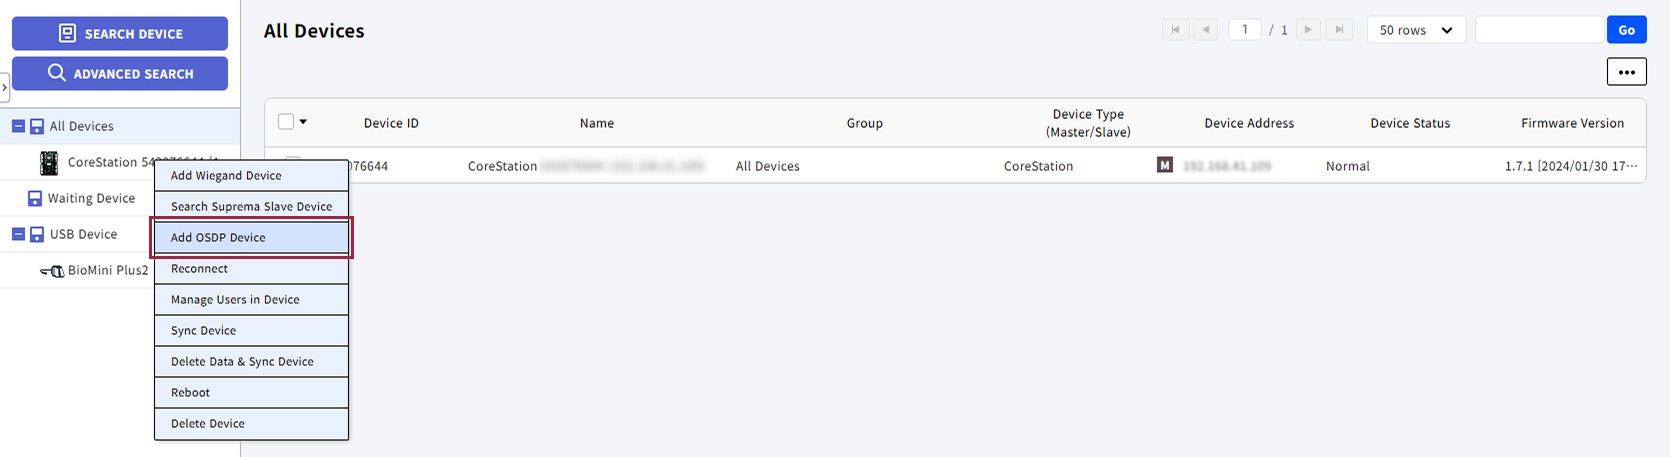
Right-click the CoreStation device in the All Devices list.
-
Click Add OSDP Device from the popup menu.
-
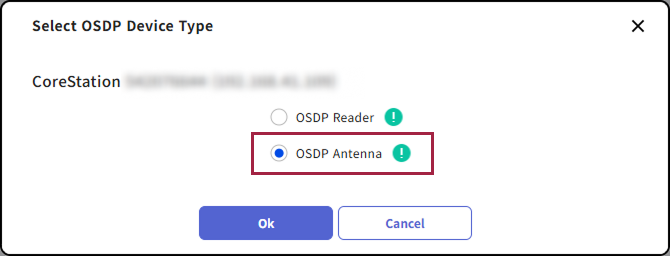
When the Select OSDP Device Type window appears, select OSDP Antenna and click Ok.
-
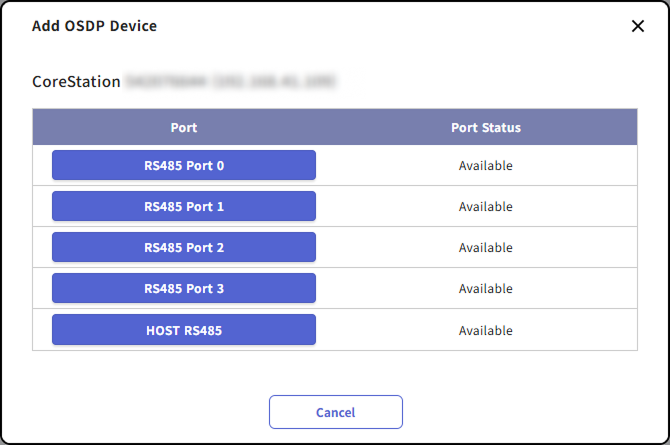
When the port list appears, select a port with Port Status set to Available to add the OSDP antenna.
-
Set Information and Network (RS-485), then click Apply.
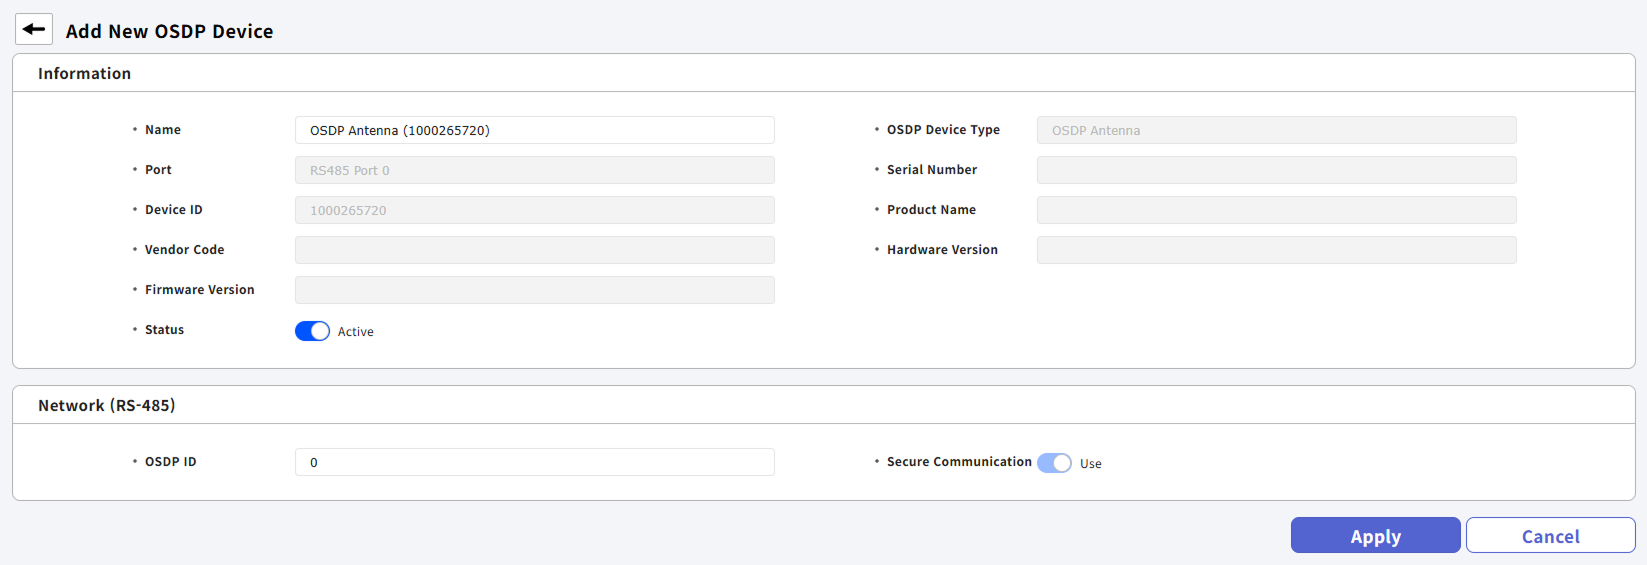
OSDP ID defaults to 0. Enter the OSDP ID set on the OSDP antenna.
Add wireless door lock
Add the wireless door lock with the OSDP antenna.
-
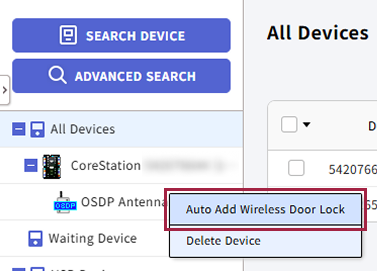
Right-click the added OSDP antenna.
-
Click Auto Add Wireless Door Lock from the popup menu.
-
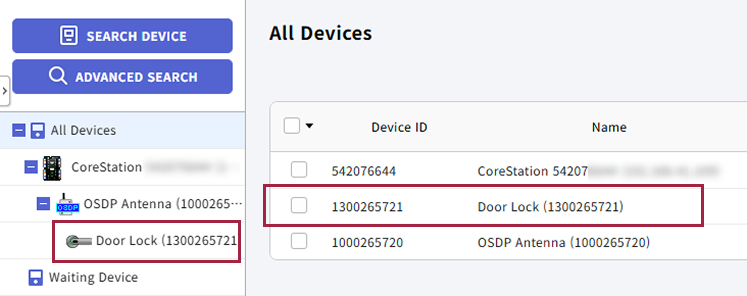
Tag the provided SERVICEKEY card on the wireless door lock.
The device list shows the connected wireless door lock under the OSDP antenna. When the connection succeeds, the wireless door lock's blue LED turns on.
-
The SERVICEKEY card is a dedicated card. Tag it to enter service mode and pair with the OSDP antenna. Obtain the SERVICEKEY card from the wireless door lock vendor.
-
Set the connected wireless door lock as an entry or exit device for a door. For more information on registering doors, see Register Door.
Set authentication mode
Set the authentication mode for access through the wireless door lock. The wireless door lock uses only CSN cards for authentication.
-
Click the wireless door lock in the device list.
-
In the Authentication section, under Auth Mode, click + Add.
-
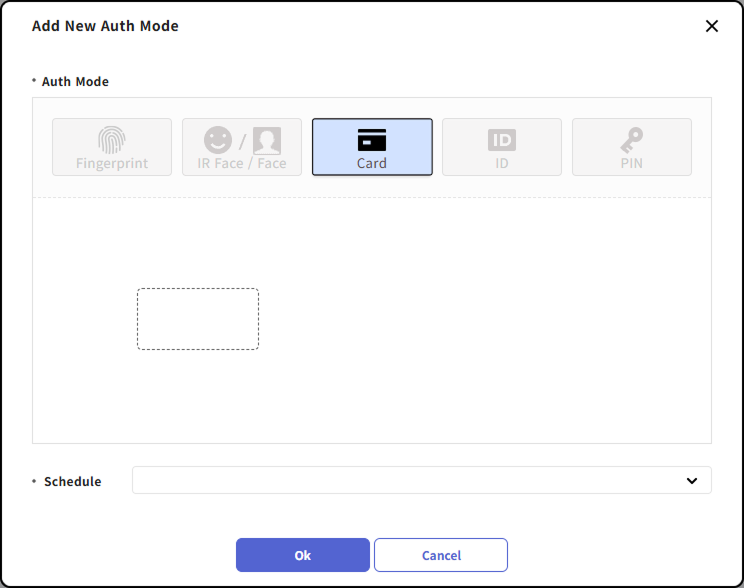
When the Add New Auth Mode window appears, drag Card to an empty area.
-
Select the desired schedule from the Schedule item.
-
Click Ok to enroll the authentication mode.
-
Click Apply at the bottom right of the screen to save the settings.
-
When authentication with a CSN card succeeds, the wireless door lock turns on the green LED. If authentication fails, the wireless door lock turns on the red LED.
-
If no schedule is available, click + Add Schedule in the Schedule item to add a schedule.
-
For more information on adding schedules, see Schedule Settings.
Change wireless door lock settings
After adding the wireless door lock, you can change the device name, status, and authentication settings.
-
Click Settings on the Launcher page.
-
Click Device → Device on the left sidebar.
-
Click the wireless door lock in the device list.
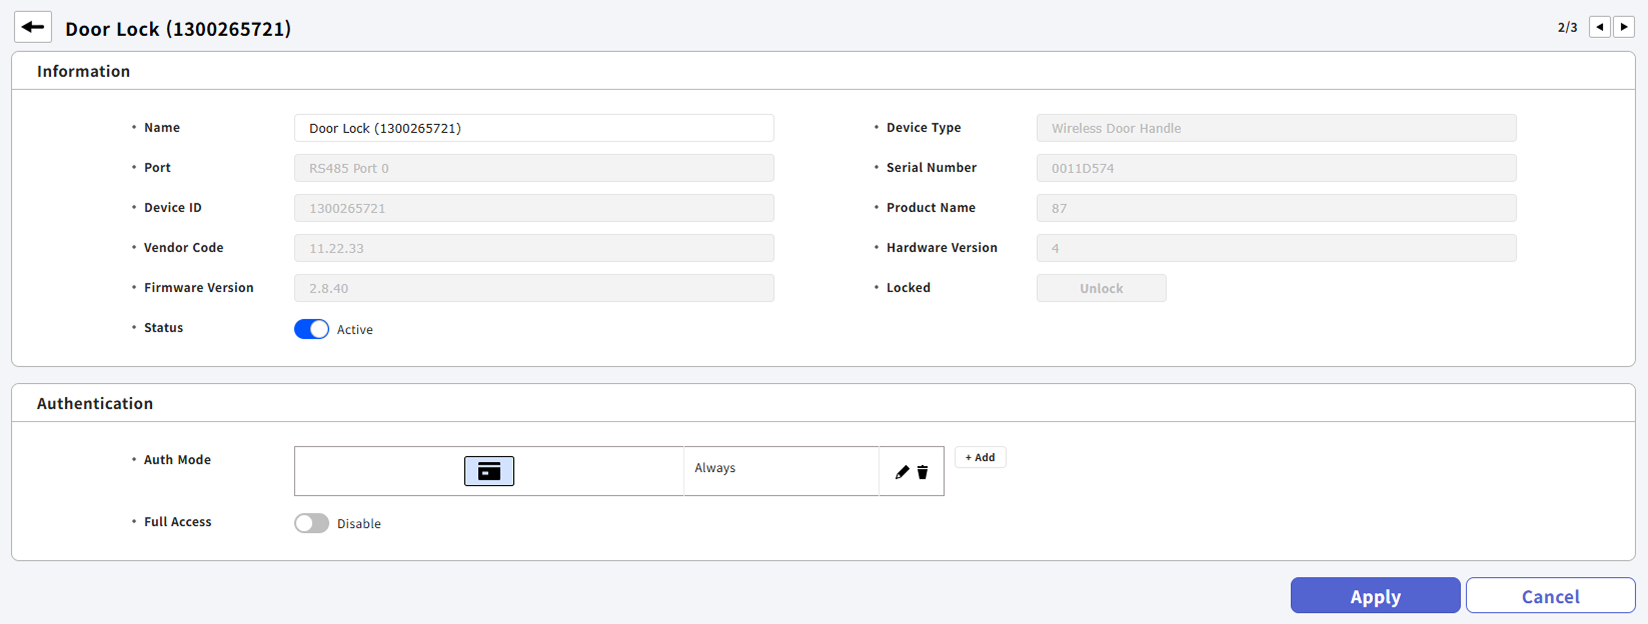
-
Name: Enter a device name. If left blank, the system assigns it automatically.
-
Status: Set the device status. If set to Inactive Inactive, CoreStation does not communicate with the wireless door lock. Use this when inspecting the wireless door lock or replacing the battery. For information on changing the status in the device list, see #changeStatus.
-
Auth Mode: The wireless door lock can only use a CSN card as an authentication mode. For more information, see #setAuthmode.
-
Full Access: Grant full access to users registered on the connected CoreStation without setting an access group.
-
-
Click Apply to save the settings.
Change wireless door lock status
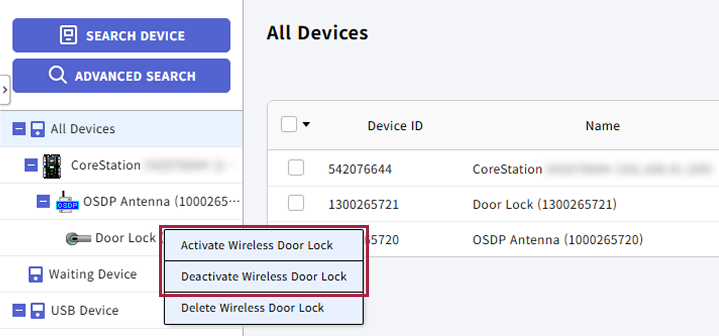
In the device list, activate or deactivate the wireless door lock.
-
Right-click the wireless door lock under All Devices.
-
Click Activate Wireless Door Lock or Deactivate Wireless Door Lock in the popup menu.
Delete a wireless door lock
-
Click Settings on the Launcher page.
-
Click Device → Device on the left sidebar.
-
In the device list, click the checkbox on the far left of the wireless door lock to delete.
-
Click Delete Device at the top right of the device list.

-
When the deletion confirmation message appears, click Delete.
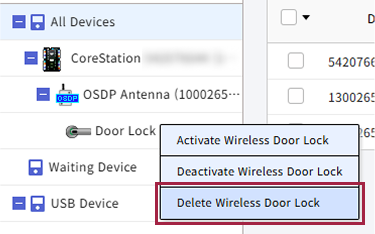
You can also delete a wireless door lock from the All Devices list on the left of the device list. Right-click the wireless door lock to delete, and click Delete Wireless Door Lock.
Deleting a wireless door lock keeps device licenses on CoreStation active. The system allows the same number of additional wireless door lock connections as the number of wireless door locks deleted.
Check wireless door lock status in Monitoring
-
Click Monitoring on the Launcher page.
-
Click DEVICE tab on the left sidebar of the screen.
-
Click the wireless door lock in the device list.
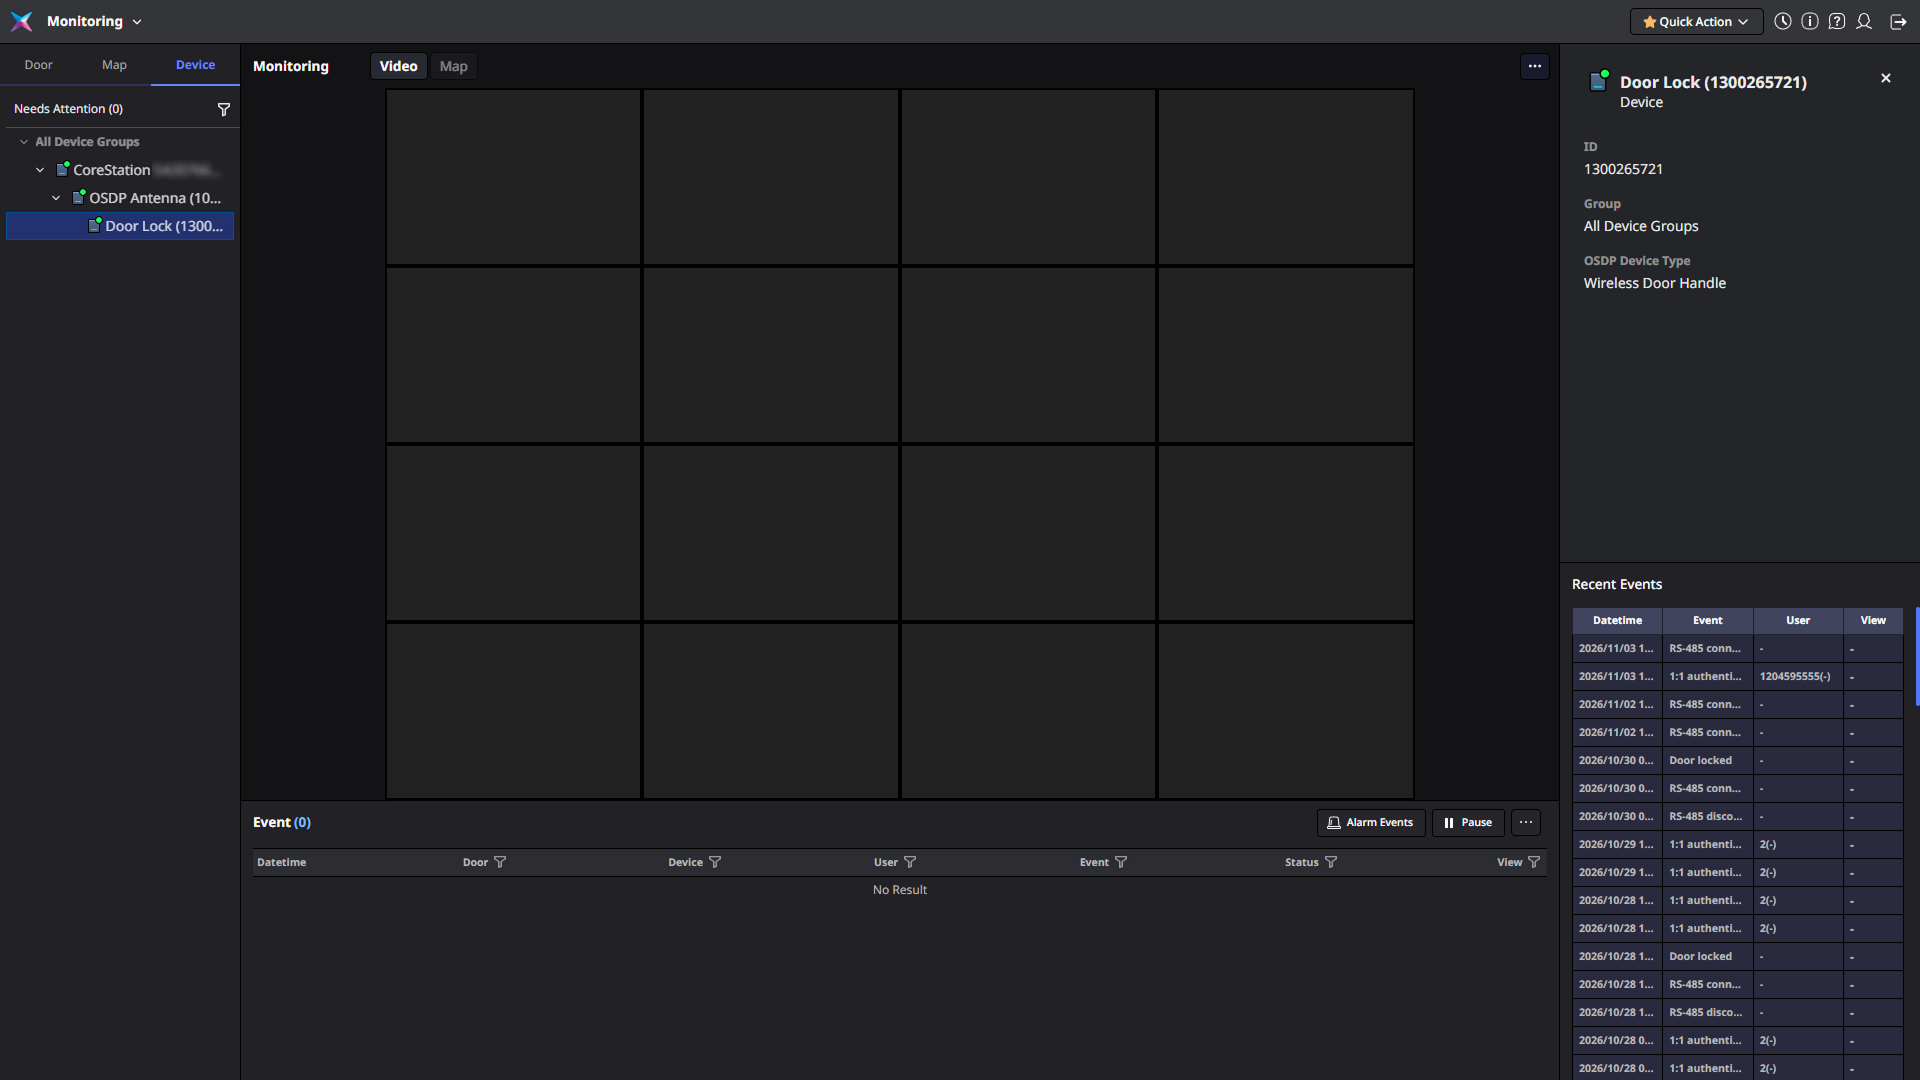
A panel appears on the right side, showing details and recent events for the wireless door lock.