Configure Door Control through Authentication
Door control through authentication switches a door to always open when a designated user authenticates twice in a row (Double Badge) with the same card on a supported device. In Always Open mode, double-badge again. The door returns to its original mode when the allowed schedule ends.
Before you start
-
The door must belong to an access group. On the Add Door screen, this feature is unavailable because the door is not in an access group yet. Save the door, add it to an access group, and set this feature on the Edit Door Info screen. For more information on access group settings, see Access Control Settings.
-
For more information about adding doors and editing door information, see the following documents.
-
Support for door control through authentication starts with the following devices and firmware versions. Use this feature only on doors that use supported devices.
-
XPass 2 firmware version 1.5.3 or higher
-
FaceStation F2 firmware 2.3.0 or higher
-
-
This feature works only with card-type credentials (CSN, Wiegand, smart cards, and mobile card CSN/ToM). This feature does not apply to template credentials or biometric authentication such as fingerprint and Facial Authentication. The system processes them as standard access authentication.
-
Door control through authentication works only when the device authentication mode is set to Card. BioStar X does not check the device authentication mode. Verify the device authentication mode before using this feature.
-
The device recognizes a double badge only when the two authentications occur within 3 seconds. If the interval exceeds 3 seconds, the device treats each authentication as a separate access authentication.
Set door control through authentication
-
Click Settings on the Launcher page.
-
Click Access Point → Door on the left sidebar.
-
In the door list, click the door to configure.
-
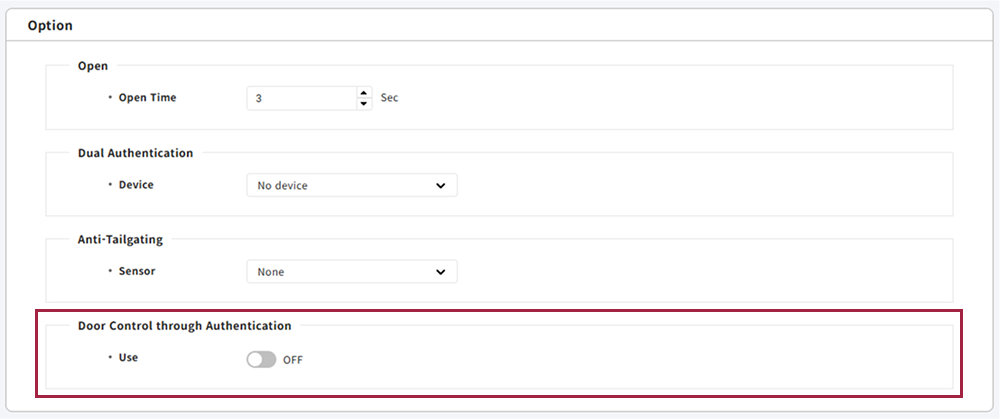
In the Option section, go to Door Control through Authentication.
-
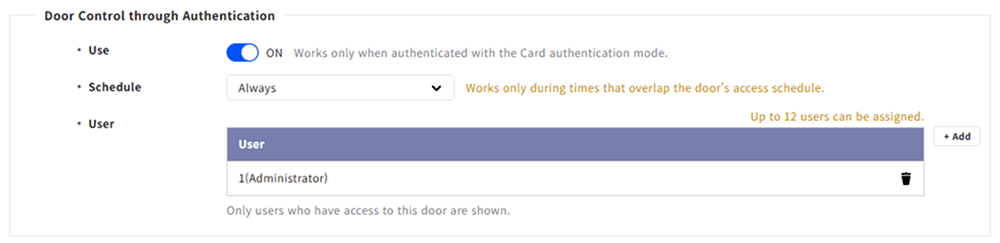
Set the Use option to ON.
-
In Schedule, select the schedule for using this feature. The default is Always. If the schedule is not available, add a schedule first.
-
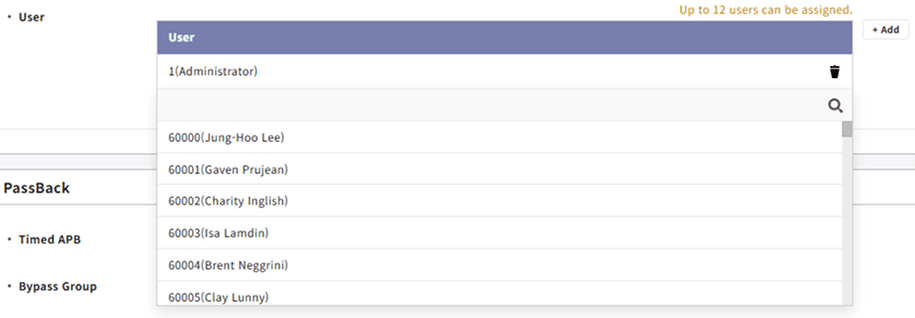
To add users who can control the door with Double Badge, click + Add and select from the User list.
-
User list shows only users with door access. Check access groups and access levels in Settings → Access Management → Access Control.
-
Specify up to 12 users.
-
Click to search for a specific user.
-
Select individual users only. User group selection is unavailable.
-
-
Once all configurations are complete, click Apply at the bottom of the screen.
-
For more information on adding schedules, see Schedule Settings.
-
For more information on setting access groups and access levels, see Access Control Settings.
Notes
-
Doors that use door control through authentication cannot change the entry or exit device to an unsupported model. Before changing the device, set Door Control through Authentication to OFF.
-
If a control user loses door access, the list marks the user as No access. This status prevents saving. Grant access again or remove the user from the list.

-
Saving requires at least one control user.
-
If the selected schedule is deleted, the Schedule field shows Deleted Schedule. This status prevents saving. Select another schedule.
-
In Hard mode, access is denied when an anti-passback violation occurs, so door control through authentication does not work. In Soft mode, access is allowed, so it does work.
-
When other advanced access control features apply, they take priority.
Related information
-
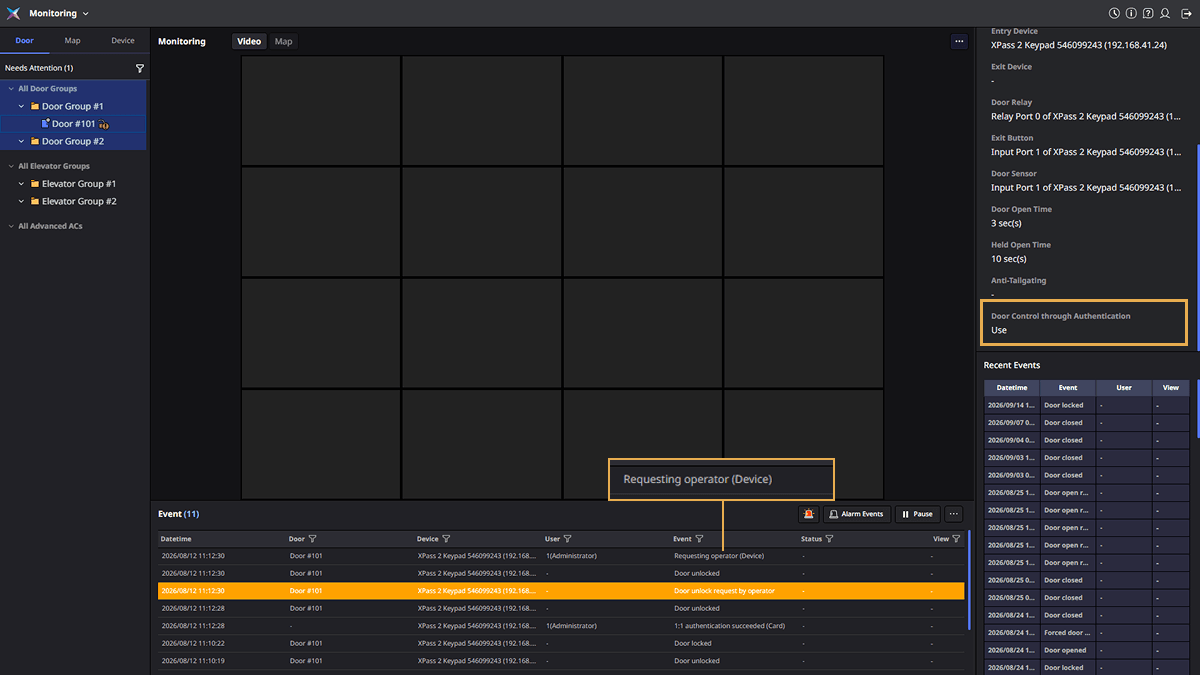
Check door control through authentication in the door preview panel on Monitoring. Related events appear as Requesting operator in Event. For more information on door monitoring, see Monitor Doors.
-
The audit trail records setting changes. For more information, refer to View Access Control Audit Logs.