Manage Door Group
This guide describes how to set up groups to easily manage multiple doors. A door group is a feature that allows you to manage several doors as one group. If you set up a group, you can configure multiple doors at once.
Register group names using door locations or office names for easier management.
Add door group
-
Click Settings on the Launcher page.
-
Click Door in the left sidebar.
-
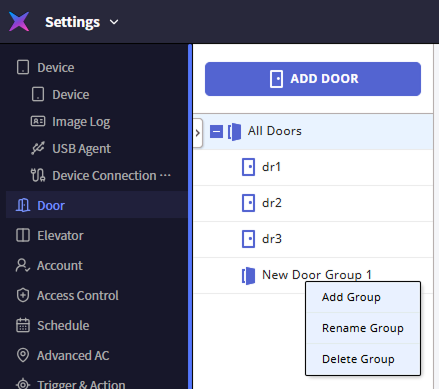
Right-click on All Doors from the door list.

-
Click Add Group in the popup menu.
-
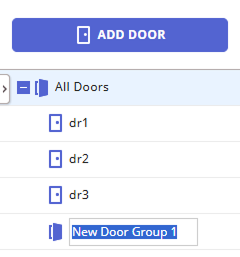
Enter your desired group name.
-
You can create up to 8 levels of door groups.
-
The door group name can be up to 48 characters long.
Rename door group
-
Click Settings on the Launcher page.
-
Click Door in the left sidebar.
-
Right-click on the group you want to rename from the door list.
-
Click Rename Group in the popup menu.
-
Enter the new group name.
The door group name can be up to 48 characters long.
Delete door group
-
Click Settings on the Launcher page.
-
Click Door in the left sidebar.
-
Right-click on the group you want to delete from the door list.
-
Click Delete Group in the popup menu.
Deleting a door group removes all doors included in the group. To avoid deleting the doors, move them to another group before deleting the group.
Add door to group
Add from door list
-
Click Settings on the Launcher page.
-
Click Door in the left sidebar.
-
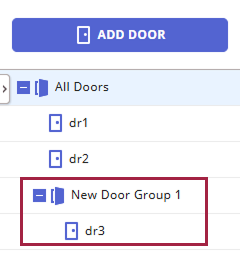
Select the door you want to add to a group from the door list and drag it to the desired group.
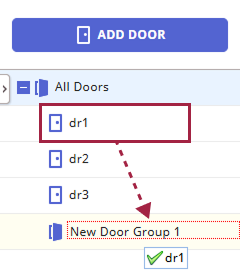
The selected door moves to the group.
Add from door information
-
Click Settings on the Launcher page.
-
Click Door in the left sidebar.
-
Click the door you want to add to a group from the list on the right side of the screen.

-
When the door information edit screen appears, click the Group option in the Information section.

-
Select the desired group.
-
Click Apply at the bottom of the screen.