Configure Area
Complete the floor and facility configuration to set up the area. Verify secured areas through the map. Configuring zones provides functionality to access and monitor the facilities and floors in the respective zone on the Monitoring page.
-
Register floors and facilities before configuring zones. For more information about registering floors and facilities, refer to the following:
-
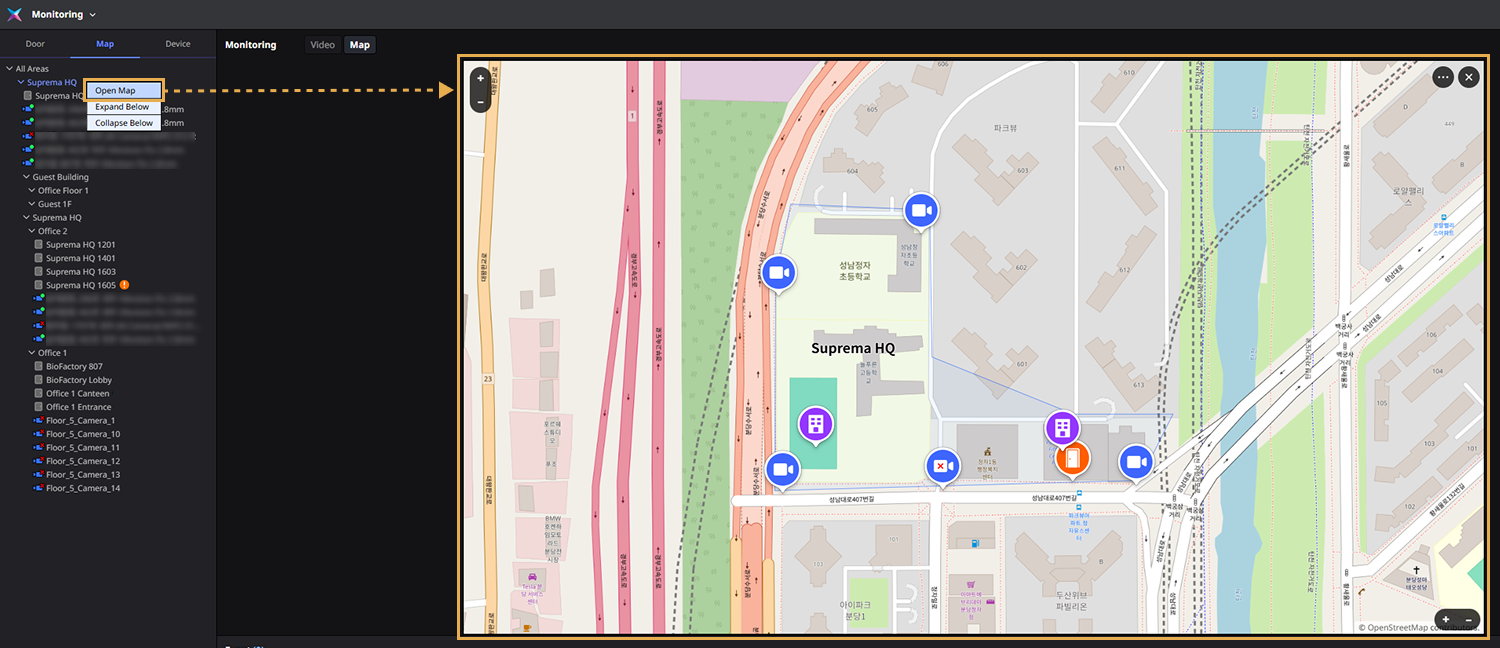
For more information on map monitoring, see Monitor Map.
-
Map settings and map monitoring feature can be used via additional options with an advanced license or higher. For more information on licensing policies, see License Policy.
Add zone
Configure and manage zones of the security areas you are currently managing via the map.
-
Click Settings on the Launcher page.
-
Click Map → Area on the left sidebar.
-
Click the New Area button in the upper right of the area list screen.

-
Enter the name and description of the area you want to add in the Information section of the Add New Area screen.
-
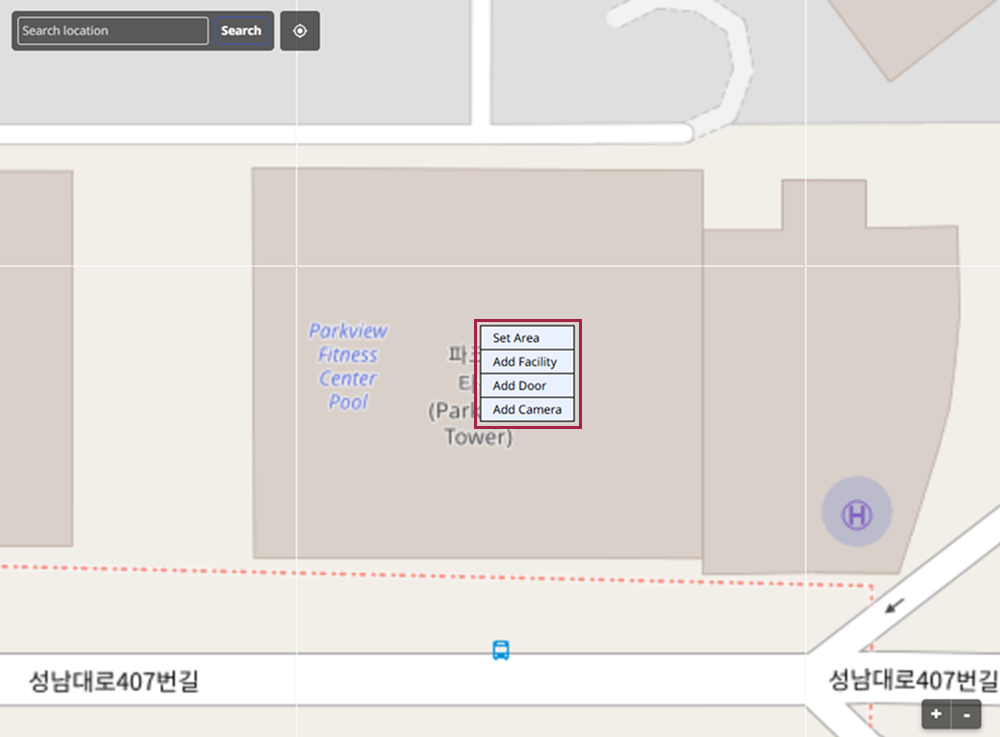
Set the location of the zone to add on the map in the Area Configuration section.
-
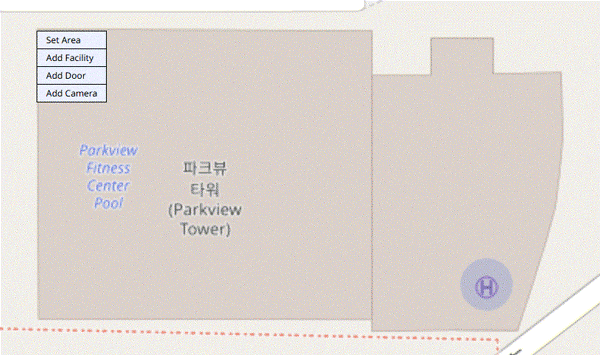
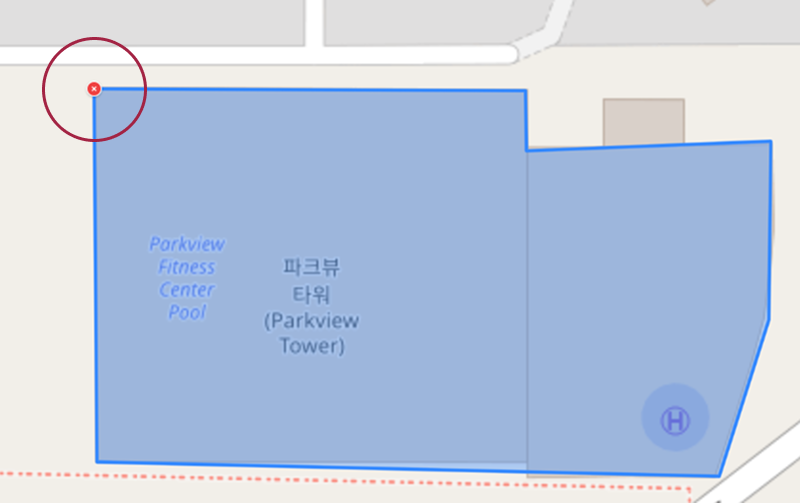
Right-click on the map and select Set Area.
-
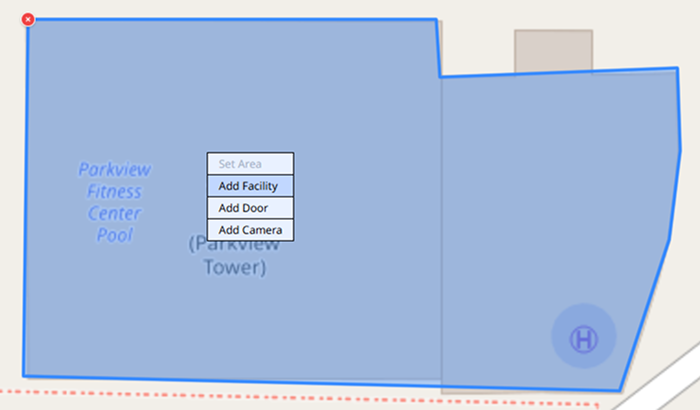
Set the zone in your desired shape. Click the mouse to start drawing and drag to set the zone.
To reset the area, you must delete the configured area. To delete the area, click the button.
-
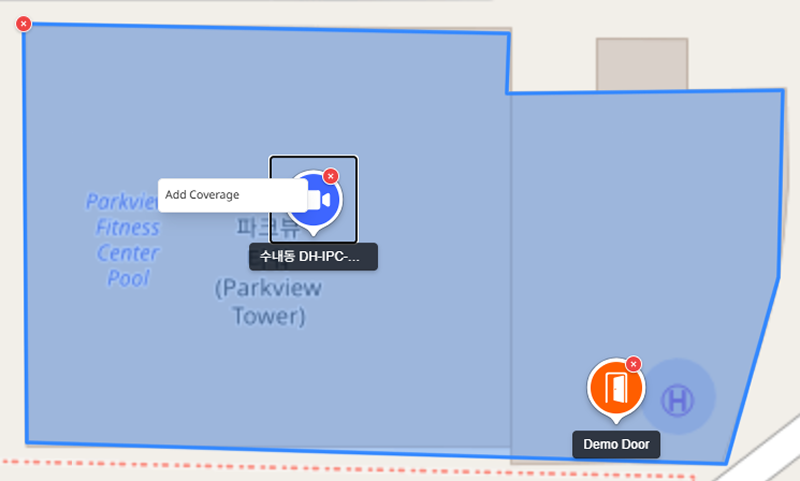
To add facilities to the configured area, right-click and select Add Facility.
When adding a zone, at least one facility, entrance, or camera must be configured.
-
To add an entrance, right-click and select Add Door.
-
To add a camera, right-click and select Add Camera.
-
-
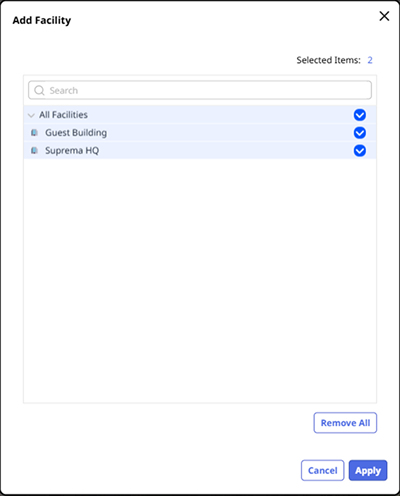
When the Add Facility window appears, select the facility to add and click Apply.
When adding an entrance or camera, the Add Door or Add Camera window will also appear. Select the item to add and click Apply.
-
Once the area settings are complete, click the Apply button in the lower right of the screen.
-
You can search for your desired location using the input field at the top left of the map. Click to return to the current location.

-
When adding a zone on the map, it can only be set as a single polygon. When setting a zone, ensure that the start and end points are the same. Once configured, the shape of the zone cannot be changed. To modify the zone, you must delete it and re-add it.
-
The positions of the added facilities, entrances, and cameras can be changed via drag-and-drop on the map.
Edit zone
You can delete and reconfigure existing zones or add or remove facilities, entrances, and cameras.
Reset zone
To reset a zone on the map, you must delete the existing zone and re-add it.
-
Click Settings on the Launcher page.
-
Click Map → Area on the left sidebar.
-
Select the zone you want to reset from the zone list.
-
In the map under the Area Configuration section, click the button at the top left of the already created area.
-
Right-click on the map and select Set Area from the popup menu.
-
To set the area as desired and save, click the Apply button in the lower right of the screen.
Delete facility/entrance/camera
Click the facility, entrance, or camera you want to delete on the map. The icon will appear. Click the icon to delete the selected facility.

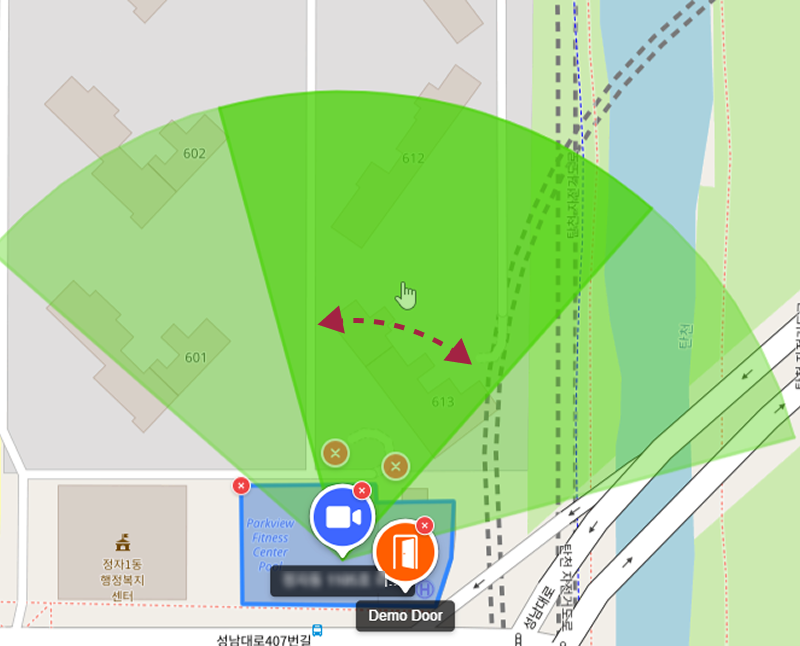
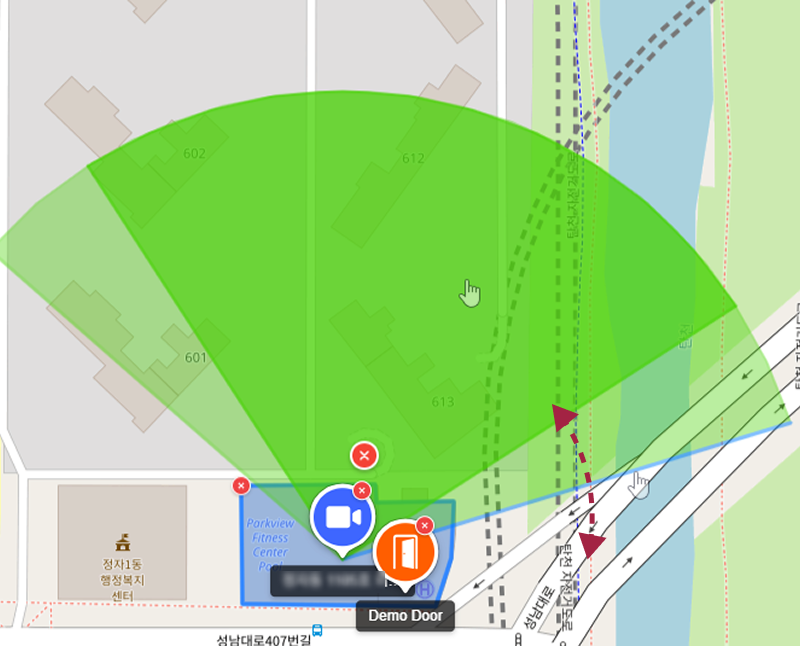
Set camera coverage
You can set the camera coverage area on the map. Right-click the icon where the camera is placed and select Add Coverage.
-
To change the shooting range, click and drag the green area's shooting range in the desired direction.
-
To adjust the coverage area, hold the edge of the range and drag to resize.
-
To delete the coverage area, click the icon.
Settings made by the user are only features provided for the convenience of security management and do not reflect the actual shooting range of the camera.
Delete zone
-
Click Settings on the Launcher page.
-
Click Map → Area on the left sidebar.
-
Check the checkbox of the zone you want to delete from the zone list.

-
Click Delete at the top right of the screen.
-
When the confirmation message window appears, click Yes.