Configure Floors
Configure floors before configuring zones and facilities. Upload the floor layout as an image and place doors and cameras for visual management. After configuring a floor, check the doors and cameras for that floor on the Monitoring page.
-
Register doors before configuring floors. For more information on registering doors, see Register Door.
-
For more information on map monitoring, see Monitor Map.
-
Map settings and map monitoring feature can be used via additional options with an advanced license or higher. For more information on licensing policies, see License Policy.
Add floor
Upload a floor layout or a 3D bird’s eye view image to add a floor and place doors and cameras.
-
Click Settings on the Launcher page.
-
In the left sidebar, click Map → Floor.
-
Click New Floor in the upper right corner of the floor list screen.

-
Enter the name and description of the floor you want to add in the Add New Floor screen's Information section.
-
Click Floor Plan in the Floor Configuration section or drag and drop the image to upload.
Supported image formats are PNG, JPEG, and JPG.
-
Confirm the uploaded image in the Add Floor Plan window and proceed with the settings.
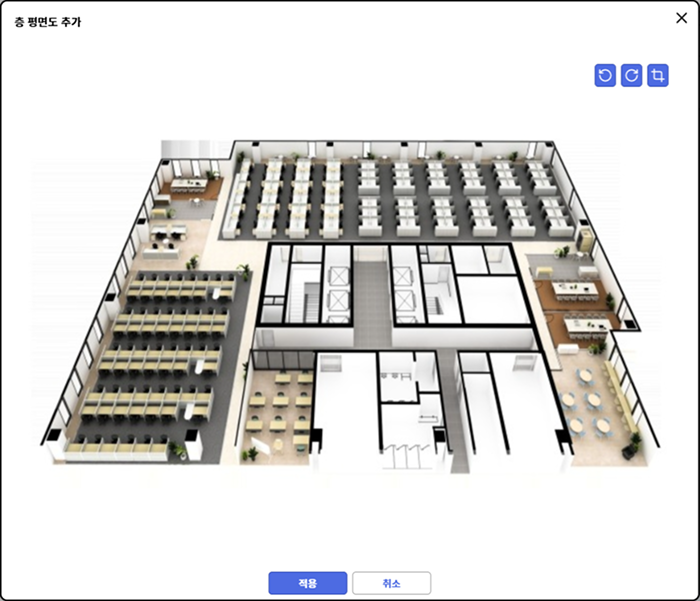
-
To rotate the image, click or .
-
To crop the image, click .
-
-
After completing the image settings, click Apply.
-
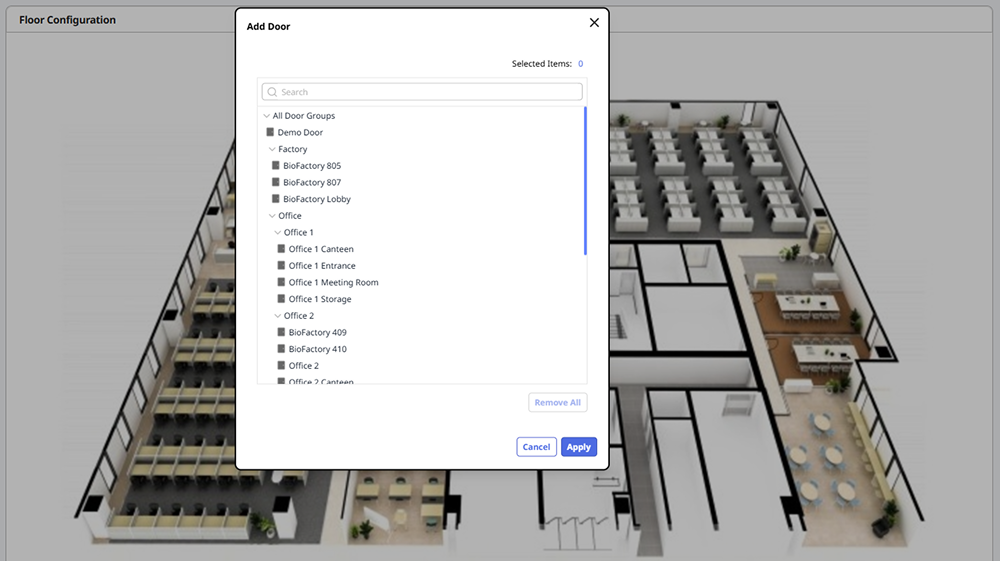
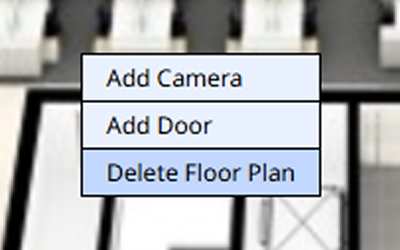
To add a door to the uploaded image in the Floor Configuration section, right-click on the desired location in the image and select Add Door.
-
When the Add Door window appears, select one of the registered doors.
-
To place the door in the image, click Apply.
-
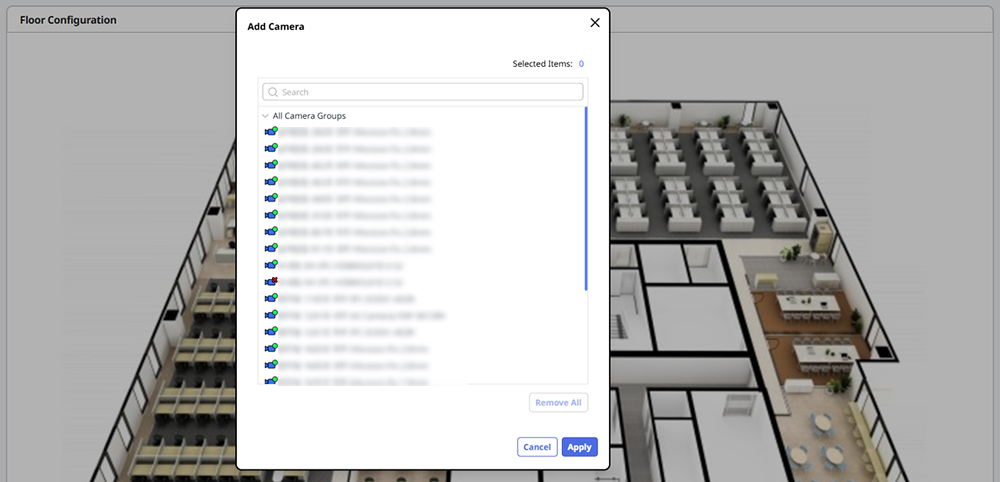
To add a camera to the uploaded image, right-click on the desired location in the image and select Add Camera.
-
When the Add Camera window appears, select one of the registered cameras.
-
To place the camera in the image, click Apply.
-
Additionally place doors and cameras as needed in the actual floor.
-
To save the configured floor settings, click Apply after completing all settings.
-
To change the position of doors and cameras placed on the floor, click and drag the respective door or camera to the desired location.
-
For more information on the icons and status of the doors and cameras on the floor, see Monitor Map.
Modify floor configuration
You can modify the layout of the floor with added doors and cameras. Modifying the floor layout allows you to change or delete the positions of doors and cameras.
-
Click Settings on the Launcher page.
-
In the left sidebar, click Map → Floor.
-
Click the floor you want to modify from the list.
After completing all settings and saving the configured floor, click Apply.
Delete door/camera
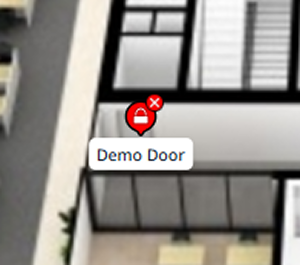
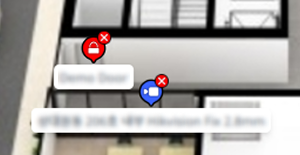
Click the icon for the door or camera you want to delete from the floor image. You can delete the respective door or camera.
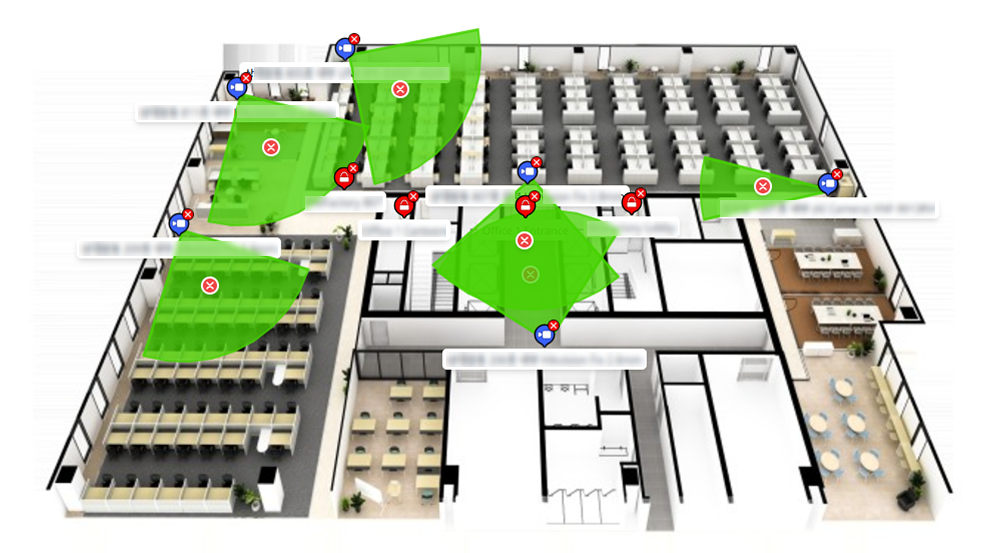
Set camera coverage
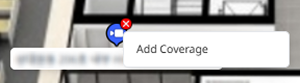
Right-click on the camera you want to set the shooting range for in the floor image. Click Add Coverage in the popup menu.
-
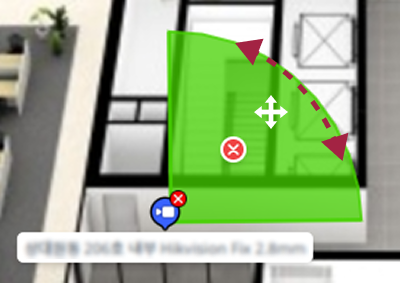
To change the shooting range, move the mouse pointer into the green area. When the mouse pointer changes to a cross shape, click and drag to the desired location while holding the mouse button down.
-
To adjust the coverage area, hold the edge of the range and drag to resize.
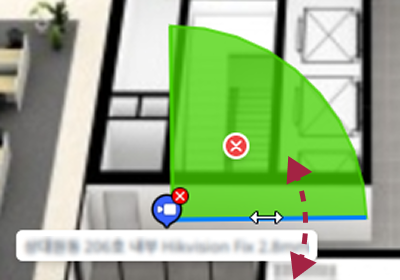
-
To delete the coverage area, click the icon.
Settings made by the user are only features provided for the convenience of security management and do not reflect the actual shooting range of the camera.
Delete floor image
To delete the floor image, right-click on the floor image and select Delete Floor Plan from the popup menu.
Delete floor
-
Click Settings on the Launcher page.
-
In the left sidebar, click Map → Floor.
-
Click the checkbox of the floor you want to delete from the list. You can select more than one floor.

-
Click Delete at the top right of the screen.
The selected floors will be deleted from the list. The deleted floors cannot be recovered.