Install HTTPS Certificate
To connect BioStar X via HTTPS, you must register the IP address of the server where BioStar X is installed to install the certificate.
When certificate installation is required
If you access BioStar X without the HTTPS certificate installed, a security warning like the following will appear in your web browser.
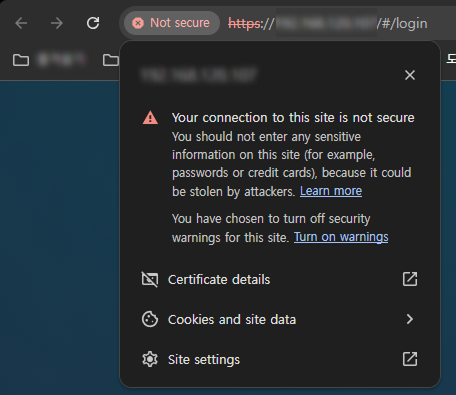
These warnings appear because the browser cannot verify the identity of the server. Installing the certificate will make the browser trust the BioStar X server, allowing for a secure HTTPS connection without security warnings.
Certificate installation
Install the certificate before using BioStar X for correct network connectivity.
-
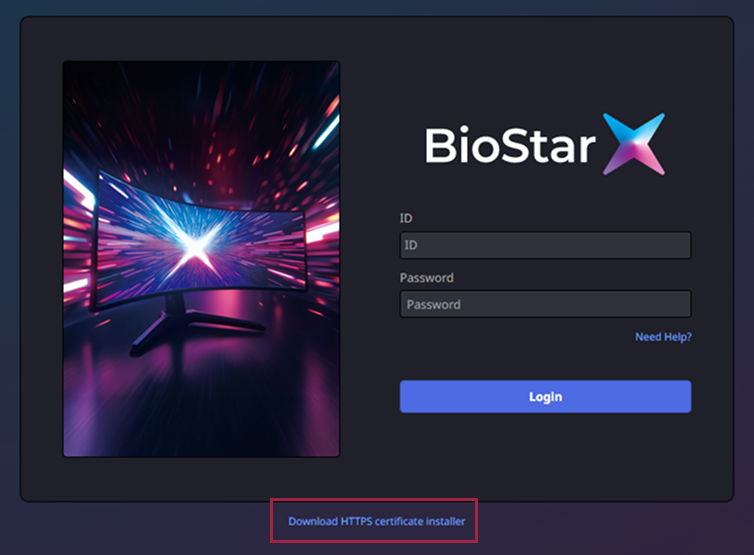
Access the BioStar X login page.
-
Click the Download HTTPS certificate installer link at the bottom of the screen.
-
Save the cert-register.zip file locally.
-
Extract the downloaded file and run the cert-register.exe file. The Enroll Certificate program runs.
-
Select BioStar X for Target System, enter the IP address of the PC where BioStar X is installed in Server Address, and click Enrollment.
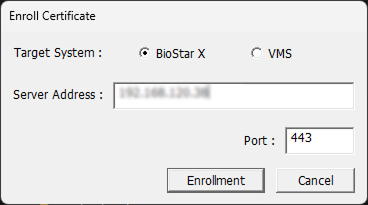
The default port number for BioStar X is 443. If you changed the port number, enter the new port number in Port.
-
Check the security warning message and click Yes.
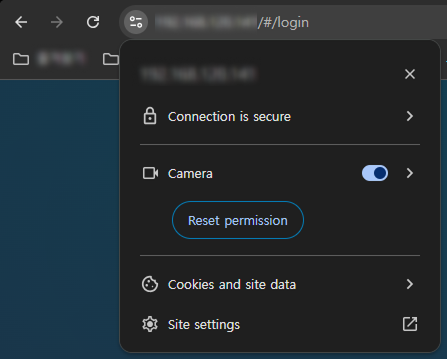
Restart the web browser and enter the registered IP address to navigate to the BioStar X page. When you click the icon to the left of the address bar, the message This connection is secure will appear.
The IP address entered in Enroll Certificate must be the same as the IP address set in BioStar X. You can check it in the menu path Settings → Server → Server under BioStar X IP Address.
Certificate installation in server settings
-
Click Settings on the Launcher page.
-
Click Server → HTTPS in the left sidebar of the screen.
-
Click Cert. Download.

-
Save the cert-register.zip file locally.
-
Unzip the downloaded file and run cert-register.exe file. The Enroll Certificate program runs.
-
Select BioStar X for Target System, enter the IP address of the PC where BioStar X is installed in Server Address, and click Enrollment.
The default port number for BioStar X is 443. If you changed the port number, enter the new port number in Port.
-
Check the security warning message and click Yes.
Restart the web browser and enter the registered IP address to navigate to the BioStar X page. When you click the icon to the left of the address bar, the message This connection is secure will appear.
Certificate installation for VMS server
If the following situations occur, you can install the certificate from the VMS server onto the client PC to resolve the issue.
-
When accessing Video Management System (VMS) through the browser, and a 'Not secure' warning appears
-
When real-time video plays on the Monitoring page but recorded video does not play
-
When installing the VMS server and BioStar X on the same server
-
For more information on installing the certificate on the VMS server, see Integrate VMS.
-
The function to integrate with the VMS server must be purchased separately in an additional options package. For more information on the licensing policy, see License Policy.
Certificate installation on client PC
-
Download the HTTPS certificate installer (cert-register.zip) from the login screen or Settings → Server → HTTPS on the client PC where BioStar X is installed.
-
Unzip the downloaded file and run cert-register.exe file. The Enroll Certificate program runs.
-
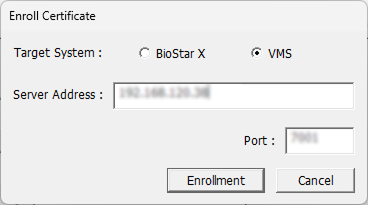
Select VMS for Target System and enter the following information.
-
Server Address: IP address of the VMS server
-
Port: Port number of the VMS server
-
-
Click the Enrollment button.
-
Check the security warning message and click Yes.
Restart the web browser and check if the recorded video from the VMS server plays normally on the Monitoring page.