Set Video Rules
Rules are settings to send events and bookmarks to the VMS server by combining events that occur at the camera and door. Proper video rule settings enable the utilization of various security management features.
-
Automatic bookmark creation: Automatically create bookmarks when specific access events occur to easily find important videos.
-
Efficient monitoring: Monitor live footage from cameras connected to doors and check events instantly when they occur.
-
Integrated event management: Link access events and footage to comprehensively understand security situations.
-
The video rule feature is available with an Advanced license or higher through additional options. For more information on licensing policies, see License Policy.
-
To link a door to a camera, you must have permission for the camera's group. For more information on configuring camera group permissions, see Set Up the Camera.
Add rule
-
Click Settings on the Launcher page.
-
Click Video → Video in the left sidebar.
-
Click the ADD RULE button in the upper left of the screen.
When the Add New Rule screen appears, set the rules according to the following instructions. Click Apply at the bottom of the screen to complete and save all settings.
Enter rule information
In the Information section, enter the name and description of the new rule.

Description is optional. Use it to enter a simple description to easily understand the purpose or features of the rule.
Video log settings
Video Log is a feature that automatically records video before and after a specific event occurs. It preserves footage for a designated period to understand the context before and after events.

-
Video Log: Set the usage of Video Log in the current rule.
-
Enabled: Automatically records video from the time before and after events occur.
-
Disabled: Disables the Video Log feature.
-
-
Video Log Length: Set the range of footage to be recorded around ten seconds before and after the event. It can be set up to a maximum of 60 seconds.
The longer the set range of Video Log Length, the more storage space it may require. Consider system performance and storage capacity when setting an appropriate length.
Event settings to be recorded in VMS
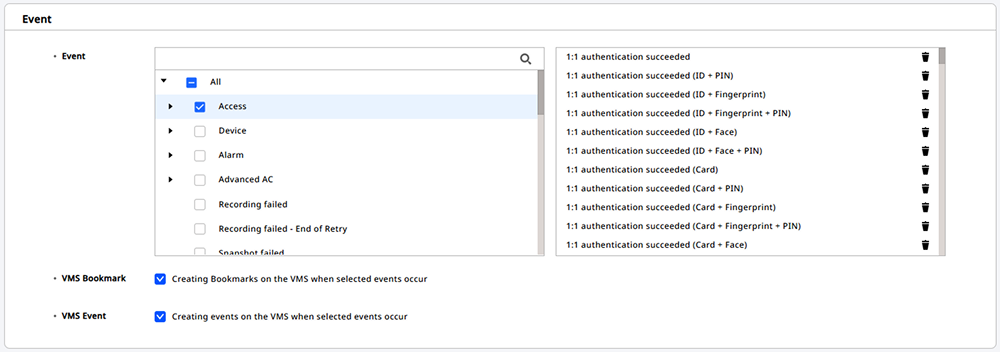
In the Event section, you can select the events to record on the VMS server and set whether to send bookmarks or events.
-
Event: Select the type of event to be sent to the VMS server. When you select the desired event from the left event list, it will be added to the right list.
-
VMS Bookmark: You can set whether to create a bookmark on the VMS server when the selected event in the event list occurs.
-
VMS Event: You can set whether to create event records on the VMS server when the selected event in the event list occurs.
-
Selecting events is not mandatory.
-
You can quickly find the desired event using the search field at the top of the left event list.
-
To remove an event from the right list, click the button.
-
You can set the language of the message when sending bookmarks and events to the VMS server. For more information, see Integrate VMS.
Linking door and camera
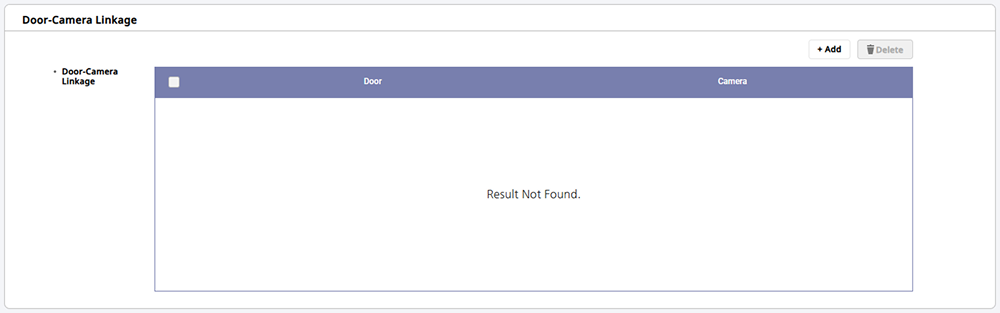
In the Door-Camera Linkage section, you can link doors with cameras to send footage from the connected cameras along with events that occur at the doors to the VMS server. This allows you to easily view footage related to access events.
-
Click the + Add button in the upper right.
-
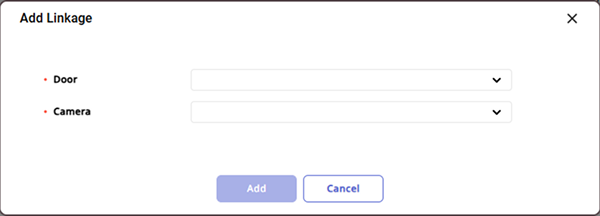
When the Add Linkage window appears, select the door and then the associated camera.
-
Once you have selected both the door and the camera, click the Add button.
You can check the cameras linked to the door in the list.

-
Administrators who lack permission for a camera group cannot view or select cameras in that group. For more information on configuring camera group permissions, see Set Up the Camera.
-
A single door can have up to four cameras added.
-
Doors included in a rule cannot be used in other rules.
-
Cameras can be linked to multiple doors without restrictions, and you can also reuse cameras already linked to other doors.
-
To delete the linkage rule of doors and cameras, click the checkbox of the items you wish to delete in the list and click the Delete button in the upper right.
-
Cameras linked to doors can be viewed as a substructure of the doors in the Monitoring page's door list. For more information, see Check Door Status.
-
Click Apply at the bottom of the screen to complete and save all settings.
Edit rule
-
Click Settings on the Launcher page.
-
Click Video → Video in the left sidebar.
-
Click the rule you want to edit in the All Rules list.
-
When the rule editing screen appears, modify the desired items.
-
To save the modified rule, click the Apply button in the lower right of the screen.
For more information on each section of the rule editing screen, see #add-camera-rule.
Delete rule
-
Click Settings on the Launcher page.
-
Click Video → Video in the left sidebar.
-
Click the checkbox of the rule you want to delete in the All Rules list. You can select one or more rules.
-
Click the Delete Rule button in the upper right of the screen.
-
Check the message and click the Yes button.
Column settings
You can add or change the order of columns to display in the list, or set them to be hidden.
-
Click Settings on the Launcher page.
-
Click Video → Video in the left sidebar.
-
In the top right of the All Rules list, click → Column Setting.
-
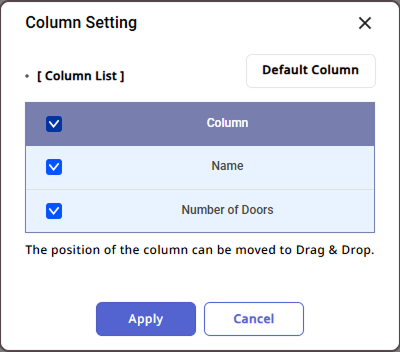
When the Column Setting window appears, you can click the checkboxes of the columns you want to display to add or set them to be hidden. You can also change the order of columns via drag and drop.
-
Once you have changed all column settings, click the Ok button.
To initialize the column settings, click the Default Column button.