Manage User Groups
User groups can share common properties and permissions. When a user becomes a member of a group, they are automatically granted all properties of that group. A user can belong to only one user group.
-
Instead of setting access permissions for individual users, you can create user groups by department or role and apply the same access permissions at once.
-
Modifying the group's access permissions will automatically apply to all users belonging to that group, reducing the administrative workload. You can quickly adjust permissions when there are organizational changes or new projects.
-
You can prevent unnecessary access and increase security by setting permissions by group.
-
You can separately analyze the access logs of specific groups, making security audits and log management easier.
-
User groups can apply detailed policies such as access limit times and restricted areas in integration with the access level.
Add group
Create groups to efficiently manage multiple users. By registering a name such as the organization the user belongs to, it can be managed conveniently.
-
Registering the group name as the name of the organization or department that the user belongs to makes management easier.
-
You can create sub-groups of the group sequentially up to 8 levels.
-
The user group name can be up to 48 characters long.
-
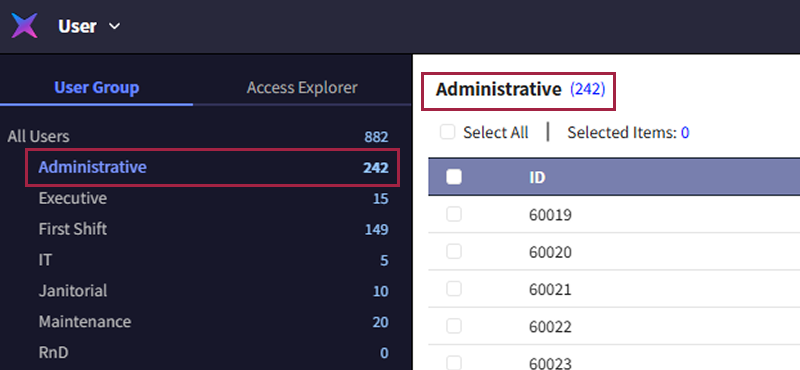
If you select a group from the user group list, only users belonging to that group will be displayed in the user list.
Create top-level group
-
Click User on the Launcher page.
-
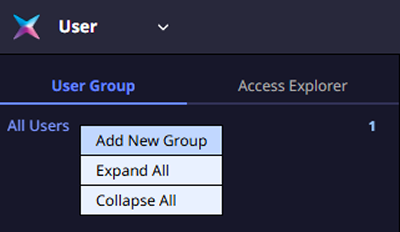
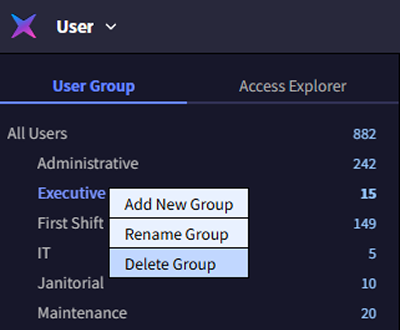
In the left sidebar of the screen, select All Users from the User Group tab and right-click.
-
Click Add New Group in the popup menu.
-
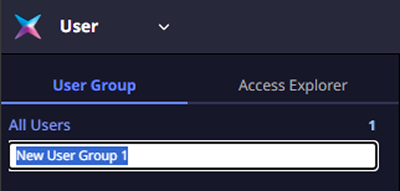
When the group is created, enter your desired group name.
Create lower group
-
In the User Group tab of the left sidebar on the screen, select the parent group and right-click.

-
Click Add New Group in the popup menu.
-
When the group is created, enter your desired group name.
-
You must select a parent group when creating a sub-group, and you can create up to 8 levels.
-
You can set a group as a subgroup of the target group by dragging the group to another group. Moving a group to All Users can set it as the top-level group.
Change group name
You can change the name of the group to which the user belongs. It is recommended to change the group name when the name of the organization or department changes.
-
Click User on the Launcher page.
-
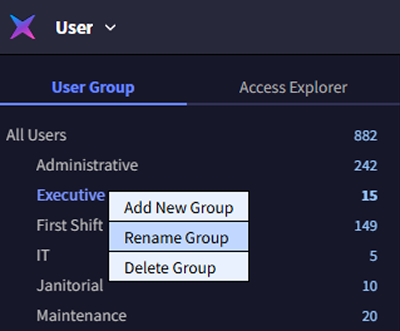
Select the group you want to rename from the User Group list of the left sidebar and right-click.
-
Click Rename Group in the popup menu.
-
Change the desired group name.
Check for changes in the User Group list.
The user group name can be up to 48 characters long.
Delete group
You can delete the group to which the user belongs.
-
Click User on the Launcher page.
-
Select the group to delete from the User Group list of the left sidebar and right-click.
-
Click Delete Group in the popup menu.
-
When the confirm message appears, click the Yes button.
In the User Group list, confirm that the selected group has been deleted.
View users by group
You can see users belonging to the user group. In the User page, select the desired user group from the left sidebar. Users from the selected user group will be displayed in the list.
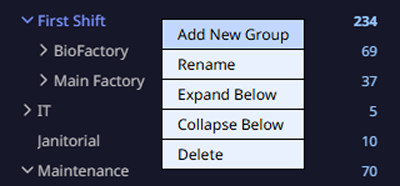
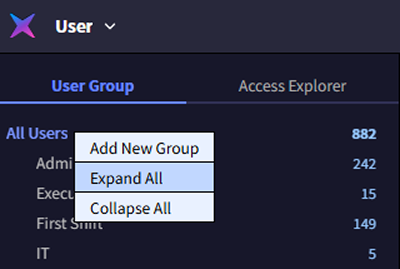
Expand/collapse group list
You can expand or collapse the user group list. In the User Group tab, select All Users and right-click. In the popup menu, click Expand All or Collapse All.
If there are subgroups within the group, you can expand or collapse them. Select the parent group and right-click. In the popup menu, click Expand Below or Collapse Below.