Explore Users
This guide explains how to view and manage registered users on the user list page. You can quickly find desired users through general and advanced searches, and use features like list sorting, column settings, and printing.
To access the User page, click User in the Launcher or select User from the menu at the top left of the screen.
View user list
On the user list page, you can check the basic information and status of users, and view or edit the detailed information of each user.
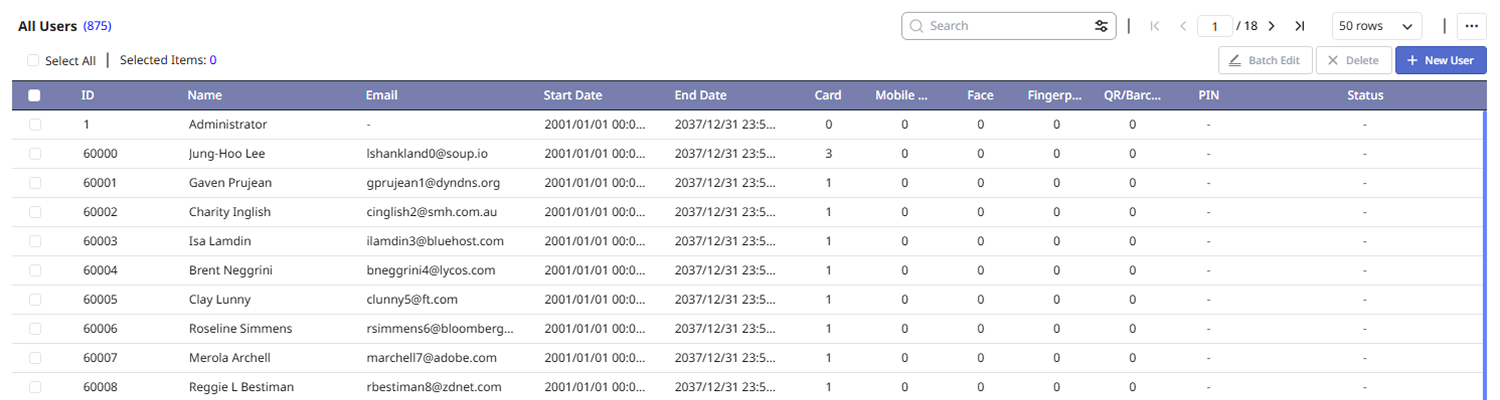
The user list displays all registered users, and you can check each user's ID, name, email address, duration, status of enrolled credentials. Users are listed in order by their ID.
-
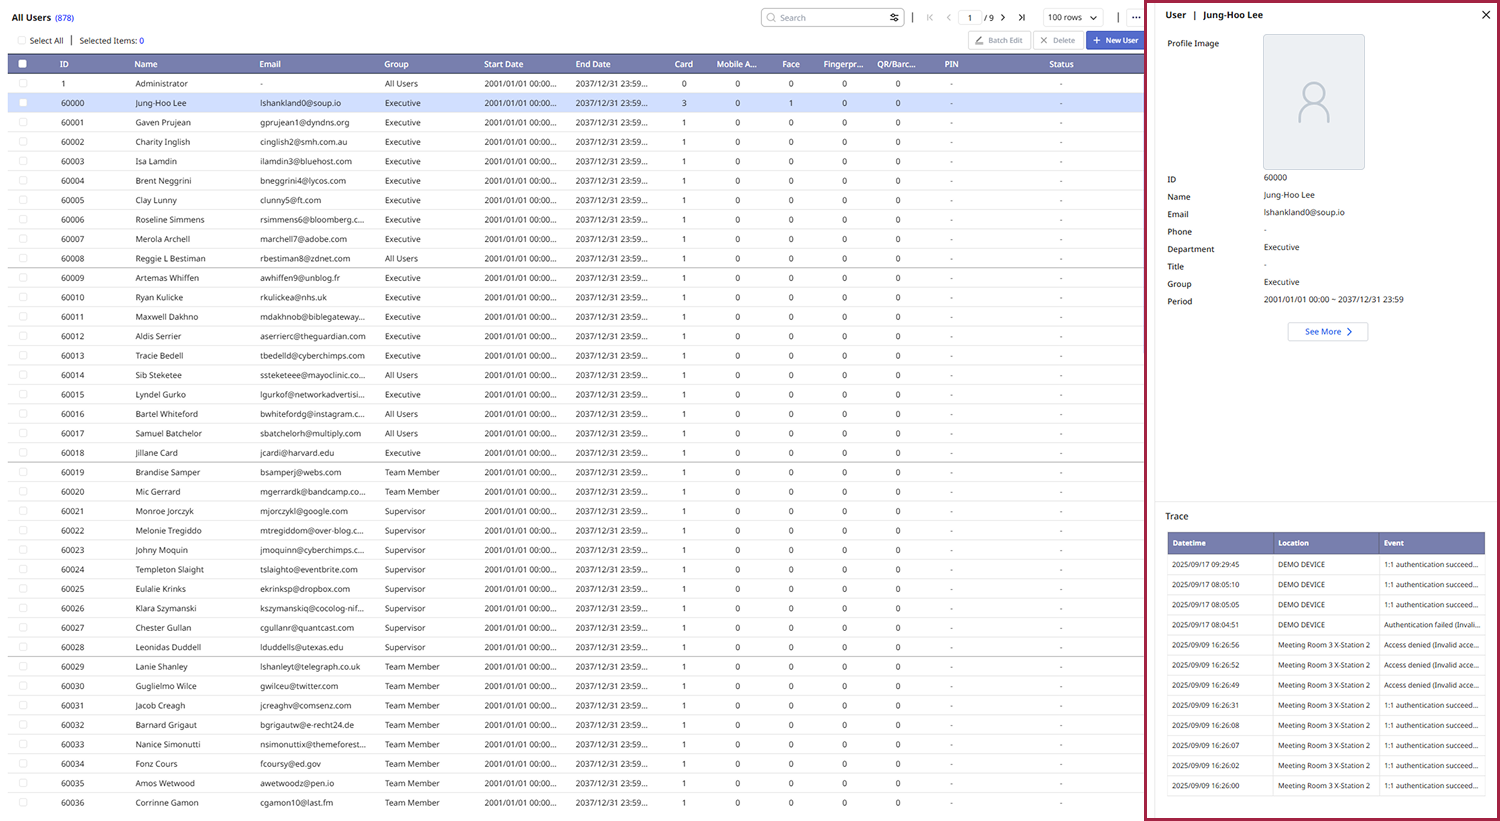
To view the detailed information of an individual user, click on the desired user in the user list. User profile information will be displayed on the right side of the screen. Click the See More button in the user profile information to navigate to the page where you can edit detailed user information.
-
To edit the detailed information of a user, double-click on the desired user in the user list. Go to the page where you can edit the user's detailed information.
-
For more information on editing user information, see Edit User Information.
-
You can change the column layout in the user list. For more information on changing the column layout, see Explore Users.
Select view options
You can change the display options for the user list using the tool button in the upper right corner of the screen.
Go to the user list
The user list displays a default of 10 users. You can click the button at the top of the screen to go to another page.
![]()
-
: Go to the first page of the user list.
-
: Go to the previous page of the user list.
-
: Go to the next page of the user list.
-
: Go to the last page of the user list.
-
Go to the desired page, enter the page number in the number input field and press the Enter.
Change the number of users displayed on the list
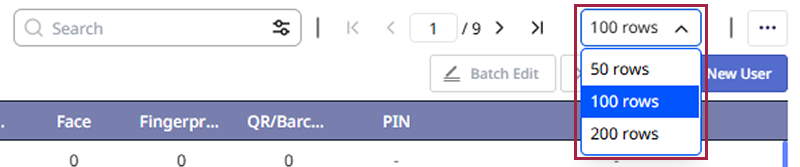
You can change the number of users displayed in the user list. Select the desired number of users from the list box at the top right of the screen. Available options are 50, 100, or 200 users.
Sort user list
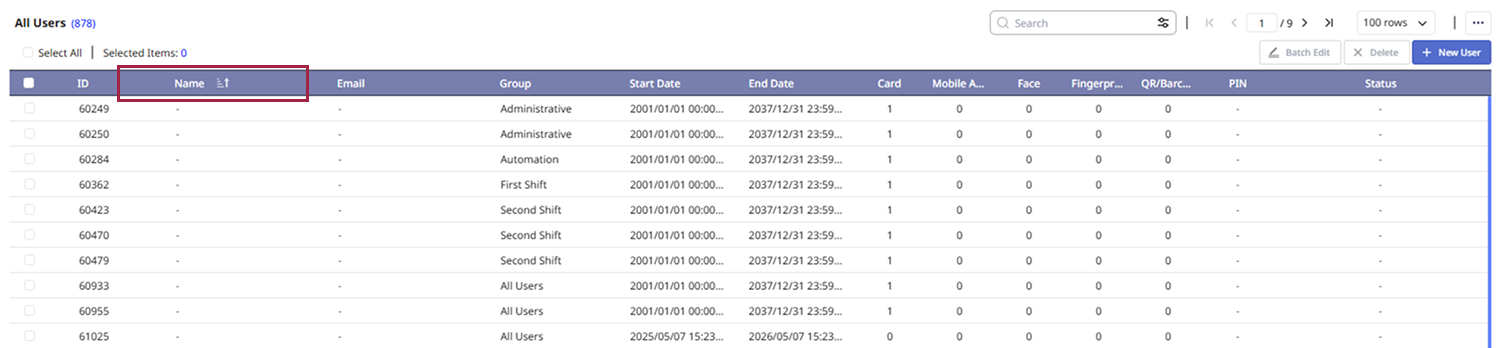
You can change the sorting criteria of the user list. Clicking the column header at the top of the list allows you to sort in ascending or descending order. For example, clicking the column header Name will sort the users' names in ascending or descending order. The clicked item will show either an ascending () or descending () icon.
There may be items that cannot be sorted depending on the column type.
Search user
Provides guidance on how to search for specific users. You can quickly find the desired users using the search feature on the user list page.
-
Search terms are case-insensitive.
-
User’s basic information must be entered to search for users. For more information on entering basic user information, see Enter Basic User Information.
General search
You can search based on the user's ID, name, or email. Enter the desired keywords in the search input field at the top of the screen and press the Enter. Users matching the specified keyword will be displayed in the list. You can check the number of search results at the very top of the list.

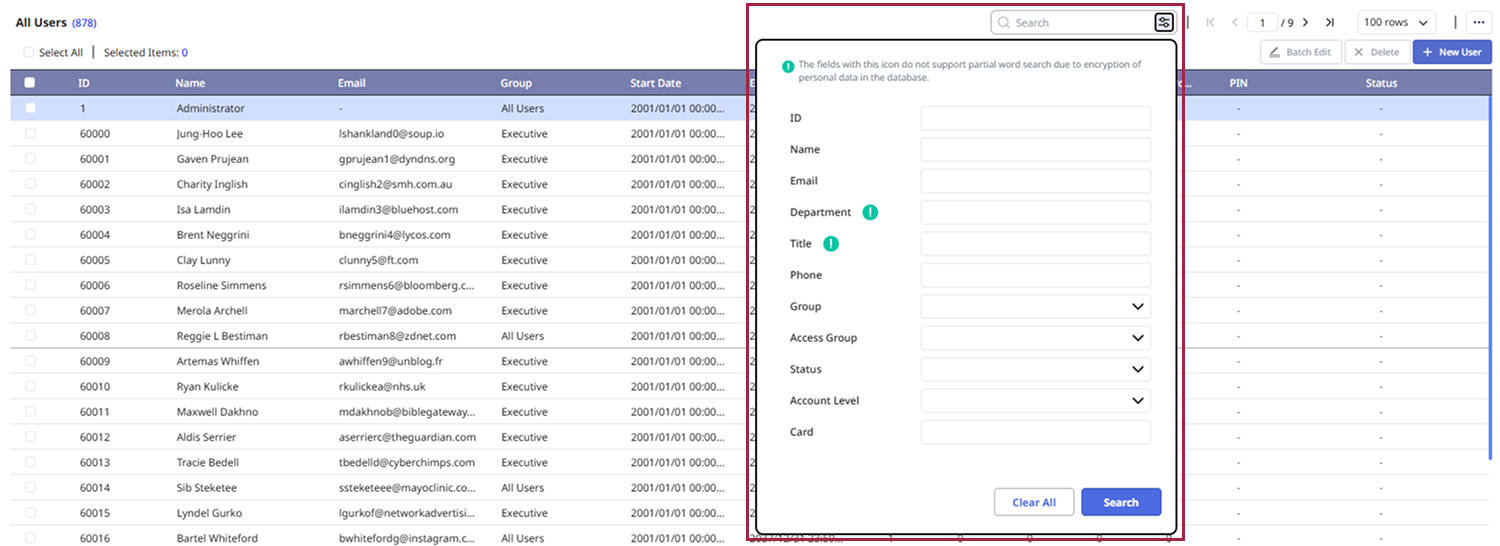
Advanced search
You can search for specific user IDs, names, email addresses, and so on.
-
Click the button next to the search input field at the top of the screen.
-
When the advanced search window opens, enter your desired search criteria and click Search.
-
The fields with icon do not support partial word search due to encryption of personal data in the database.
-
To reset the criteria entered the advanced search window, click the Clear All button.
-
Advanced search supports searching for Custom User Field. For more information on Custom User Field, see Server Detailed Settings.
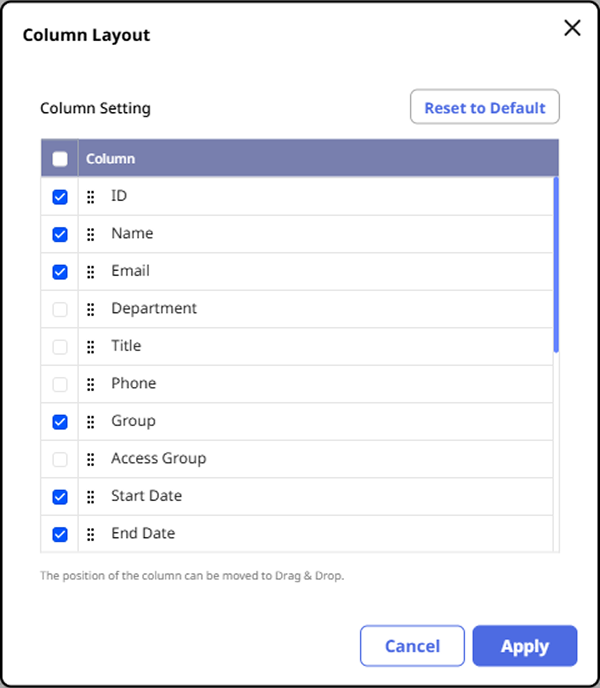
User list column settings
You can change the column settings displayed in the user list. Through column settings, you can select the columns to be displayed or change the order of the columns.
-
Click the button at the top right of the user list screen.
-
Click Column Layout.
-
When the Column Layout window appears, select or deselect the desired columns.
-
To change the order of the columns, click and drag the desired column to change its position.
-
To save the settings, click the Apply button.
-
Column settings are saved for each user account.
-
To reset the column layout settings, click the Default Column button.
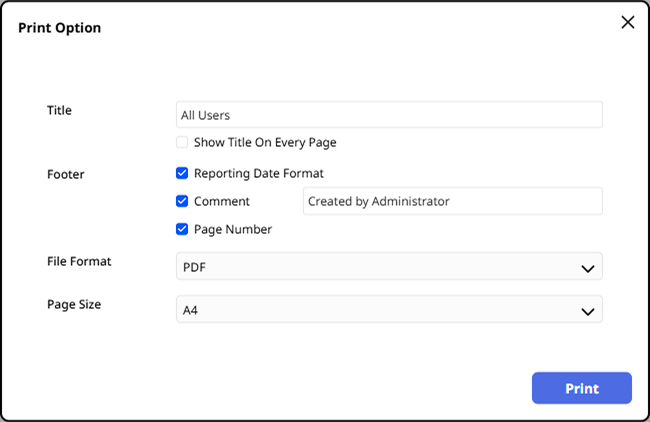
Print user list
You can save the user list you are currently viewing as a PDF or SVG file.
-
Click the button at the top right of the user list screen.
-
Click Print.
-
When the Print Option window appears, select your desired format in the File Format options and set the other options.
-
Enter Print Reason (optional) and click Print.
You can print the PDF or SVG file that opens through the browser.
Print Reason is optional. Check Print Reason records in Settings → System → Audit Trail.