Self-Register Device
Even when installers cannot log in to the CLUe portal onsite, they can register a device to a Place using only the information the admin prepared in advance. This feature is called Device Self-Registration, and it consists of an admin preparation step performed in advance and an onsite registration step performed by the installer.
Supported devices and firmware versions
| Device model | Supported firmware version |
|---|---|
| X-Station 2 | 2026.06.01 or later |
| BioStation 3 | 2026.05.26 or later |
| BioLite N2 | 2026.06.01 or later |
| XPass 2 | 2026.06.01 or later |
| BioEntry W3 | Not supported |
| BioEntry W2 | Not supported |
Admin preparation step
Before starting onsite registration, the Place admin must check the Place ID in the CLUe portal and set the device allocation email address. If you do not set it, you cannot receive the allocation code onsite. Only admins invited with Place admin or higher permissions can access it.
-
Log in to the CLUe web portal.
-
Go to the Place where you will allocate the device.
-
On the left sidebar, click Settings → Basic.
-
Click the Device Self Allocation section.
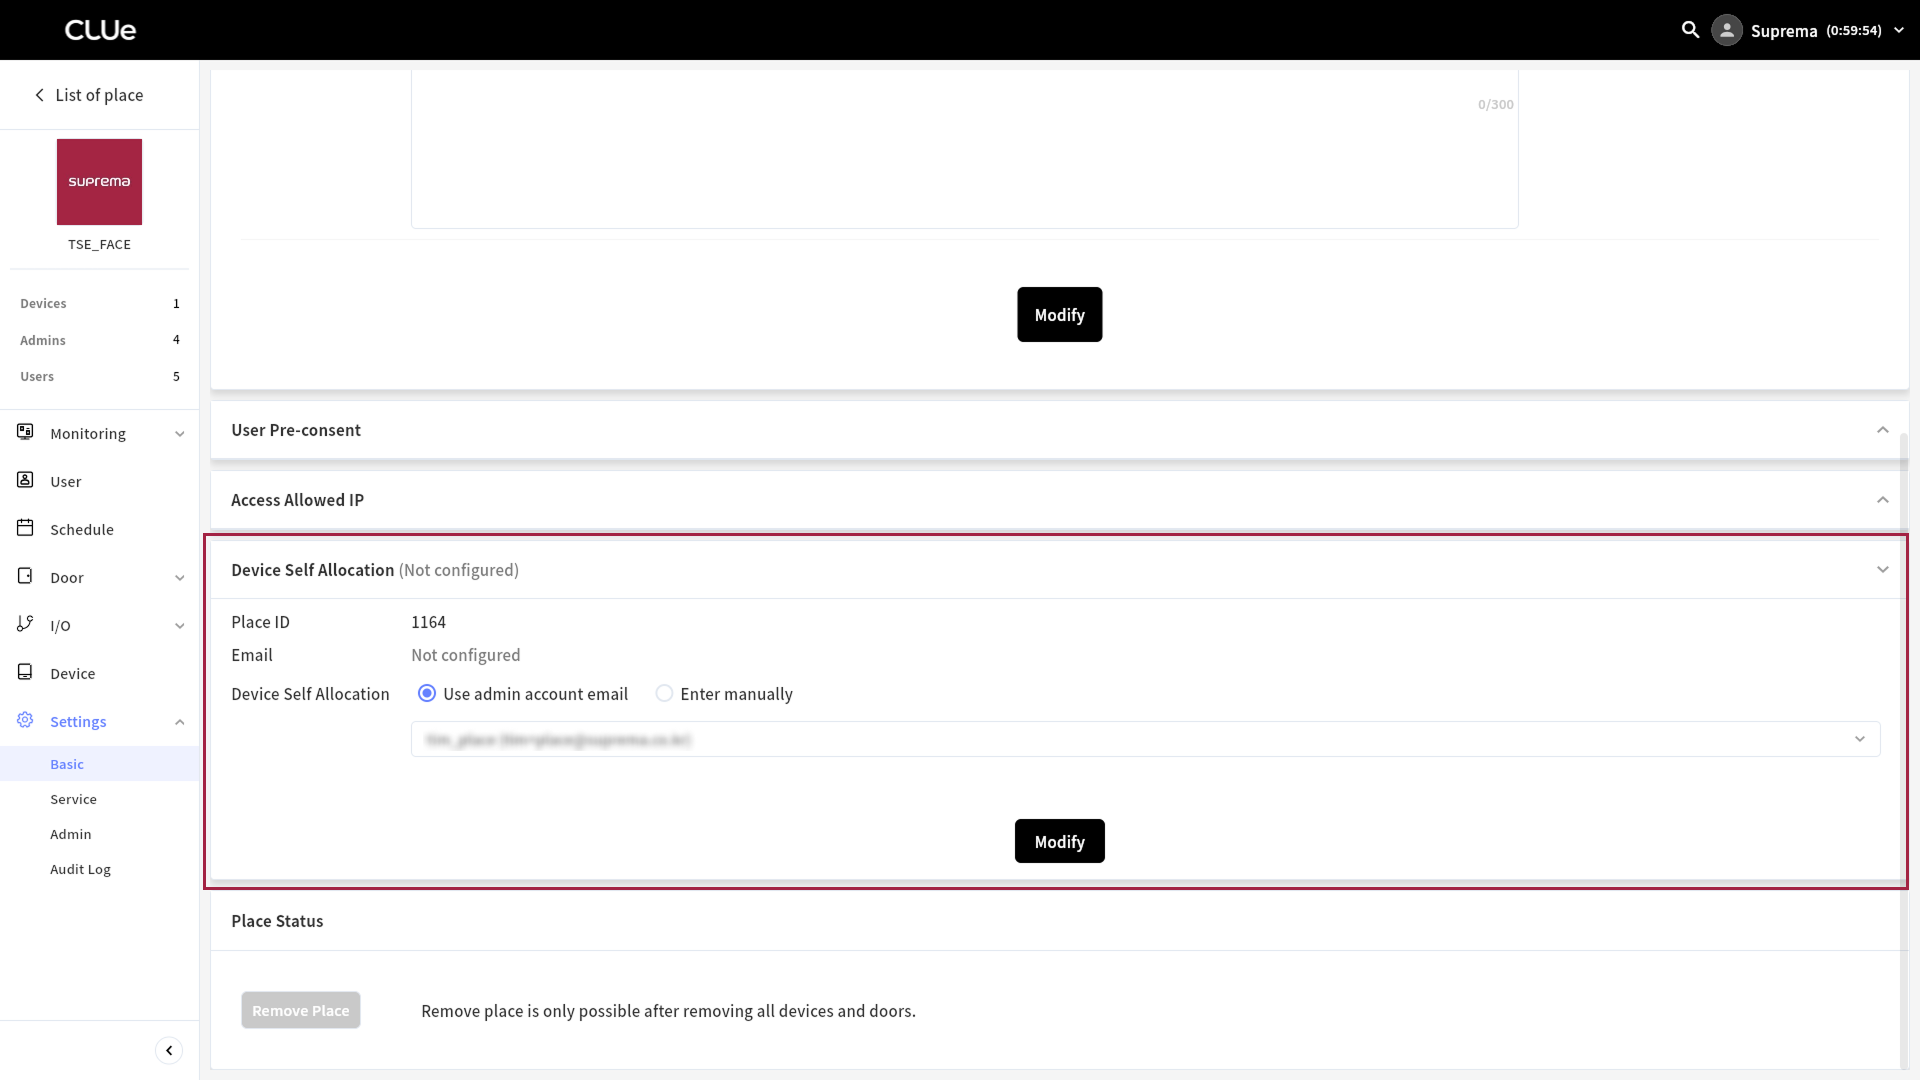
The Place ID (read-only) field and the Device Self Allocation email address field appear.
Check the place ID
Place ID is read-only. Share this number with the onsite installer. The installer can enter the Place ID on the device to complete registration. Entering the wrong Place ID is the most common cause of registration failure, so share it accurately.
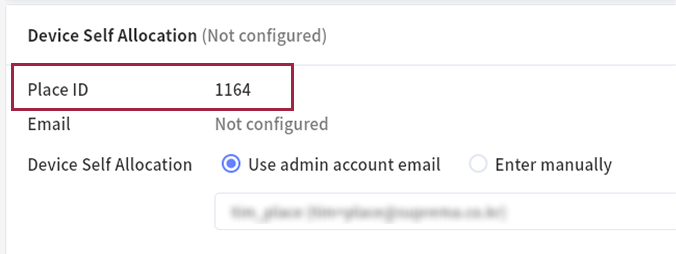
Set the device allocation email address
Set the device allocation email address using one of two methods.
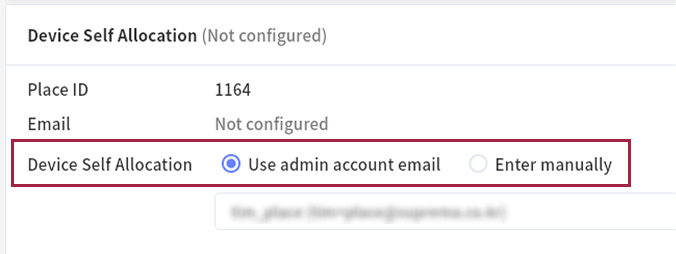
-
Use admin account email: Automatically fills in the email address of the admin account currently signed in.
-
Enter manually: Enter any email address manually. Enter it in the usual email address format, up to 254 characters.
In both methods, the entered email address is stored on the server as entered. The system does not distinguish whether the recipient is an admin, onsite installer, or third party. You can set only one allocation email for each Place. When you create a new Place, the allocation email starts unset, so set the email first to use the self-registration feature.
What happens if you do not set an email address?
If an installer executes Send Allocation Code in a Place without a set allocation email, the error "The admin must set the allocation email address first." appears.
Onsite registration step
The registration process for devices with LCDs (#lcdSelfRegistration) and devices without LCDs (#nonelcdSelfRegistration) follows the same principle, but the screens differ. First, this guide explains the concepts that apply to both.
| Steps | Trigger and Action | Result |
|---|---|---|
| Send allocation code | Enter the Place ID, then execute Send Allocation Code. | The server generates a 6-digit allocation code and sends it to the Place's allocation email address. |
| Enter allocation code | Enter the code you received by email within the specified time. | If the code matches, the device registers to that Place. |
LCD device self-registration
The screens below are examples. Actual screen layouts and button names may differ by device model and firmware version. Proceed based on the guidance shown on the screen.
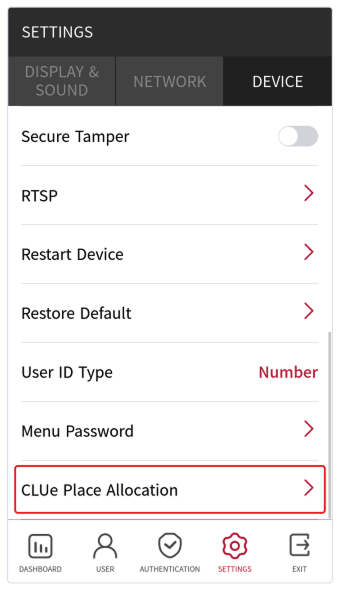
Go to Place registration
In the device settings menu, select DEVICE → CLUe Place Allocation. The Place registration screen appears.
-
Menu names and locations may differ by device model and firmware version.
-
If the device already belongs to a specific Place, Place group, Distributor, or Branch, you cannot enter the registration screen, and a message appears stating that it is already registered.
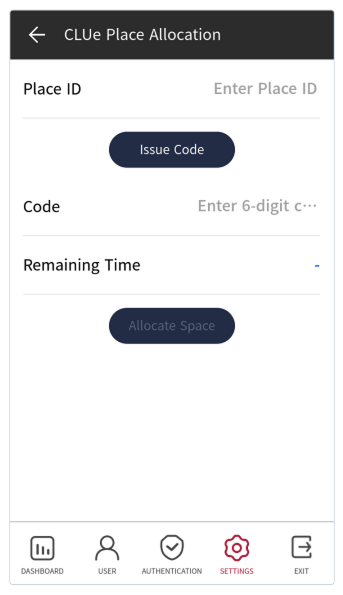
Enter the Place ID
Enter the Place ID you received from the admin using the numeric keypad. If you enter an ID that does not exist, or a Branch, Distributor, or Place group ID instead of a Place ID, an error message appears. Check the Place ID again, then enter it.
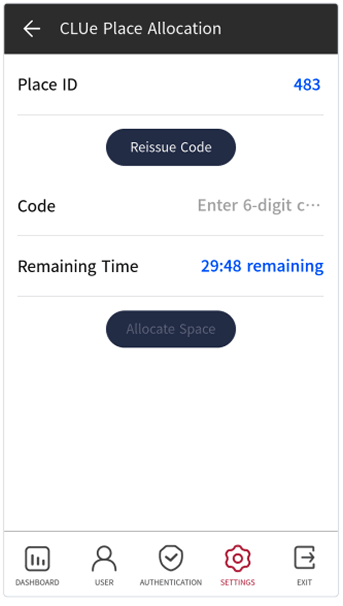
Send allocation code
Enter the Place ID, then execute Issue Code. The server generates a 6-digit allocation code and sends it to the allocation email address for that Place. The device switches to the allocation code entry screen.
If no allocation email is set, an error message appears. In this case, ask the admin to set the allocation email address.
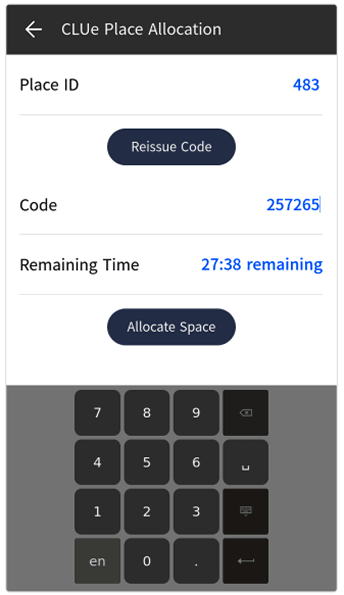
Enter the allocation code
Enter the 6-digit code you received by email within 30 minutes. If the code expires or does not match, an error message appears.
-
To enter the code again or request a new one, tap the Reissue Code button.
-
If you enter the code incorrectly five times in a row, the issued code is discarded. Return to the previous step and request a new code.
Registration complete
Tap the Allocate Space button. If the code matches, the device registers to that Place, and a registration complete message appears. After that, the device switches to the normal access operation screen.
A registered device cannot change Places onsite. If you need to change it, do it in the CLUe portal.
Device self-registration without LCD (web server)
Devices without LCDs cannot register a Place on the device body. Use a web browser on a PC or mobile device connected to the same network as the device to access the device's web server and complete registration.
Access the device web server
Enter the following address in the web browser address bar on a device connected to the same network as the target device.
https://
{device_IP_address}:{port}— for example, https://192.168.0.27:8443
-
Refer to the installation guide for each device to check the device's IP address and port.
-
If you use a self-signed certificate, the browser may show a security warning: "Not Secure." Continue to open the registration screen.
If the device is not yet registered to any Place, the Place registration screen (CLUe Device Web Panel) appears. If the device belongs to a specific Place, a message appears stating that it is already registered, and you cannot access the registration screen.
Register on the web
Follow the instructions below to complete Device Self-Registration.
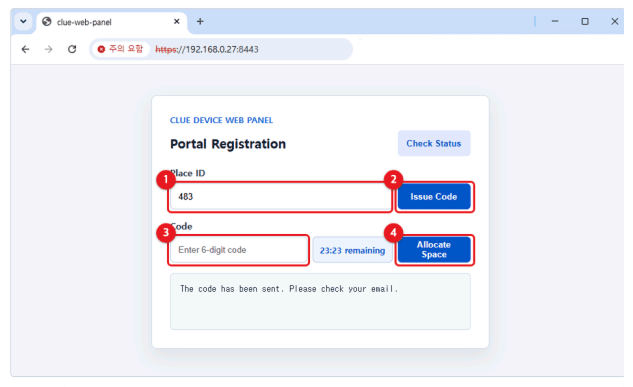
Enter the Place ID
Enter the Place ID you received from the admin in the Place ID input field. If you enter an ID that does not exist or is not a leaf Place, an error message appears. Check the Place ID again, then enter it.
Send allocation code
Enter the Place ID, then click the Issue Code button. The server generates a 6-digit allocation code and sends it to the allocation email address for that Place.
If no allocation email is set, an error message appears. In this case, ask the admin to set the allocation email address.
Enter allocation code
Enter the 6-digit code you received by email within 30 minutes. If the code expires or does not match, an error message appears.
-
To check the current registration status, click the Check Status button.
-
To receive the code again, click the Reissue Code button. However, the same device must wait 60 seconds after the previous code send before sending again.
-
If you enter the code incorrectly five times in a row, the issued code is discarded. Return to the previous step and request a new code.
Registration complete
Click the Allocate Space button. If the code matches, the device registers to that Place, and a completion message appears. After registration completes, the web server runs for about 3 more minutes, then shuts down automatically. After that, attempts to access the same address no longer connect. This is normal behavior to prevent unnecessary resource use and enhance security. To change the Place after registration, do it in the CLUe portal.
Notes
Check allocation code email
When you execute Send Allocation Code (Issue Code), the system sends an allocation code email to the allocation email address set for the Place. Before entering the allocation code, the recipient must check the email body to confirm that the target for registration is correct.
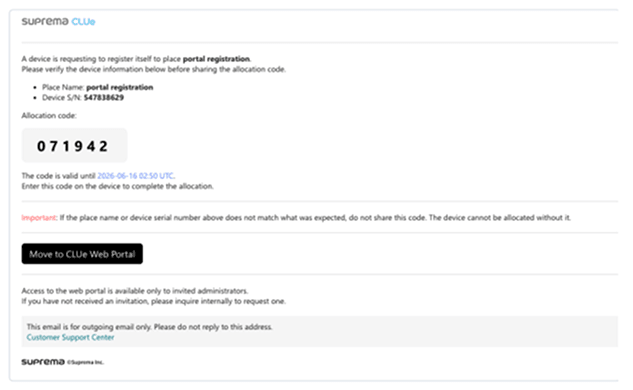
The email subject includes the device serial number (deviceSn). In the inbox list, the subject alone identifies which device the code belongs to. When installing several devices at once, use the serial number in the subject to distinguish each device's email.
Already registered device (re-registration not allowed)
A device that already belongs to a specific Place, Place group, Distributor, or Branch cannot be registered again onsite. If you enter the registration menu (CLUe Place Allocation) on an LCD device or access the web server for a device without an LCD, the following message appears and access to the registration screen is blocked.
This device is already registered. Changes can be made from the CLUe portal.
You can change or unassign a Place only in the CLUe portal, not onsite. In rare cases, the device itself may appear to belong to no specific Place, but the server already has it registered, such as when it was pre-registered in the portal. In that case, executing Send Allocation Code also shows the same already-registered error message. In this case too, change it in the portal.