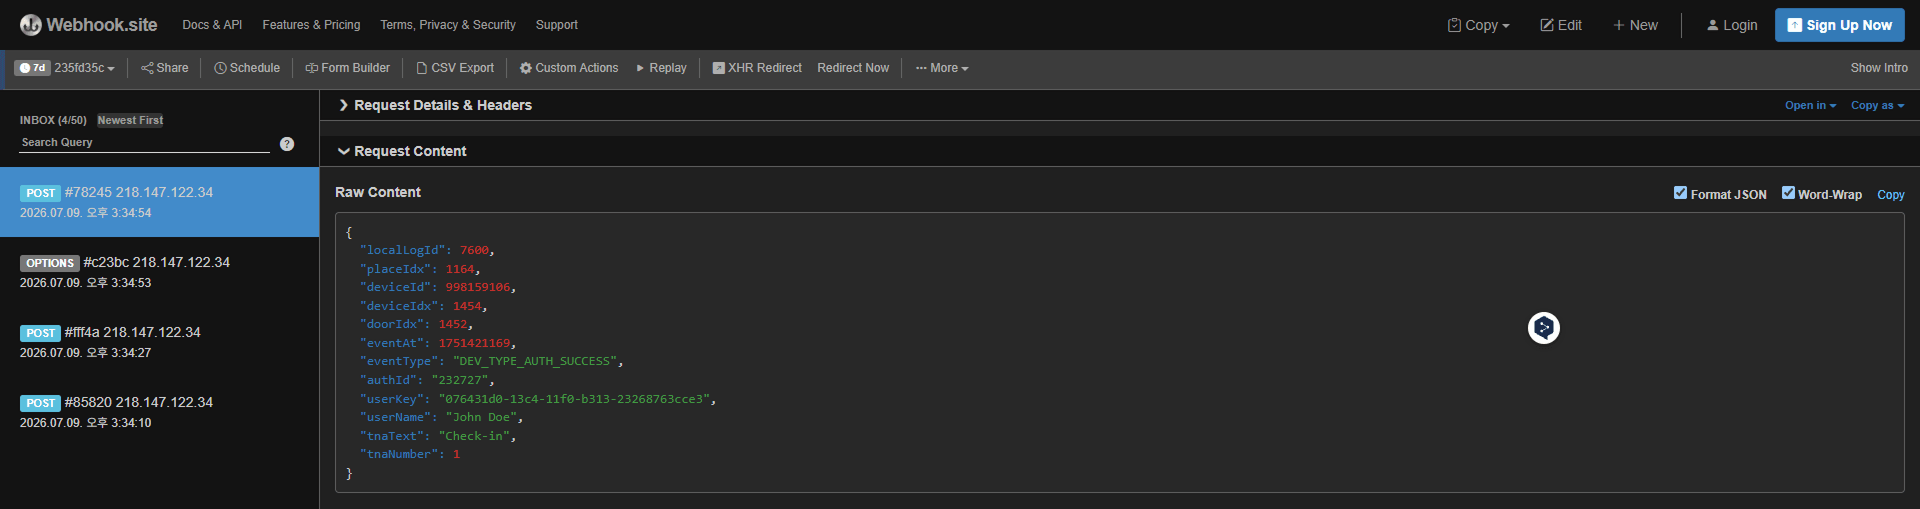
Set Up Device Webhook
When you set up a webhook in the CLUe portal, the device sends real-time events to the endpoint you specify (an external server) when a specified event occurs. Use this feature for the following use cases.
-
Integration with a time and attendance system
-
Receive duplicated face detection events
You can also use it for various real-time, event-based integrations with systems.
Supported devices
| Device | Model | Supported firmware version |
|---|---|---|
| BioStation 3 | BS3-DB, BS3-APWB | bs3-all_v1.1.0_20250626 or later |
The following CLUe supported devices will also support webhooks.
- BioEntry W3, BioLite N2, X-Station 2, XPass 2
Key advantages
-
Send the device's real-time event notifications to an external system.
-
Integrate with external systems easily through webhooks.
-
Supports use cases such as time and attendance integration and security event monitoring.
Webhook settings
-
Log in to the CLUe web portal.
-
Go to the Place assigned to the device where you want to set up the webhook.
-
Click Device in the left sidebar.
-
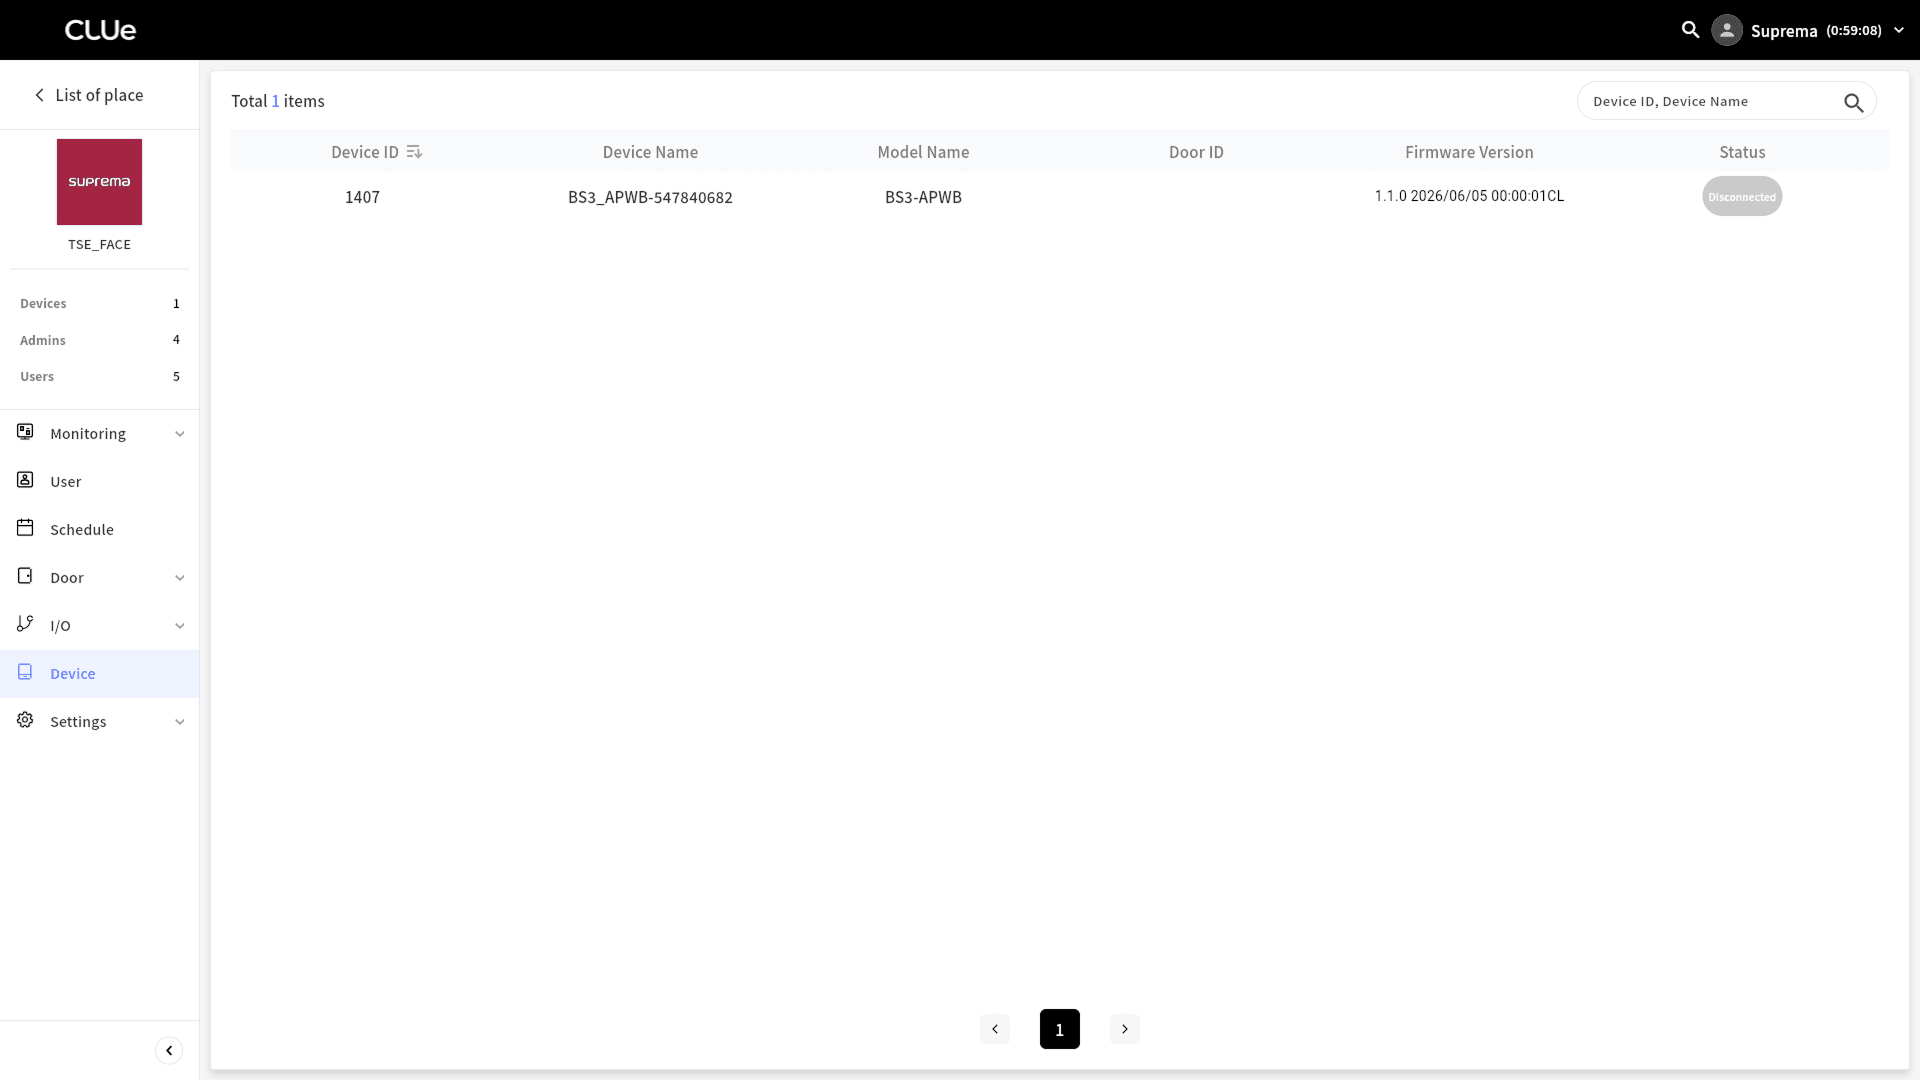
Select the device from the device list where you want to set up the webhook.
-
Click the Webhook tab at the top of the screen.
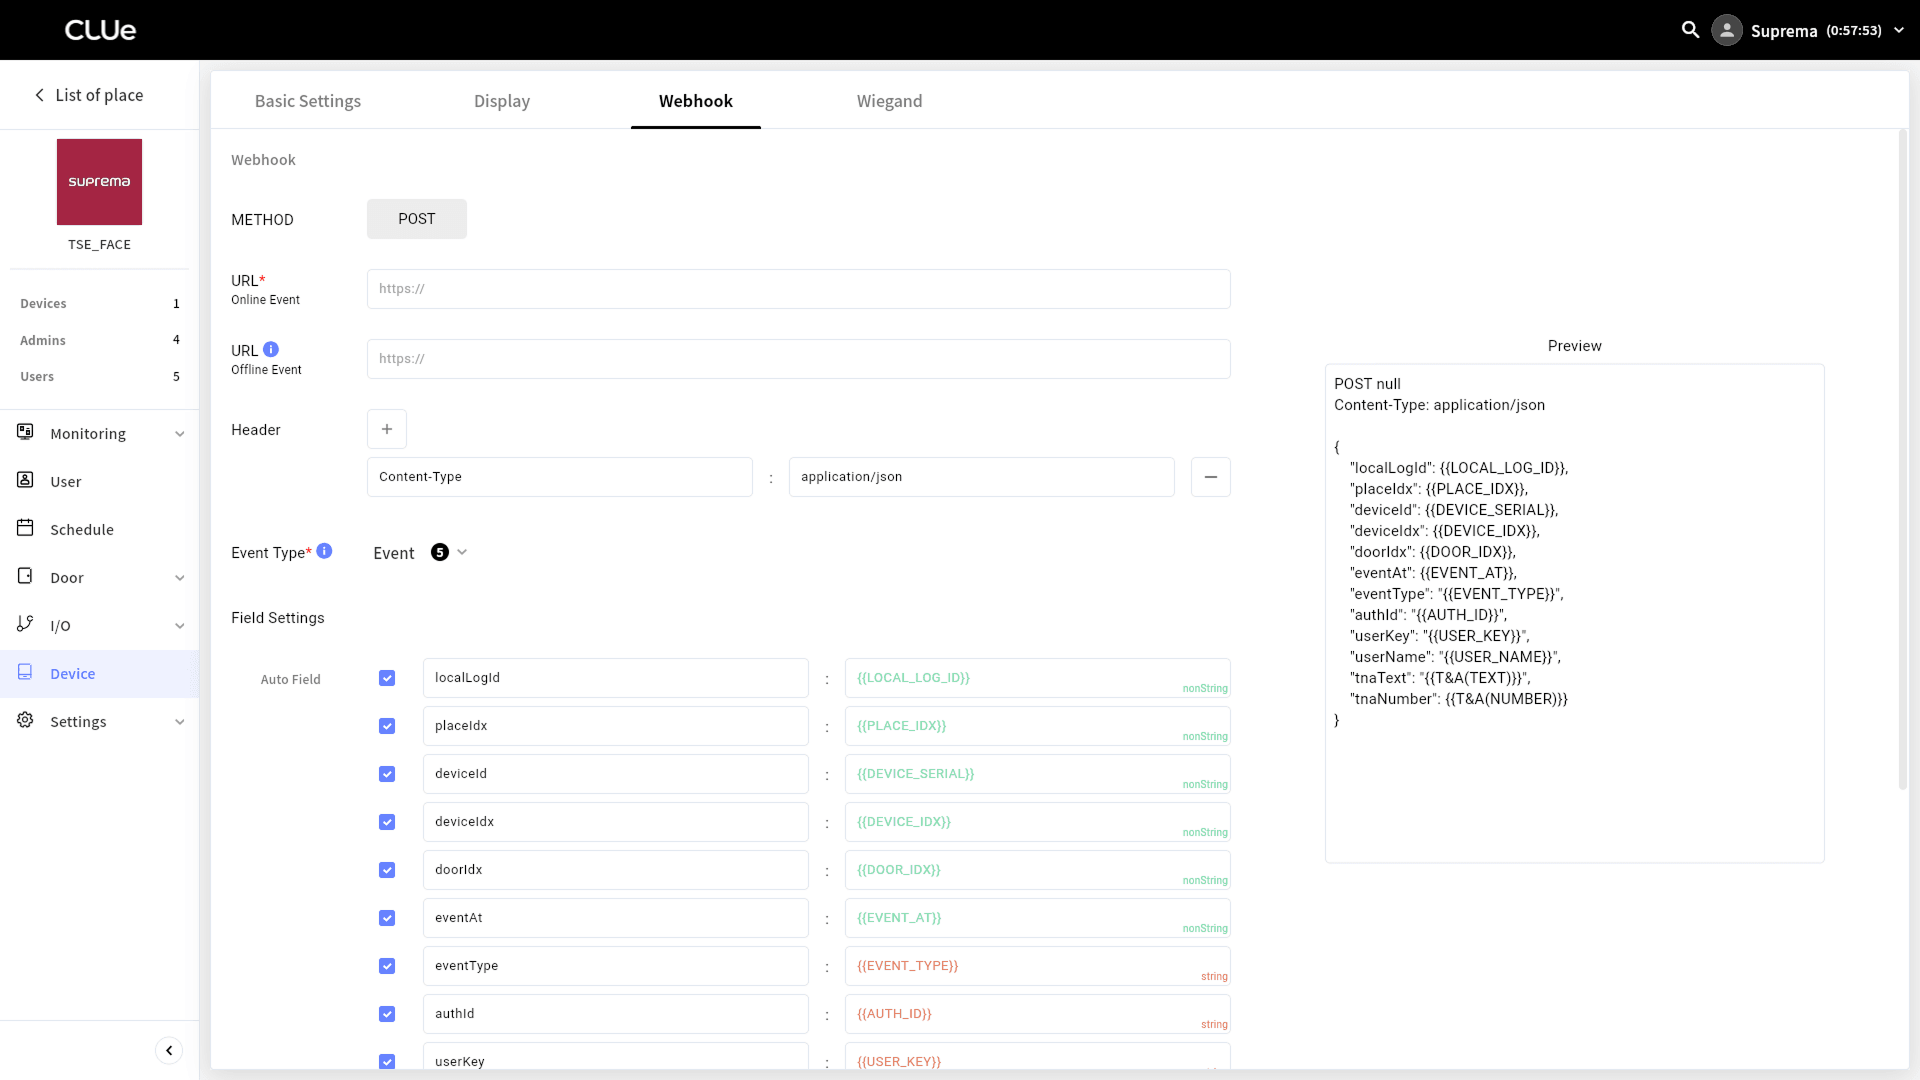
If the Webhook tab does not appear, check the device's CLUe firmware version and update it to the supported firmware version or later.
Method
Webhooks use the POST method by default.
Endpoint URL settings
-
Online Event: An endpoint that sends real-time webhook calls when a specified event occurs while the device is online.
-
Offline Event: An endpoint that sends a list of events that occurred while the device was offline, after it comes back online.
Header settings
Set the required keys or authentication values for the webhook server in the request headers. To add a header, click the button.

Select trigger events
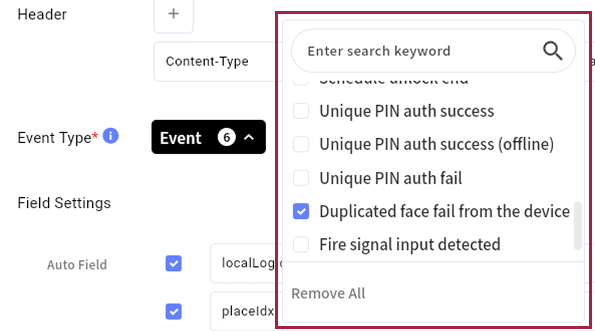
Select the events that trigger webhook calls. In addition to the default selected events, you can also select events such as Duplicated face fail from the device.
Webhook field settings
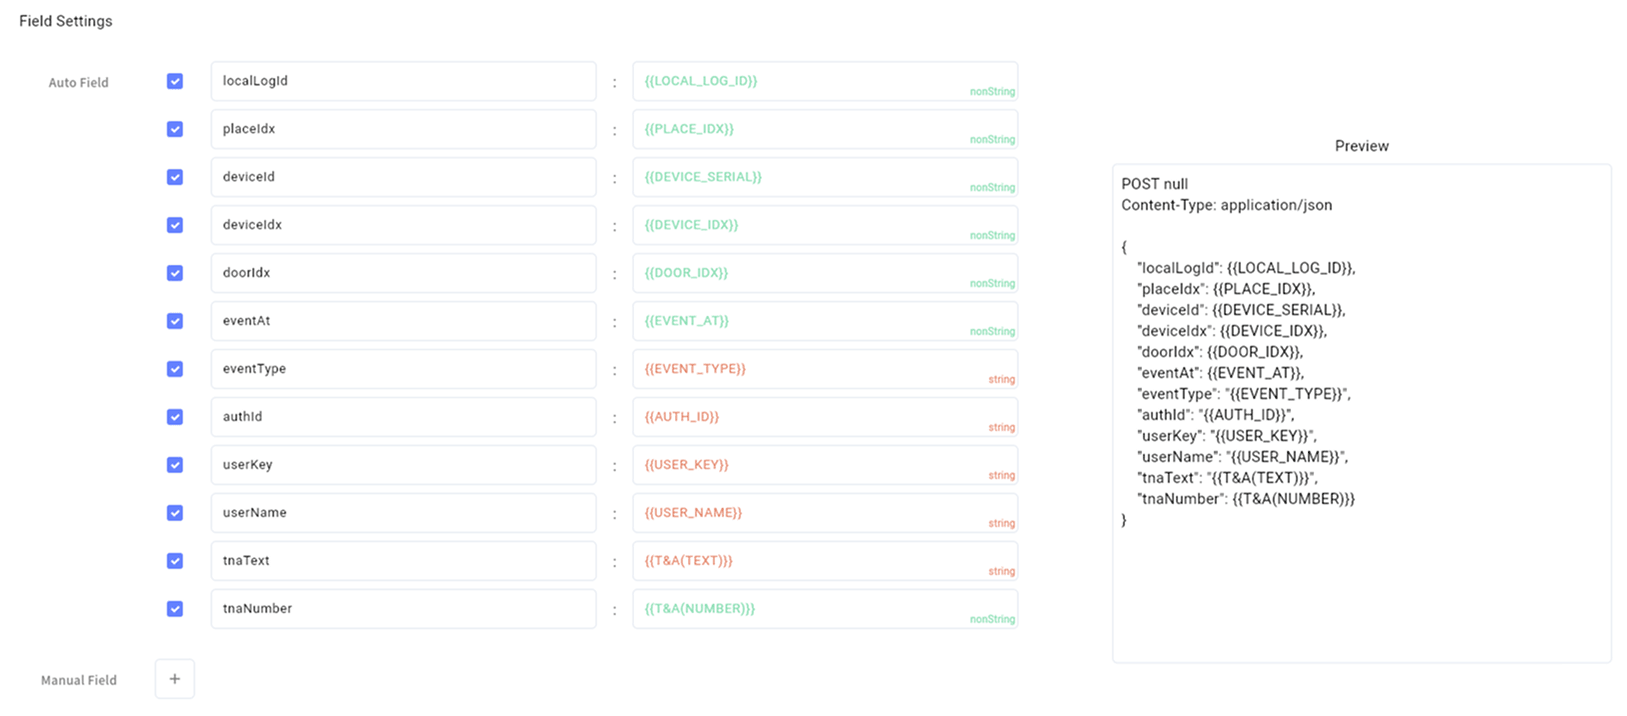
To define the data the device sends, configure the webhook fields.
-
Auto Fields: Indicates the type of data set the device can send.
-
nonString: Refers to data types that do not use quotation marks (
""), such as Boolean and int.
After selecting the required data fields, you can preview the webhook payload in the Preview panel.
If you also need to include fixed values, add them with Manual Fields. These values are sent as fixed values with the webhook payload.
Run a test call
After completing the settings, you can run Test Call.
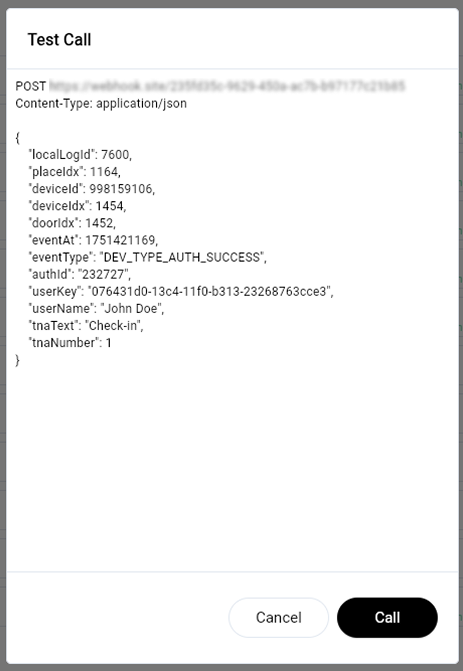
A test call lets you check the structure and format of data sent directly from the browser to the configured endpoint, not the actual device.
Notes
Even if the server is not ready yet, you can test webhooks with a publicly available webhook testing service on the internet. For example, use Webhook.site to easily verify webhook calls.